The Password Policy allows you to define the rules for passwords created by your users and set account security options. Through the Kuika Config Manager module, you can configure the characters a password must and must not contain, the password length, the validity period, account lockout, and CAPTCHA rules.
In this guide, you’ll learn step-by-step how to create a new password policy and configure each setting.
How to Create a Password Policy?
1. Open or Create a Configuration
Log in to the Kuika platform.
From the Apps screen, open the project you’ll be working on.
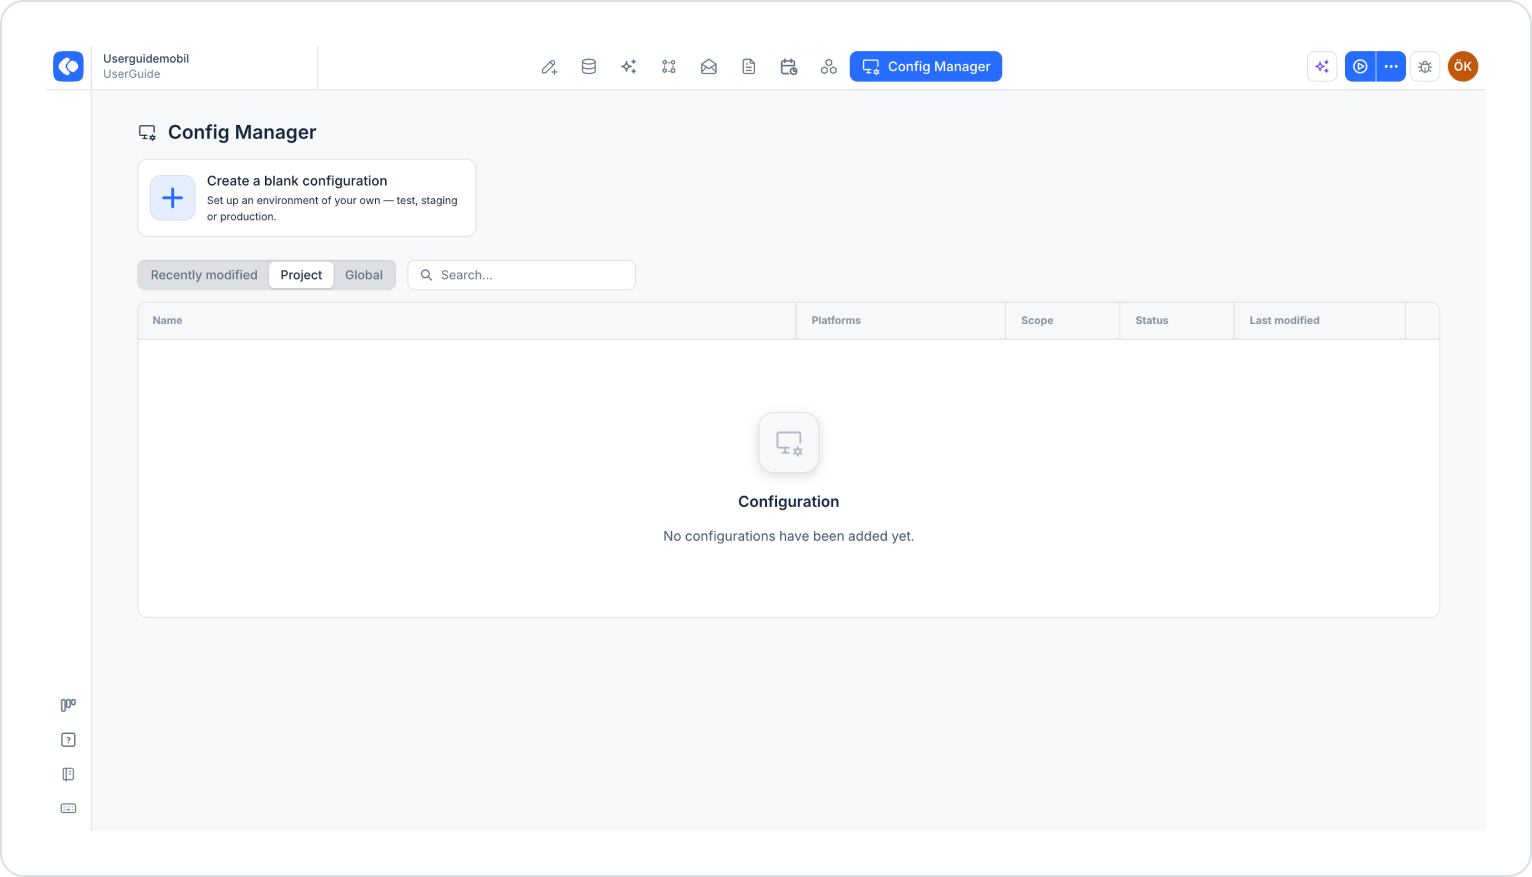
Click the Config Manager module in the top menu.
To create a new configuration, click the Create a blank configuration card, give the configuration a name, and complete the creation process. If you want to use an existing configuration, click its name in the list.
2. Go to the Authentication & Authorization Setting
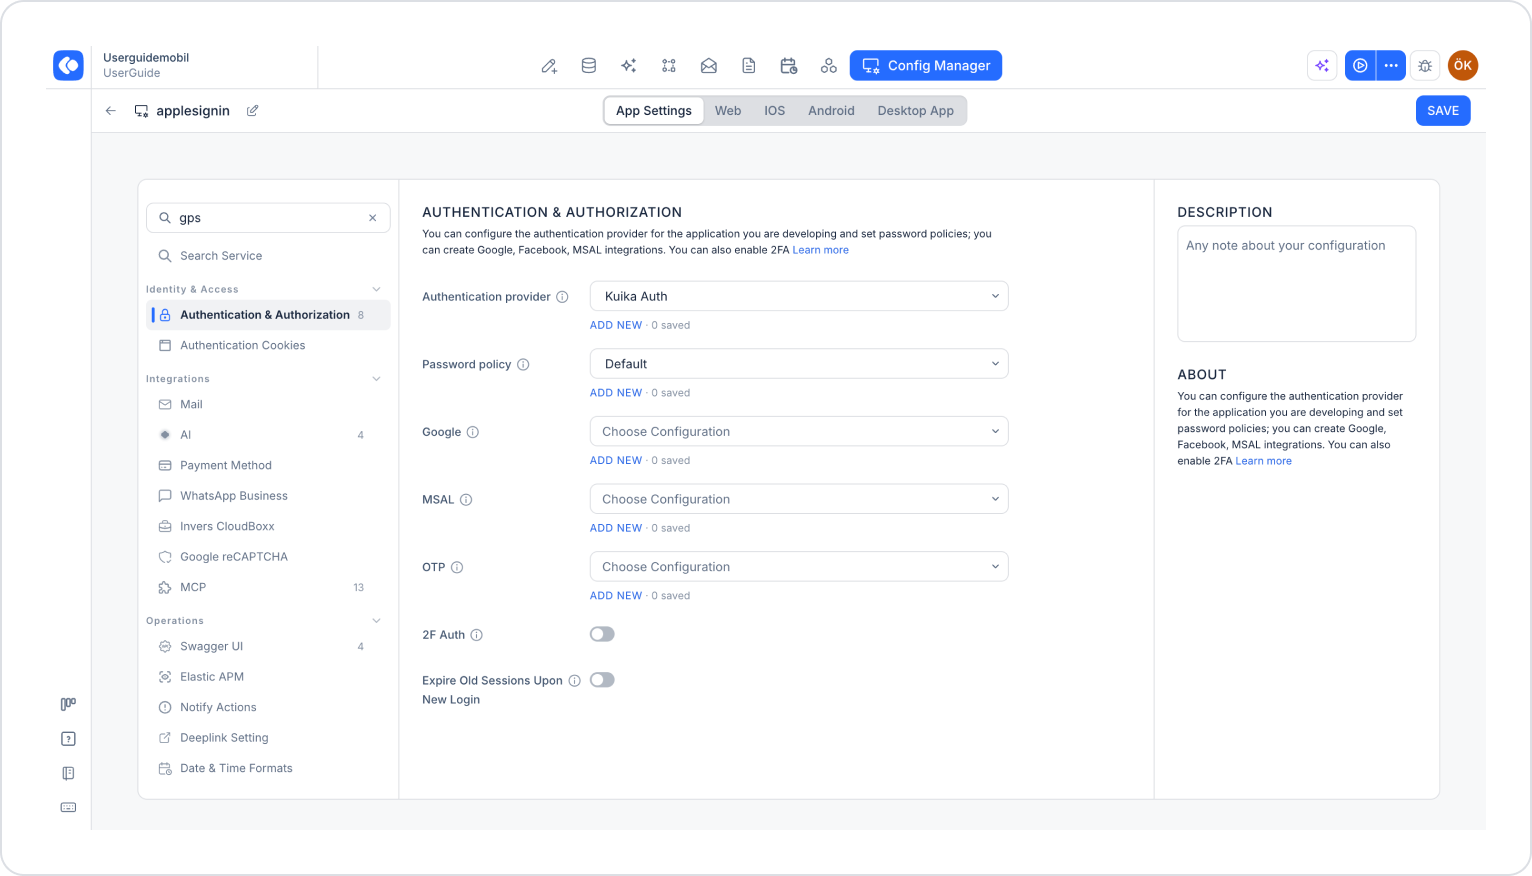
Make sure the App Settings tab is selected at the top of the configuration screen.
In the left menu, click the Authentication & Authorization option under the Identity & Access heading. You can also quickly access this setting by typing “authentication” into the Search settings field at the top of the menu.
In the Password policy section, the Default policy is selected by default. Policies you’ve created previously are listed in this drop-down menu. To create a new policy, click the ADD NEW link at the bottom of the menu.
3. Fill Out the Password Policy Settings Window
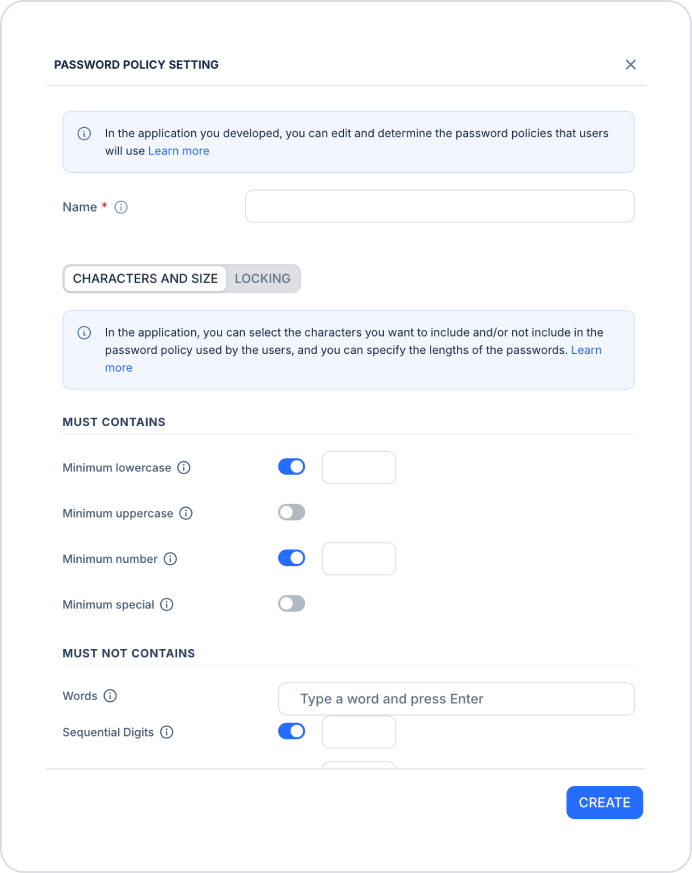
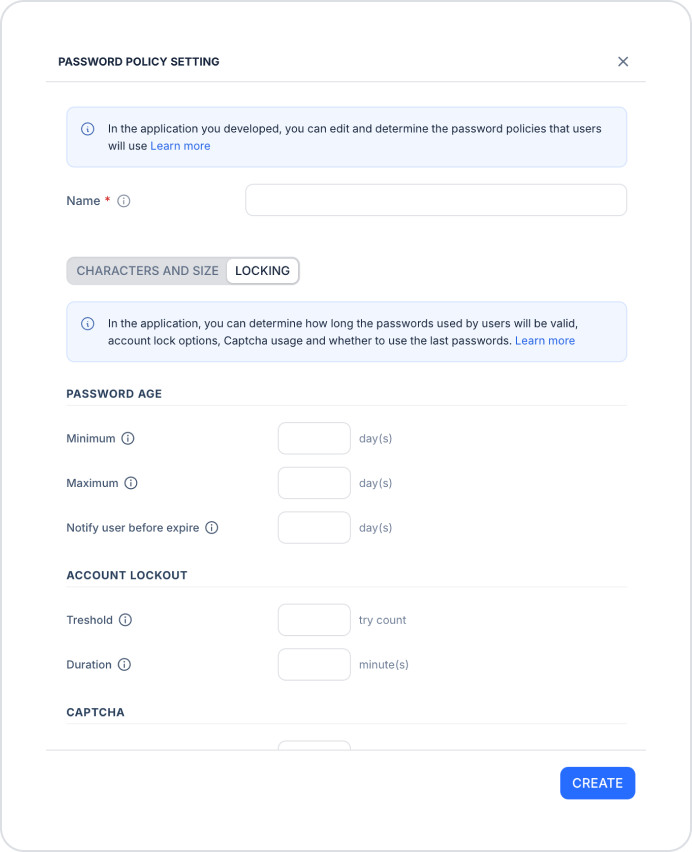
In the Password Policy Settings window that opens, first enter a descriptive name for the policy in the Name (required) field. The window consists of two tabs: CHARACTERS AND SIZE and LOCKING.
CHARACTERS AND SIZE Tab
In this tab, you specify the characters that must and must not be included in the password, as well as the password length.
MUST CONTAIN: In this section, you specify the characters that must be included in the password. Enable each rule using the toggle and enter the minimum count in the adjacent field:
Minimum lowercase: Minimum number of lowercase letters (a-z).
Minimum uppercase: Minimum number of uppercase letters (A-Z).
Minimum number: Minimum number of digits (0-9).
Minimum special: Minimum number of special characters (e.g., !, @, #).
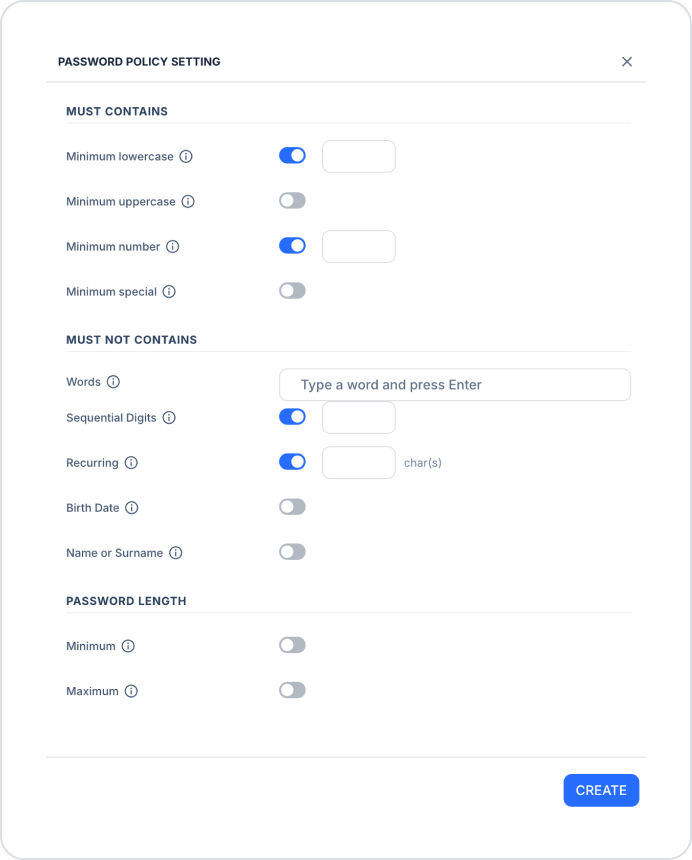
In the MUST NOT CONTAIN section, you specify the characters that must not be included in the password:
Words: Words you do not want used in the password (e.g., admin, password). Type the word and press Enter to add it.
Sequential Digits: Restricts the use of consecutive digits (e.g., 1234).
Recurring: Restricts the repetition of the same character (e.g., aaaa). The value is entered as the number of characters.
Birth Date: Prevents the user’s birth date from being used in the password.
Name or Surname: Prevents the user’s first name or last name from being used in the password.
In the PASSWORD LENGTH section, you set the password length limits:
Minimum: The minimum number of characters in the password.
Maximum: The maximum number of characters in the password.
LOCKING Tab
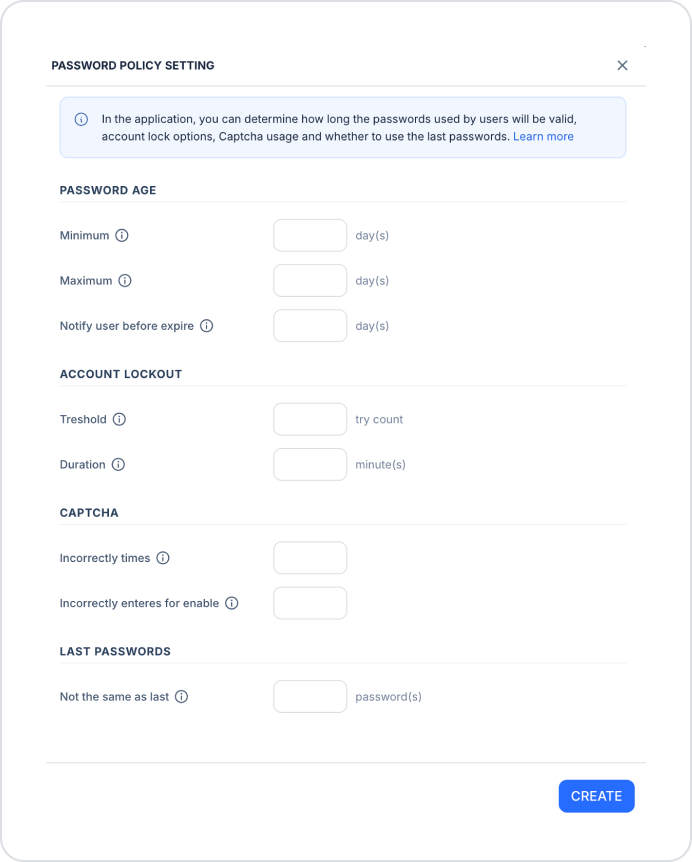
In this tab, you set the password validity period, account locking, CAPTCHA, and password re-entry rules.
PASSWORD AGE section: Here, you set the password’s validity period in days:
Minimum: The minimum time that must elapse before the password can be changed.
Maximum: The maximum time the password will remain valid.
Notify user before expire: How many days before the password expires the user will be notified.
ACCOUNT LOCKOUT: In this section, you set the account lockout rules:
Threshold: The number of failed login attempts allowed before the account is locked.
Duration: The duration (in minutes) for which the account will remain locked.
CAPTCHA section: Here, you configure CAPTCHA usage to protect against bot attacks:
Incorrect attempts: Setting for the number of incorrect CAPTCHA entries.
Incorrect attempts to enable: The number of incorrect entries required to trigger CAPTCHA.
LAST PASSWORDS section: Here, you limit password repetition:
Not the same as last: The number of previous passwords the new password cannot match.
After entering the information, click the CREATE button to create the password policy.
4. Save the Settings
Select the policy you created from the Password policy drop-down menu.
Make sure you have filled out all required fields completely and correctly.
Click the SAVE button in the upper-right corner to save the changes.
Once you’ve completed these steps, users in your application will be required to create passwords that comply with the password policy you’ve defined.
Important Tips
Avoid setting password policies that are too strict. Rules that users cannot remember may lead to frequent password reset requests.
Set the account lockout period to strike a balance between security and user experience.
Before deploying to production, test the password rules, account lockout, and CAPTCHA behavior in a test environment using simulated failed login attempts.
By configuring the password policy correctly, you can ensure your users create strong and secure passwords and enhance your application’s security standards.