The Kuika Configuration Manager module allows you to centrally and easily manage your application's email configuration settings. You can quickly configure email sending using SMTP or Amazon Web Services (AWS) infrastructure.
This configuration enables the email sending infrastructure to work in both the preview environment and the exported live version of your application. Configuration is not mandatory in the preview environment, but it can be optionally defined to test email sending.In exported applications, configuration is mandatory for email functions to work.
All necessary settings for sending emails through your own SMTP server, Exchange Server infrastructure, or AWS SES service are defined through this module. Thanks to the configurations made, your application's email traffic is completely routed to your infrastructure and managed securely without third-party dependencies.
Email Configuration Steps
Project Selection:
Login to Kuika platform.
Select the project you will work on from the Apps screen.
Access to Configuration Manager:
Click the Configuration Manager module from the left menu.
Enter a name for the configuration on the screen that opens.
Click the CREATE button.
Access to App Settings Module:
Go to the App Settings module on the screen that opens.
Click ADD NEW from the drop-down menu.
Mail Provider Setting with SMPT:
On the modal screen that opens, select SMPT from the drop-down menu opposite the Type title.
Enter information about your SMPT server.
SMPT Server: Type the server address.
Port: Specify the port number.
Username: Enter the user name.
Password: Enter the password.
Security Protocol: Select TLS or SSL as the security protocol.
After entering the information, click the CREATE button to create the SMTP configuration.
Mail Provider Setting with AWS:
On the modal screen that opens, select AWS from the drop-down menu opposite the Type title.
Enter the information about your AWS account.
Access Key ID: Type the AWS Access Key ID.
Secret Access Key: Enter the Secret Access Key.
Region: Select the AWS region.
After entering the information, click the CREATE button to create the AWS configuration.
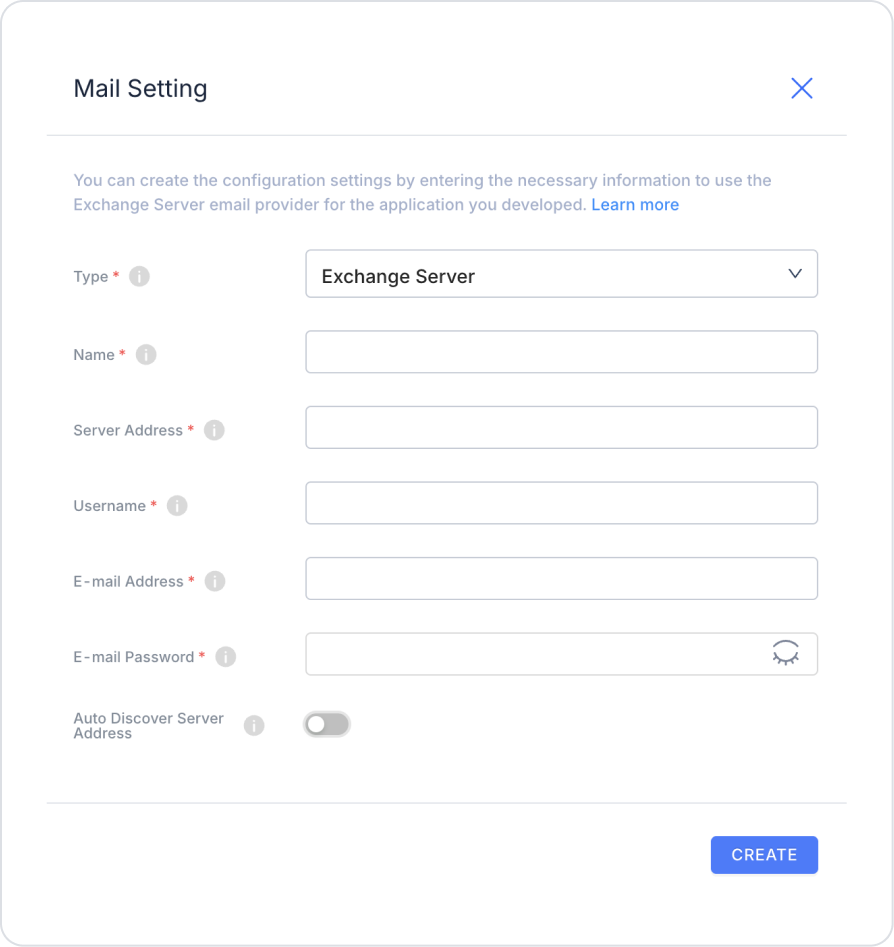
Exchange Server Mail Provider Settings
In the modal screen that opens, select the Exchange Server option from the drop-down menu opposite the Type heading.
Fill in the required fields:
Name: The name you will give to the configuration.
Server Address: The address of the Exchange server.
Username: Your Exchange username.
E-mail Address: Your sender e-mail address.
E-mail Password: Your email password.
Auto Discover Server Address: Enable this option if you want the server address to be found automatically.
After entering all the information, click the CREATE button to create the Exchange Server configuration.
After completing these steps, you can use the SMPT, Exchange Server,or AWS configuration to send emails in your application.