In the iOS apps you develop with Kuika, you can allow users to sign up and log in using their Apple accounts. To do this, you must first generate the necessary key in your Apple Developer account, and then configure the Apple Sign In settings in Kuika’s Config Manager module.
In this guide, you’ll learn step by step how to obtain the necessary information from Apple Developer and how to configure Apple Sign In settings in Kuika.
Obtaining the Required Information from Your Apple Developer Account
1. Create an Apple Developer Account
Go to https://developer.apple.com to create an Apple Developer account or sign in with your existing account.
2. Create a “Sign In with Apple” Key
Go to the Certificates, Identifiers & Profiles section in your account.
Click the Keys option in the left menu. You can use an existing key or create a new one.
When creating a new key, check the Sign In with Apple option and associate the key with your app’s App ID.
Download the generated key as a .p8 file. This file can only be downloaded once and its name must not be changed.
3. Note Down the Team ID
Note down the Team ID from your Apple Developer account. This information is required when configuring Kuika.
Setting Up Apple Sign In in Kuika
1. Open or Create a Configuration
Log in to the Kuika platform.
From the Apps screen, open the project you’ll be working on.
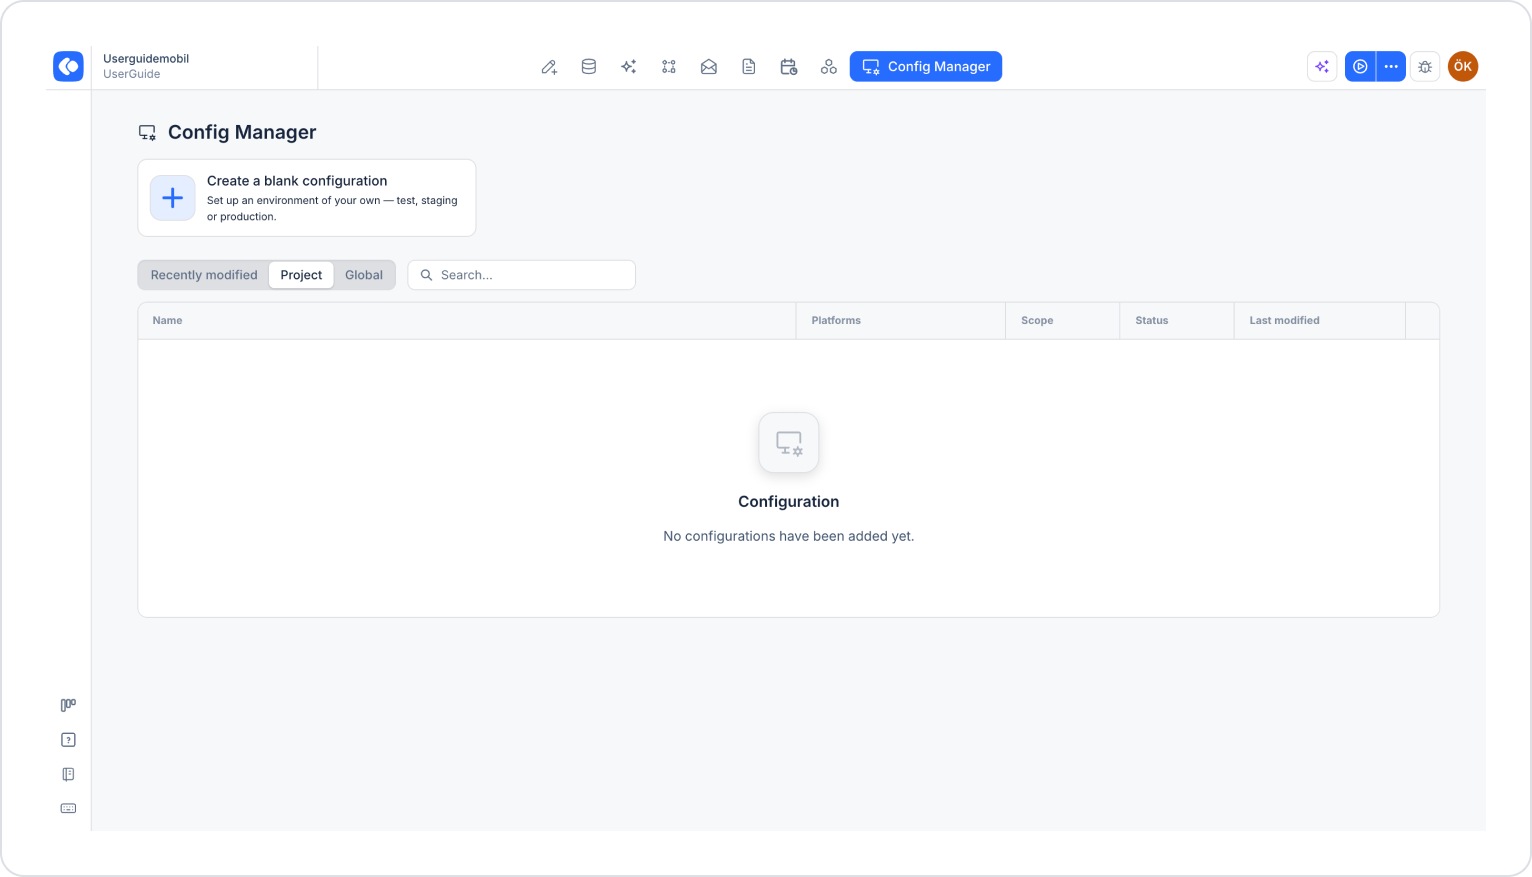
Click the Config Manager module in the top menu.
To create a new configuration, click the Create a blank configuration card, give the configuration a name, and complete the creation process. If you want to use an existing configuration, click its name in the list.
2. Go to Apple Sign In Settings
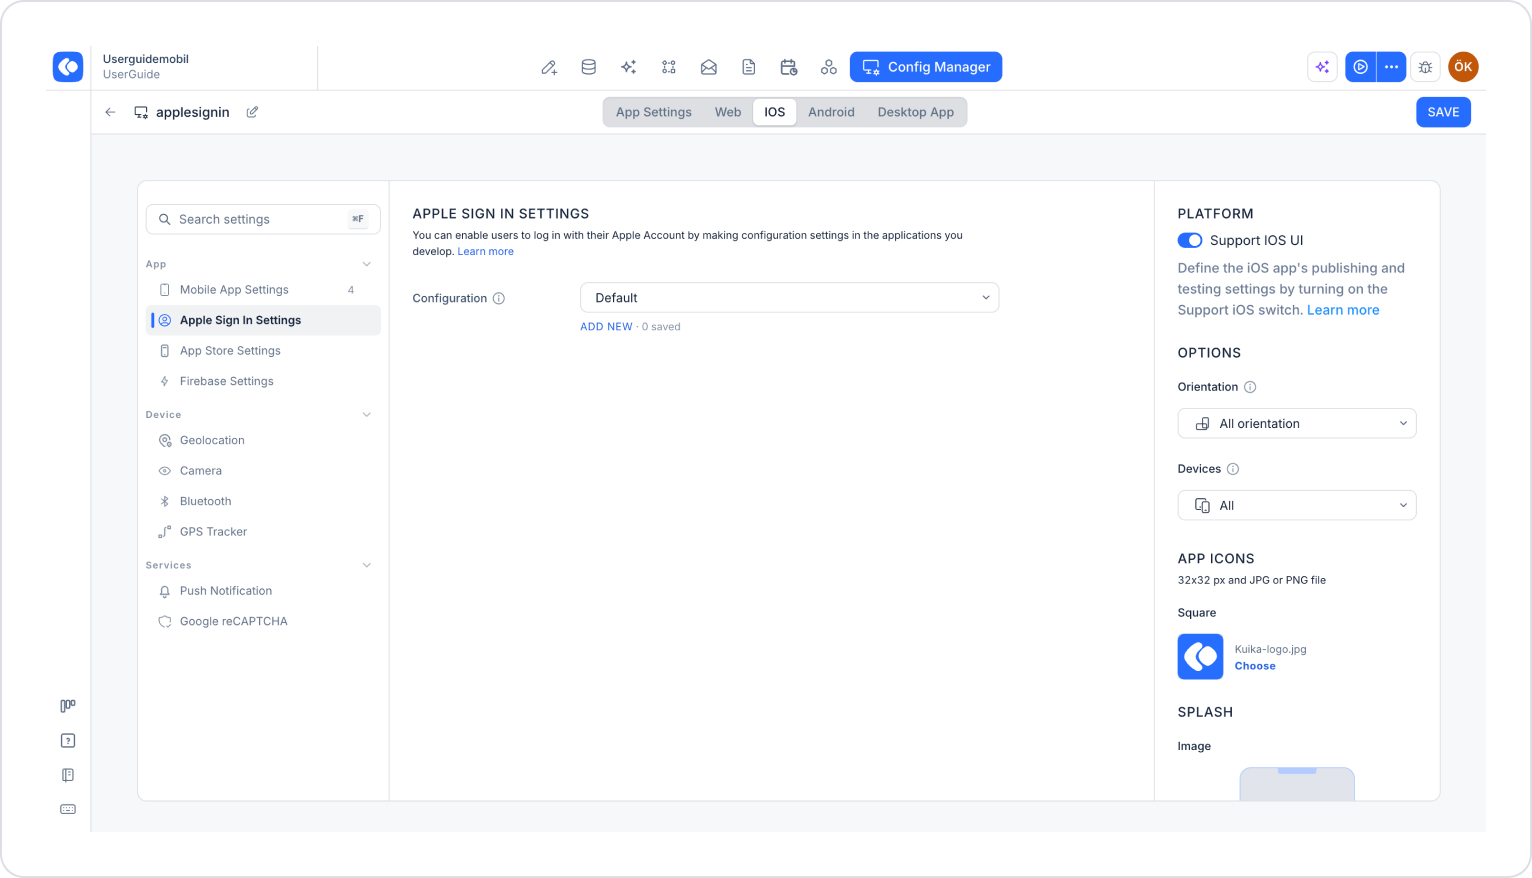
From the tabs at the top of the configuration screen, select the iOS tab.
In the PLATFORM section on the right, enable the Support iOS UI toggle.
In the left menu, click the Apple Sign In Settings option under the App heading. You can also quickly access this setting by typing “apple” into the Search settings field at the top of the menu.
Click the ADD NEW link under the Configuration dropdown menu.
3. Fill Out the Apple Sign In Settings Window
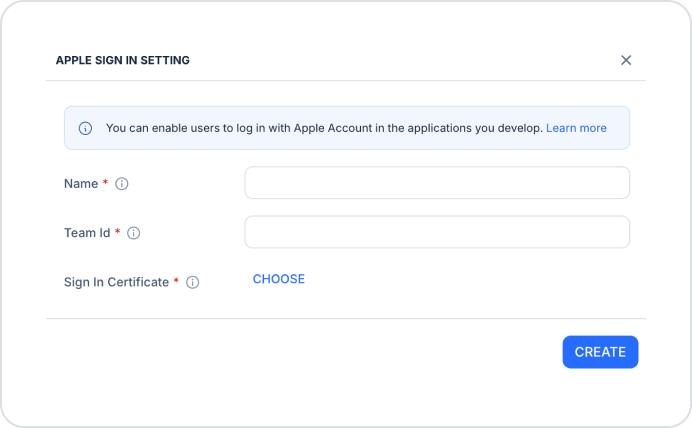
In the Apple Sign In Settings window that opens, fill out the following fields (all fields are required):
Name: A descriptive name for the configuration.
Team ID: The Team ID for your Apple Developer account.
Sign-In Certificate: Click the CHOOSE link to select the .p8 file you downloaded from Apple Developer.
After entering the information, click the CREATE button to create the configuration.
4. Save the Settings
Select the configuration you created from the Configuration dropdown menu.
Make sure you’ve filled out all required fields completely and correctly.
Click the SAVE button in the top-right corner to save your changes.
Once you’ve completed these steps, your users will be able to sign in to your iOS app using their Apple accounts.
Important Tips
The .p8 file can only be downloaded once. Store the file in a safe place without renaming it.
Make sure the Team ID and the .p8 file belong to the same Apple Developer account.
Test the Apple Sign In flow on a real iOS device before going live.
By properly configuring Apple Sign In settings, you can offer your users a fast and secure sign-in option.