WhatsApp Business is a solution that enables businesses to communicate with their customers more efficiently and professionally. You can manage message sending and customer interactions by configuring WhatsApp Business settings through the Kuika Config Manager module.
How to Integrate the WhatsApp Business API?
1. Set Up Your WhatsApp Business Account and App Information
Create a WhatsApp Business account via Meta Business (Facebook Business).
Create an app on the Meta for Developers (Facebook for Developers) platform and add the WhatsApp product to your app.
Log in to the Kuika platform.
Open the project you’ll be working on from the Apps screen.
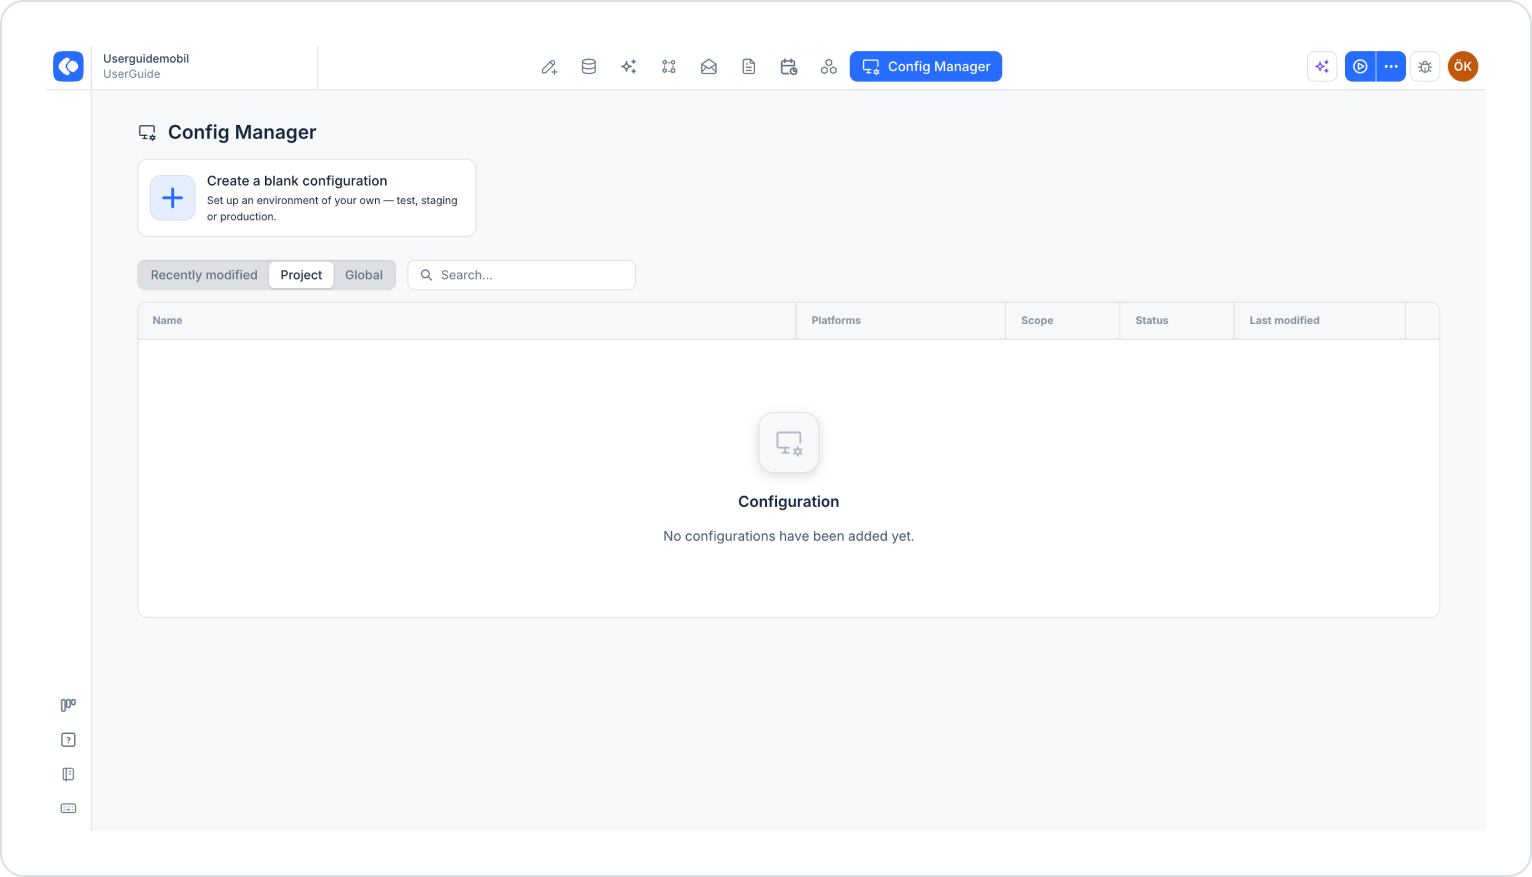
Click the Config Manager module in the top menu.
To create a new configuration, click the Create a blank configuration card, give the configuration a name, and complete the creation process. If you want to use an existing configuration, click its name in the list.
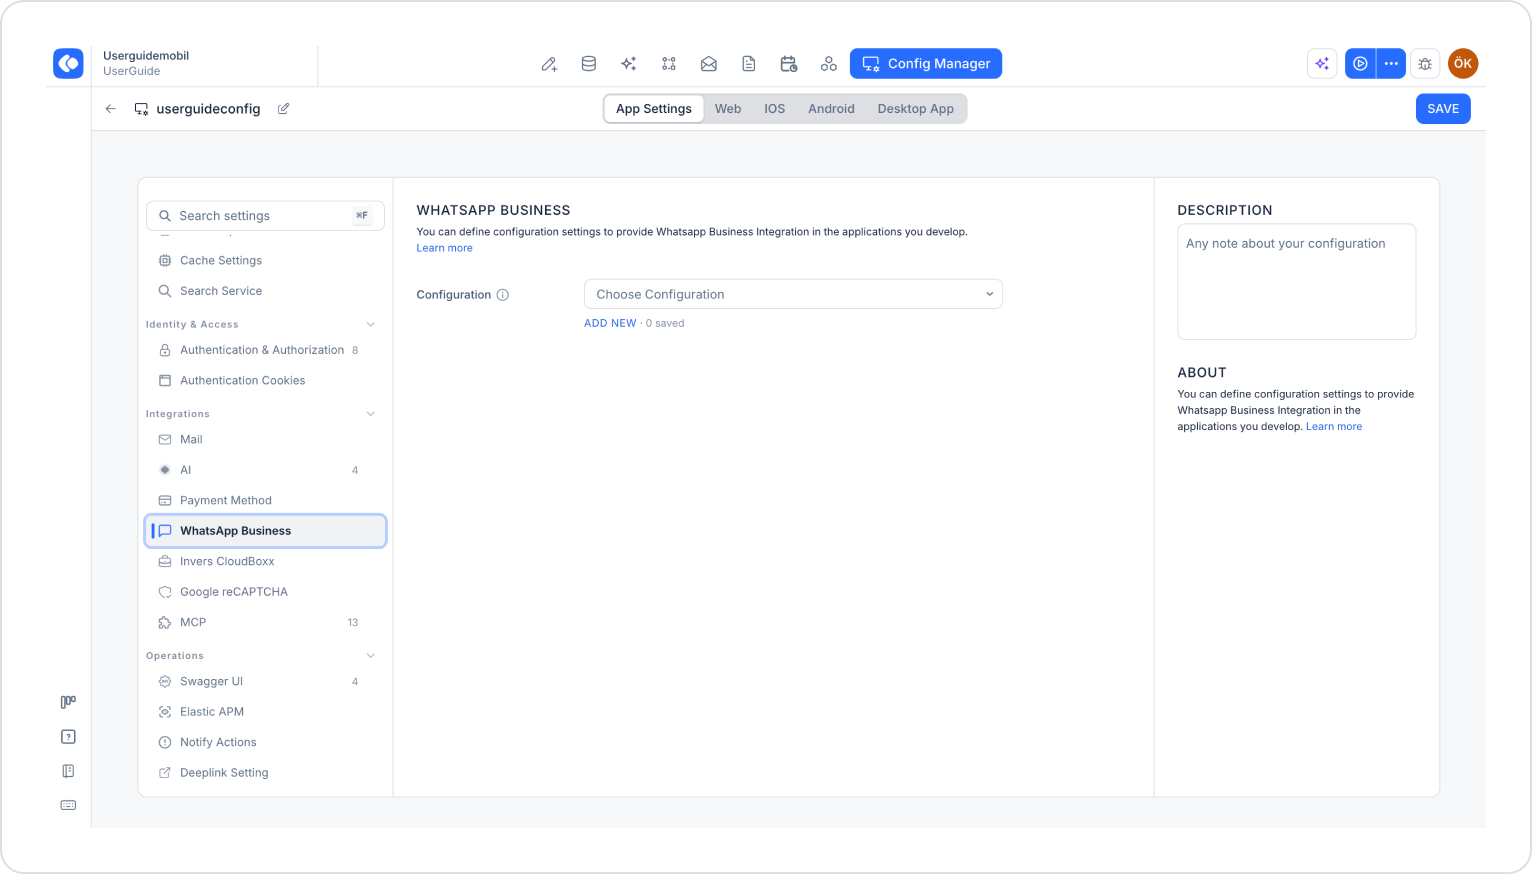
Make sure the App Settings tab is selected at the top of the configuration screen.
In the left menu, click the WhatsApp Business option under the INTEGRATIONS heading.
Click the Add New link under the Configuration section.
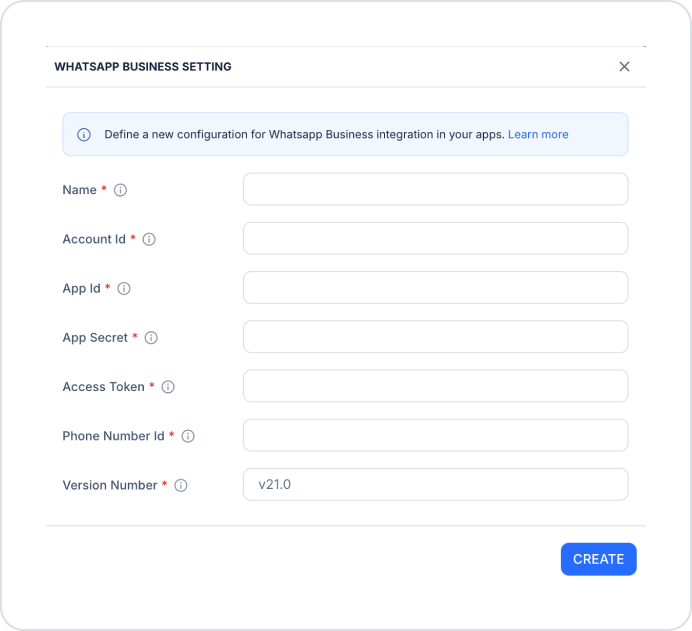
In the WhatsApp Business Settings window that opens, fill in the following fields (all fields are required):
Name: The descriptive name to be assigned to the configuration.
Account Id: The unique identifier for your WhatsApp Business account. It must be the same across all WhatsApp configurations.
App ID: The unique identifier of the app created via Meta for Developers.
App Secret: The secret key used to secure your app.
Access Token: The authentication token used to access the WhatsApp API. It can be obtained as either time-limited or permanent. If it is time-limited, messages cannot be sent once it expires.
Phone Number Id: The unique identifier for the phone number associated with your WhatsApp Business account.
Version Number: The version of the WhatsApp Business API being used. The default value is v21.0. This is important for compatibility with the latest version.
After filling in all fields, click the Create button.
Select the configuration you created from the Configuration dropdown menu.
Click the Save button in the top-right corner to save your changes. (In an existing configuration, this button appears as Update.)
2. Create a WhatsApp Message Template and Complete the Approval Process
Create a message template from the WhatsApp section in the Meta Business dashboard.
Wait for WhatsApp to approve the template.
Approved templates can be sent using the Send WhatsApp Business Message action in Kuika.
3. Use WhatsApp Message Templates
The parameters in WhatsApp message templates are defined when the template is created via Meta Business.
These parameters are automatically imported into Kuika, where they can be configured to send messages.
Template Example:
Subject: Regarding the Status of Your Offer
Message: Congratulations! Your process has been successfully completed. Please select one of the buttons below to indicate whether you accept or decline our offer.
Buttons: I Accept | I Decline
4. Template Types and Button Usage
There are different template types in the WhatsApp Business API:
Templates with buttons: Can only be used in steps with external assignments.
Templates without buttons: Can be used at any stage of the process.
Kuika currently supports only Quick Reply buttons. Other button types cannot be used.
5. Using Quick Reply
Buttons used to advance the process must be of the Quick Reply (custom) type.
Each button must be paired with a mail interaction.
By following these steps, you can complete the WhatsApp Business integration on the Kuika platform and effectively manage your customer interactions.