In the app you’re developing with Kuika, you can process fast and secure payments using Stripe, an international payment method. Thanks to its flexible infrastructure and widespread global adoption, Stripe allows you to add a user-friendly payment system to your app. In this tutorial, you’ll learn how to integrate Stripe into your app.
How to Add Stripe Integration?
To add Stripe integration to your app, follow the steps below.
1. Access the Config Manager Module
After logging into the Kuika platform, open the project you’ll be working on from the Apps screen.
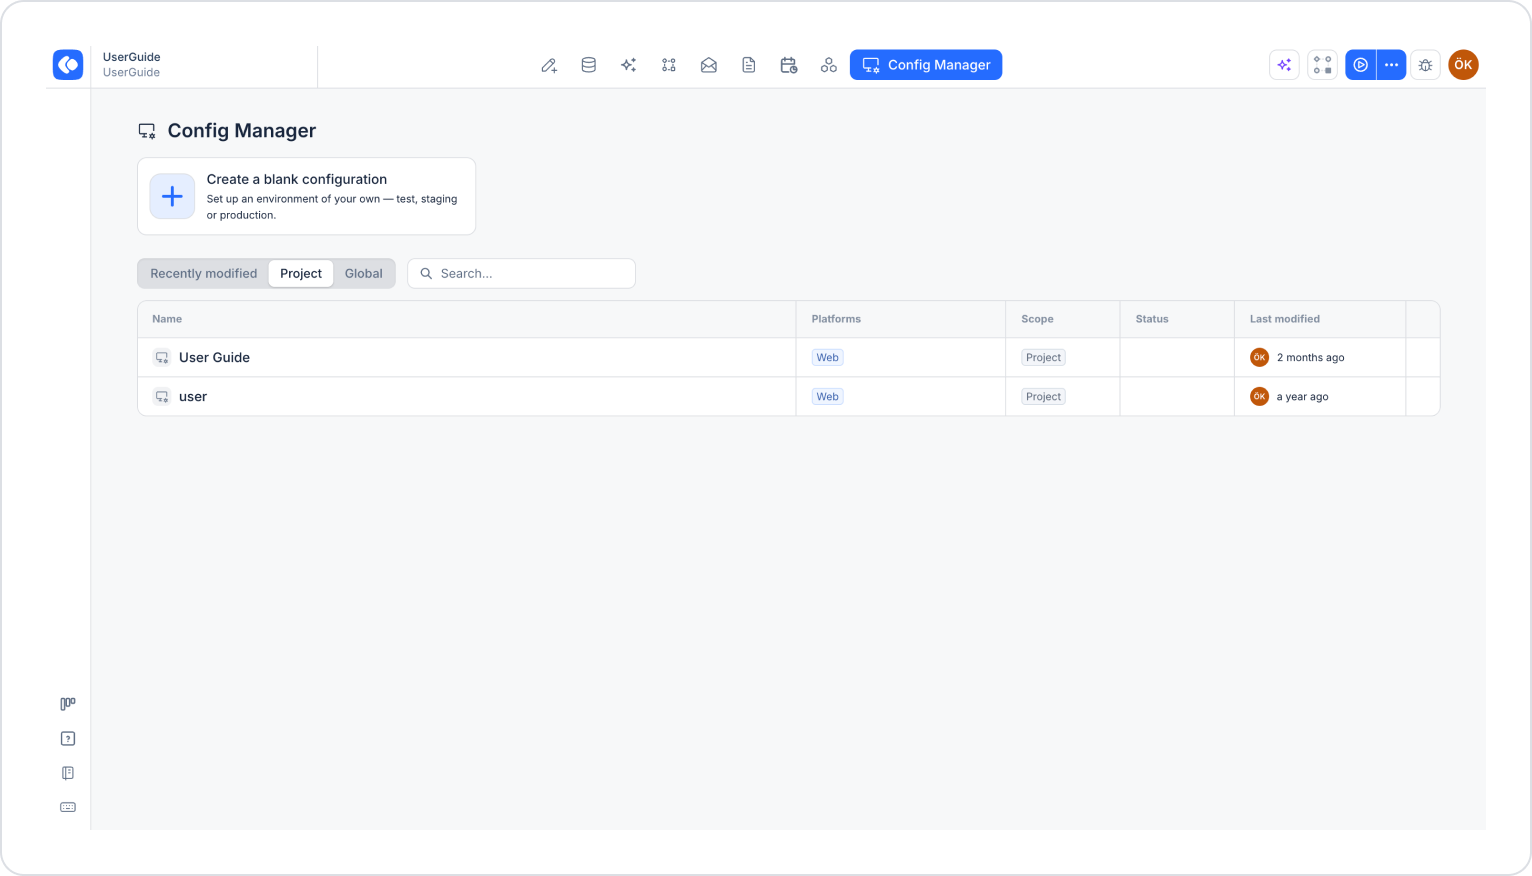
Click the Config Manager module in the top menu.
To create a new configuration, click the Create a blank configuration card, give the configuration a name, and complete the creation process. If you want to use an existing configuration, click its name in the list.
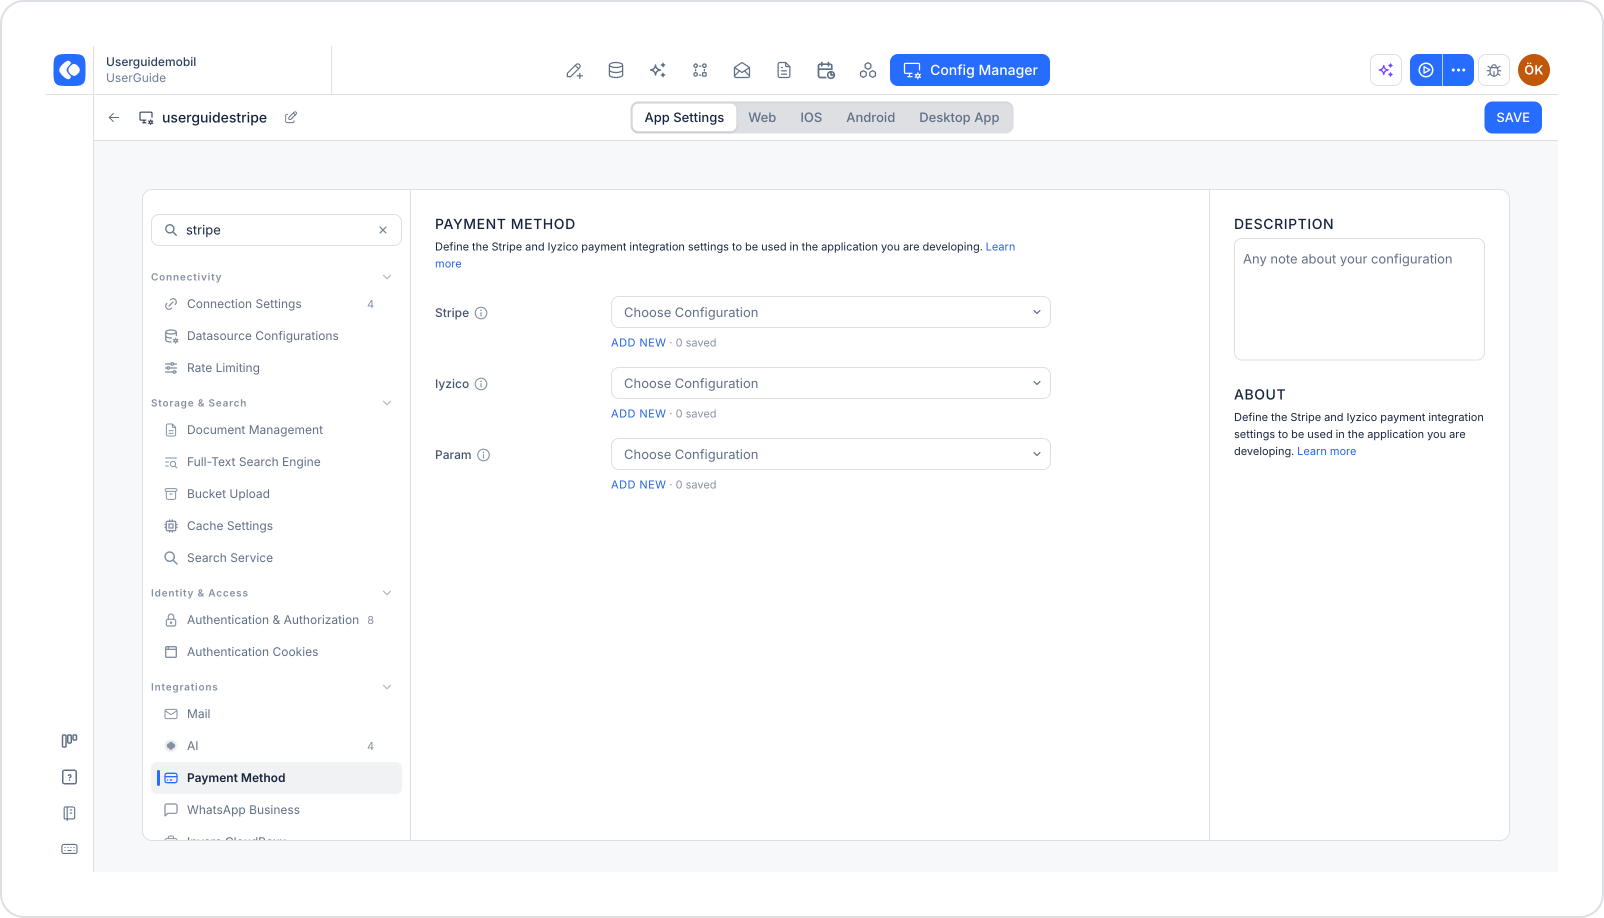
Make sure the App Settings tab is selected at the top of the configuration screen.
In the left menu, click the Payment Method option under the Integrations heading. You can also quickly access this setting by typing “stripe” into the Search settings field at the top of the menu.
2. Add Stripe Settings
Click the ADD NEW link under the Stripe section.
3. Fill in the Stripe Information
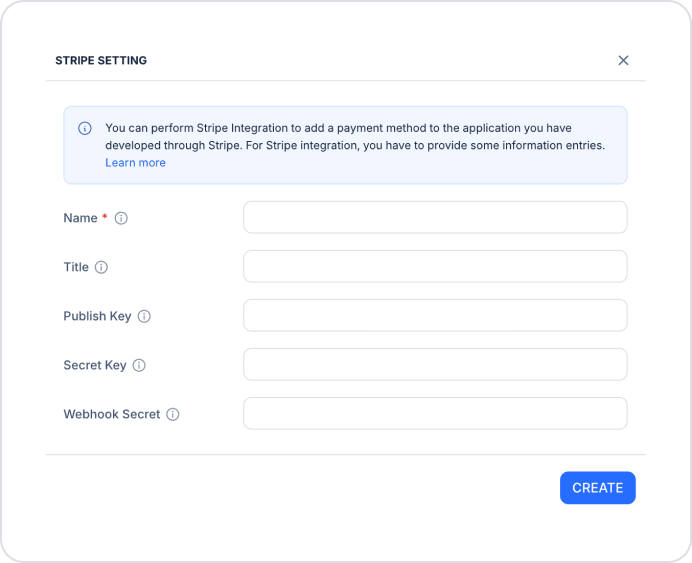
In the Stripe Settings window that opens, enter the information for your Stripe account:
Name (required): The identifying name to be given to the configuration (e.g., Stripe_1).
Title: A distinctive title that describes the configuration in more detail.
Publish Key: The Publishable Key value for your Stripe account.
Secret Key: The Secret Key value for your Stripe account. This key must be kept confidential.
Webhook Secret: The signing key used to verify webhook notifications sent by Stripe.
You can find the Publishable Key and Secret Key information on the API Keys page in the Stripe Dashboard, and the Webhook Secret information in the details of your relevant webhook endpoint.
If you don’t have a Stripe account yet, you can refer to our guide titled Stripe (Integrations) for steps on creating a Stripe account and detailed information.
4. Save the Stripe Configuration
After filling in the required information, click the CREATE button.
From the Choose Configuration dropdown menu in the Stripe section, select the configuration you created.
Click the SAVE button in the top-right corner to save your changes. (In an existing configuration, this button appears as UPDATE.)
This will activate your Stripe integration, and your app will be ready to accept payments.