User Manual

Scheduled Jobs Module

22/9/26
Scheduled Jobs Module

Kuika’s Scheduled Jobs module enables specific tasks to be scheduled and run automatically in mobile and web applications. This module allows you to manage processes such as reporting, sending notifications, payment transactions, and data export on a scheduled basis. In this training, you will learn how to schedule and configure tasks using the Scheduled Jobs module.
Create Scheduled Jobs

  1. Log in to the Kuika platform and open your project from the Apps screen.
  2. Open the Scheduled Jobs module from the top menu.
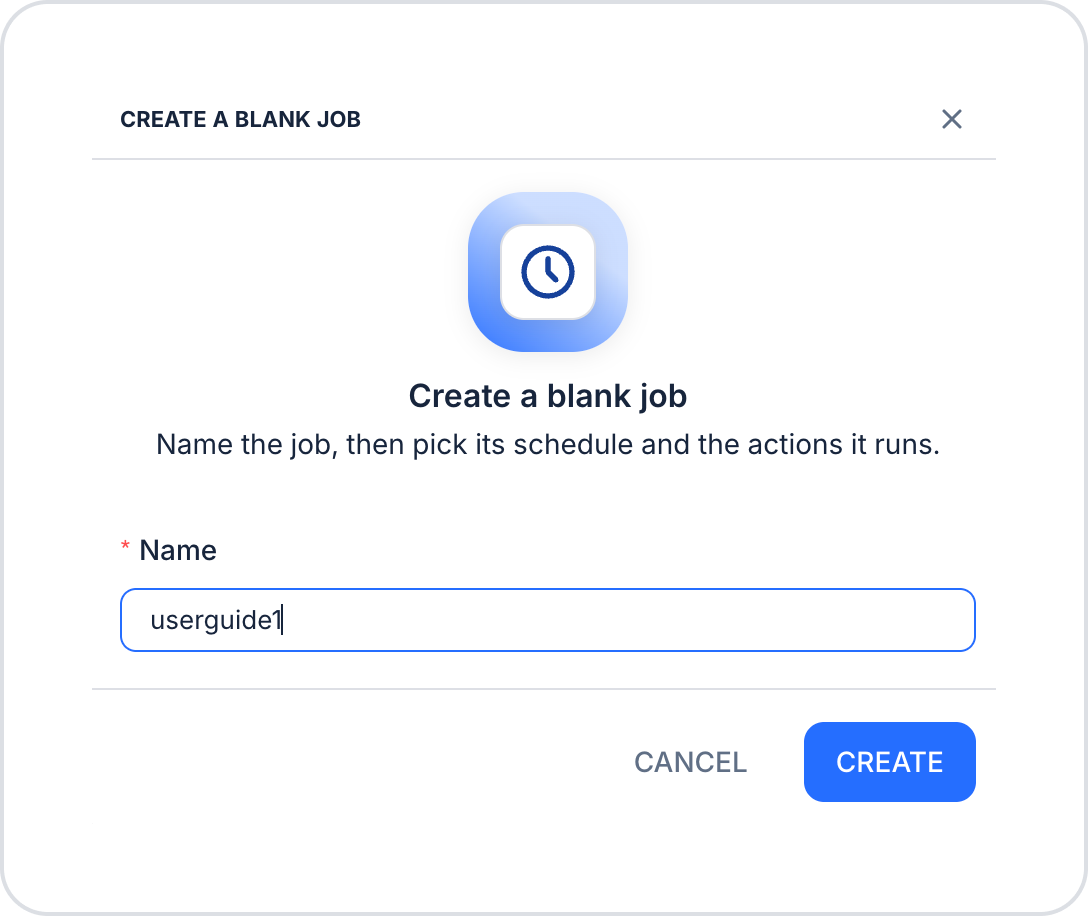
  3. On the screen that opens, you’ll see two options:
    • Create a blank job: Allows you to set your own schedule and add the actions the job should run yourself (“Pick a schedule yourself, then attach the actions it should run.”).
    • From template: Allows you to start from a ready-made schedule template (nightly, hourly, weekly, or monthly) (“Start from a ready-made schedule — nightly, hourly, weekly, or monthly.”).
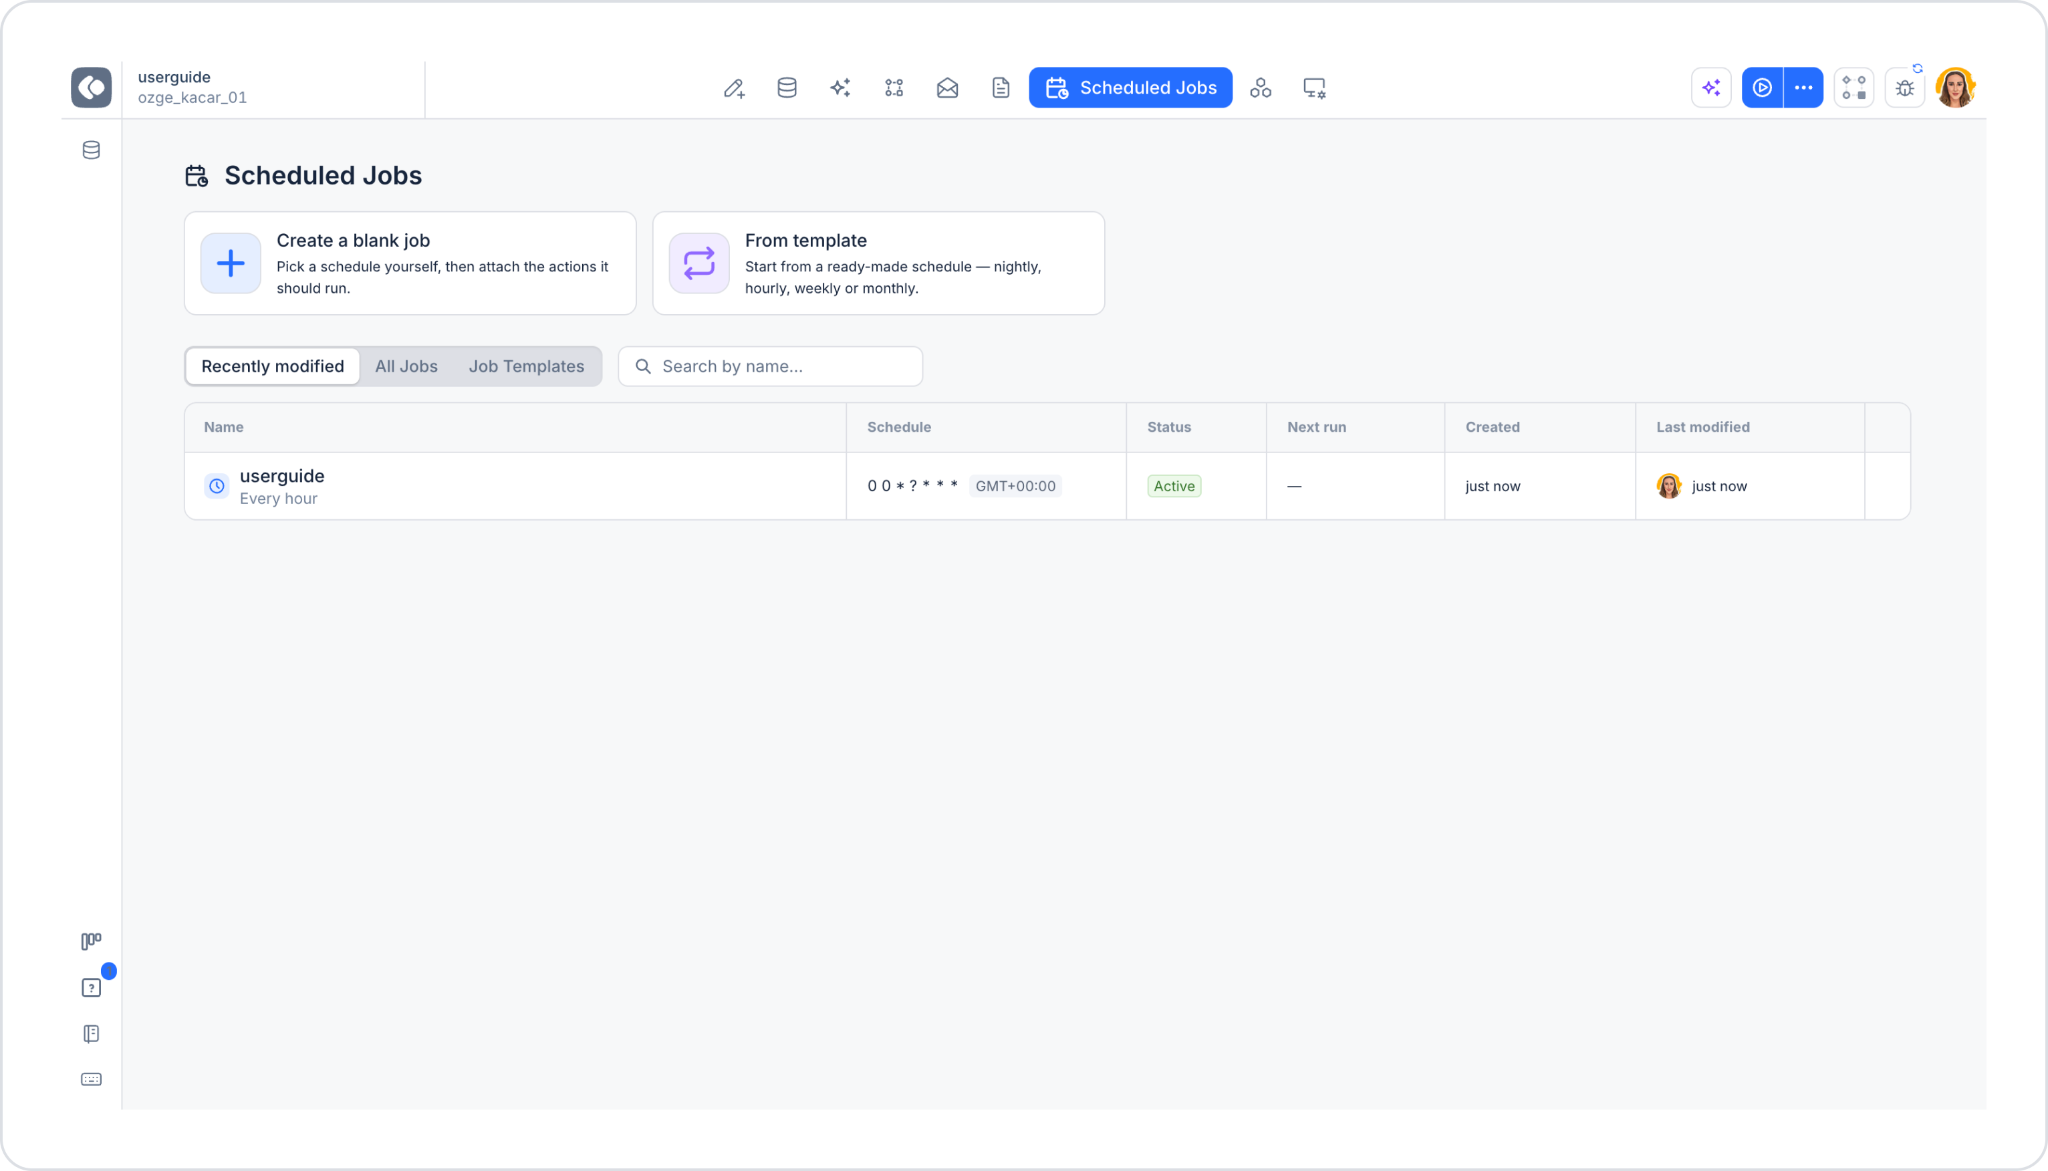
  1. When you click the Create a blank job card, enter a Name for your job in the window that opens and click the CREATE button. You can cancel the process by clicking CANCEL.

Scheduled Jobs List

On the Scheduled Jobs main screen, there are three tabs that let you view the jobs you’ve created:
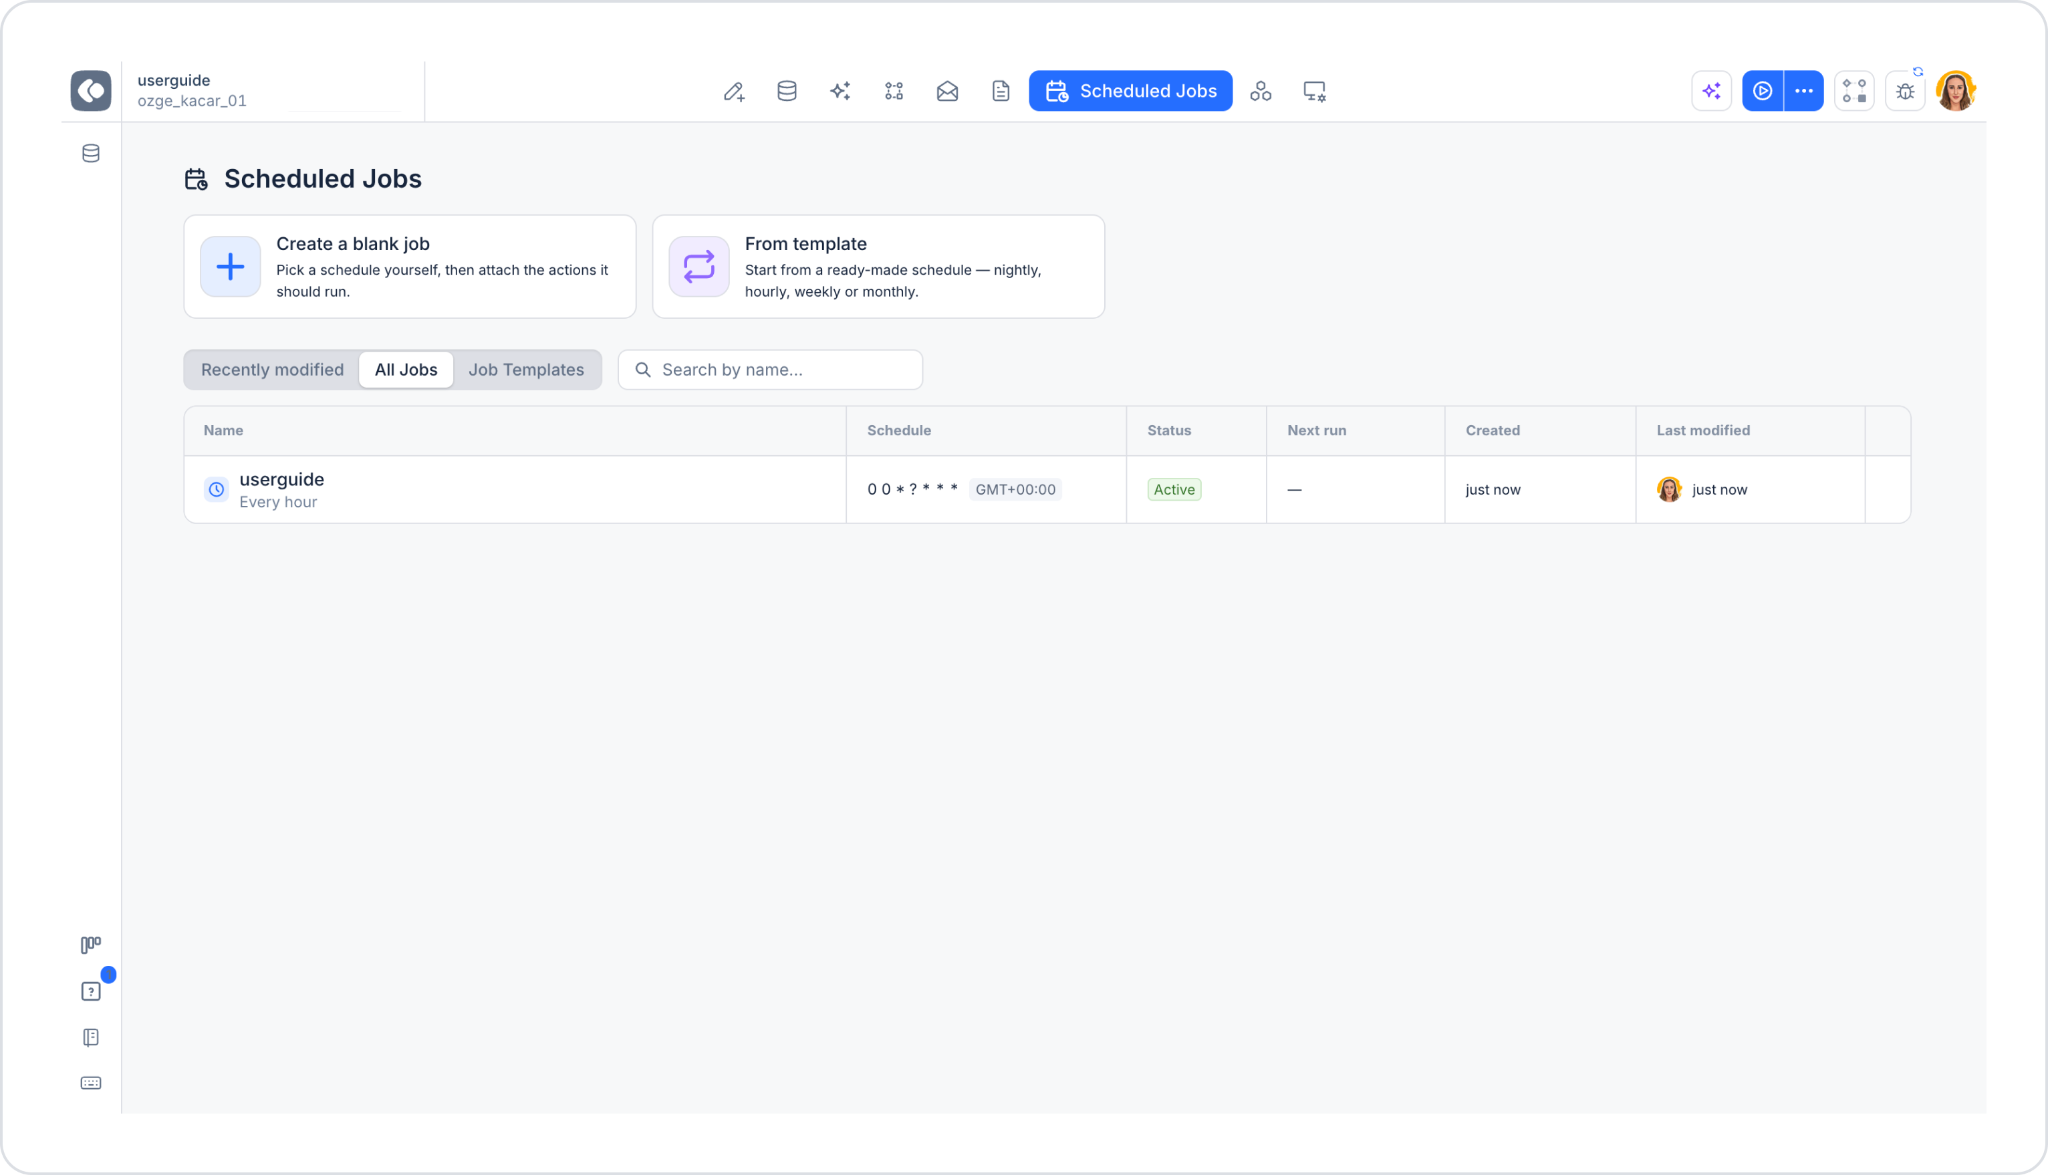
  • Recently modified: This is the default view, listing jobs modified within the last 30 days. If no jobs have been modified, the message “Nothing changed recently — Jobs edited in the last 30 days appear here.” is displayed.
  • All Jobs: This view lists all scheduled jobs in your project.
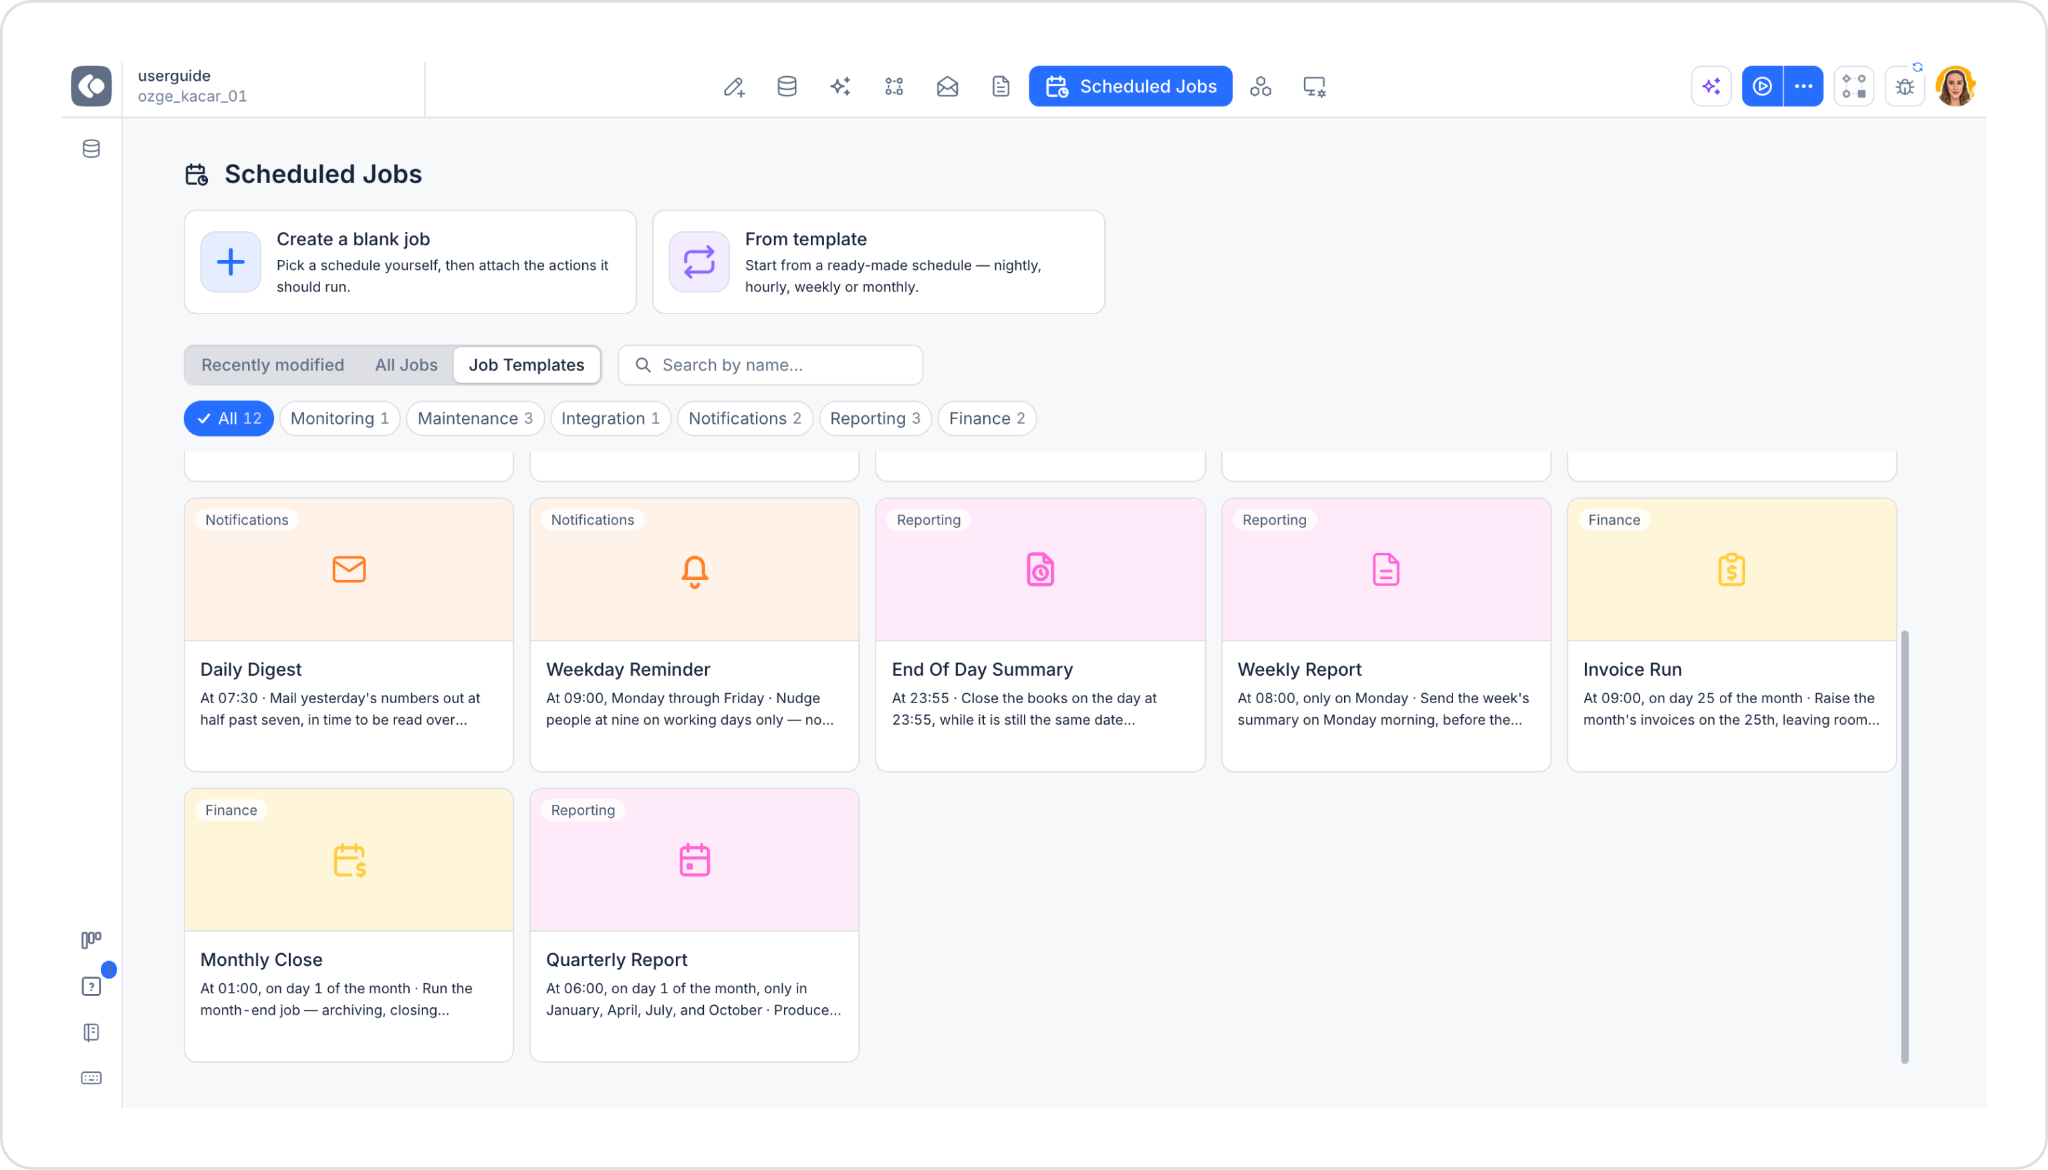
  • Job Templates: This view lists predefined job templates. Templates can be filtered by category tags such as Monitoring, Maintenance, Integration, Notifications, Reporting, and Finance; the number of templates in each category is displayed next to it (e.g., Maintenance 3, Reporting 3). Example templates include Health Check, Session Cleanup, Hourly Sync, Nightly Backup, Daily Cleanup, Daily Digest, Weekday Reminder, End Of Day Summary, Weekly Report, Invoice Run, Monthly Close, and Quarterly Report; each template card includes the execution frequency and a brief description.

In both lists, you can search by name using the Search by name... box.

The table in the Recently modified / All Jobs tabs consists of the following columns:

  • Name: The job’s name.
  • Schedule: The cron expression and time zone indicating the job’s schedule (e.g., “0 0 * ? * * *, GMT+00:00”).
  • Status: The job’s status (e.g., Active).
  • Next run: The job’s next execution time; if not yet determined, it is displayed as “—”.
  • Created: The time the job was created.
  • Last modified: The person who last updated the job and the time of the update.

Configure Scheduled Jobs Settings

Scheduled Jobs is divided into sub-tabs, Seconds, Minutes, Hours, Hours, Days, Days, Months and Years. These tabs determine the time period in which the actions will run.
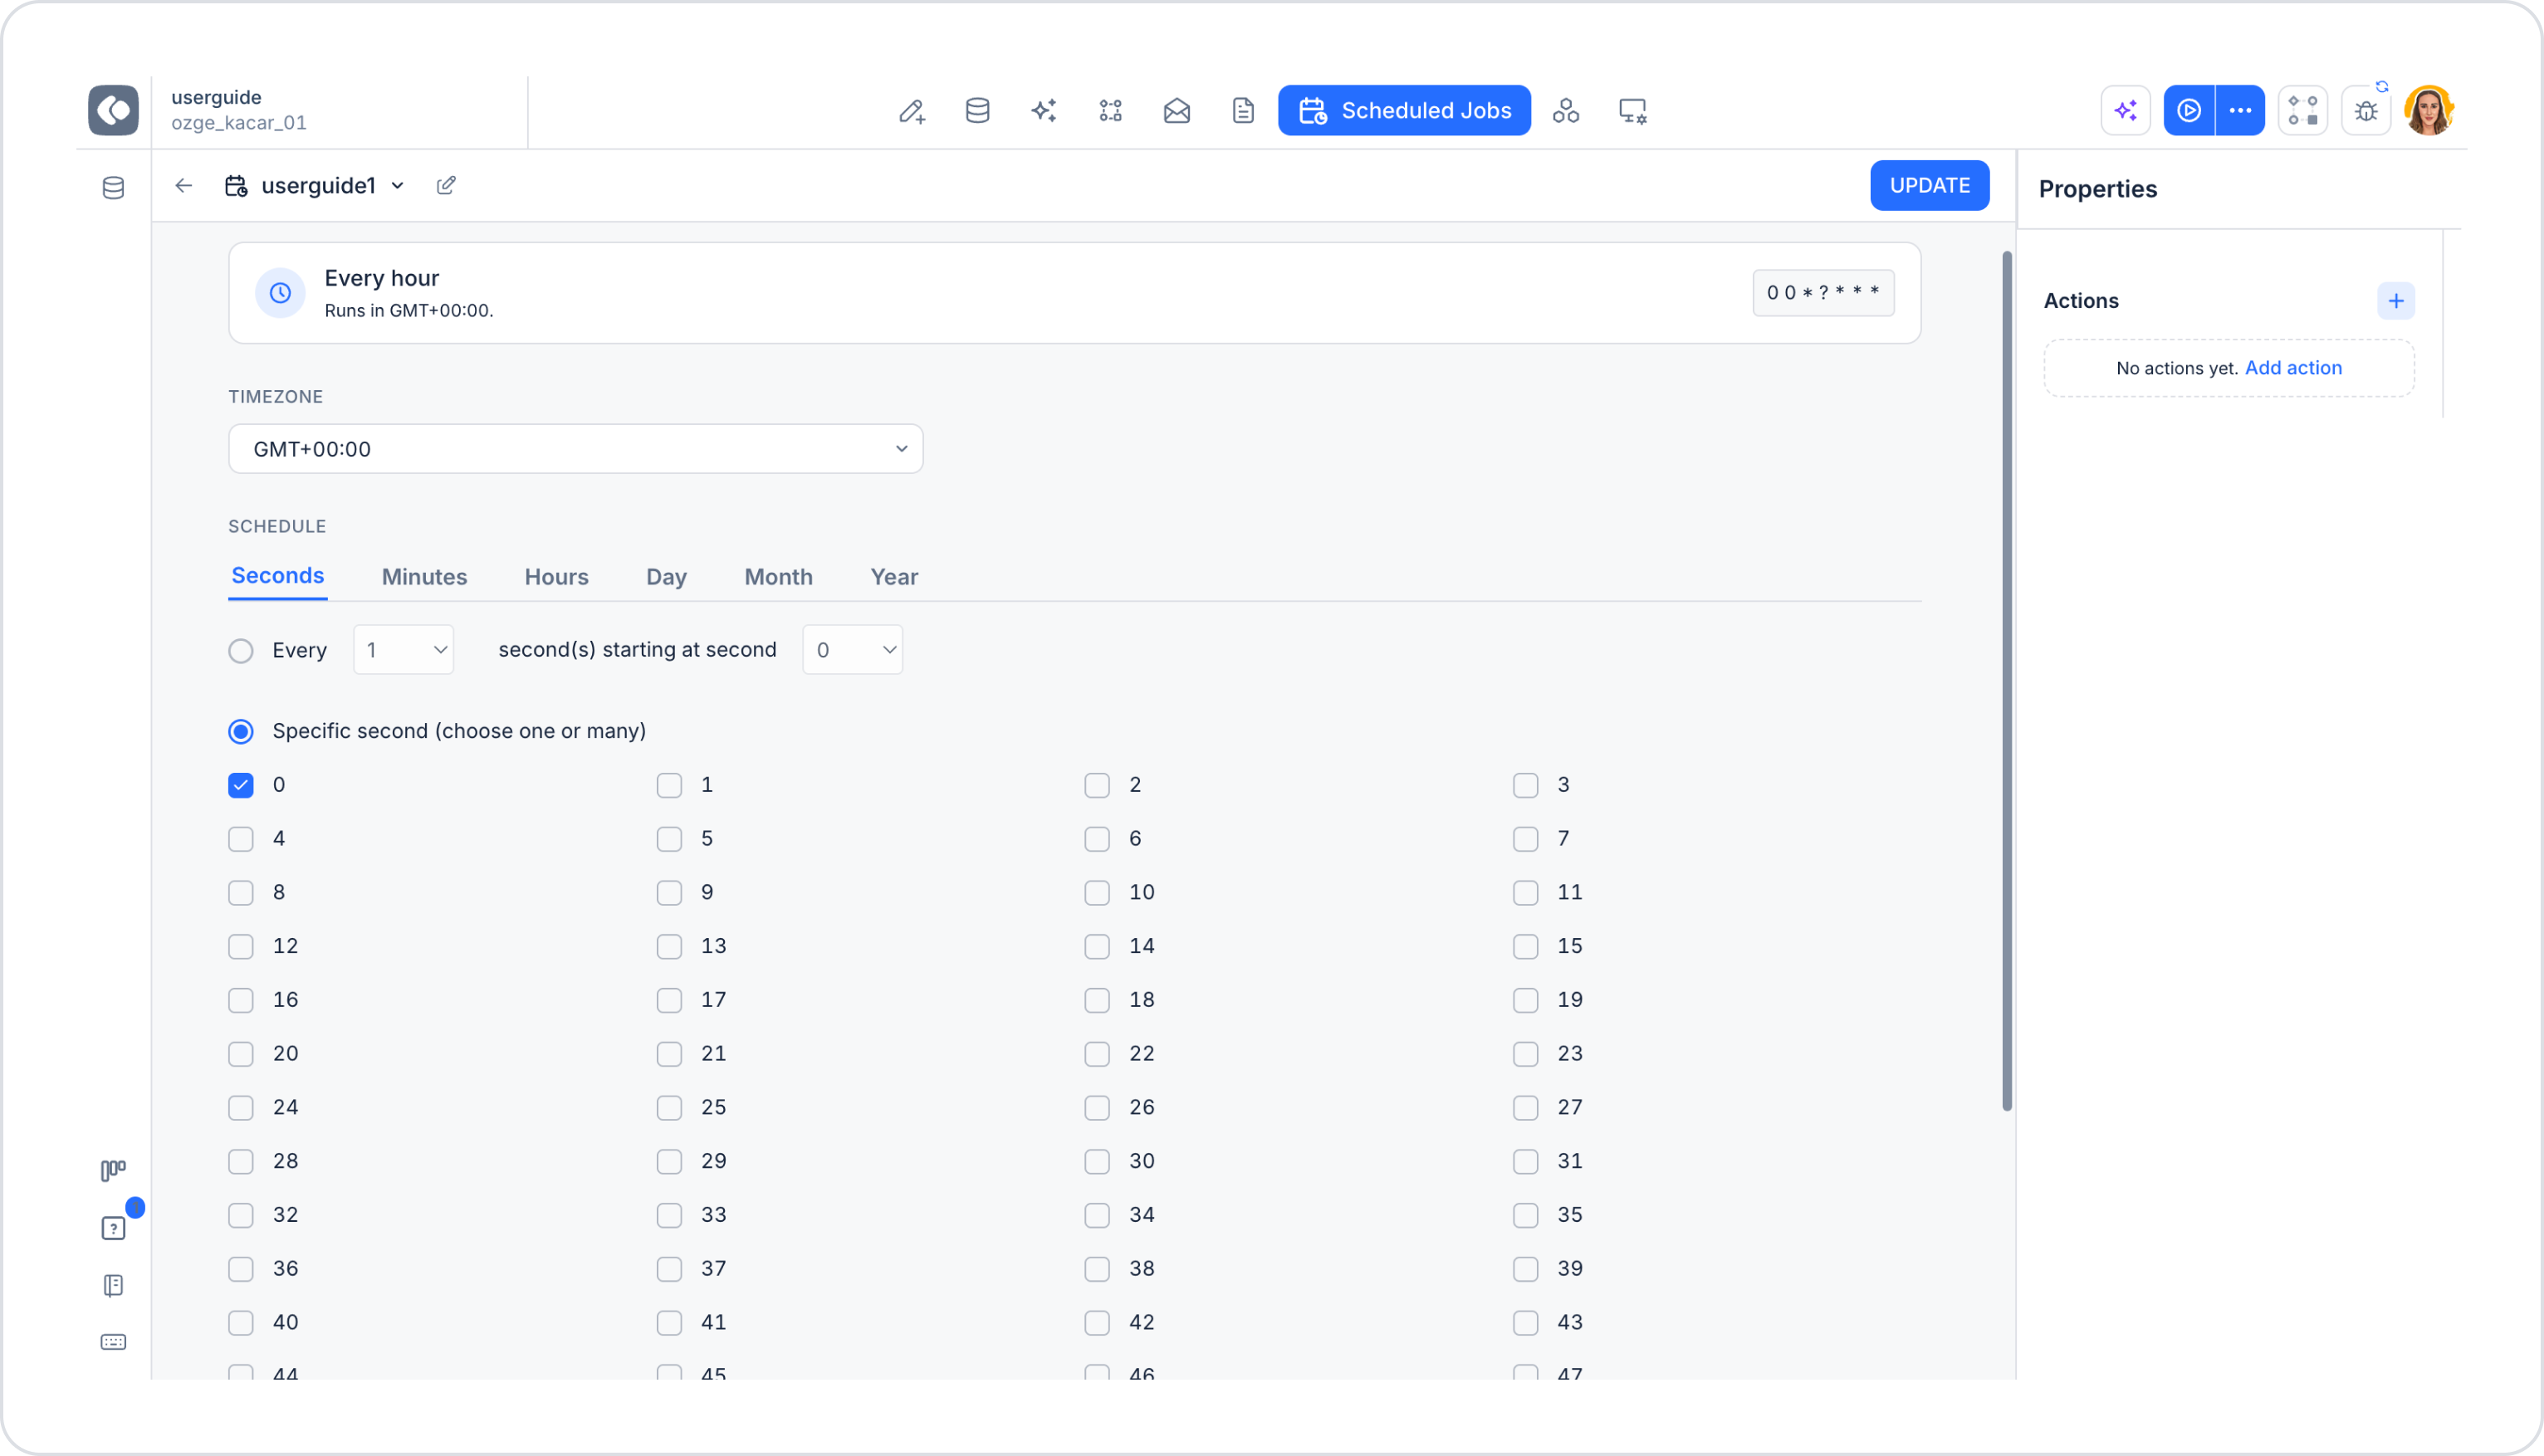
  • Result: Allows you to view the success status of tasks, output information or error messages.
  • Time Zone: Determines the time zone in which the tasks will run. It is used to ensure accurate scheduling in international projects.

With these settings, scheduled jobs become flexible and efficient.

Schedule Settings

The following table shows the scheduling options in the Scheduled Jobs module:

Time Interval Description
Seconds Schedule actions based on seconds
Minutes Schedule actions based on minutes
Hours Schedule actions based on hours
Day Schedule actions based on days
Month Schedule actions based on months
Year Schedule actions based on years

For each category, you can run actions at a specific time interval. For example

  • Every 5 minutes starting at minute 3: You can define an action to run every 5 minutes starting from minute 3.
  • Every 5 days starting at day 3: It can be scheduled to repeat every 5 days starting from day 3.

Learn System Actions in Scheduled Jobs Module

Scheduled Jobs enable the scheduling of certain actions on the Kuika platform. These actions fall into the following categories:

  1. Device
  2. Export (Data Export)
  3. Invers (Vehicle Information and Status)
  4. Notification
  5. Payment

Example Use Cases

  • Download Report (Device - Download Report): Can be used to get an automatic report on a specific day of the year.
  • Data Export (Export - Export Excel): Can be used to export data to an Excel file on a monthly basis.
  • Vehicle Status (Invers - Get Car Info): Get vehicle information periodically.
  • Receive Payment (Payment - Charge Payment Method): Can be used to automate the process of receiving monthly payments.
  • Send Notification (Notification - Send Mail): Can be used to send weekly notification emails to users.

With this training content, you learned the process of creating and managing scheduled jobs in the Scheduled Jobs module.

Glossary

No items found.

Alt Başlıklar