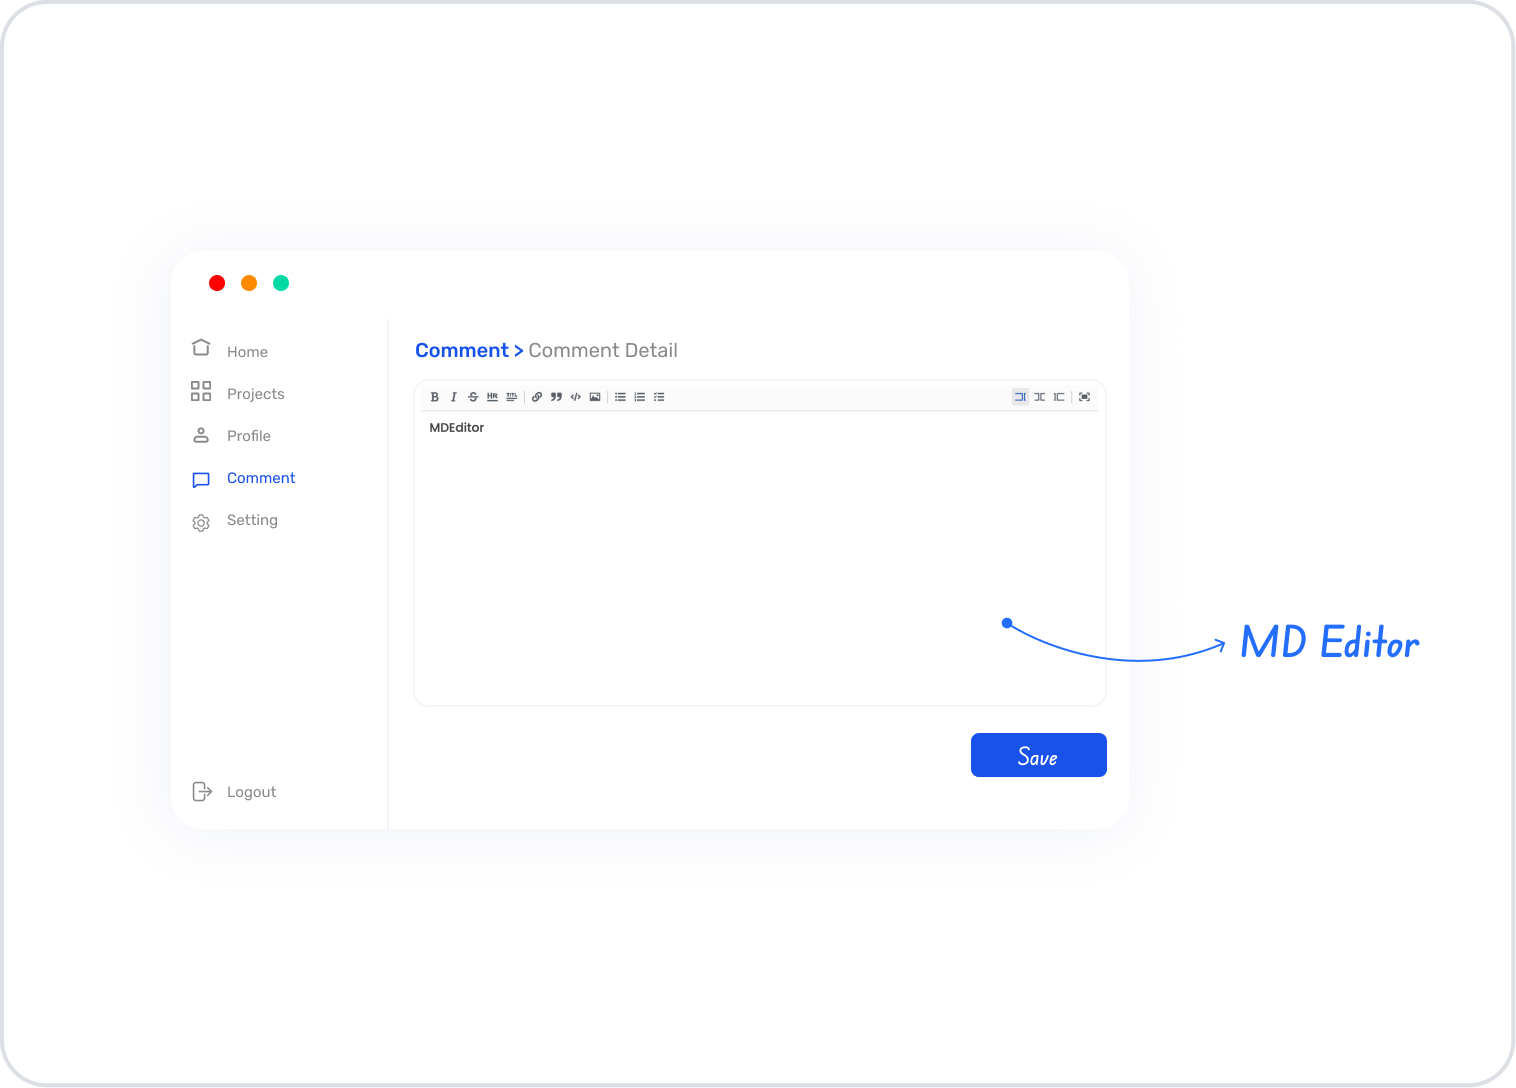
The MD Editor element is a text editing element that allows users to create rich text content in Markdown format. It supports Markdown syntax such as headings, lists, bold/italic text, links, and code blocks, facilitating the creation of structured content.
The MD Editor element is only supported in web applications.
1.1. Common Use Cases
Description and detail fields
Blog, announcement, or content management screens
Documentation and help texts
User-generated rich text content
Markdown-based content editing scenarios
2. Key Features
Markdown syntax support: Markdown elements such as headings, lists, links, quotes, and code blocks can be used.
Rich text editing tools: Basic formatting operations such as bold, italics, headings, and lists are provided through a user-friendly interface.
Real-time content creation: Content is edited instantly as the user types and becomes ready for saving.
Compatible with MD Viewer: Created content can be viewed in a formatted manner via the MD Viewer element.
Dynamic data binding support: Content can be entered statically or managed dynamically with state, variable, and action outputs.
2.1. MD Editor Element Properties
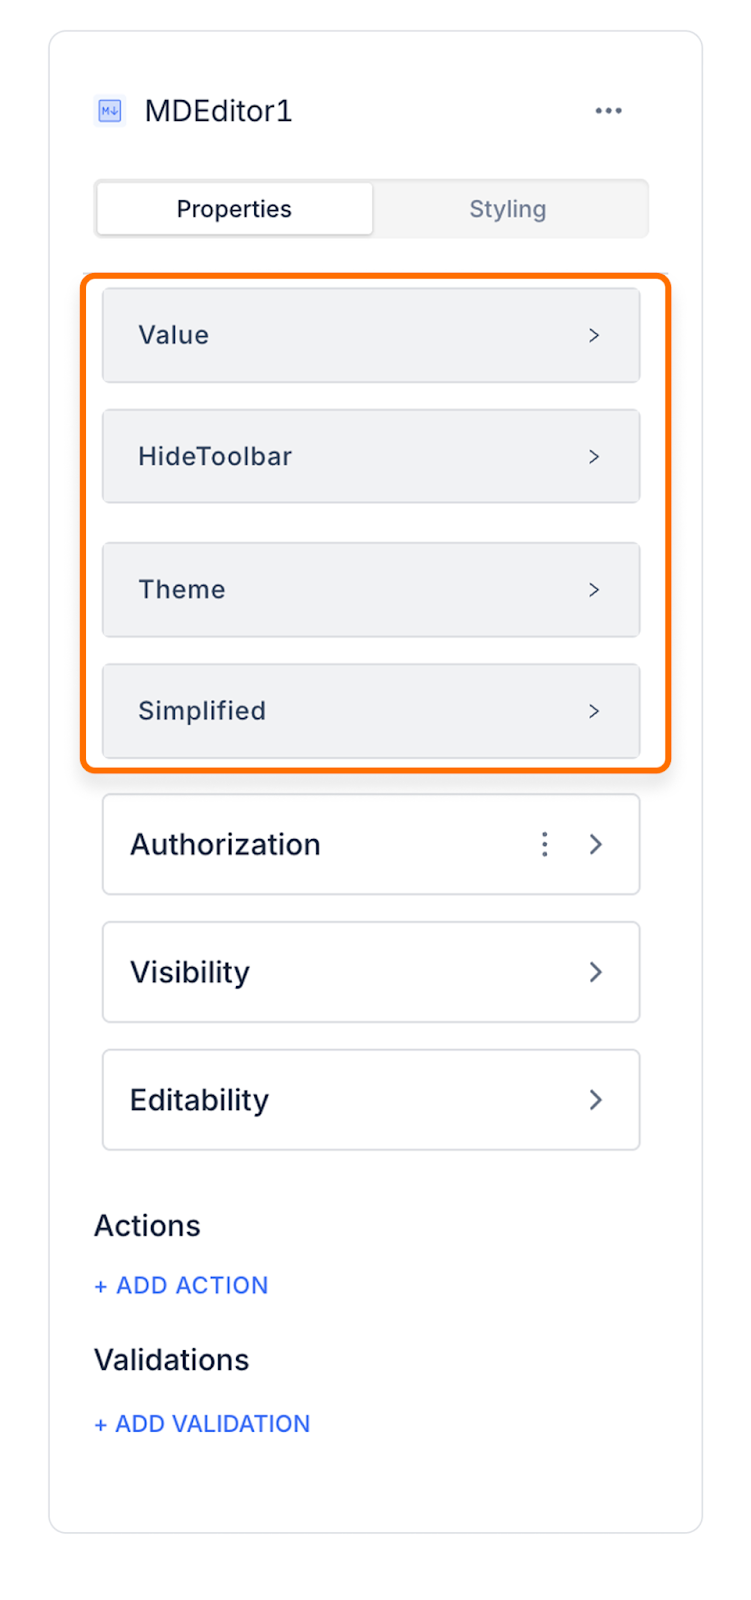
You can configure the following settings from the Properties panel:
Value: Represents the content edited and saved in the MD Editor. When users enter text in Markdown format, this content is saved in the Value field.
Hide Tool Bar: Controls whether the formatting toolbar at the top of the MD Editor is visible.
Theme: Sets the appearance theme of the MD Editor. The color scheme of the user interface is controlled by this setting.
Simplified: Switches the editor to a simplified appearance. It offers fewer controls and a cleaner writing area.
Single Line Break As Double: Treats line breaks created with a single Enter key press as double line breaks (as defined by the Markdown standard), ensuring the text wraps to the next line.
2.2. Actions That Can Be Added to Elements
The MD Editor element supports the onChange trigger when the user makes changes to the text content.
onChange: Triggers every time the user updates the content within the MD Editor.
Usage scenarios:
Save the entered Markdown content to state or variables
Updating the live preview (MD Viewer) area
Controlling content length or format
The onChange trigger enables the MD Editor element to be used effectively in dynamic content management scenarios.
3. How to Use the MD Editor Element
In this section, we will cover the end-to-end use of the MD Editor element through example scenarios.
Scenario: Creating Rich Content and Documentation
In an application, users want to create explanatory, documentation, or informative content not only as text, but also in an organized manner with code blocks, images, and links. In this scenario, MD Editor enables the preparation of rich and readable content thanks to its Markdown-supported tools.
In the scenario:
The user enters the text content into the MD Editor field.
Headings, bold, italic, and underlined text formatting is easily applied using the toolbar.
Listing and ordered list options are used to organize content into items.
Links are added to direct users to external sources.
Content is made visually appealing using the add image option.
Technical content is shared in a readable format with the code block and inline code features.
Important notes are highlighted with quote fields.
The written content is instantly displayed as a live preview in the right section of the editor.
Step 1 - Creating a Data Source
Creating a table in the DataSources module:
Go to the Datasources module.
Then go to the Tables tab.
Create a new table named “ContentBlocks”.
The table structure to be set up is as follows:
Set the Size field in the CommentText column to Max.
Important Field Names:
CommentText: Stores text content entered via the MD Editor. Free-form content such as descriptions, notes, or comments is stored in this field.
CreatedAt: Specifies the date and time the content was created. Used for time-based tracking of records.
CreatedBy: Stores information about the user or source that created the content.
Used in user-based content separation and authorization scenarios.
Step 2 - Adding and Configuring Elements
Drag and drop the Elements > Text Input > MDEditor element onto the page.
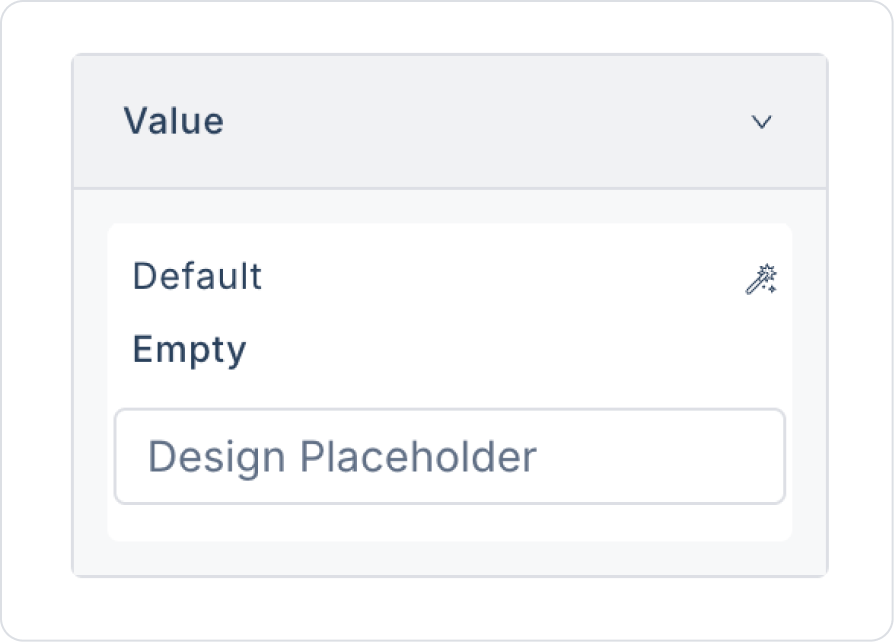
Update MDEditor > Properties > Value > Default > Empty so that the MD Editor content is initially empty.
Since the scenario will involve advanced usage, set the MDEditor > Properties >Simplified and HideToolbar options to off.
Drag and drop the Elements > Navigation > Button element onto the page.
Edit the Button text to Button > Properties > Label > “Save”.
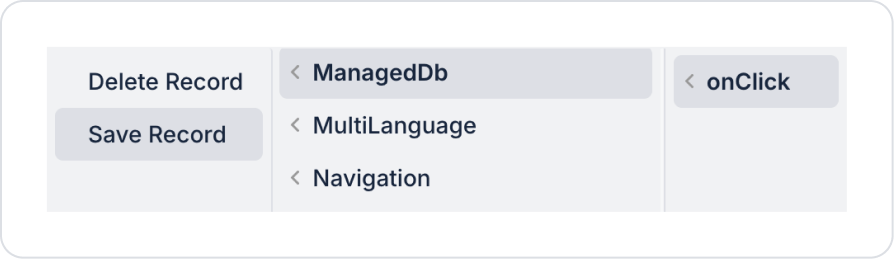
Add the save action to the Button element: Button > Add Action > onClick > ManagedDb > Save Record.
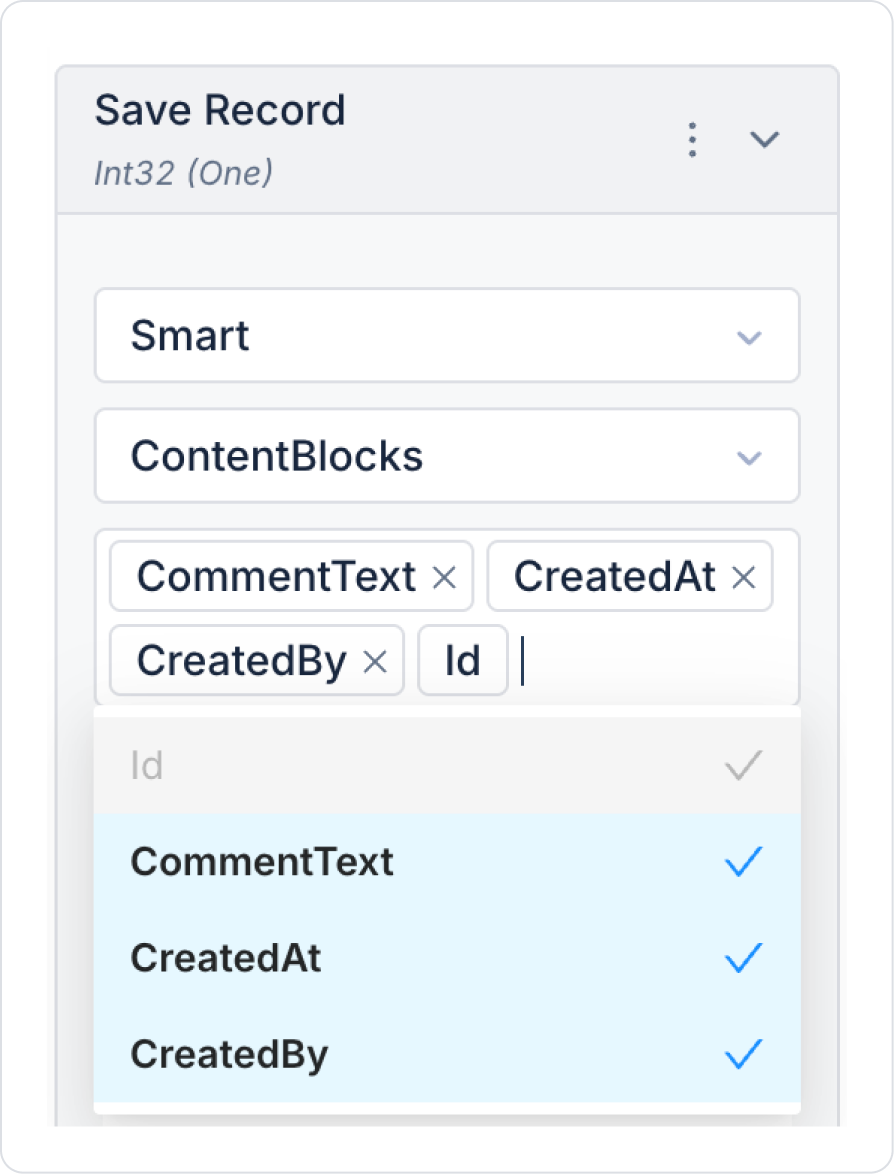
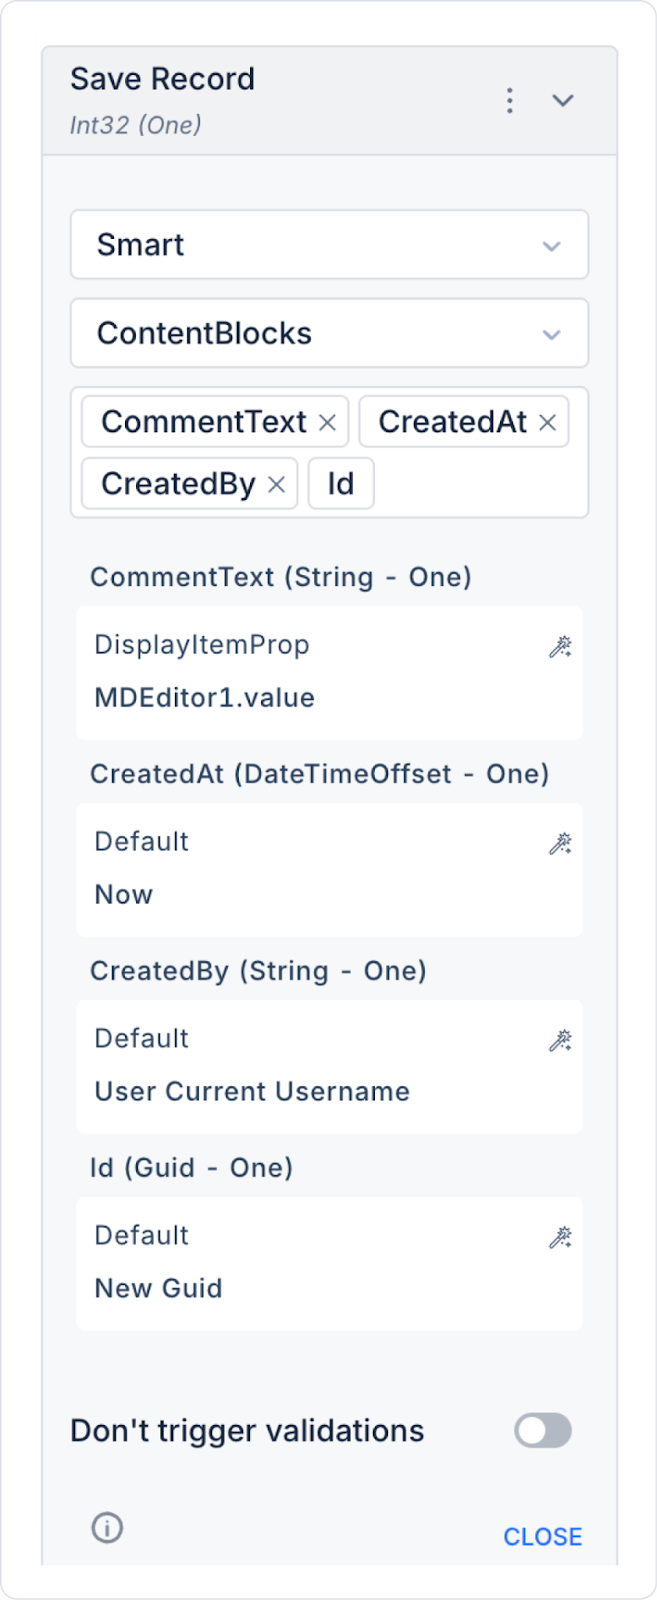
In the Save Record action, select the ContentBlocks table. In the column names field that opens, select all column names.
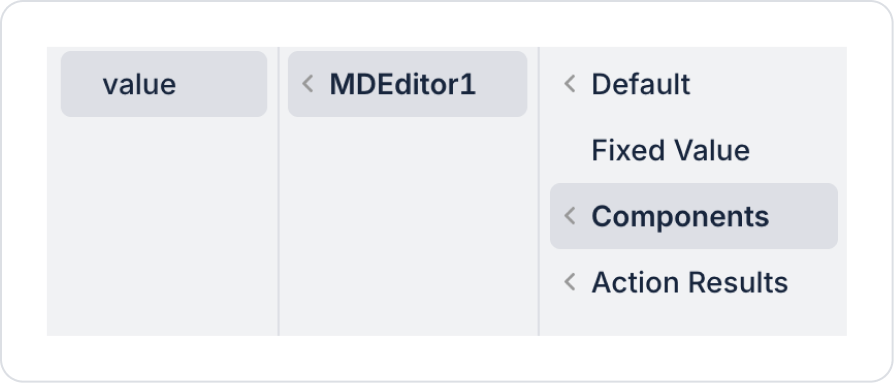
Define the CommentText field as Components > MDEditor > value.
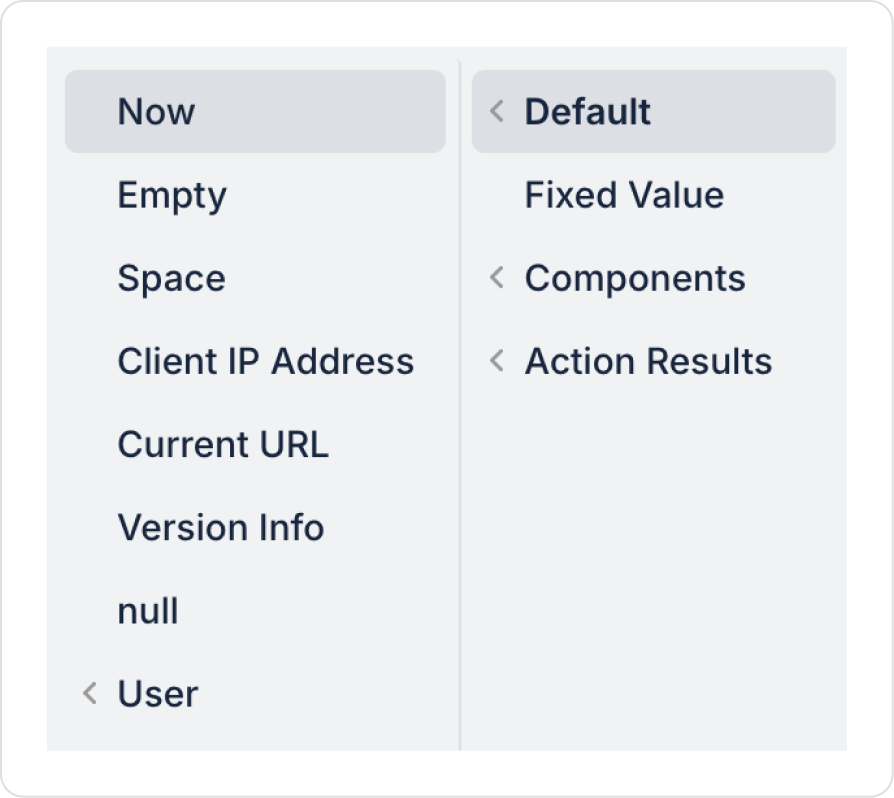
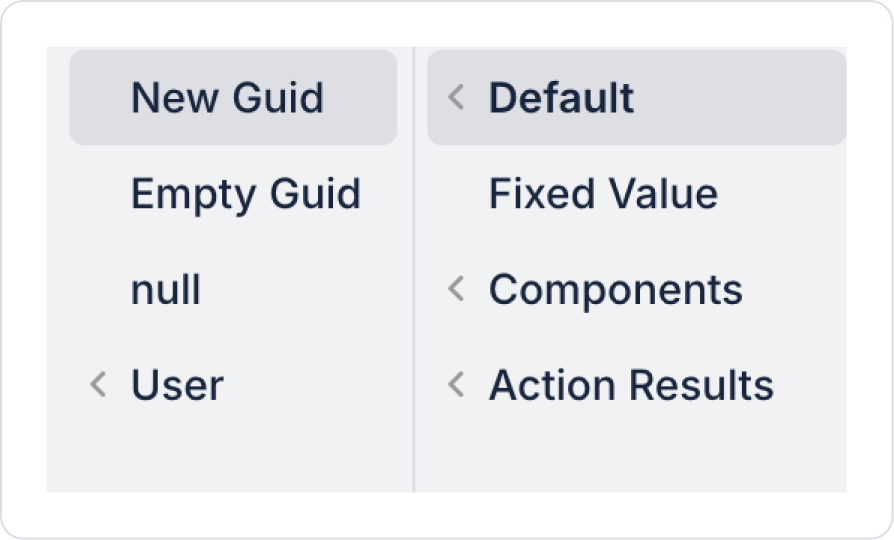
Define the CreatedAt field as Default > Now.
Define the Id field as Default > New Guid.
As a result of these definitions, all fields of the Save Record action should be as follows.
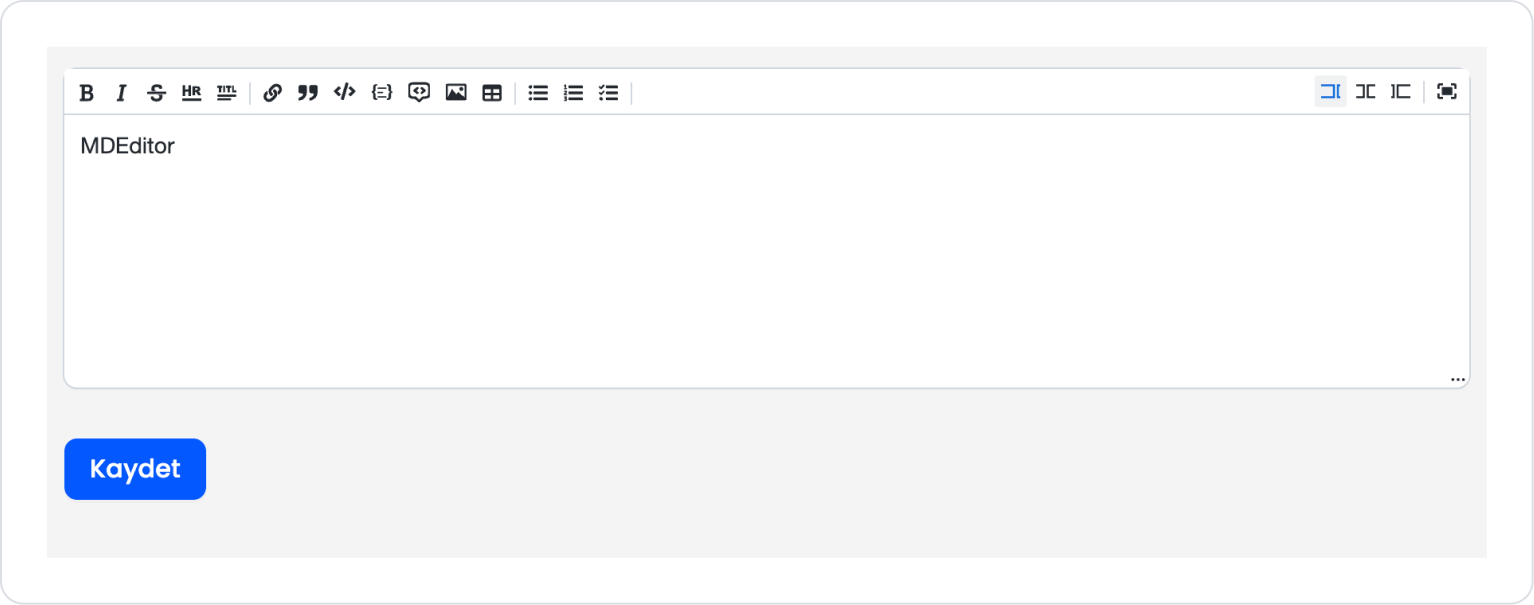
The final page should look like this.
Preview:
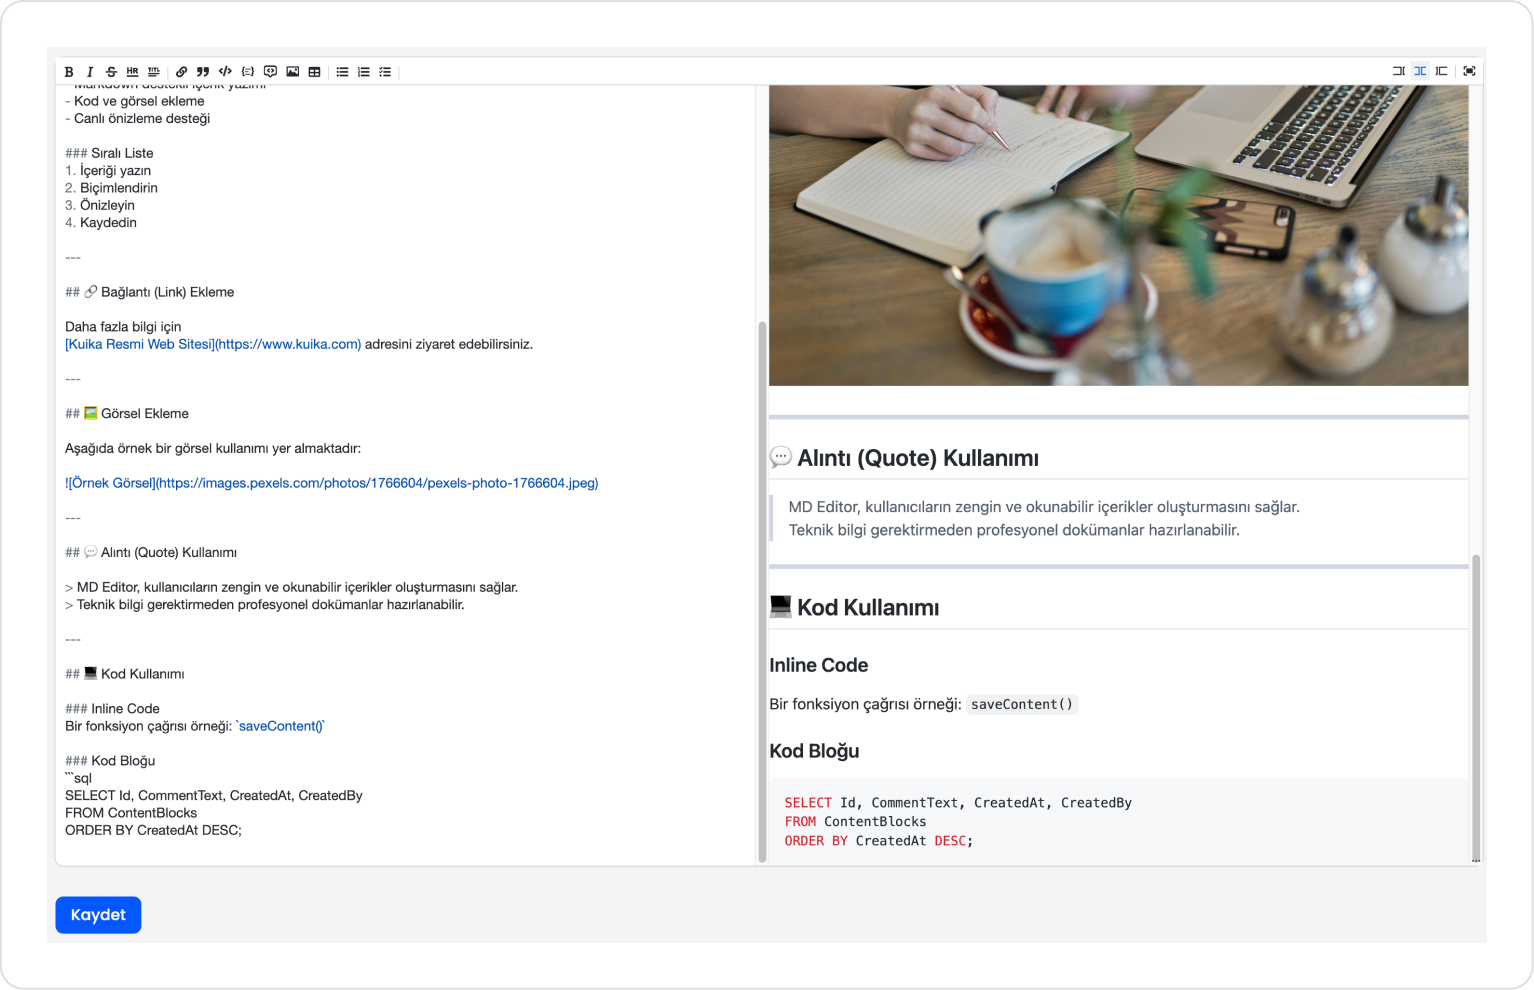
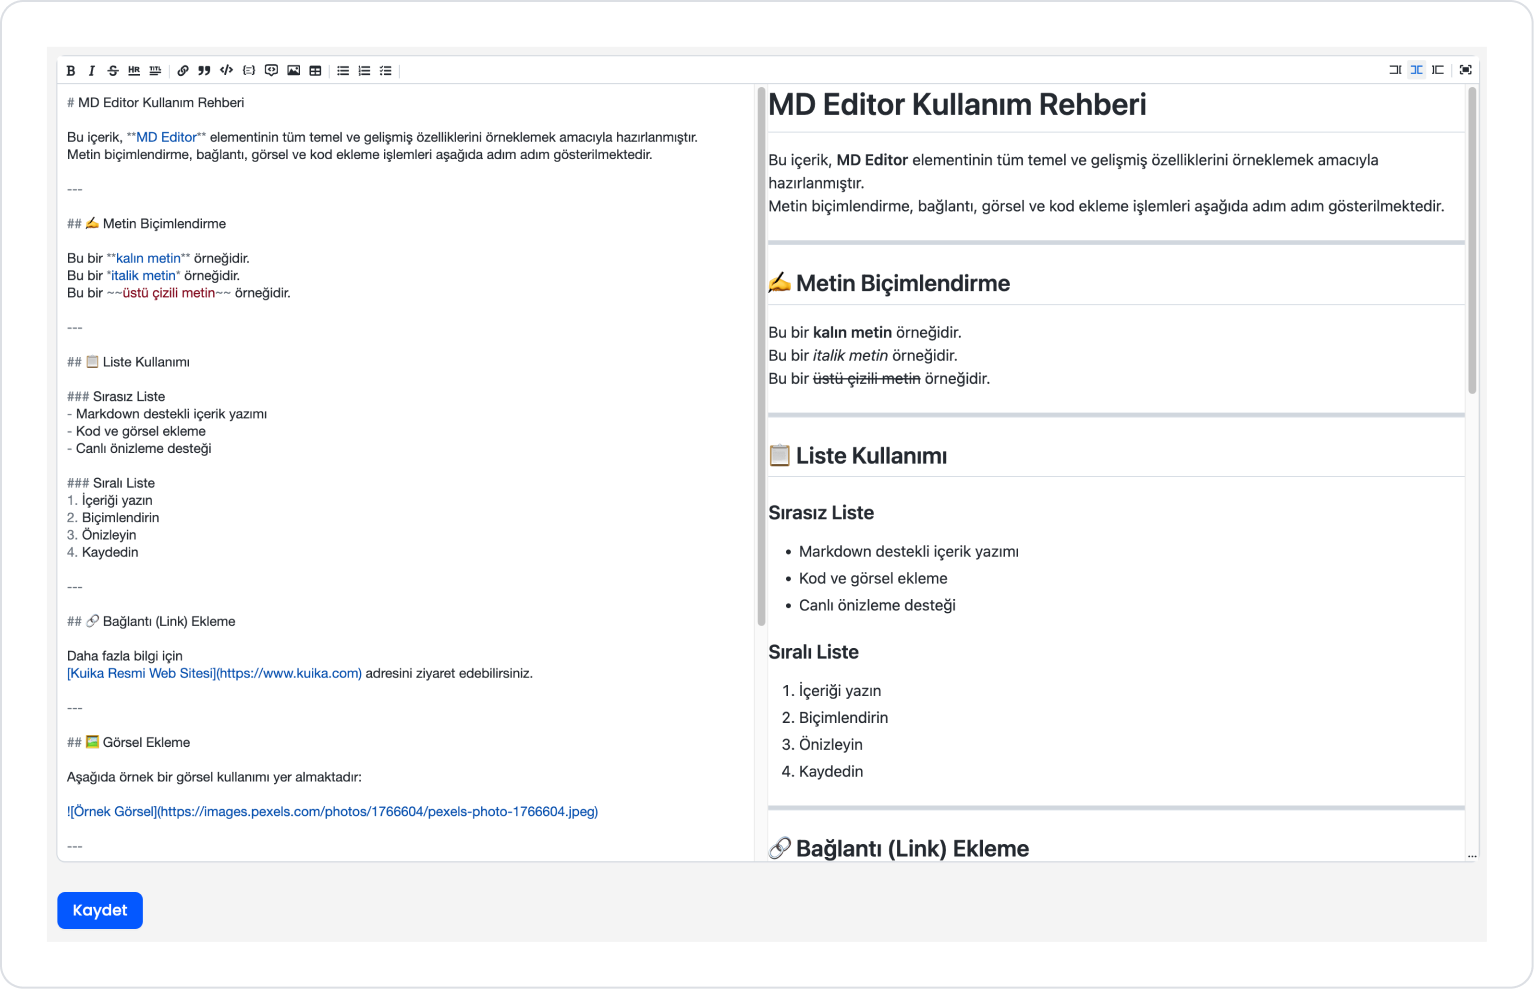
When the application is tested, the content entered in the MD Editor field is edited on the left side and displayed instantly as a live preview on the right side. The live preview area can be turned on and off via the control in the upper right corner. All Markdown features, such as text formatting, listing, linking, images, quotes, and code insertion, can be easily applied in the editor, and the results can be tracked in real time.
Users can increase or decrease the editor size as needed via the three dots (⋯) menu in the bottom right corner of the editor. This allows for a wider workspace when working with long content, while enabling a more compact view for short texts.
Once the content is ready, click the Save button to save it.
4. Common Features (Properties)
Some fields on the MD Editor element are common to all UI elements. Therefore, detailed descriptions of the following features are available in the relevant general guide pages: