OData API is one of the external data sources you can use on the Kuika platform. You can integrate an existing OData service as a data source into your application developed in Kuika. In this tutorial, you will learn how to add a data source to your application using the OData API.
To use the OData API, you need to upgrade your current subscription plan. By upgrading, you can access features like API management, OData integration, and advanced data sources. For more information, please visit the Pricing page.
Add a Data Source Connection to Your Application Using OData API
Log in to the Kuika platform and open the project you want to work on from the Apps screen.
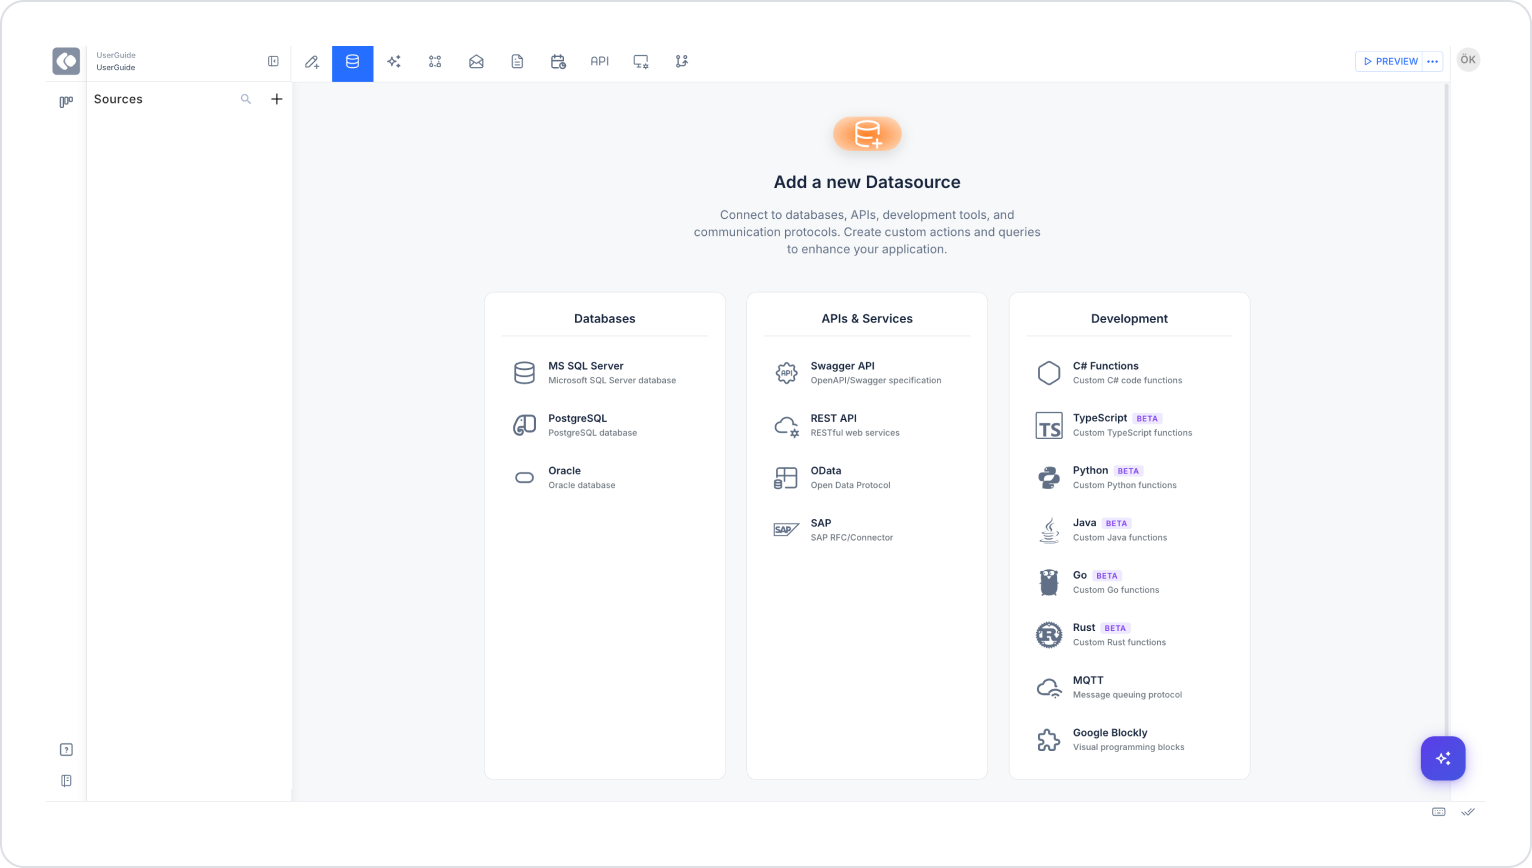
Open the Data Sources module. In this module, you can view data sources, actions, and tables, and add a new data source.
Click the + icon next to the Sources heading to add a new data source.
Select the OData API option and enter a name for your data source.
Click the CREATE button to complete the process.
Anatomy of the OData API Modal
A. Top Menu
Title: Area where you can name the connection settings.
CANCEL and CREATE Buttons: Allows you to cancel or save the changes made.
B. Connection Settings
Metadata URL: Enter the URL of the service metadata (schema) file.
Service Base URL: Enter the base URL of the OData service.
Description: A field where you can add a description about the data source.
C. Authentication
Authentication Type: Select the type of authentication for API access (No Auth, Basic, OAuth2).
Add Field: Used to add a field for authentication.
Configuring OData API Connection Settings
After clicking the CREATE button, in the Connection Settings section:
Enter the Metadata URL and Service Base URL information.
Select the authentication type from the Authentication Type dropdown menu.
If No Auth is selected, no additional configuration is required.
OData API Authentication Types
No Authentication: Used for services that do not require authentication. No additional settings are required.
Bearer: Token-based authentication method. In some cases, a username can be used to obtain a token.
Usage:
Authorization: Bearer YOUR_ACCESS_TOKEN
If the token is obtained with a username and password, a ‘login’ process must be performed first, and then the process must be continued with the obtained token.
Basic Authentication: Authentication is performed with a username and password.
Username: Username
Password: Password
Usage:
Authorization: Basic base64(username:password)
You can add custom parameters if you wish.
API Key Authentication: An API key and sometimes a secret key are used for authentication to access the API. This information is usually provided by the API provider and sent as a header or query parameter.
Parameters that can be used:
ID Key Name: Name of the API identity key
(e.g. client_id, api_key, x-api-key)
ID: Your unique API identity value
Secret Key Name: The header name of the secret key
These values may have different names depending on the API provider's documentation. In Kuika, you can define these values as the correct header or parameter to complete the integration.
By following these steps, you can easily integrate the OData API data source into your Kuika applications.