The File Upload Path is a setting that determines which directory on the server uploaded files will be stored in. File Upload Path settings simplify the management of file upload operations in your application. By configuring this setting in Kuika’s Config Manager module, you can ensure that files are stored securely and in an organized manner.
How to Configure File Upload Path Settings?
1. Open or Create a Configuration
Log in to the Kuika platform.
From the Apps screen, open the project you’ll be working on.
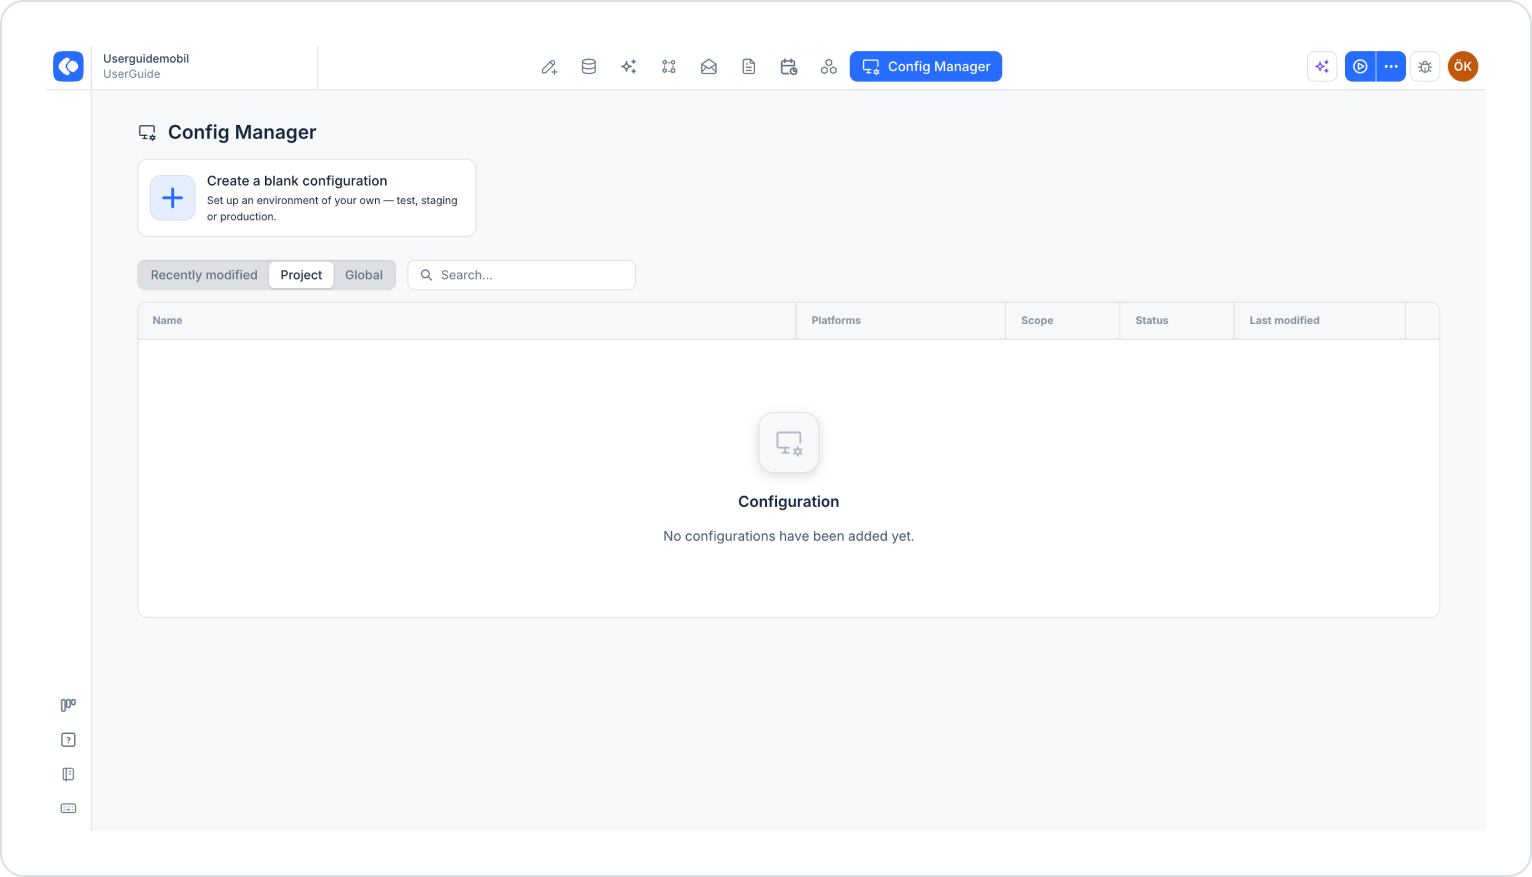
Click the Config Manager module in the top menu.
To create a new configuration, click the Create a blank configuration card, give the configuration a name, and complete the creation process. If you want to use an existing configuration, click its name in the list.
2. Configure the File Upload Path Settings
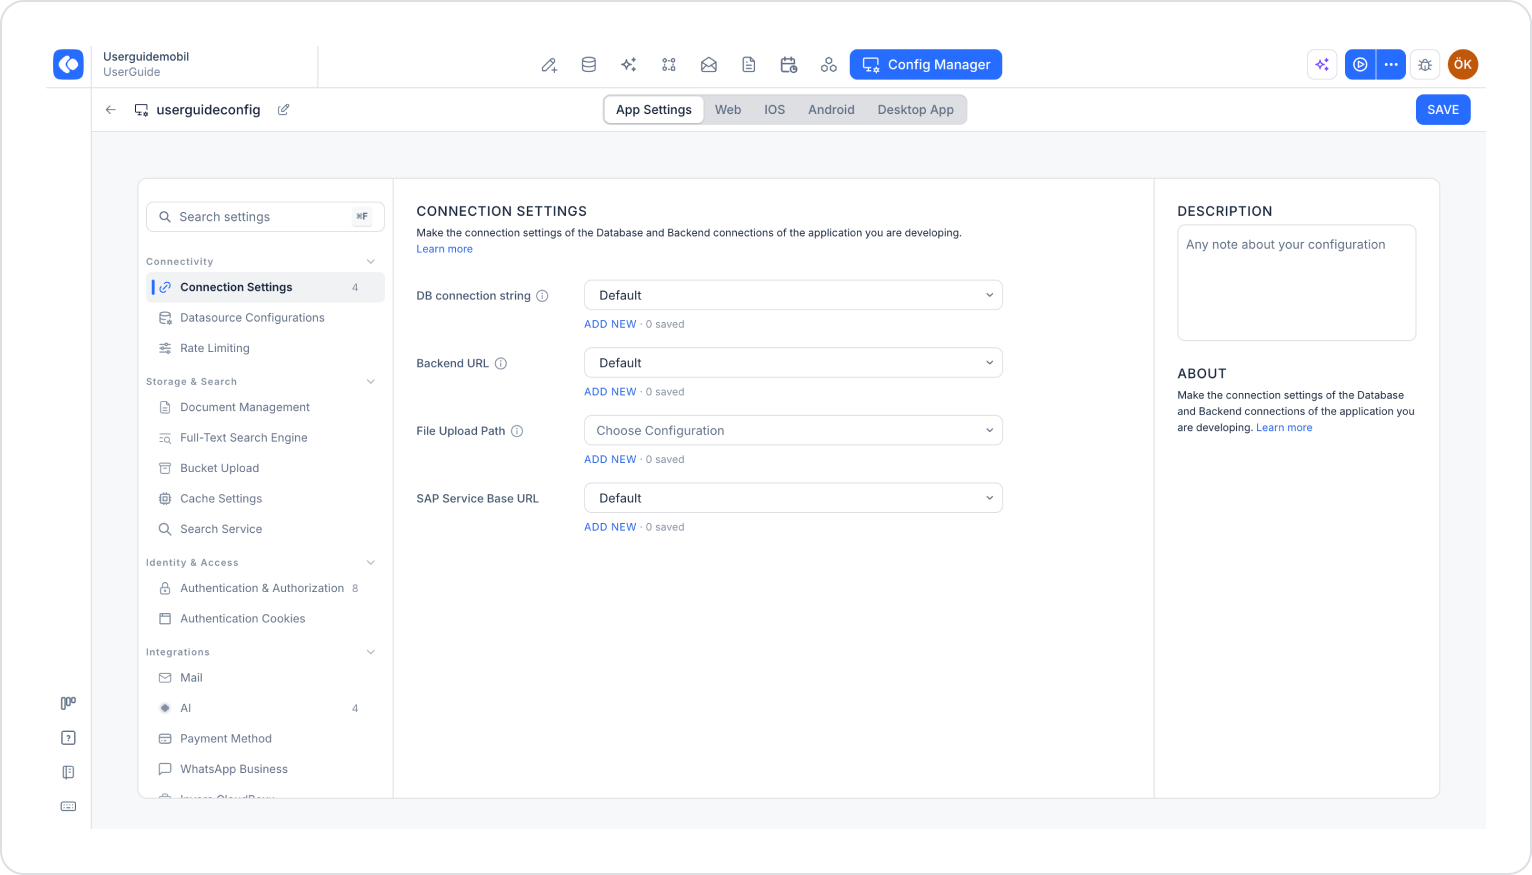
Make sure the App Settings tab is selected at the top of the configuration screen.
In the left menu, click the Connection Settings option under the CONNECTIVITY heading.
Click the Add New link below the File Upload Path field.
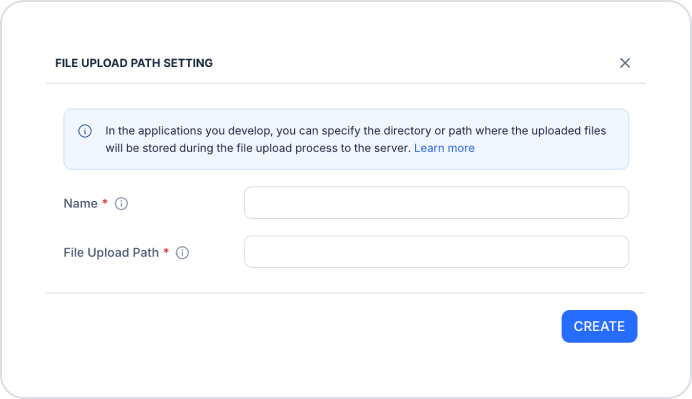
In the File Upload Path Setting window that opens, fill in the following fields (all fields are required):
Name: The descriptive name to assign to the configuration.
File Upload Path: The directory where uploaded files will be stored (e.g., /upload/user_documents/).
After filling in all fields, click the Create button.
Select the configuration you created from the File Upload Path drop-down menu.
Click the Save button in the upper-right corner to save your changes. (In an existing configuration, this button appears as Update.)
3. Test the Settings
Click the three dots next to the Preview button in the top-right corner of the screen.
From the dropdown menu, click the Run option.
Once the application opens, upload a file to verify that it is stored correctly in the specified directory.
By following these steps, you can easily configure file upload settings on the Kuika platform and optimize the management of uploaded files.