User Manual

Param

5/10/26
Param

With Kuika’s Param integration, you can offer your users alternative payment options such as credit cards, debit cards, and digital wallets. You can easily add the Param integration as the payment infrastructure for the app you’ve developed through system actions on the Kuika platform.

This allows you to securely process various payment types within your app, such as subscription payments, one-time payments, or recurring payments.

In this tutorial, you’ll learn how to add the Param integration to your apps.
You must have an active Param account to follow the steps described in this guide.

Param Integration with Configuration Manager

1. Open or Create a Configuration

  1. Log in to the Kuika platform.
  2. From the Apps screen, open the project you’ll be working on.
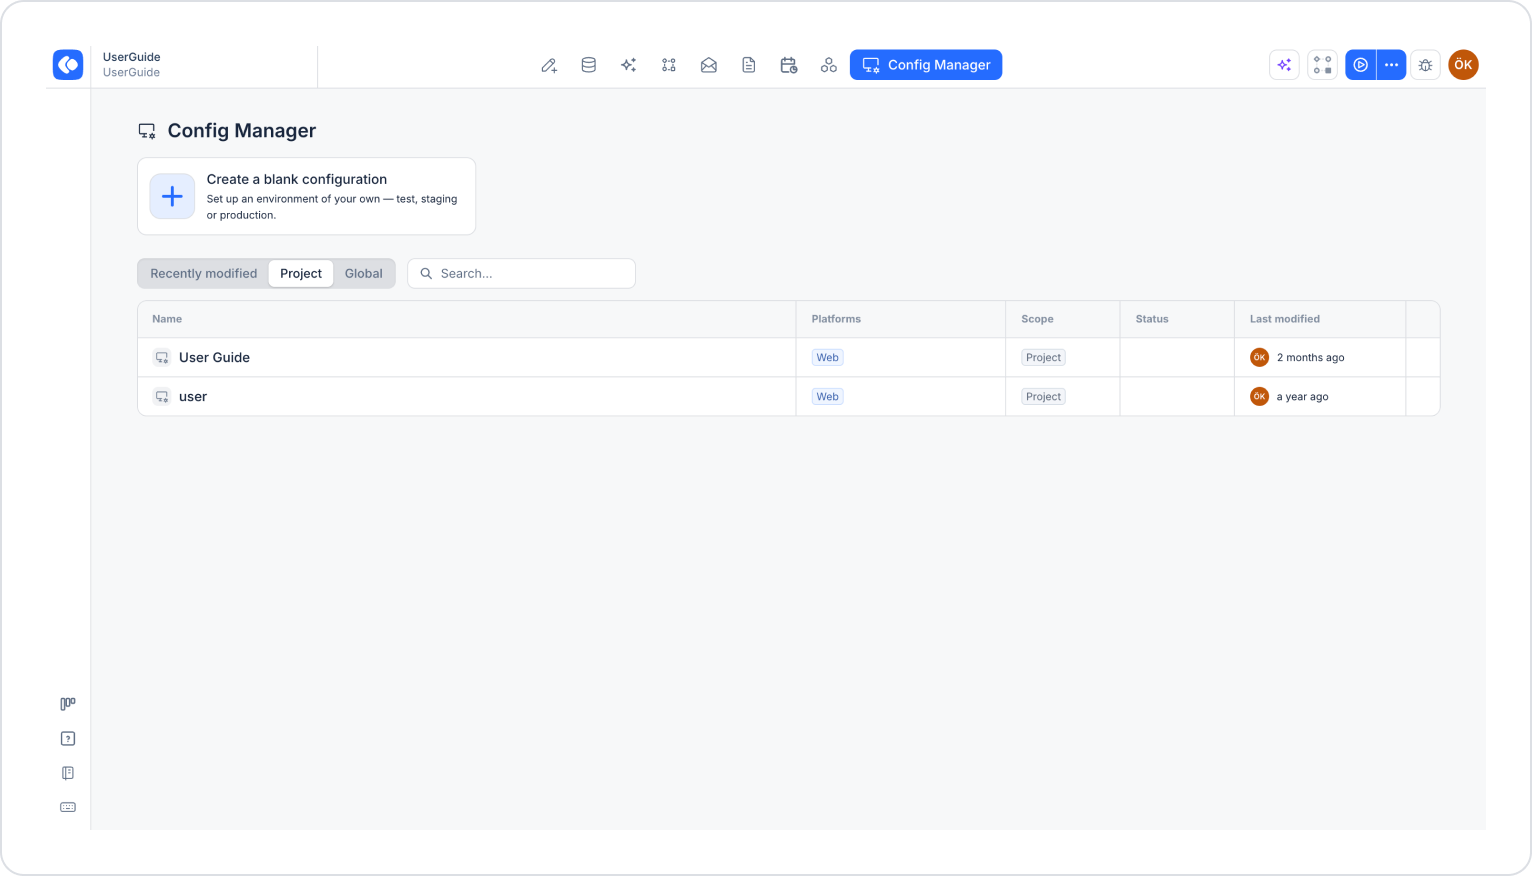
  3. Click the Config Manager module in the top menu.
  4. To create a new configuration, click the Create a blank configuration card, give the configuration a name, and complete the creation process. If you want to use an existing configuration, click its name in the list.

2. Obtain Param Information

  1. Open a new browser tab, go to the Param Dashboard, and log in.
  2. Make a note of the following information required for integration:
    • Client Code: The client code associated with your Param account.
    • Client User Name: The username associated with your Param account.
    • Client Password: The password associated with your Param account.
    • Client Guid: The unique identifier associated with your Param account.
    • URL: The URL of the Param API.

3. Add the Param Configuration

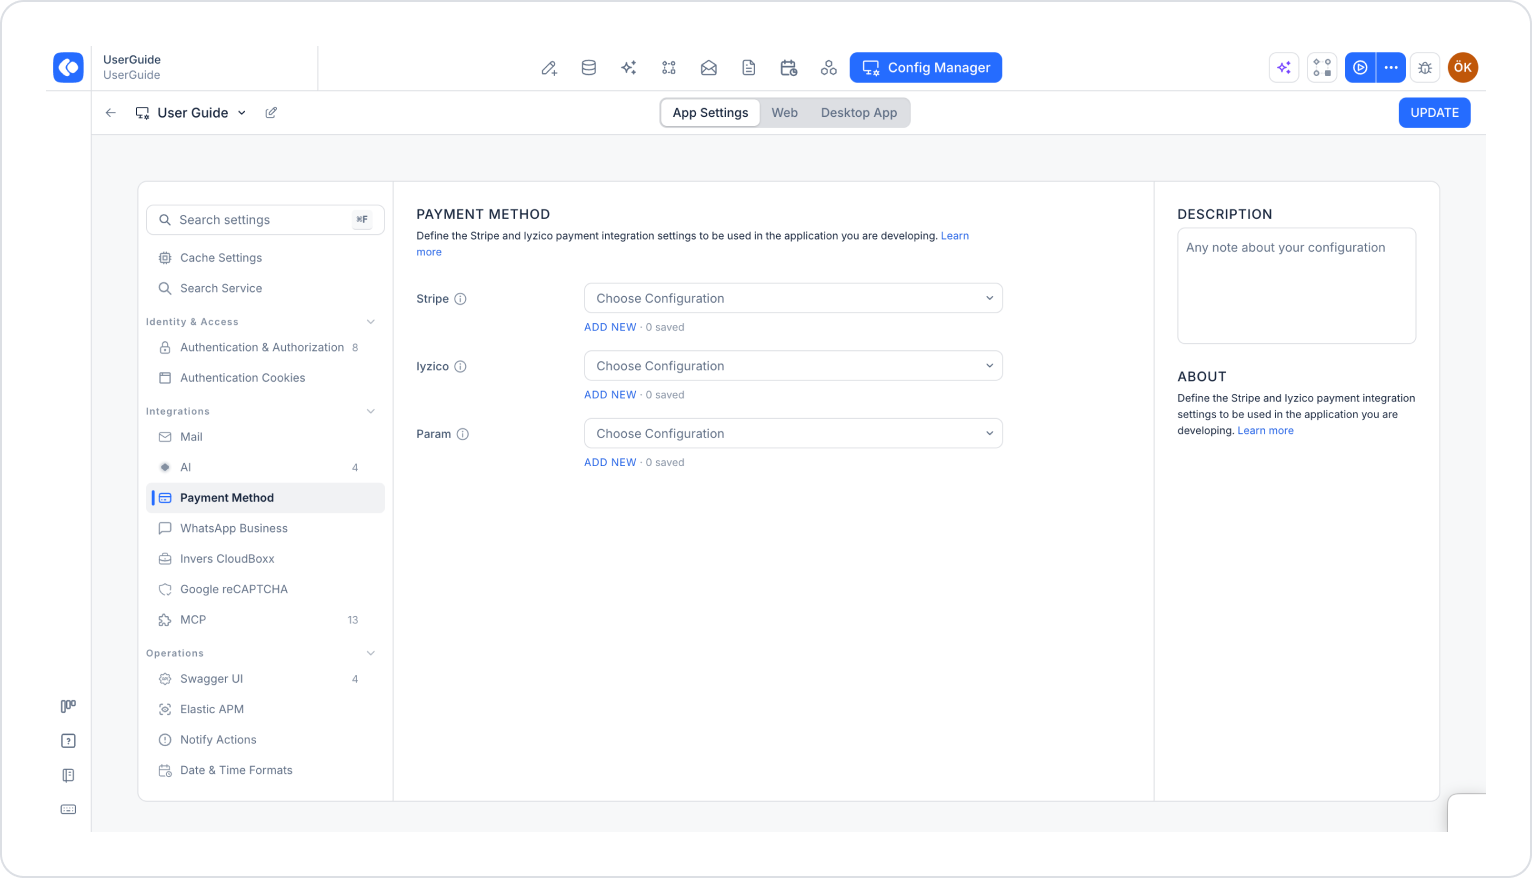
  1. Return to the configuration screen in Kuika and make sure the App Settings tab is selected at the top.
  2. In the left menu, click the Payment Method option under the Integrations heading.
  3. Click the ADD NEW link under the Param section.
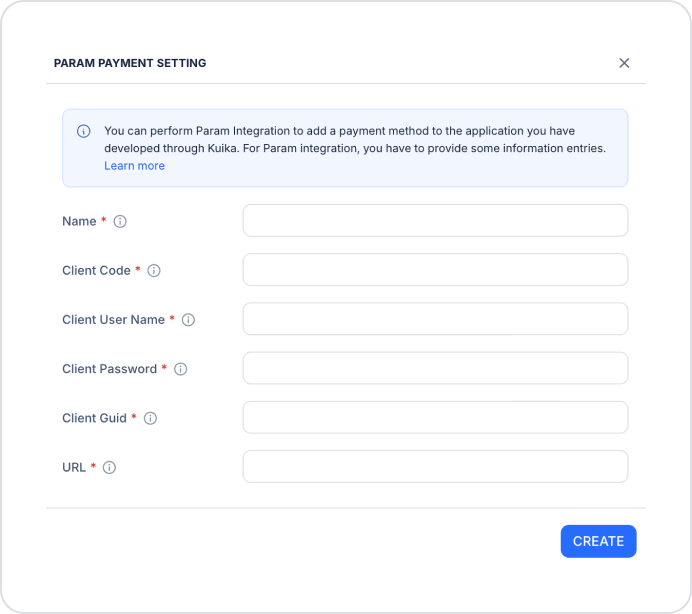
  1. In the Param Payment Setting window that opens, fill in the following fields (all fields are required):
    • Name: The descriptive name to assign to the configuration.
    • Client Code
    • Client User Name
    • Client Password
    • Client Guid
    • URL
  2. After filling in all fields, click the CREATE button.
  3. Select the configuration you created from the Choose Configuration dropdown menu in the Param section.
  4. Click the button in the top-right corner to save your changes. This button appears as SAVE for a new configuration and UPDATE for an existing one.

After completing these steps, you will have successfully added the Param integration to the application you developed with Kuika.

Glossary

No items found.

Alt Başlıklar