Kuika's Select Action feature automatically generates an SQL SELECT query for a table in a listing screen, allowing you to create joins between multiple tables, define calculated fields (DateDiff, Row Number), and quickly retrieve data without writing code.
Anatomy of Select Action Modal
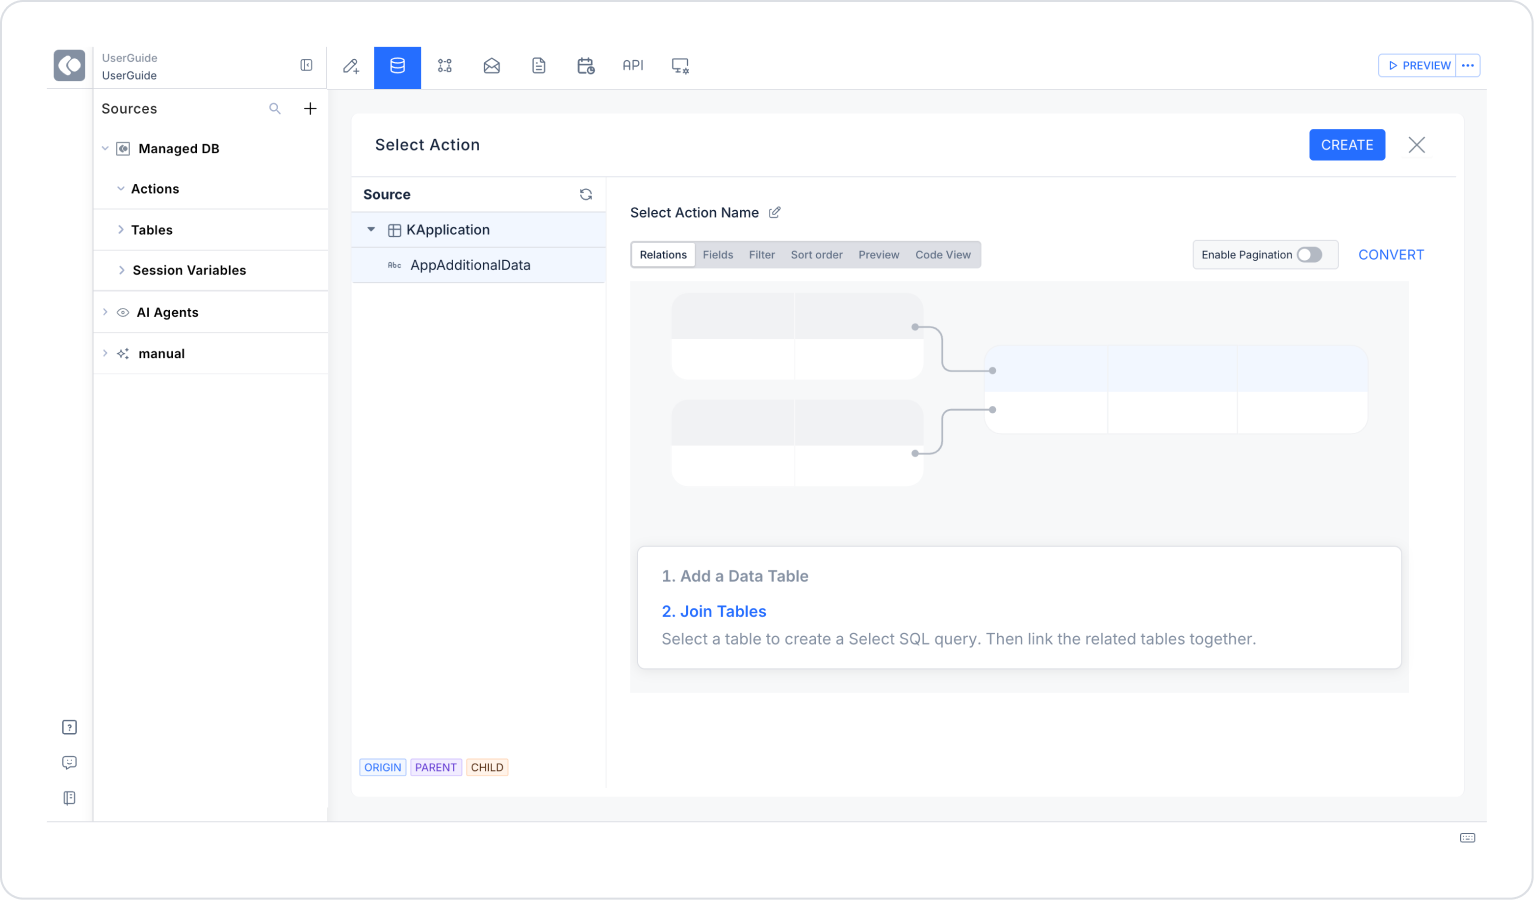
The Select Action panel has the following functions:
On the left side of the panel:
Action Name: Used to name the query.
Choose Source: Allows you to select the data source.
In the upper right corner of the panel:
Relations: You can create queries by adding and linking data tables.
Fields: Allows you to select fields from data tables.
Filter: Helps you filter the data.
Sort Order: Allows you to determine the sorting order of the data.
Preview: Allows you to preview the query and view the results.
Code View: Allows you to view the technical query structure generated by the system for the created query. It is used to examine how the query is created in the background and to perform technical verification.
Enable Pagination: Enables query results to be retrieved in pages (pagination). It is used to improve performance in large data sets and to ensure that data is loaded in chunks.
Convert to SQL Action: Allows you to convert your query to an SQL query.
In the lower right corner:
CREATE: Used to save the query.
Create SQL SELECT Query with Select Action
Log in to the Kuika platform and open the project you will be working on from the Apps screen.
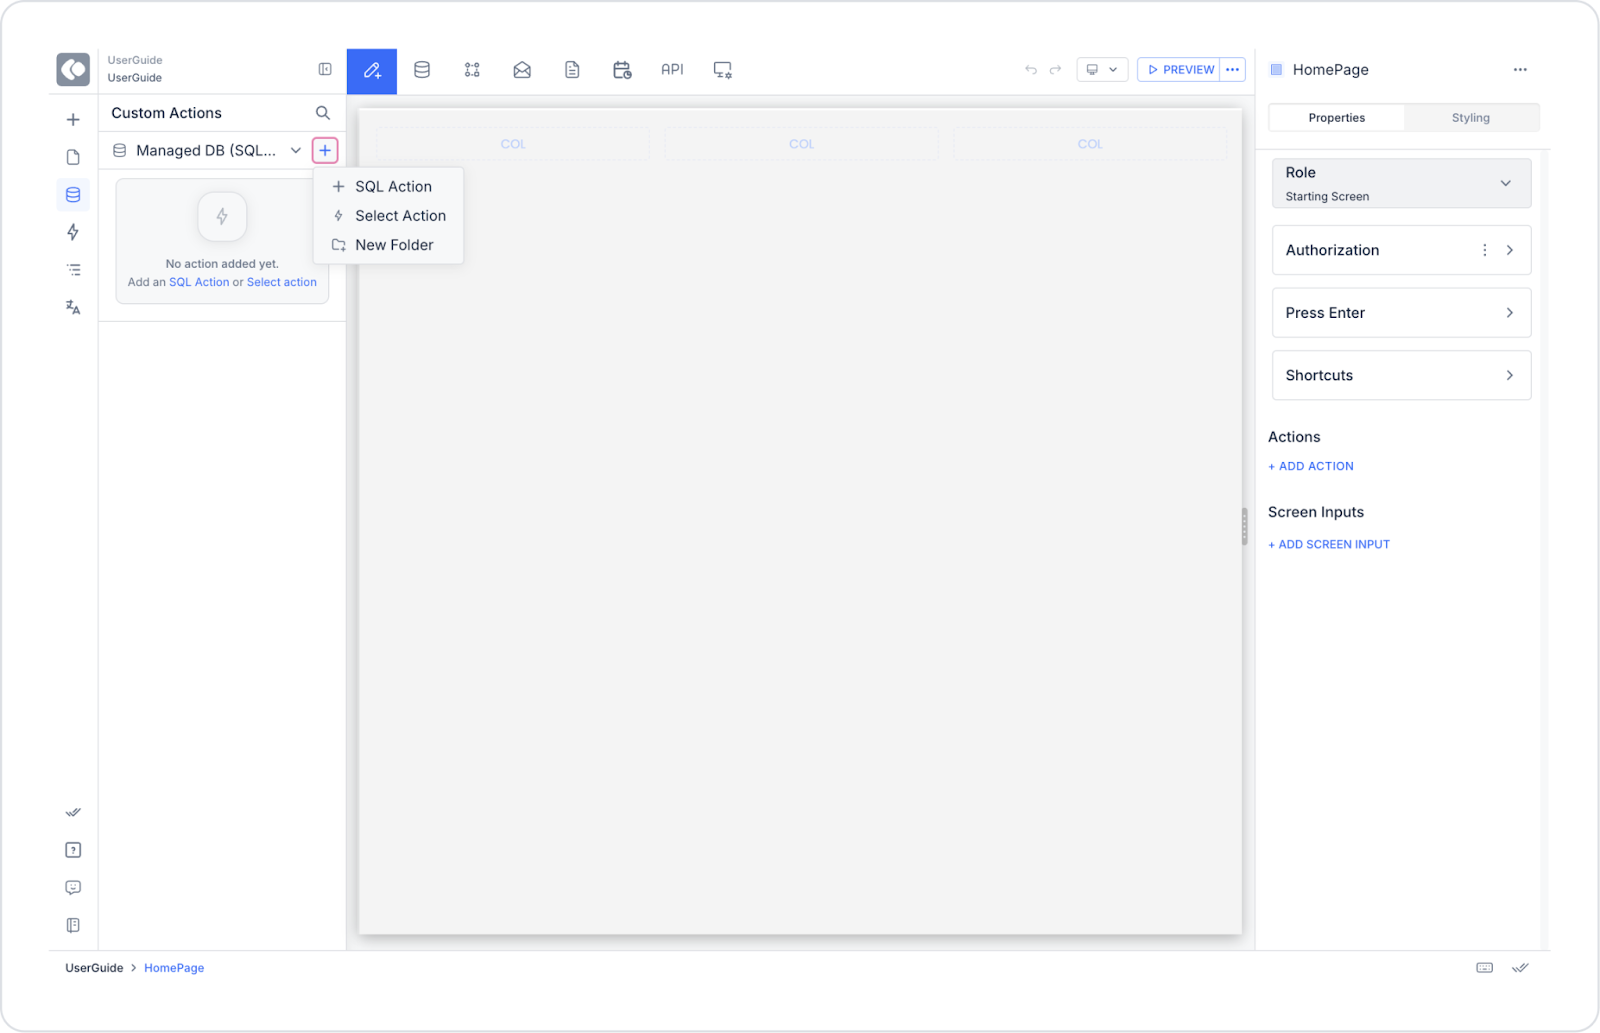
Open the Custom Actions panel on the left side of the UI Design module.
Click on the + icon next to the Managed DB heading and select the Select Action option.
Name the query in the window that opens.
Click on the + icon to select the data source. You can select a table you created earlier as the data source.
Configure the Fields, Filter, and Sort Order settings according to your needs.
Adjust Select Action Tab Settings
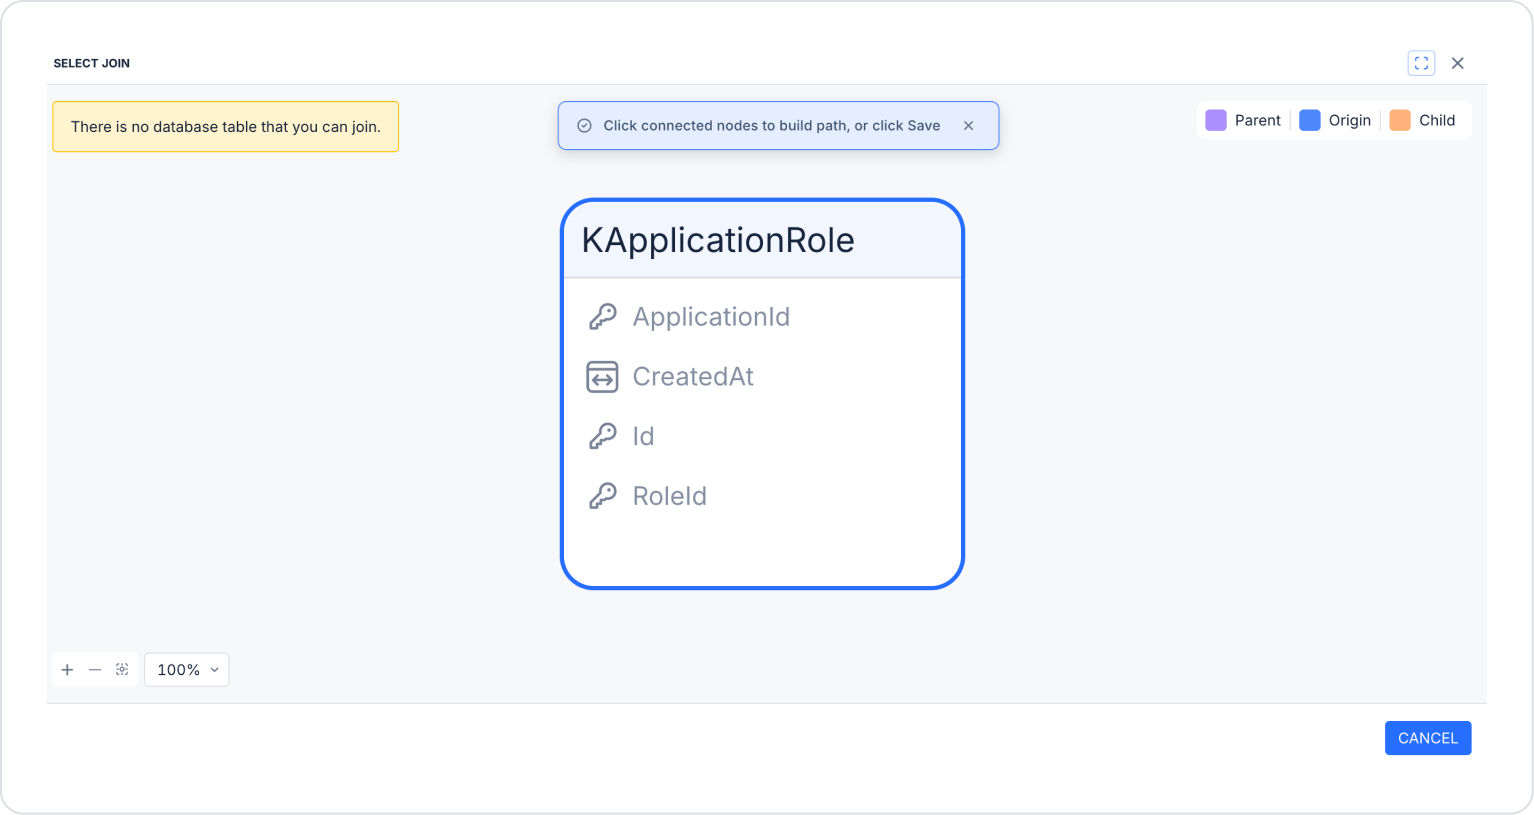
Relations
From the Relations tab, you can select tables you created earlier as data sources and join multiple tables within the same query to establish relationships between them.
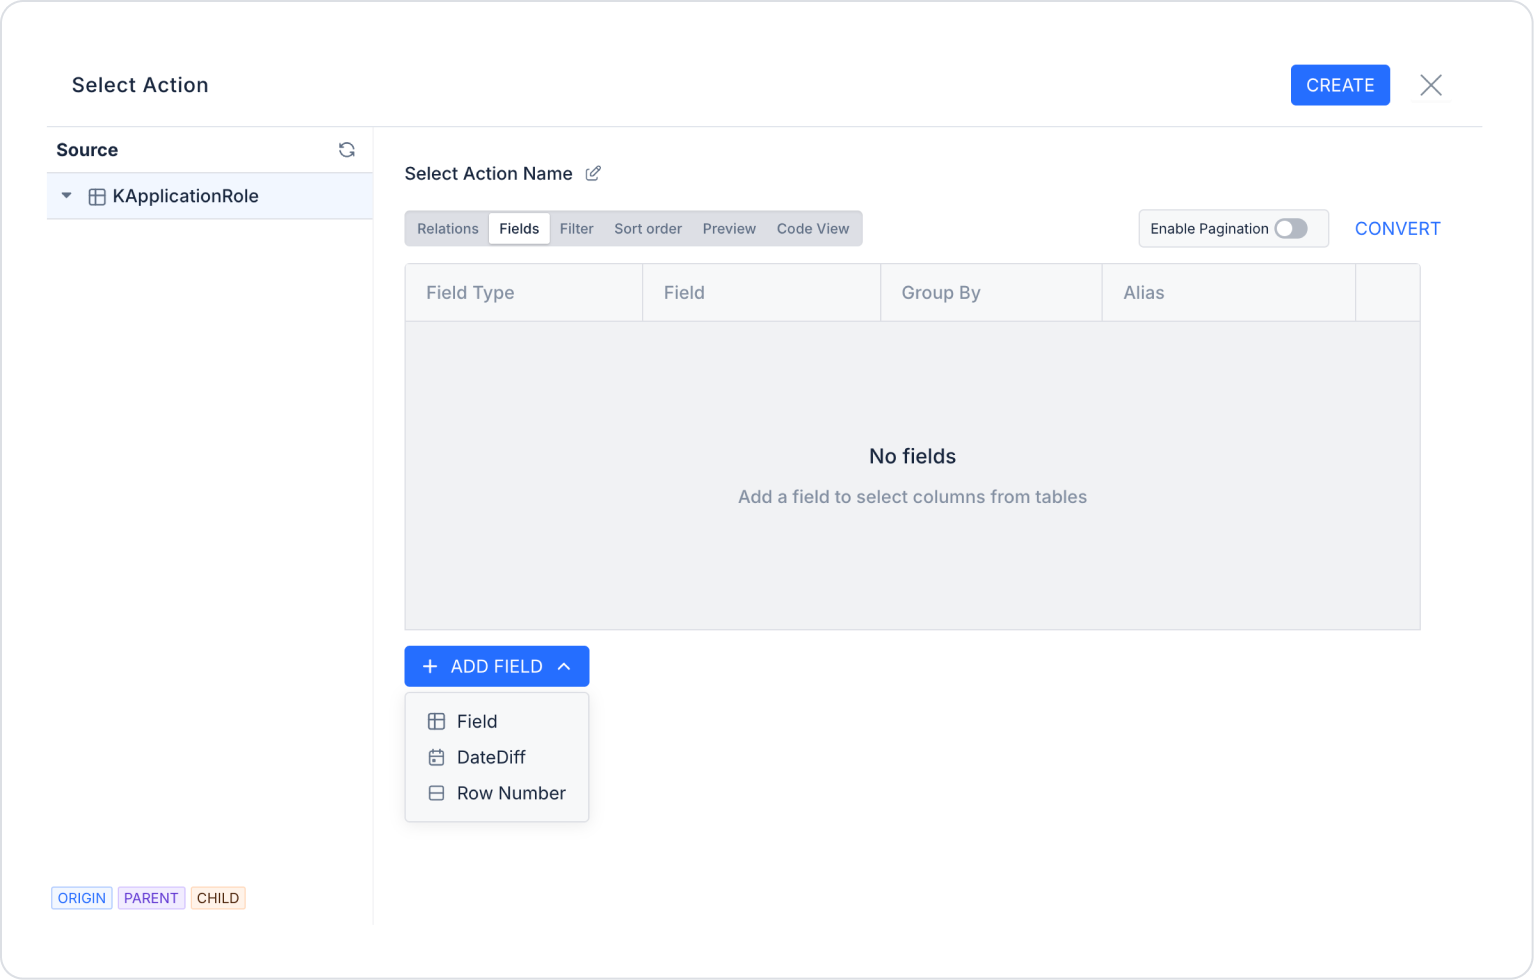
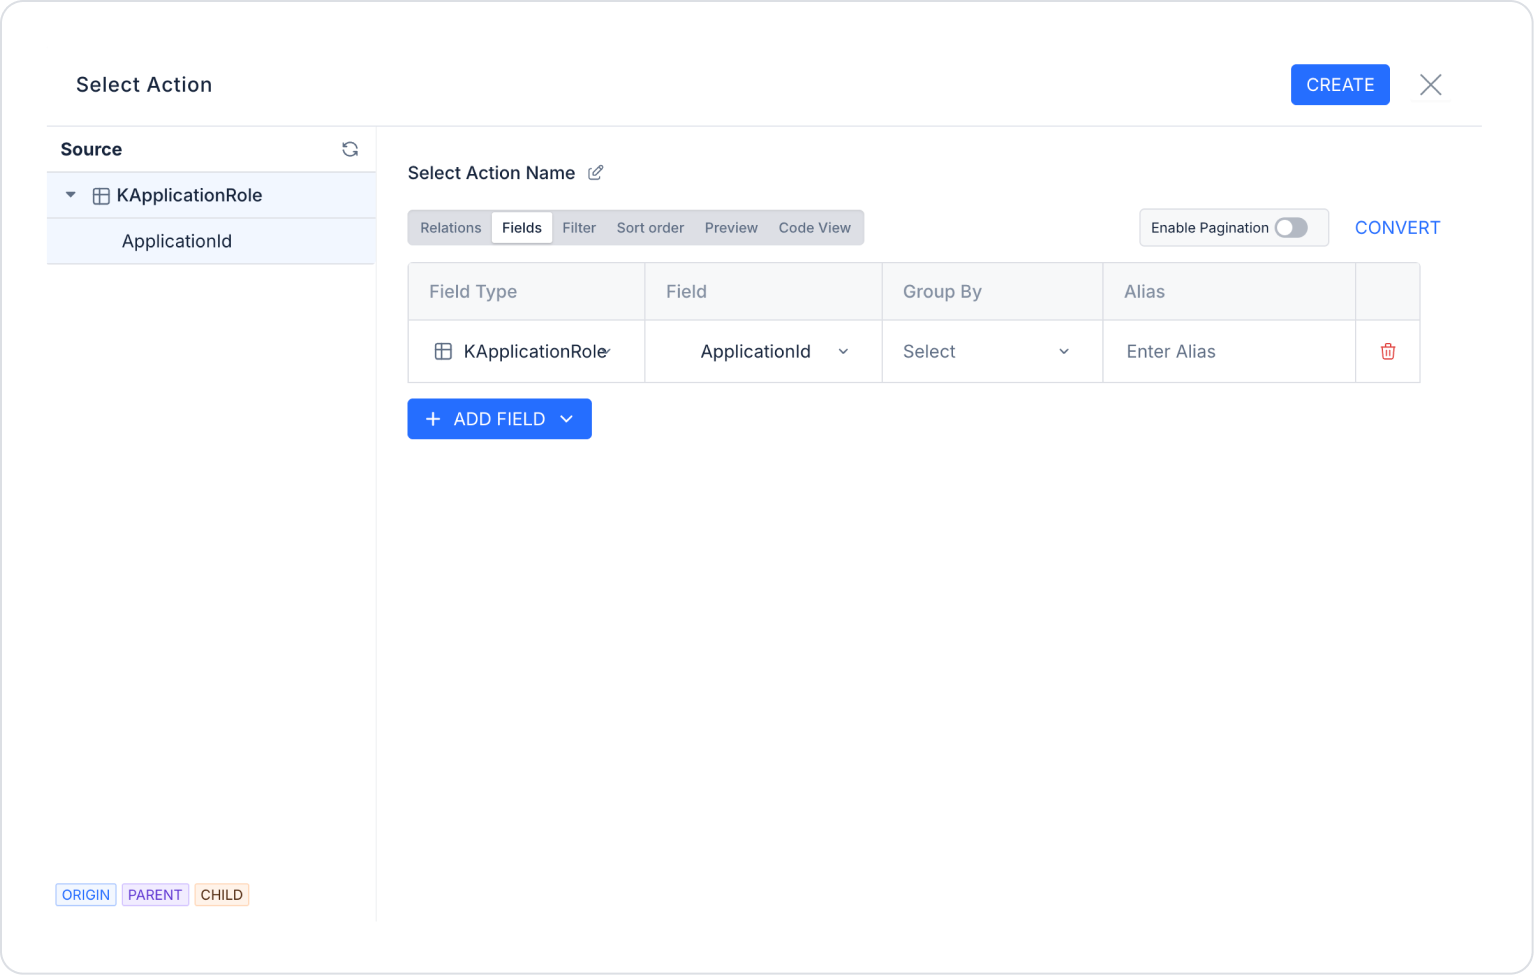
Fields
The Fields tab is where you specify the fields to be listed in the query results.
You can specify the data fields you want to list from the selected tables.
Data can be grouped and summarized using functions such as Group By, Count, Min, and Max.
By defining Alias, you can give more meaningful and readable names to the columns returned in the query results.
Defining Additional Fields with + Add Field
New calculated or custom fields can be added to the query using the + Add Field option.
Field: Allows you to manually add fields to the query using existing table fields.
DateDiff: Used to calculate the difference between two date fields. Calculations can be made on a daily, monthly, or yearly basis.
Example usage: Calculating the difference between the creation date and the current date.
Row Number: Adds a sequential number to the rows in the query result. It is especially used in reporting and sequential listing scenarios.
Filter
Used to filter data that meets specific criteria.
You can create logical connections with the AND and OR operators.
AND: All conditions must be met.
OR: Meeting any one of the conditions is sufficient.
Example:
To select employees with the role of “Team Leader” working in the “Design” department:
DepartmentName = ‘Design’ AND Title = ‘Team Leader’
To select employees in the “Design” or “Marketing” department:
DepartmentName = ‘Design’ OR DepartmentName = ‘Marketing’
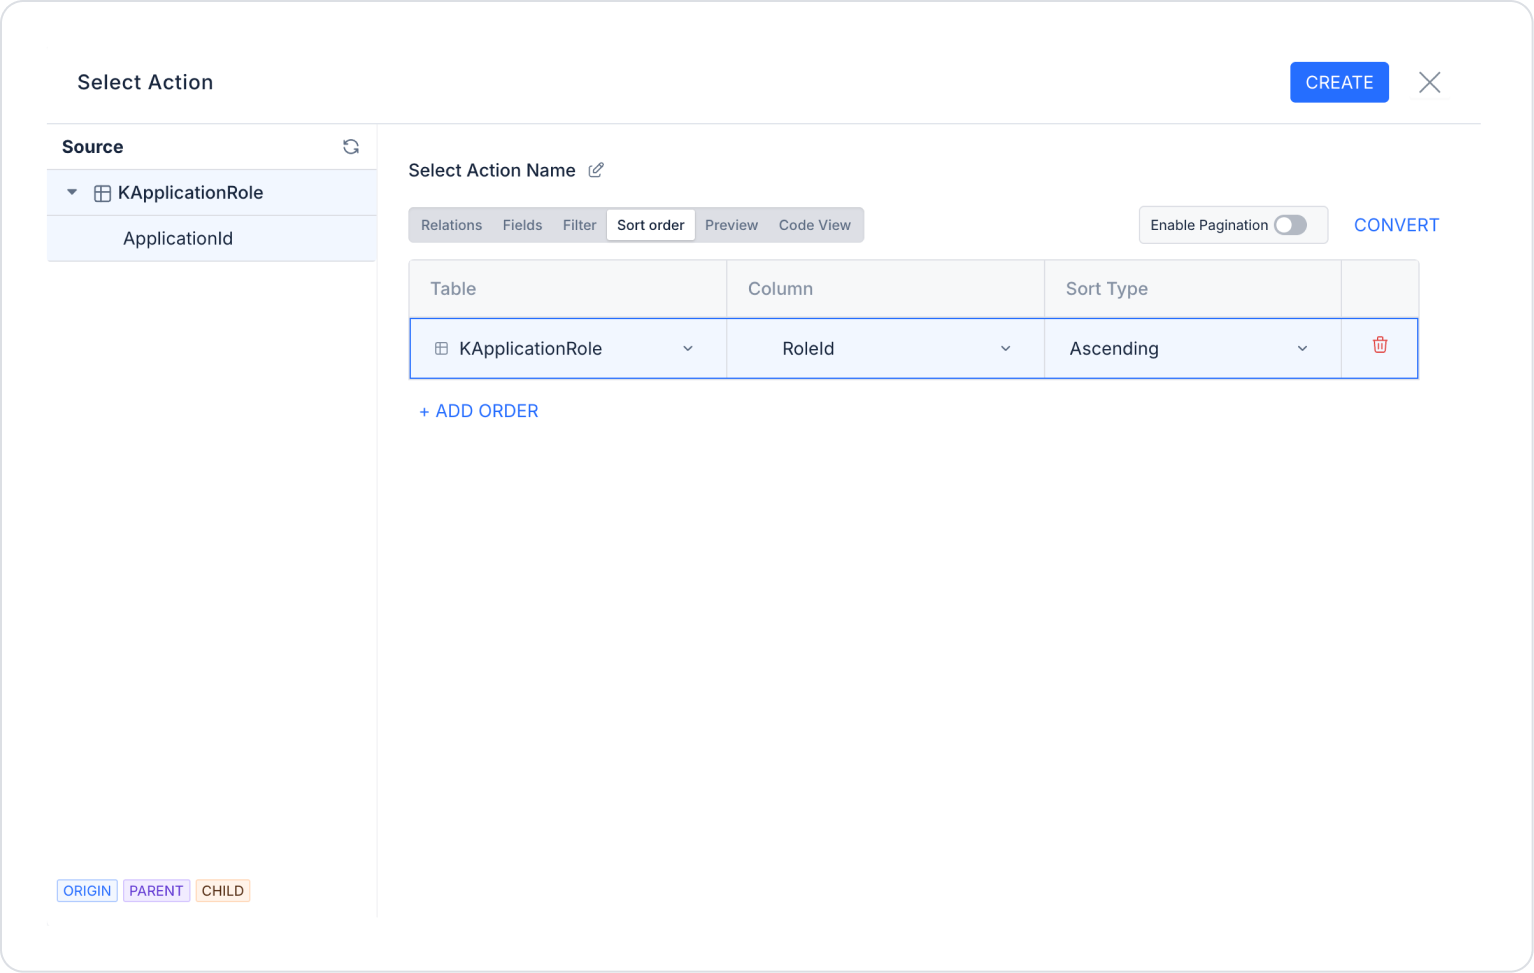
Sort Order
Used to sort data ascending or descending.
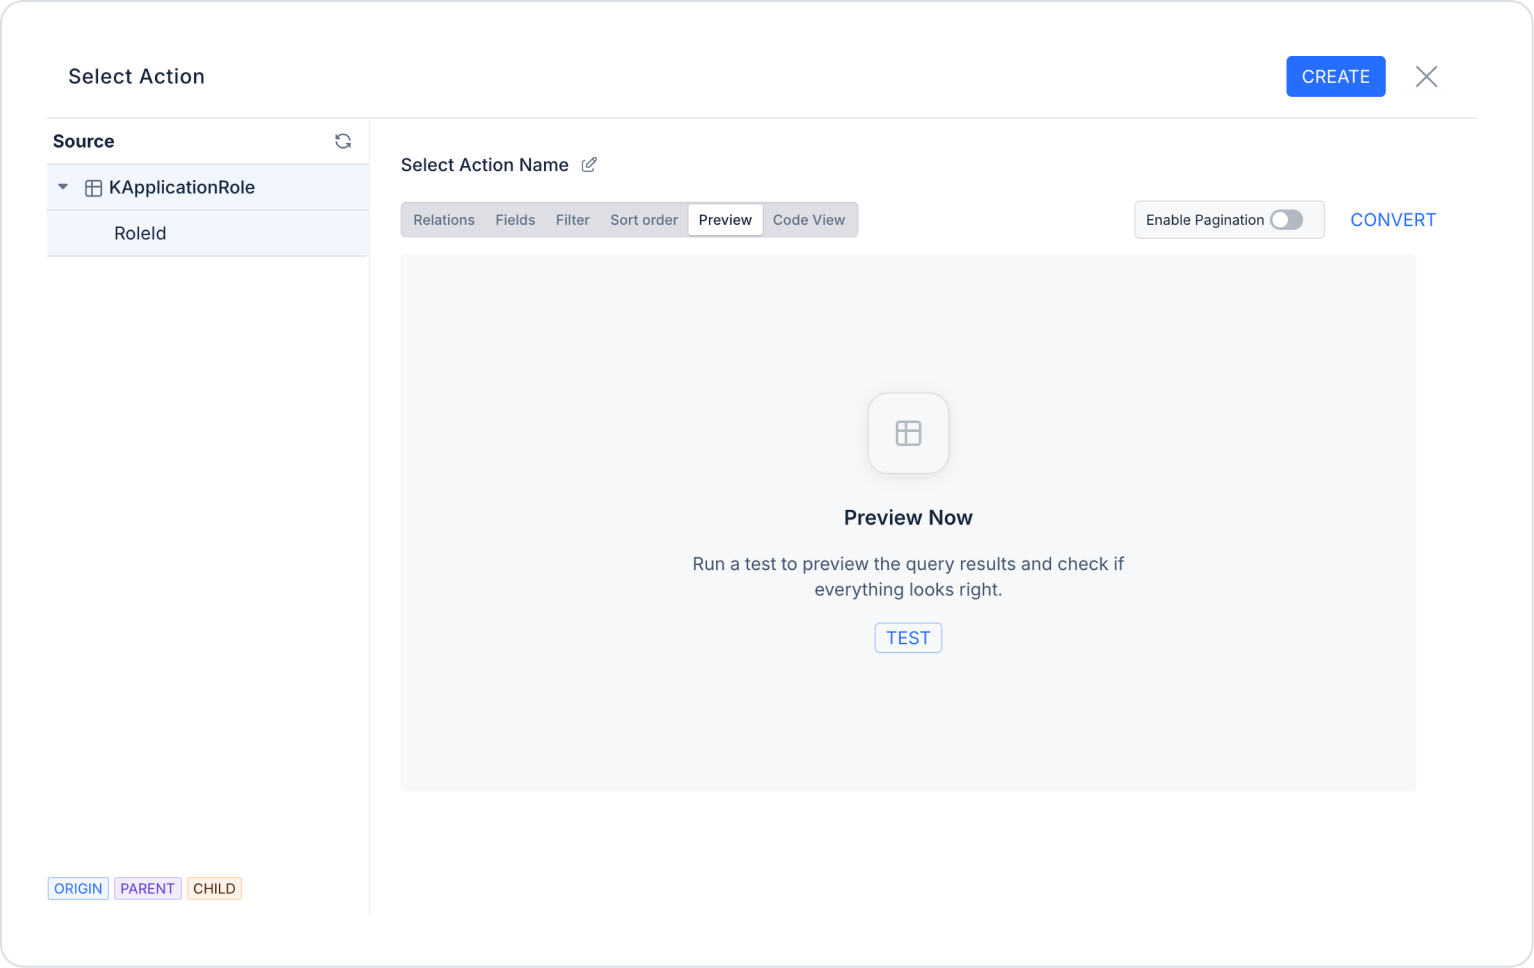
Preview
You can preview the query you have created.
If there is no data stored in the relevant data table, the Preview field will be empty.
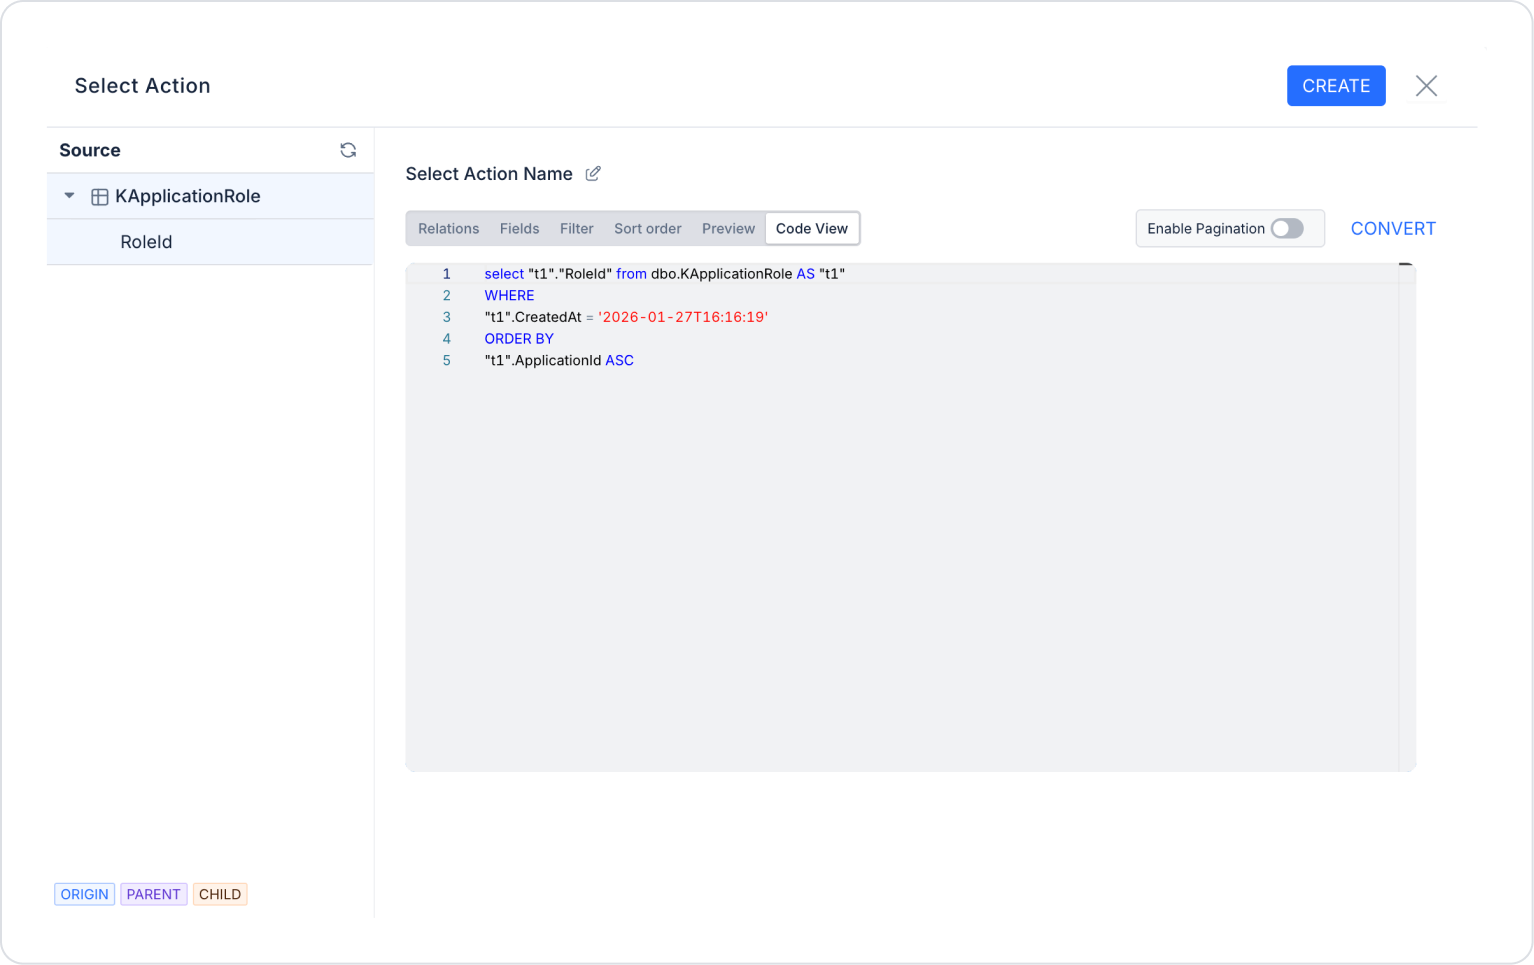
Code View
Code View allows you to view the technical query structure generated by the system for the query created visually. This view is used to examine how the query is constructed in the background and to perform technical verification.
The Fields, Relations, Filter, Group By, and Sort Order definitions made in the visual interface are displayed as the system query structure in Code View.
It is used to understand the query execution logic and identify potential errors.
Especially in complex queries, it helps verify that fields are added correctly and relationships are established properly.
Code View is for viewing purposes only; changes made on this screen do not affect query behavior.
External Pagination
External Pagination allows the pagination of query results to be managed by the data source or external system. Thanks to this structure, Kuika requests only the data relevant to the page instead of fetching all the data at once.
Pagination is used to improve performance with large data sets; the pagination process is performed at the database or external service (API) level, and Kuika only retrieves the data corresponding to the specified page / page size (limit–offset) information. When pagination is active, defining the sort order is mandatory for consistent results; the system automatically validates this.
Usage Behavior
When External Pagination is enabled, the page number and page size information are passed to the query as parameters.
The data source must support pagination; otherwise, the expected performance advantage cannot be achieved.
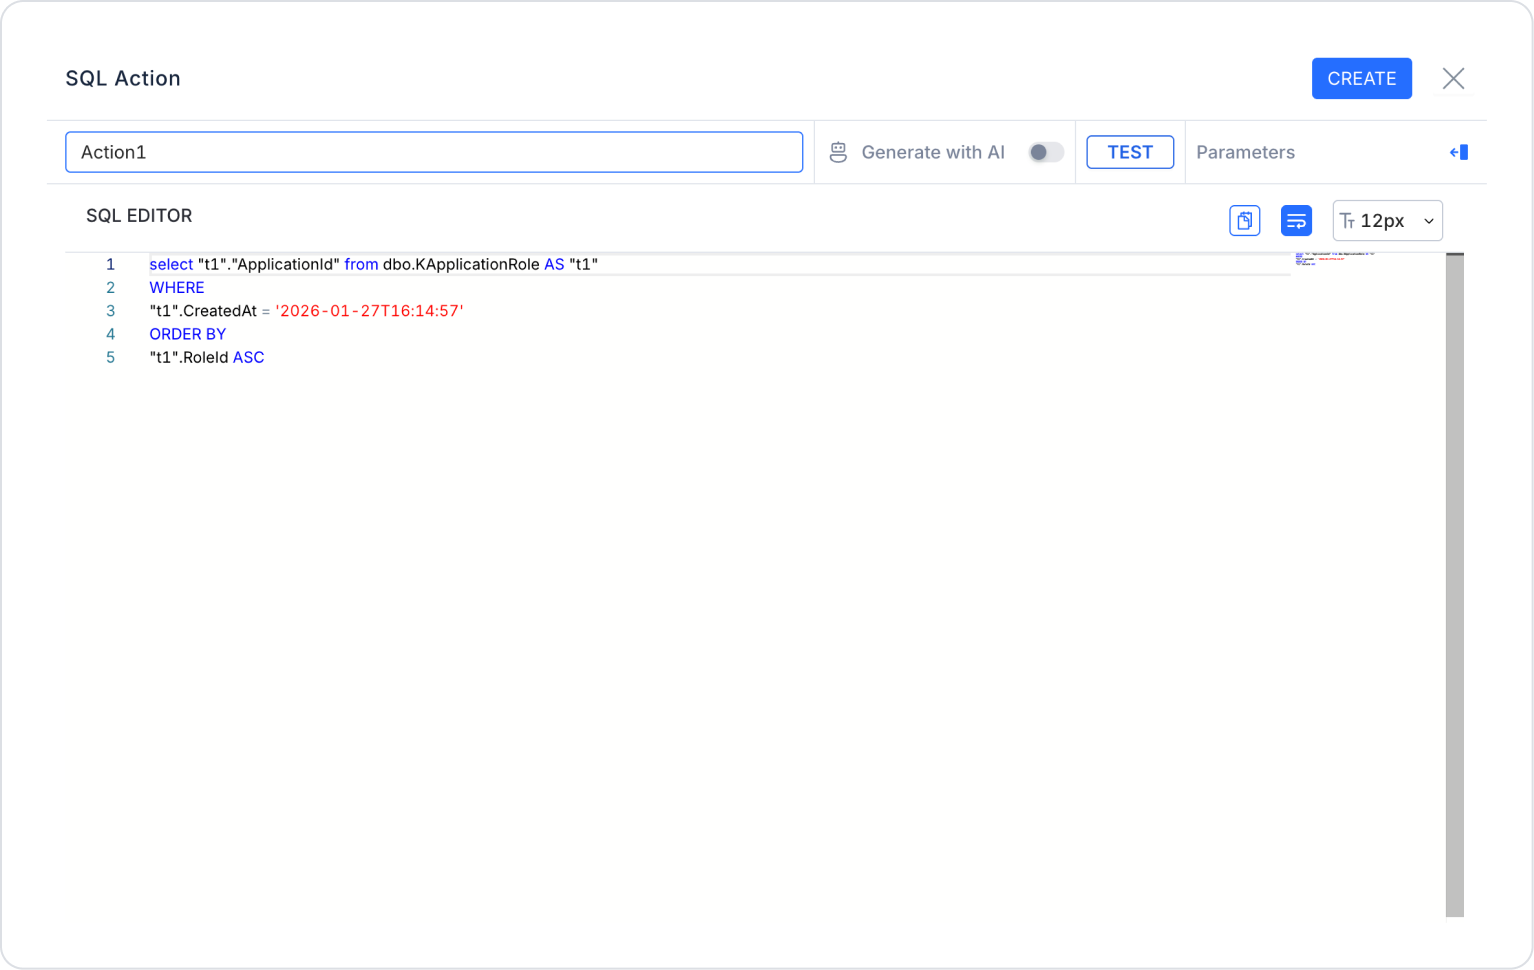
Convert to SQL Action
Used to convert the action you created to an SQL query.
Once you click the Convert to SQL Action option, you cannot return to the Select Action modal. Editing can be done via the SQL Editor.
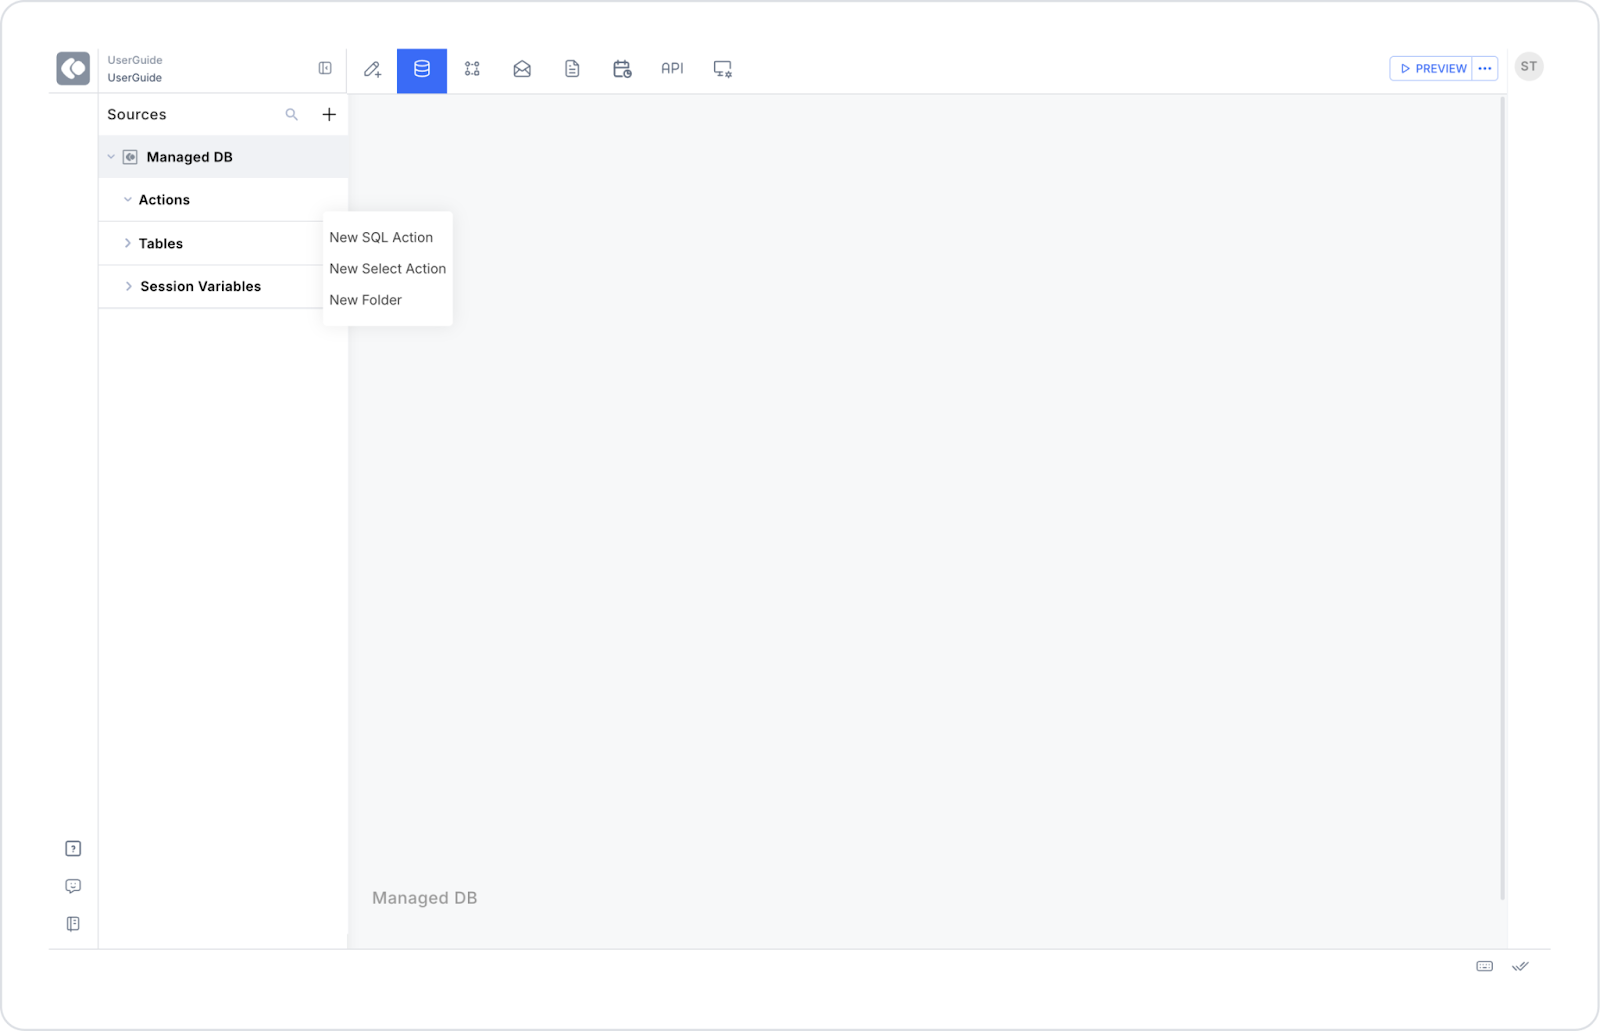
Creating Select Action Query with Datasources Module
You can also perform the select query creation process through the Datasources module:
Open the Datasources module.
Click the + icon next to the Actions tab under the Sources panel and select the New Select Action option.
You can use the Select Action feature in the Data Sources module by following the steps in the UI Design module.