App Store Settings contain the configuration settings required to link the iOS version of the mobile app you developed with Kuika to AppMachine and publish it to the App Store. To configure these settings, you’ll need to obtain certain information from your Apple Developer and App Store Connect accounts. You can configure these settings through the Kuika Config Manager module.
In this guide, you’ll learn step-by-step how to configure the App Store Settings and how to fill out each field.
Prerequisite: Mobile App
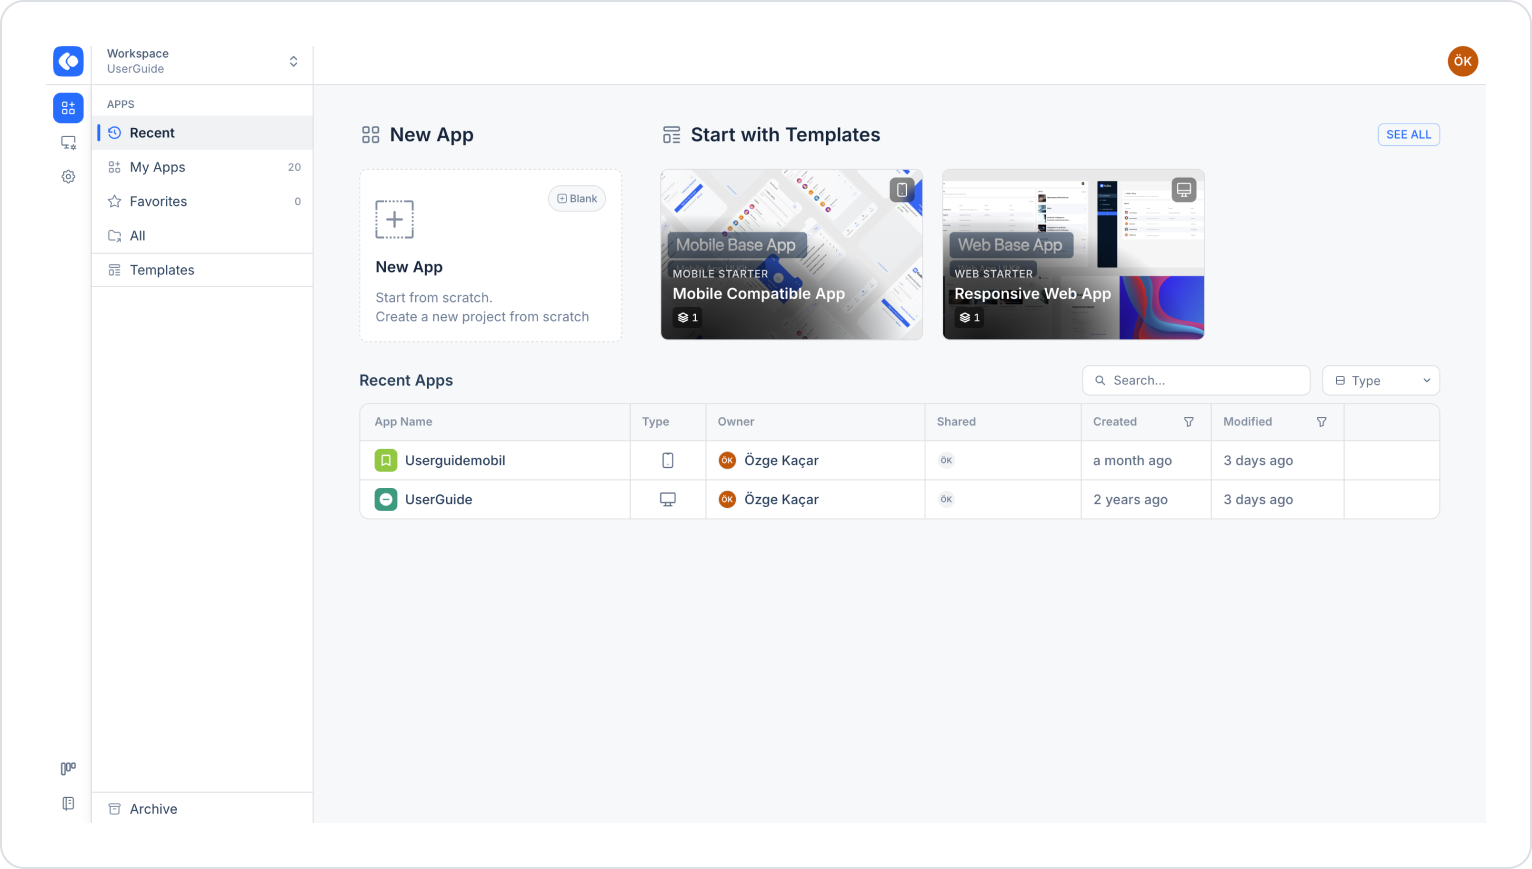
This setting is available only for mobile apps. You can check whether the app you’re working on is a mobile app by looking at the Type column in the app list on the Apps screen. Mobile apps are indicated by a phone icon, while web apps are indicated by a screen icon.
To create a new mobile app:
Log in to the Kuika platform.
On the Apps screen, click the New App card.
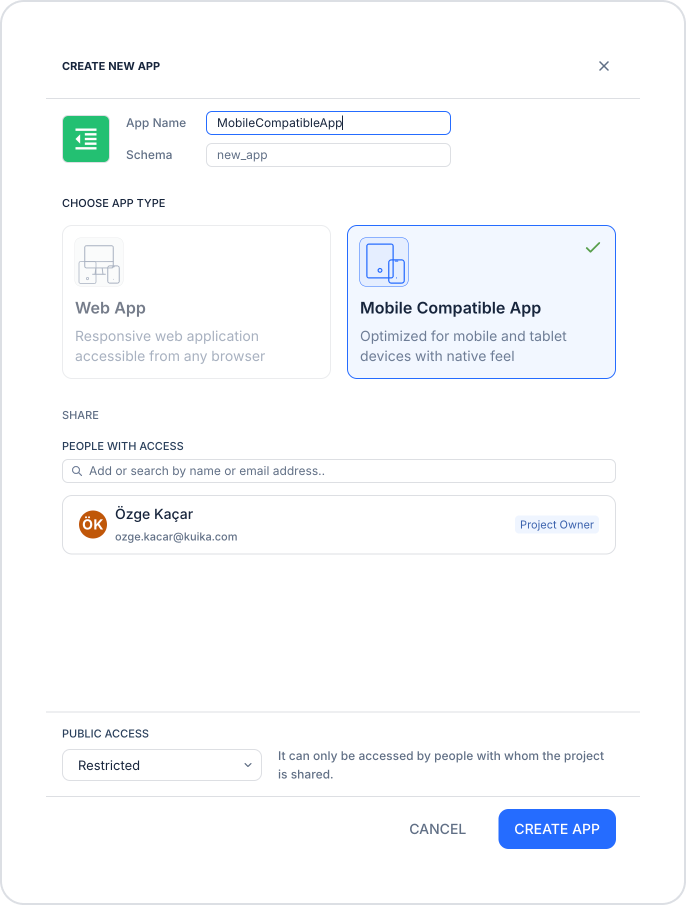
In the Create New App window that opens, enter your app’s name in the App Name field.
Check your app’s schema name in the Schema field. Change it if necessary.
In the CHOOSE APP TYPE section, select the Mobile Compatible App option.
If you wish, add people who can access the app in the PEOPLE WITH ACCESS field and specify the access type in the PUBLIC ACCESS field. By default, Restricted is selected. In this case, only the people with whom the app has been shared can access it.
Click the CREATE APP button to create the app.
If you’d like to start with a ready-made template, you can also use the Mobile Compatible App template under Start with Templates on the Apps screen.
How to Set Up App Store Settings?
1. Open or Create a Configuration
Log in to the Kuika platform.
Open the mobile app you’ll be working on from the Apps screen.
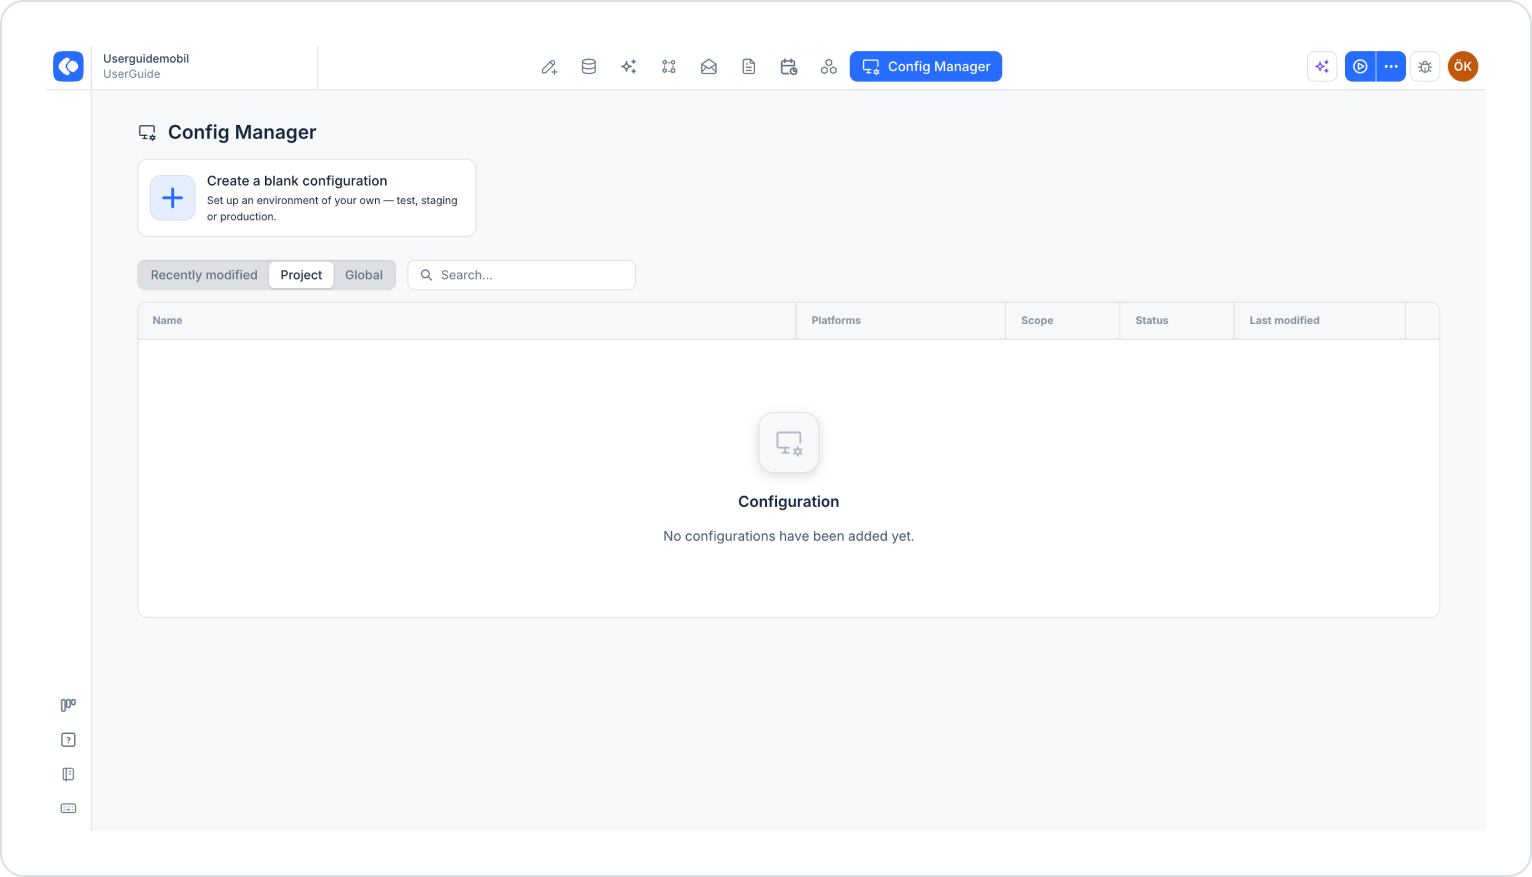
Click the Config Manager module in the top menu.
To create a new configuration, click the Create a blank configuration card, give the configuration a name, and complete the creation process. If you want to use an existing configuration, click its name in the list.
2. Go to App Store Settings
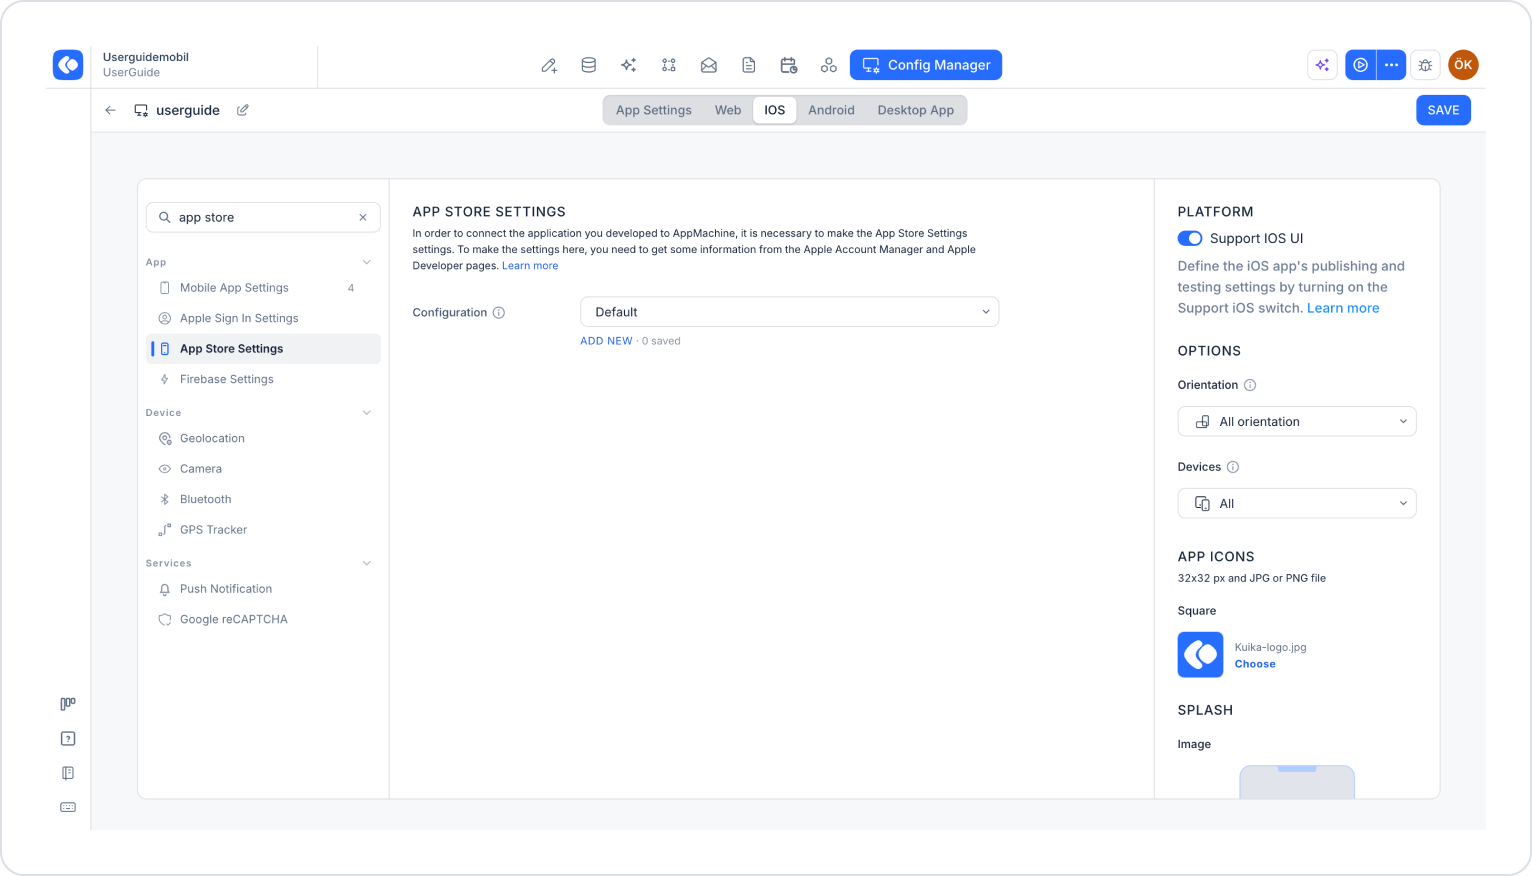
From the tabs at the top of the configuration screen, select the iOS tab.
In the PLATFORM section on the right, make sure the Support iOS UI toggle is enabled.
In the left menu, click the App Store Settings option under the App heading. You can also quickly access this setting by typing “app store” into the Search settings field at the top of the menu.
In the Configuration section, the Default configuration is selected by default. To create a new configuration, click the ADD NEW link below the dropdown menu.
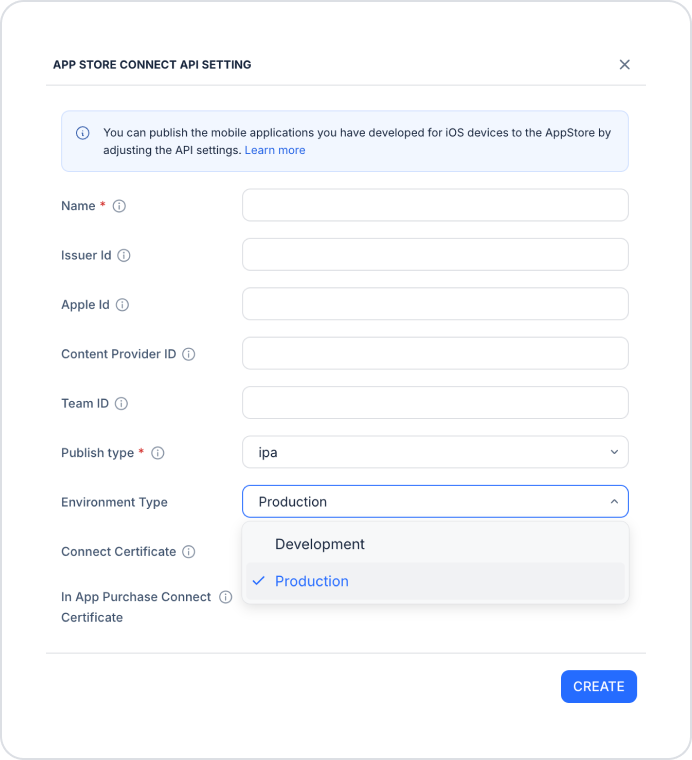
3. Fill Out the App Store Connect API Settings Window
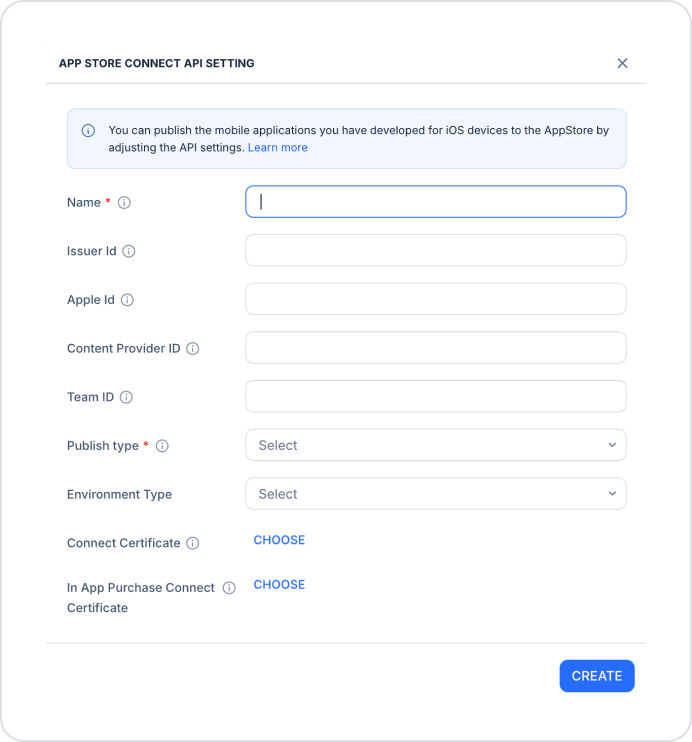
In the App Store Connect API Settings window that opens, fill out the following fields:
Name (required): A descriptive name for the configuration.
Issuer ID: The Issuer ID found on the API Keys page under the Users and Access section in App Store Connect.
Apple ID: Your Apple ID.
Content Provider ID: The content provider ID found in the Account section of your App Store Connect account.
Team ID: The team ID found in the Membership section of your Apple Developer account.
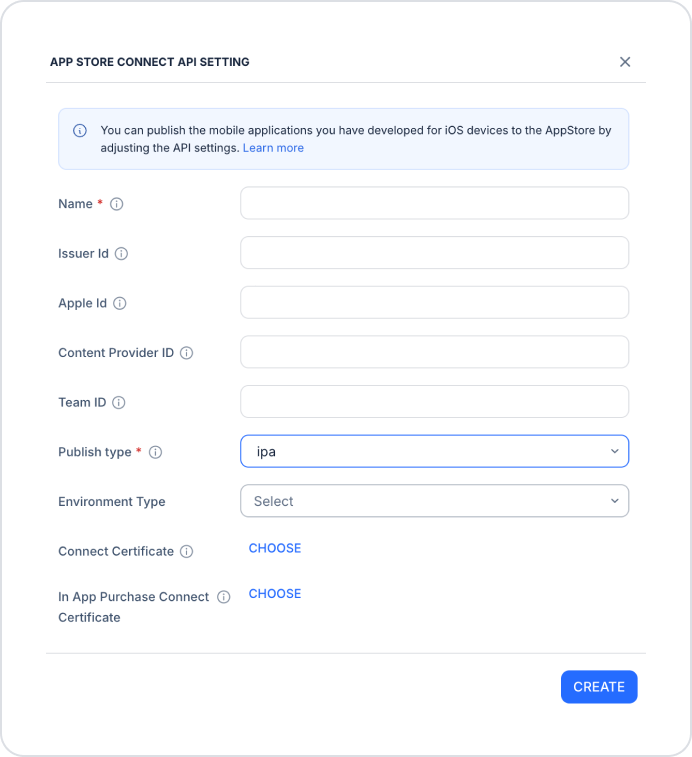
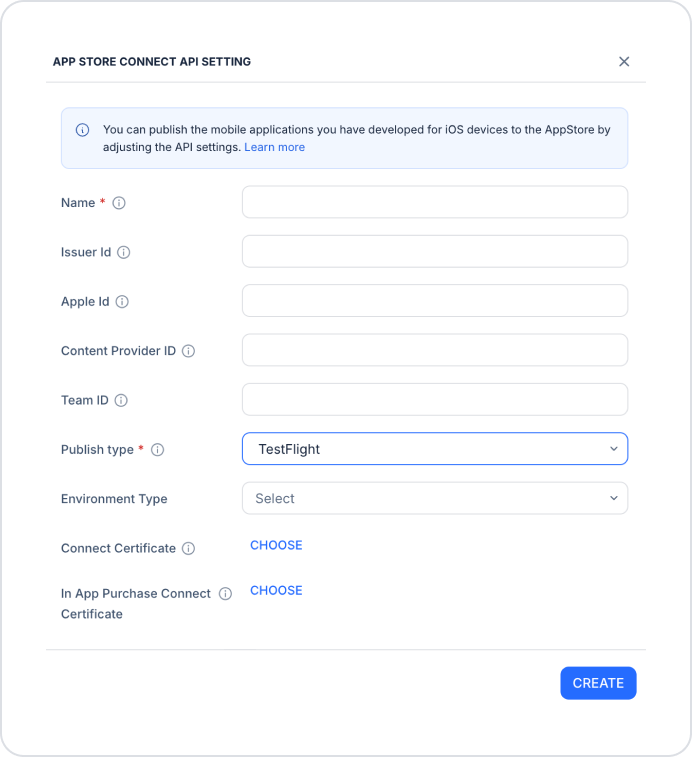
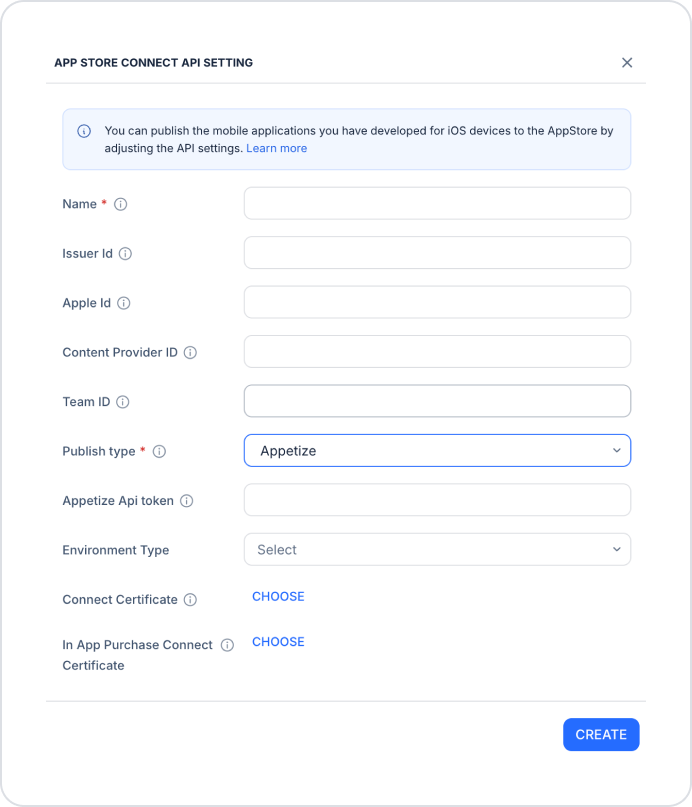
Publish type (required): Determines how the app will be published or tested. Select one of the following options from the drop-down menu:
ipa: The app is built as an .ipa file.
TestFlight: The app is submitted to TestFlight via App Store Connect for testing.
Appetize: The app is submitted to Appetize so it can be tested in a browser. When this option is selected, the Appetize API token field appears. Enter the API token you obtained from your Appetize account in this field.
Environment Type: The app’s environment type. Select either Development or Production from the drop-down menu.
Connect Certificate: Click the CHOOSE link to upload the App Store Connect API key (.p8 file).
In-App Purchase Connect Certificate: If your app uses in-app purchases, click the CHOOSE link to upload the in-app purchase key (.p8 file).
After entering the information, click the CREATE button to create the configuration.
4. Save and Test the Settings
Saving Settings
Select the configuration you created from the Configuration dropdown menu.
Make sure you’ve filled out all required fields completely and correctly.
Click the SAVE button in the top-right corner to save your changes.
Testing Process
Click the three dots next to the Preview button in the top-right corner and select RUN from the dropdown menu.
Once the process is complete, verify that the app has been built or submitted correctly based on the distribution type you selected.
Once you’ve completed these steps, the App Store Settings configuration will be complete, and your mobile app’s iOS version will be ready for release.
Important Tips
.p8 files can only be downloaded once. Store the files in a safe place without renaming them.
Test your app using TestFlight or Appetize before submitting it to the App Store.
Make sure the Team ID, Issuer ID, and certificates belong to the same Apple Developer account.
By correctly configuring your App Store Settings, you can test and release the iOS version of your mobile app without any issues.