User Manual

Iyzico

5/10/26
Iyzico

Thanks to Kuika's Iyzico integration, you can offer your users various payment options such as credit cards, debit cards and digital wallets. You can easily add Iyzico integration as a payment infrastructure to the application you have developed through system actions on the Kuika platform. In this way, you can securely receive various payment types such as subscription payments, one-time payments or recurring payments from end users within the application.

In this tutorial, you will learn how to add Iyzico integration to your applications.

You must have an active Iyzico account in order to follow the steps described in this guide.

Requirements for Iyzico Integration

You must complete the following steps to realize Iyzico integration:
  • You must define API/Secret key definitions with Configuration Manager.
  • You should prepare the fields suitable for Iyzico definitions on the payment screen.
  • You must add the relevant Kuika system actions for the transactions.

Iyzico Integration with Configuration Manager

1. Open or Create a Configuration

  1. After logging into the Kuika platform, open the project you’ll be working on from the Apps screen.
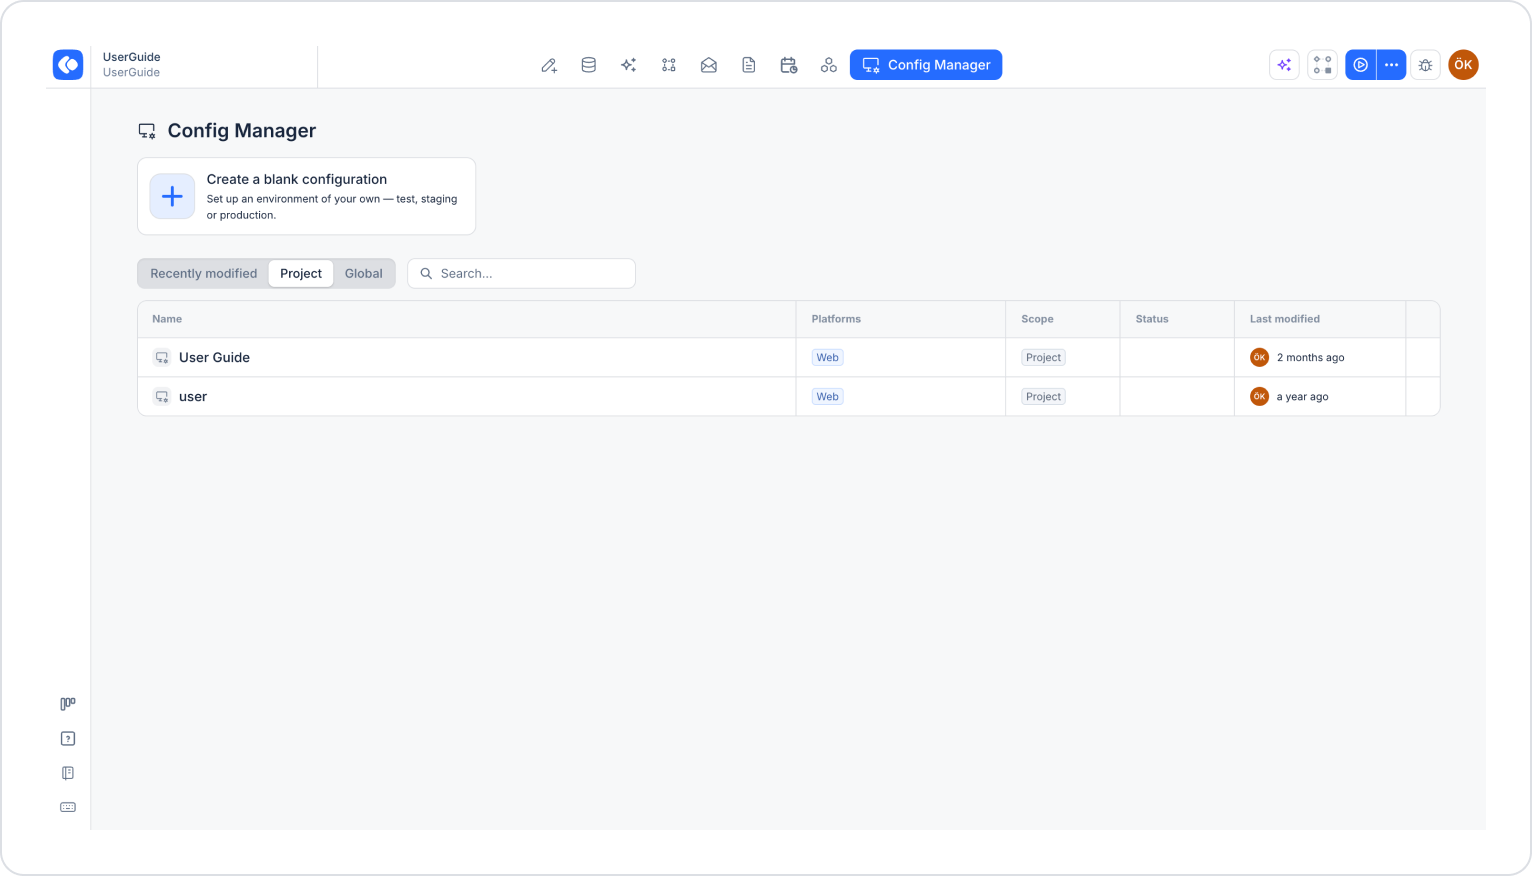
  2. Click the Config Manager module in the top menu.
  3. To create a new configuration, click the Create a blank configuration card, give the configuration a name, and complete the creation process. If you want to use an existing configuration, click its name in the list.

2. Retrieve Your Iyzico Information

  1. Open the Iyzico Dashboard in a new browser tab.
  2. Go to Account → Account Settings → API Keys → Live Keys.
  3. Make a note of the API Key and Secret Key values displayed on this screen.

3. Add the Iyzico Configuration

  1. Return to the configuration screen in Kuika and make sure the App Settings tab is selected at the top.
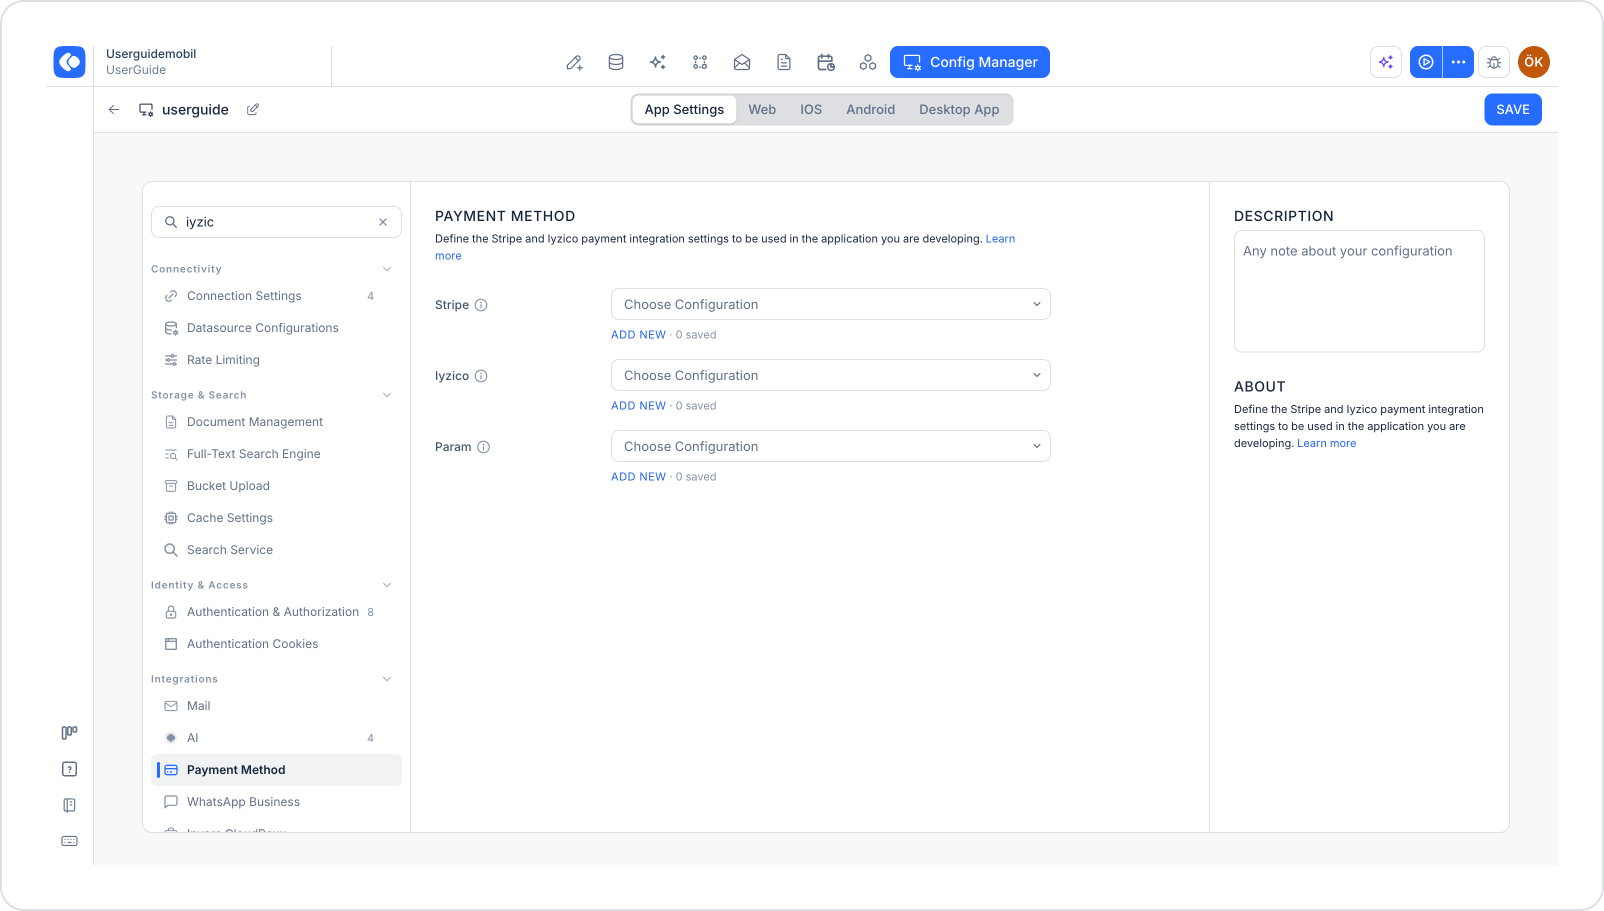
  2. In the left menu, click the Payment Method option under the Integrations heading. You can also quickly access this setting by typing “iyzico” into the Search settings field at the top of the menu.
  3. Click the ADD NEW link under the Iyzico section.
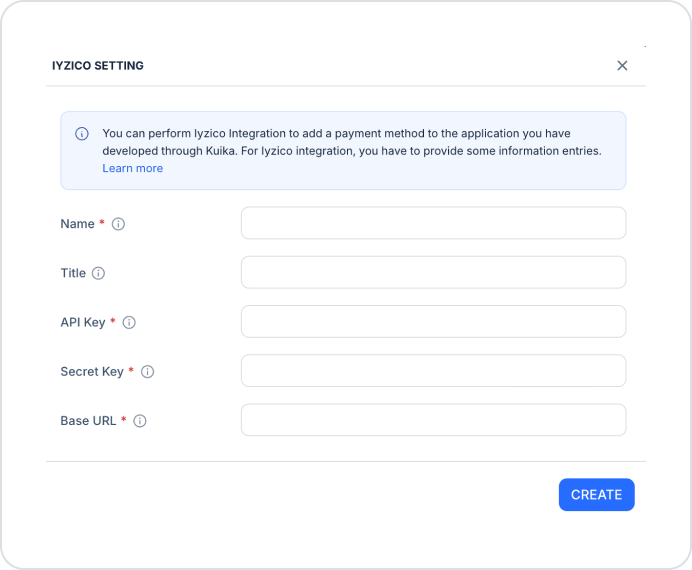
  1. In the Iyzico Settings window that opens, fill in the following fields:
    • Name (required): The name you’ll give to identify your integration (e.g., Iyzico_1).
    • Title: A descriptive, distinctive title that further identifies your integration.
    • API Key (required): The unique authentication key provided by your Iyzico account.
    • Secret Key (required): This is the key used in conjunction with the API Key and is critical for verifying transactions. Since it safeguards your application’s identity, it must remain confidential and be used only by your application.
    • Base URL (required): This is the base web address you’ll use to interact with the Iyzico API server. In a production environment, use https://api.iyzipay.com/. This address enables your application to access the Iyzico payment system.
  2. After filling in all fields, click the CREATE button.
  3. Select the configuration you created from the Choose Configuration dropdown menu in the Iyzico section.
  4. Click the SAVE button in the top-right corner to save your changes. (In an existing configuration, this button appears as UPDATE.)
You can use Iyzico’s sandbox environment for testing. In this case, you’ll need to enter the keys obtained from the sandbox section of the Iyzico dashboard and the Base URL https://sandbox-api.iyzipay.com.

Glossary

No items found.

Alt Başlıklar