The Billing System allows you to manage subscriptions and purchases using native payment infrastructures on Android and iOS platforms. This document explains step by step the setup and configuration of the Google Play Billing (Android) and Apple In-App Purchase – IAP (iOS) systems, as well as the logic behind the actions used on Kuika.
Actions developed for payments made through the Google Play Store and App Store in Kuika projects:
Opens the payment screen,
Creates or updates a subscription record after a successful transaction,
Queries and synchronizes the subscription status.
In this context, actions are offered at both the Client-Side and Backend levels.
Since the google-service.json file is required in the Configuration Manager, first download the relevant file from Firebase (http://console.firebase.google.com/), then perform the setup under the Android tab.
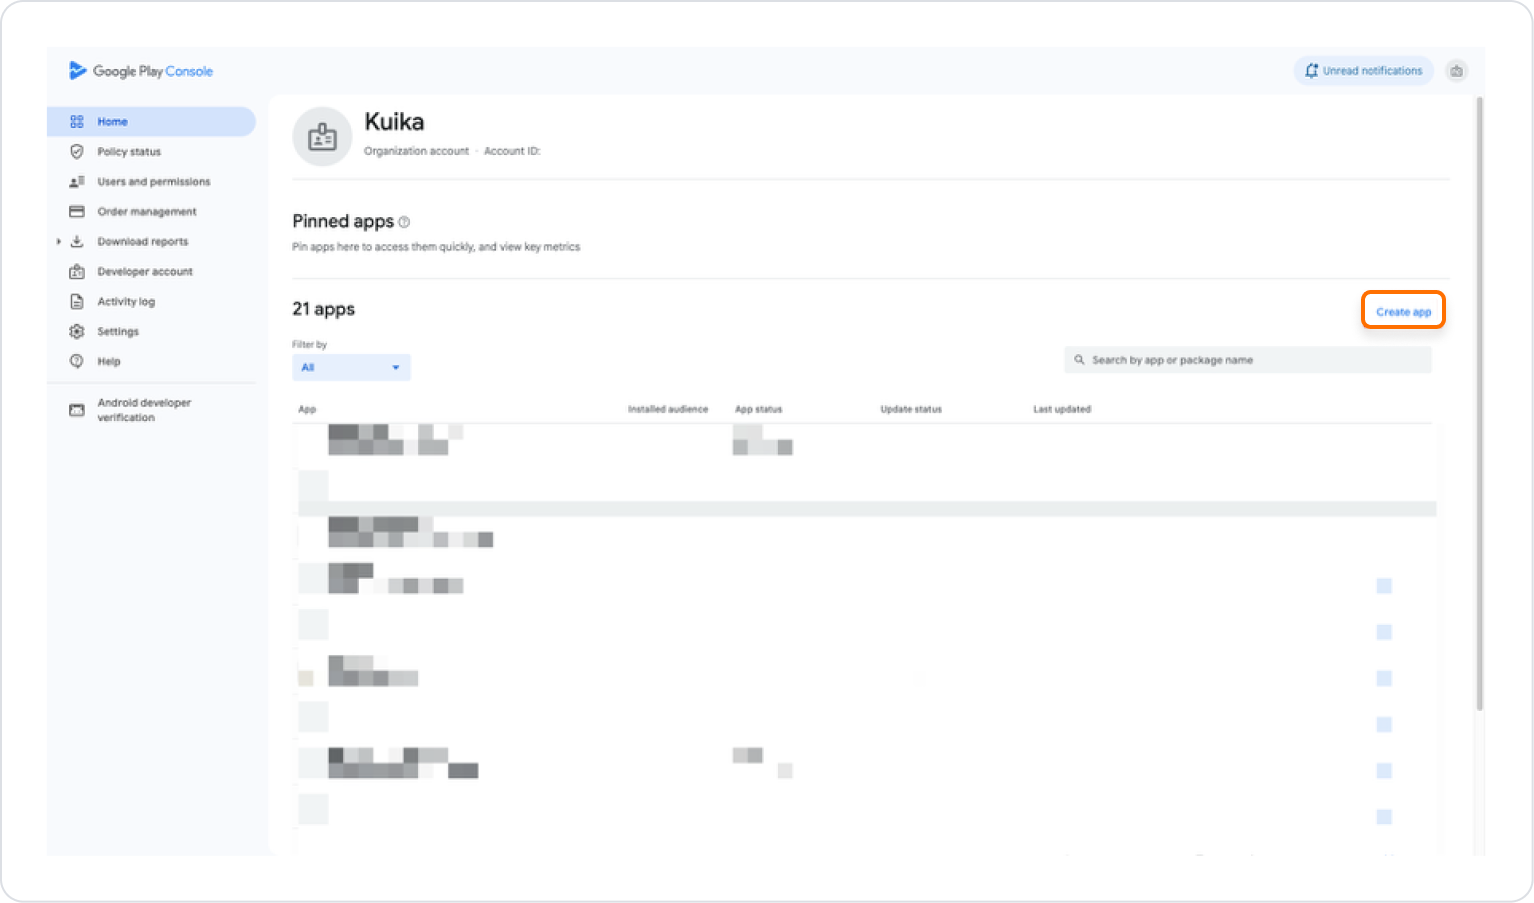
A billing area is also opened via Google Play Console.
The following platforms must be configured together for Google Billing System integration:
Firebase
Kuika Configuration Manager
Google Play Console
Firebase Setup
Retrieving Files from an Existing Firebase Project
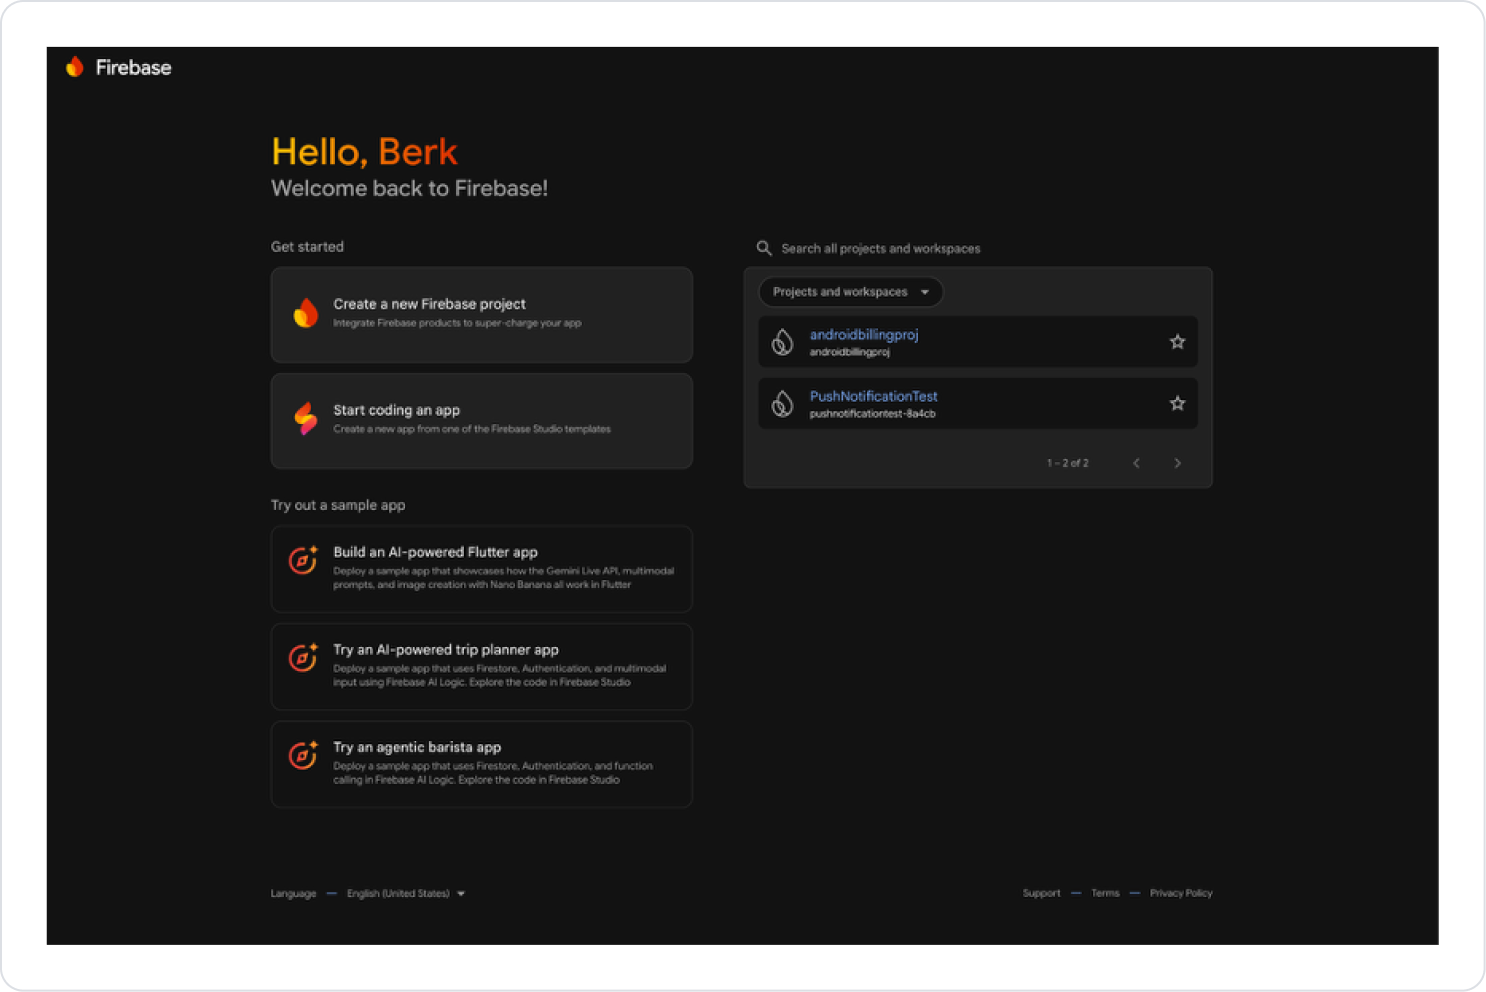
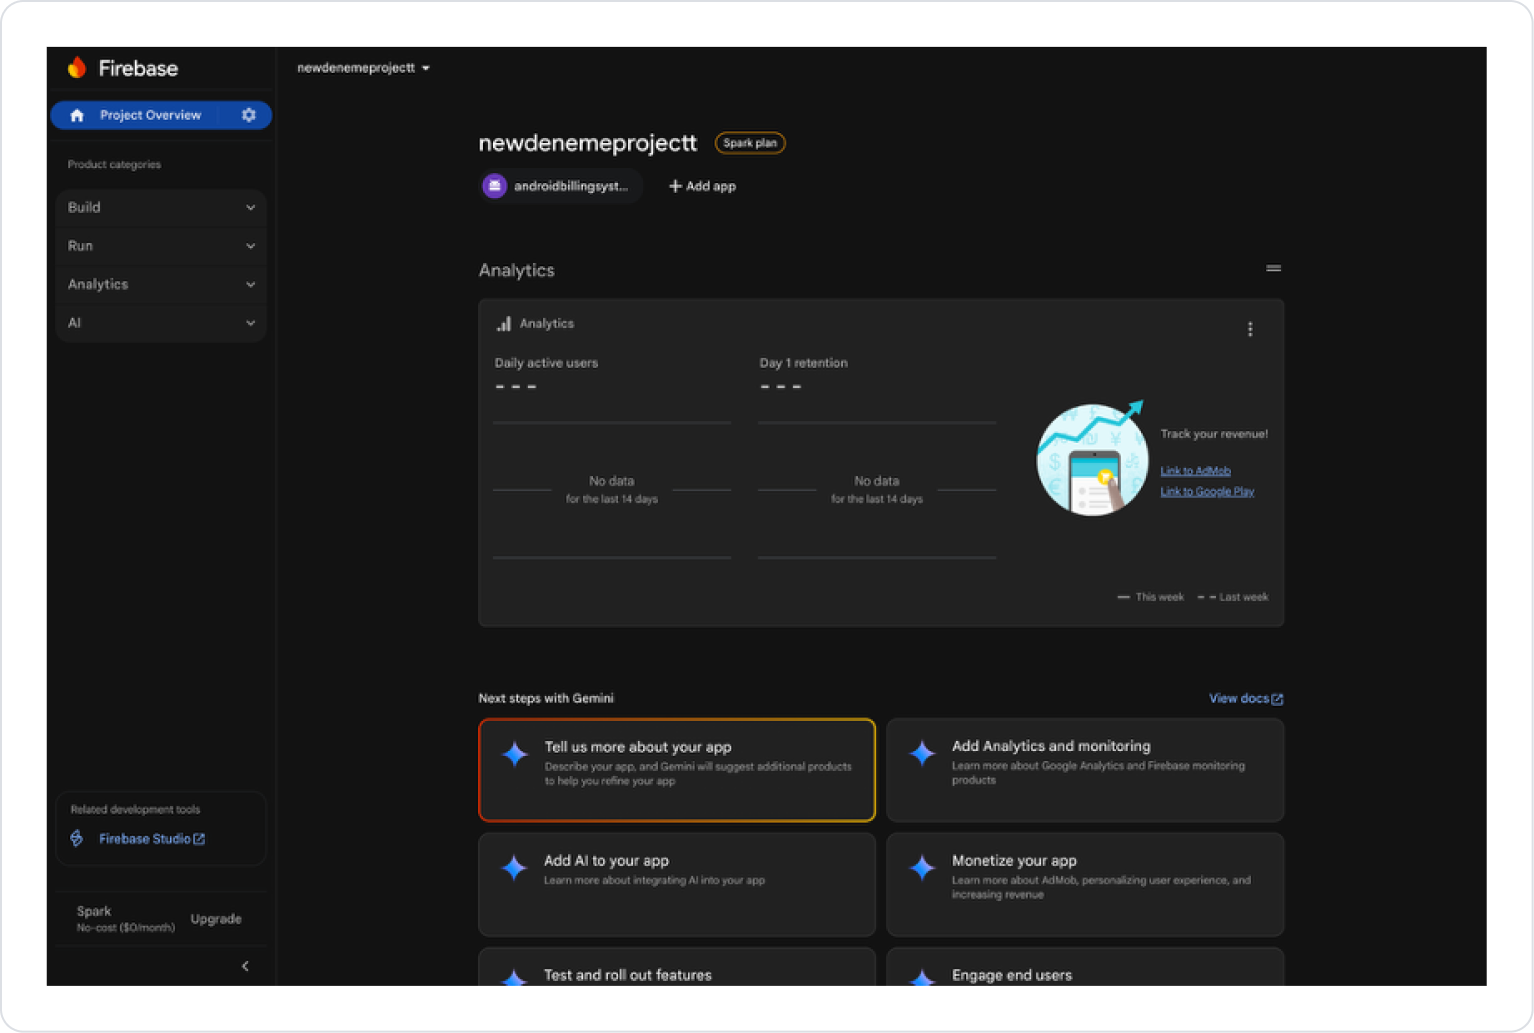
Log in to console.firebase.google.com.
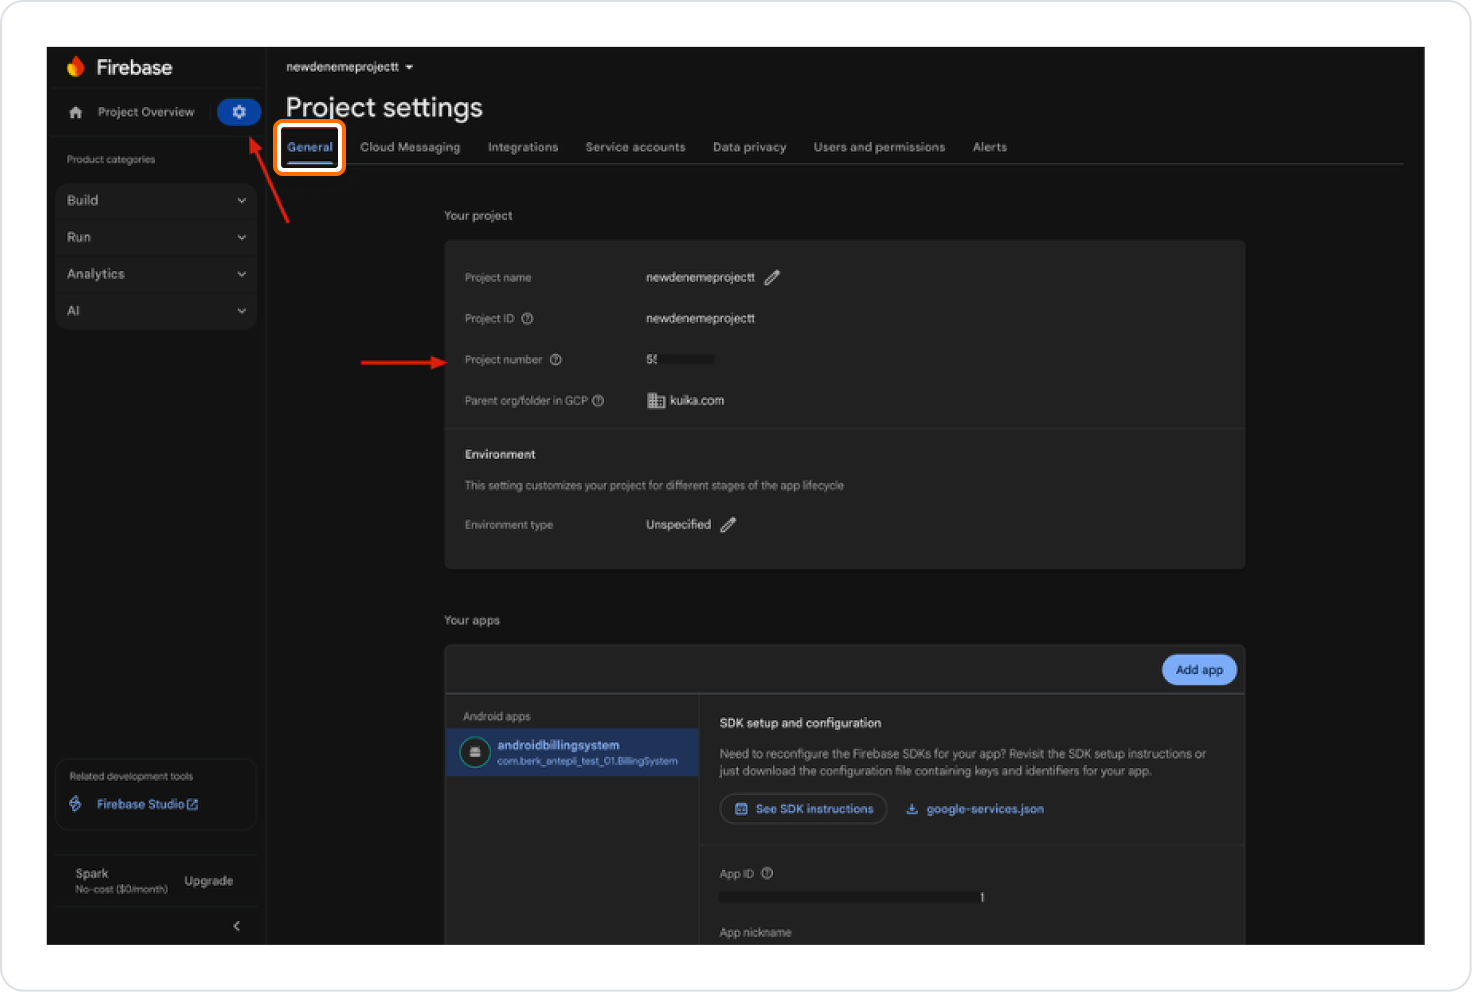
Click the ⚙️ icon next to Project Overview in the upper left corner.
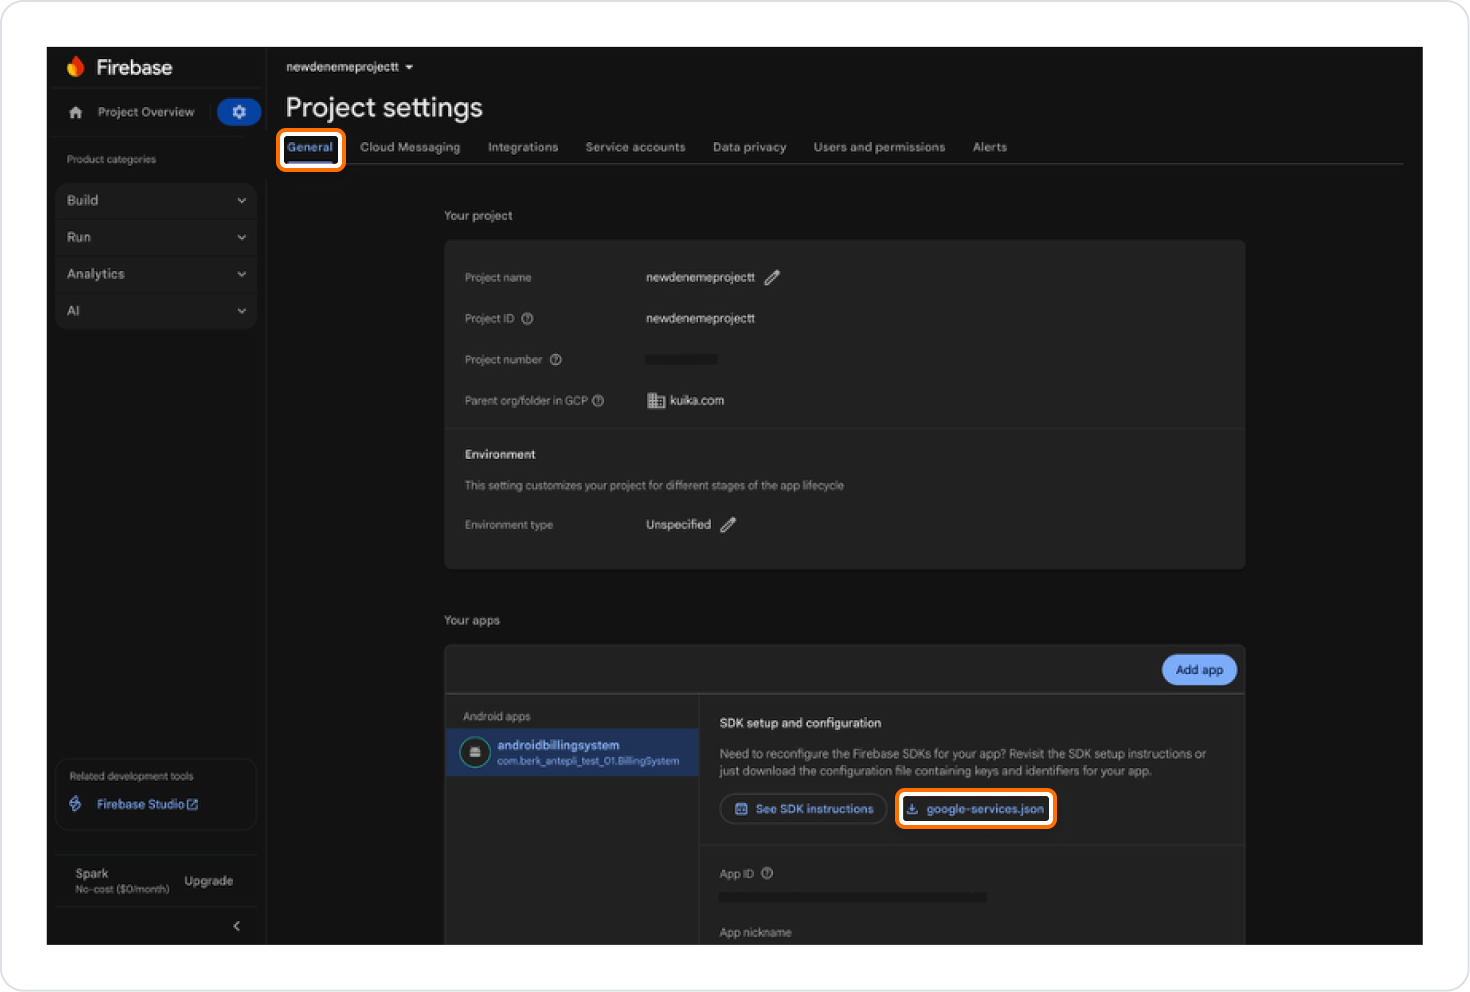
Go to the Project settings > General tab.
Select the relevant Android app from the Your apps field.
Download the google-services.json file.
Creating a New Firebase Project
Click the Create a new Firebase project button in the Firebase Console.
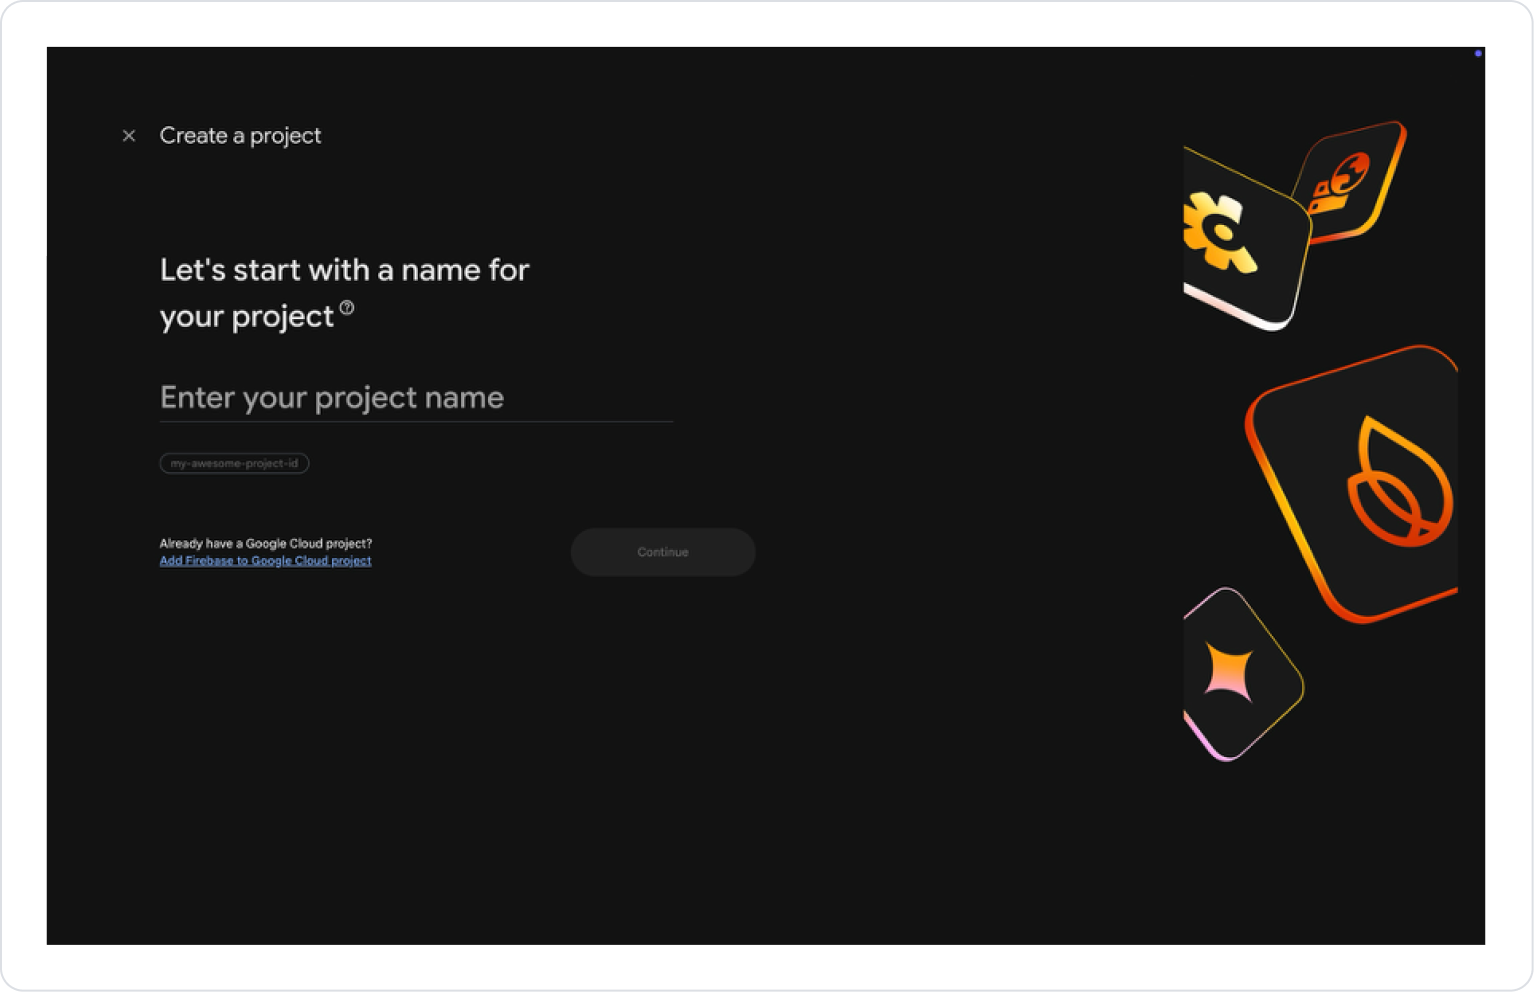
Enter the project name and proceed with Continue.
Optionally, select the Gemini and Analytics settings.
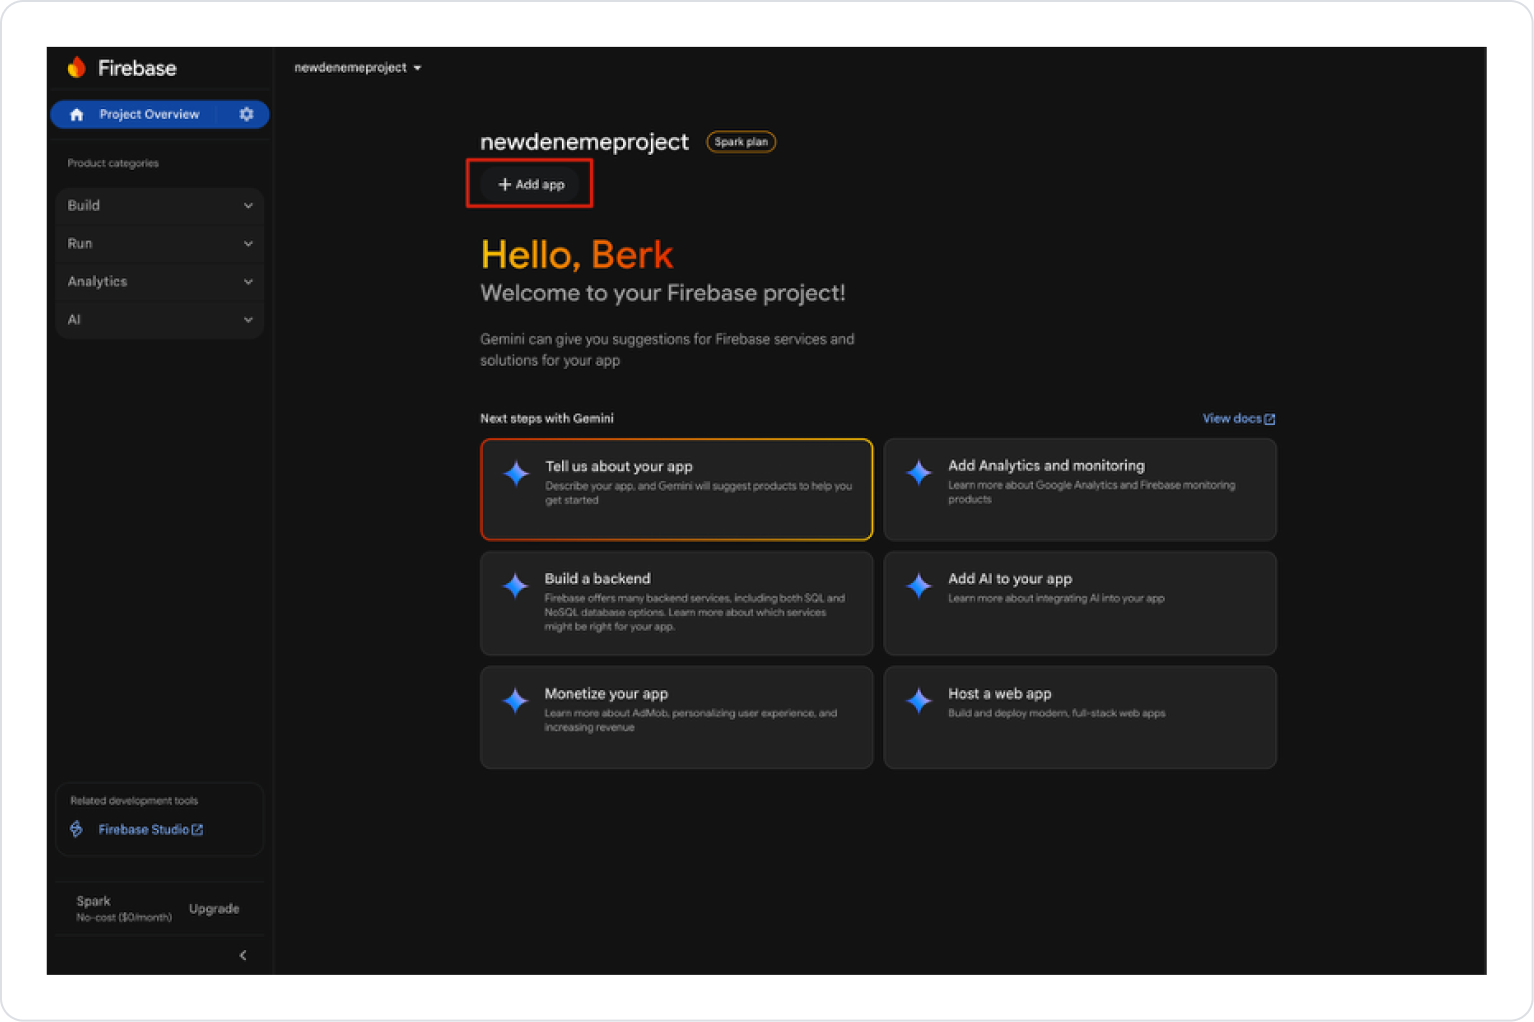
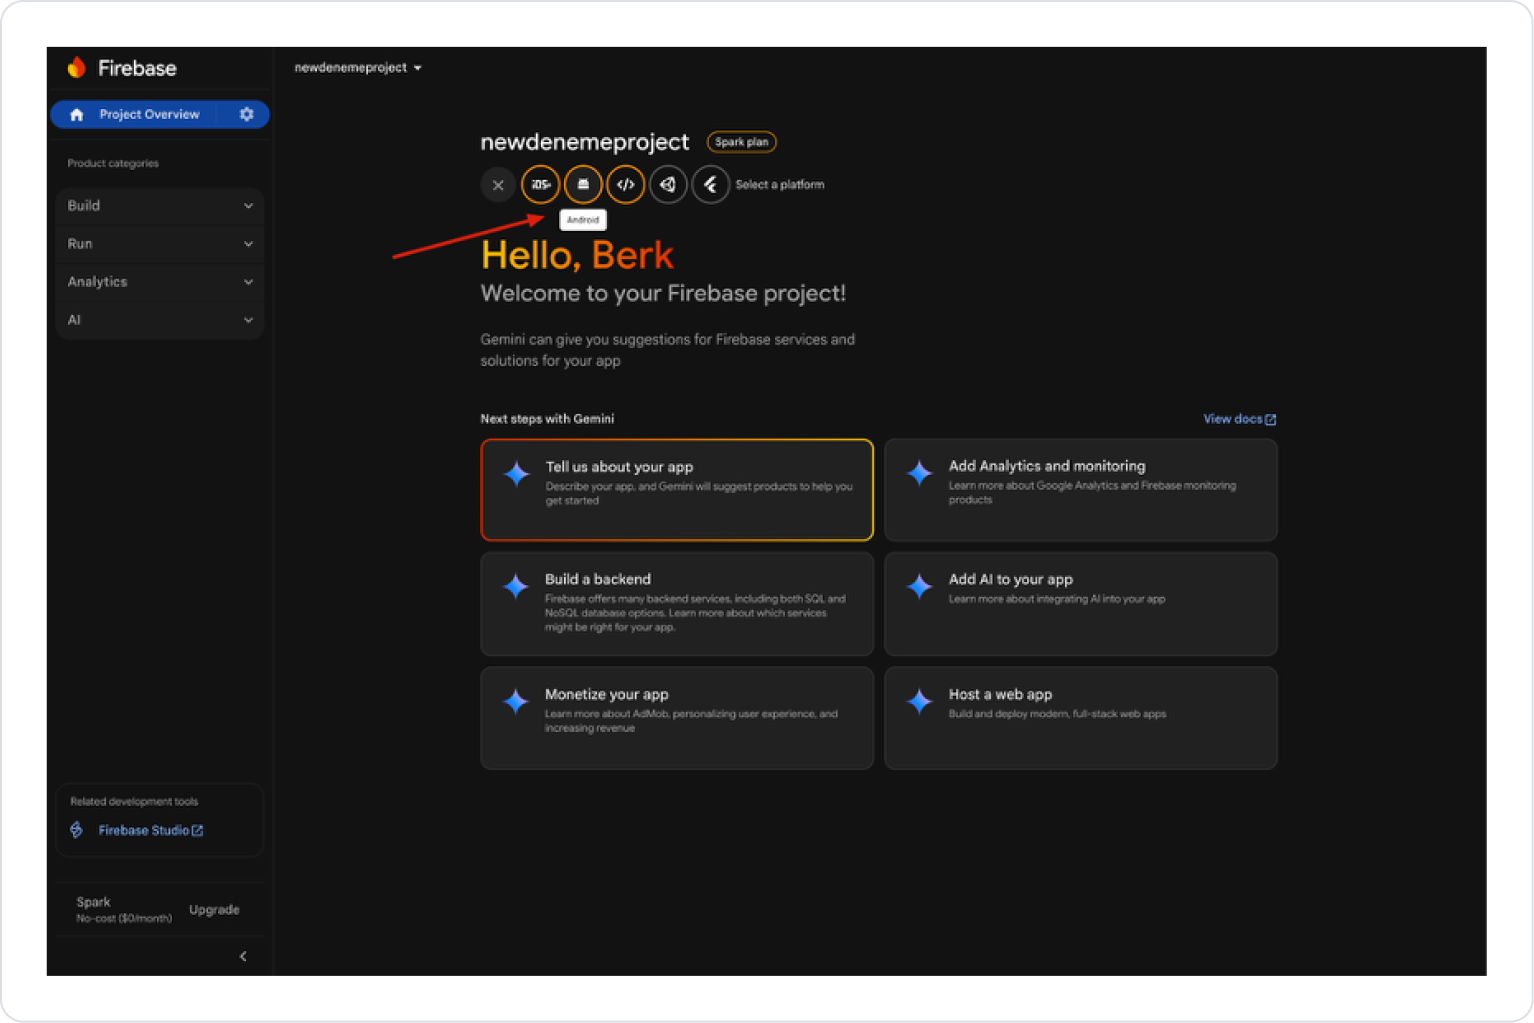
Once the project is created, select the Add app > Android option.
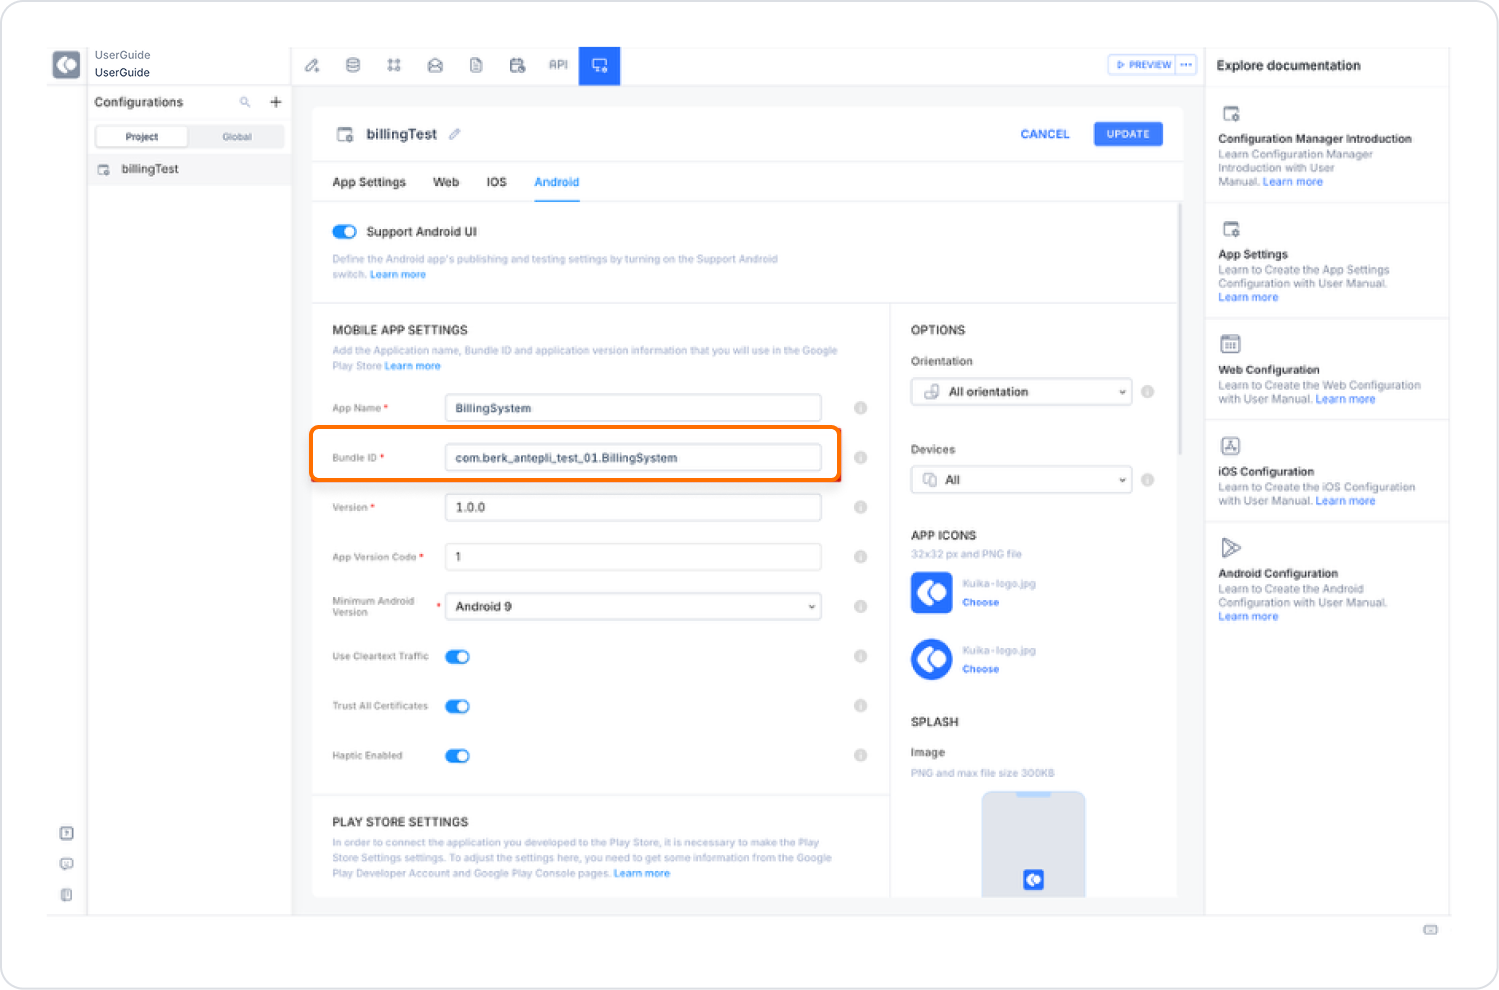
Android package name → Configuration Manager > Android > Enter the Bundle ID section.
App nickname → Can be filled in optionally.
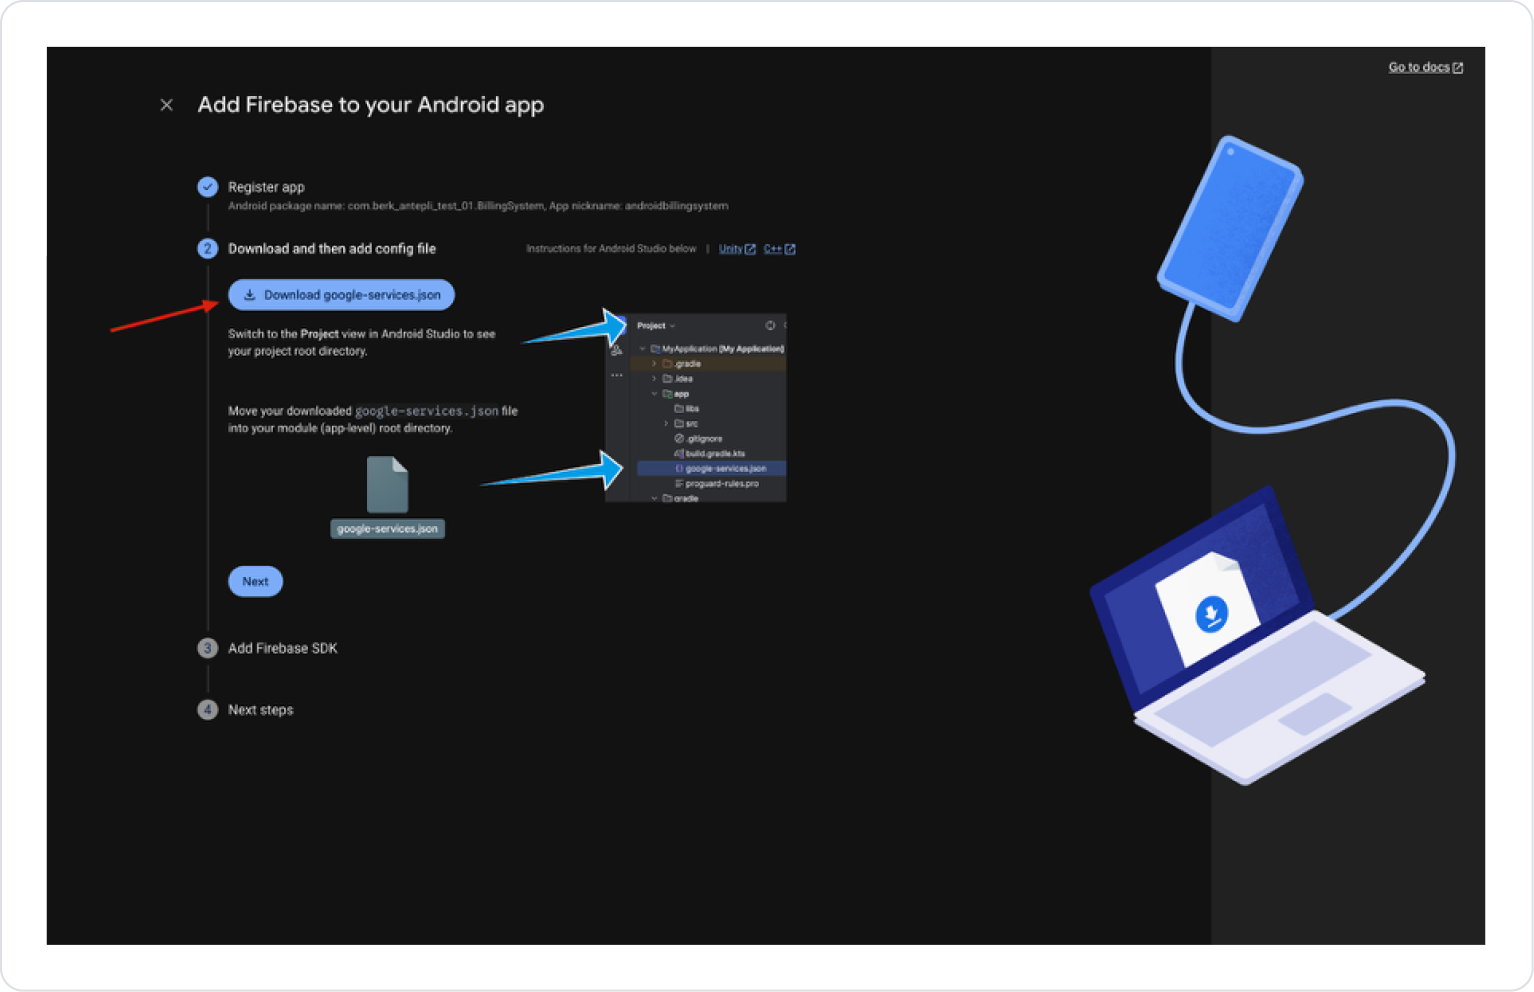
Then click the “Register App” button.
Register the application and download the google-services.json file by clicking the “Download” button.
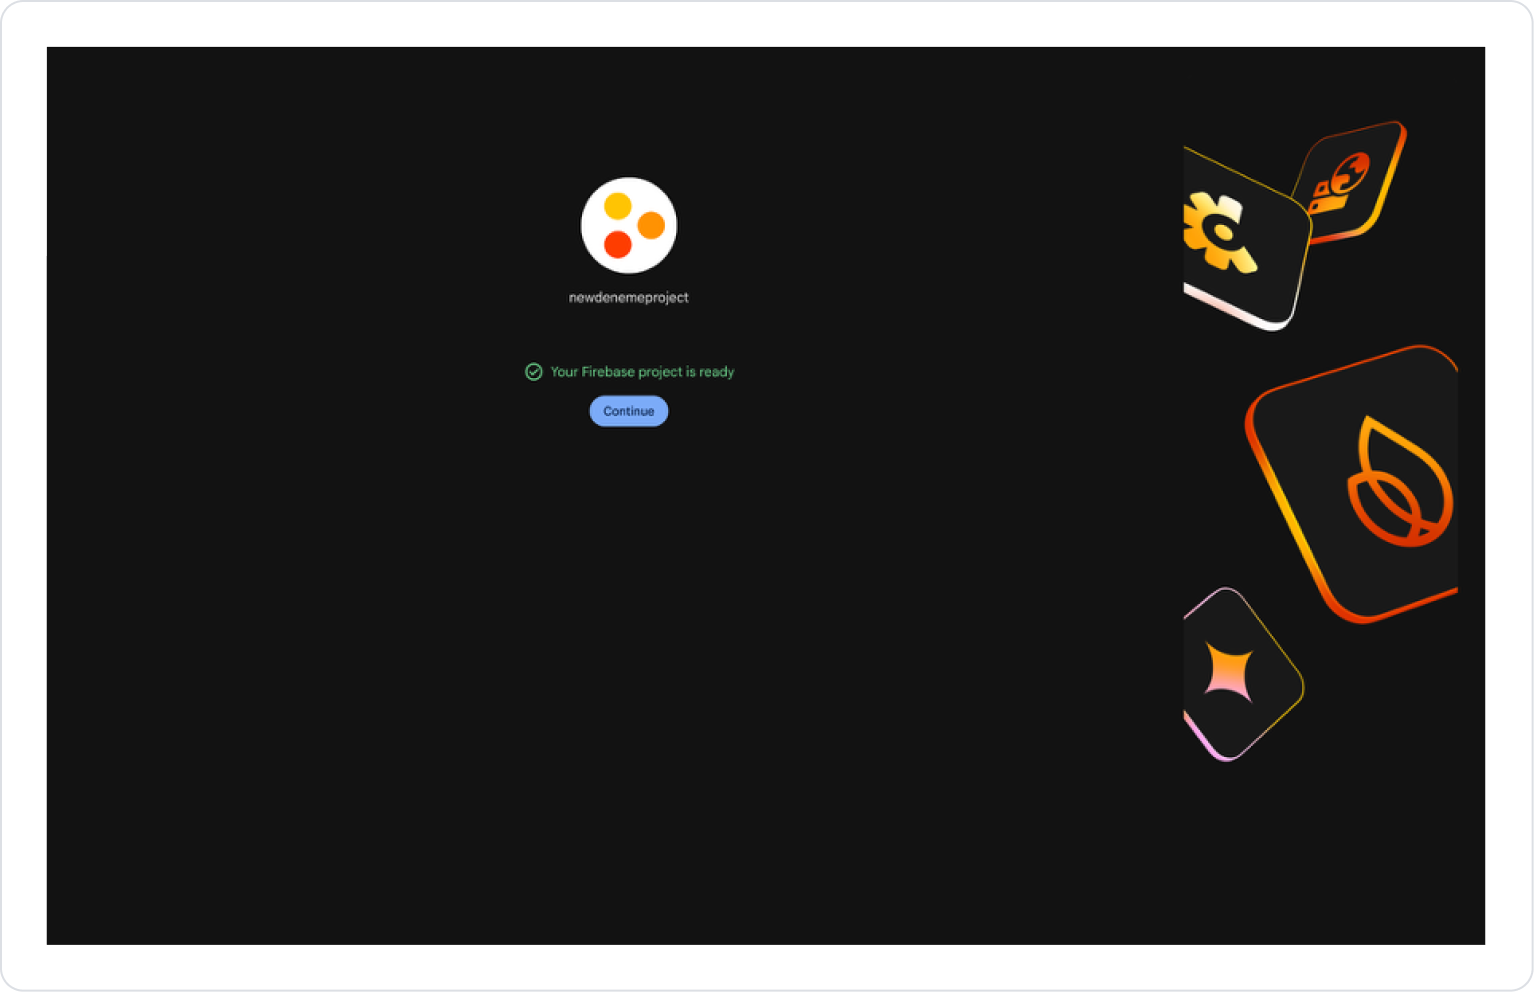
After this process, the relevant file is downloaded to your computer and you need to click the “Next” button.
Follow the ‘Next’ and “Continue to Console” steps to complete the process.
Click on the ⚙️ icon next to “Project Overview” in the upper left corner and select the “Project Settings” option from the menu that opens.
On the page that opens, under the “General” tab, under the “Your Apps” heading, you will find the download link for the google-service.json file for the selected application.
Configuration Manager Installation (Android)
Log in to the Kuika platform.
Then enter the Configuration Manager module.
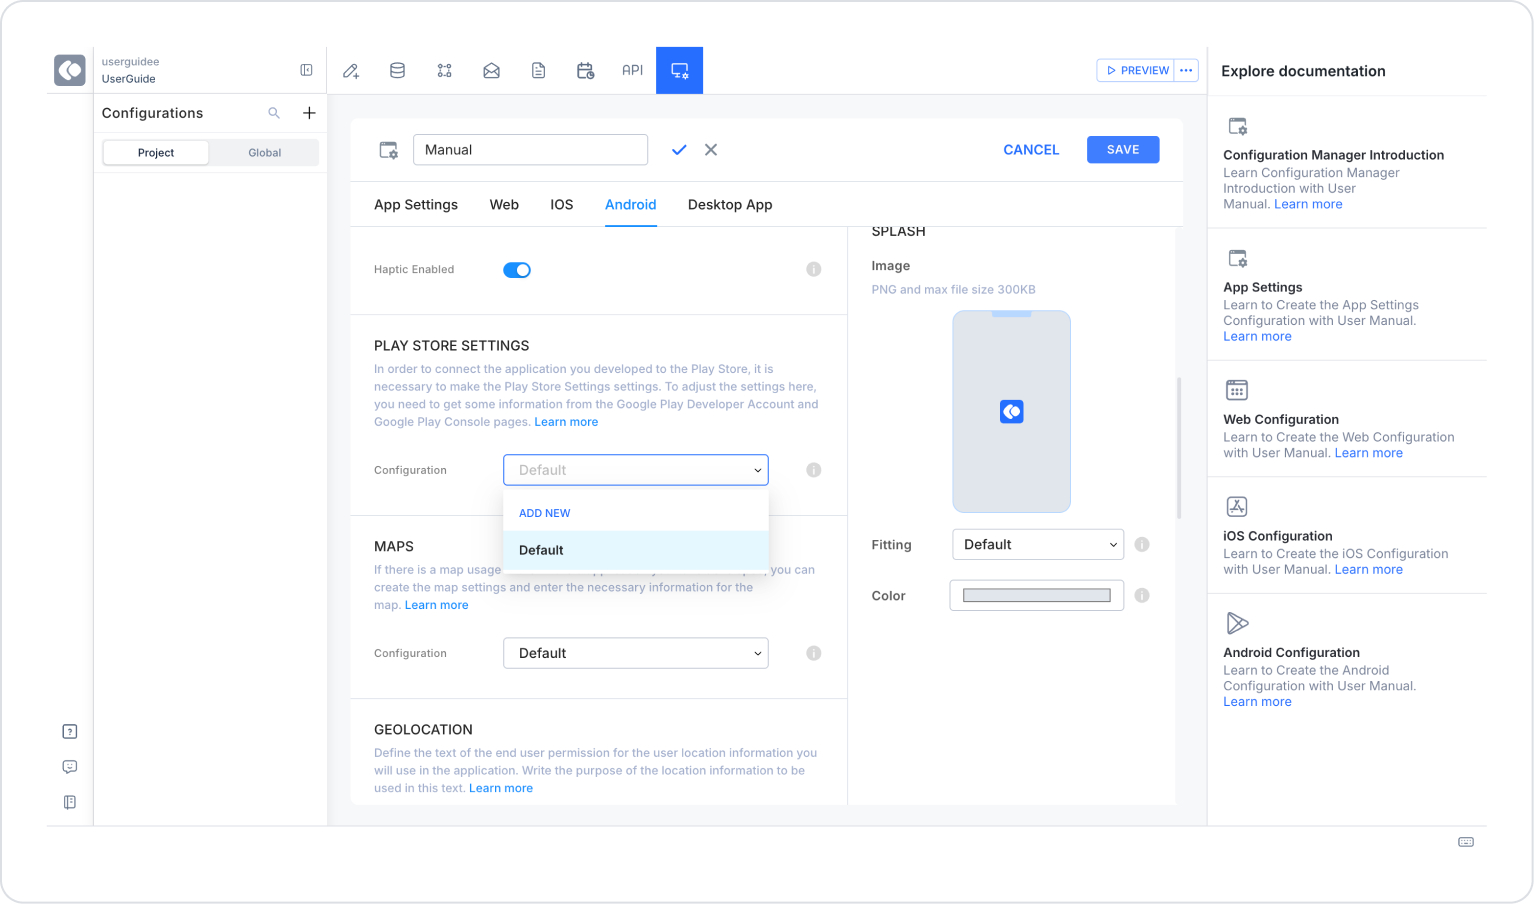
On the Android tab, create a new configuration under Play Store Settings.
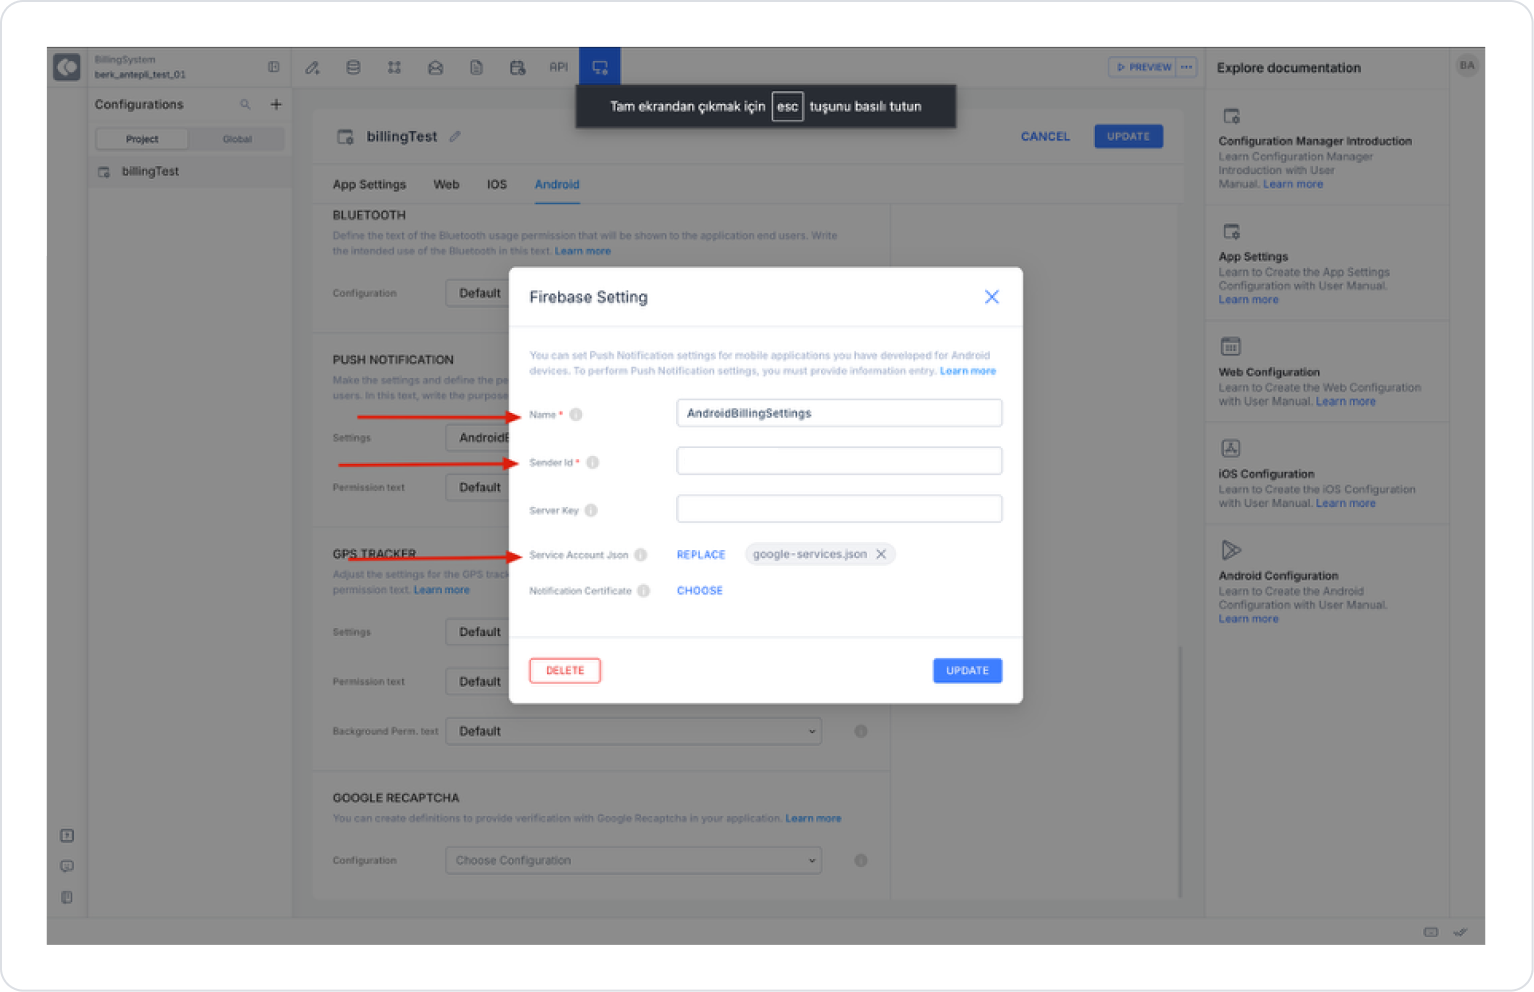
Fill in the fields as follows:
Name: Any name
Sender ID: Project Number code in the Firebase project
Service Account Json: Downloaded google-services.json file
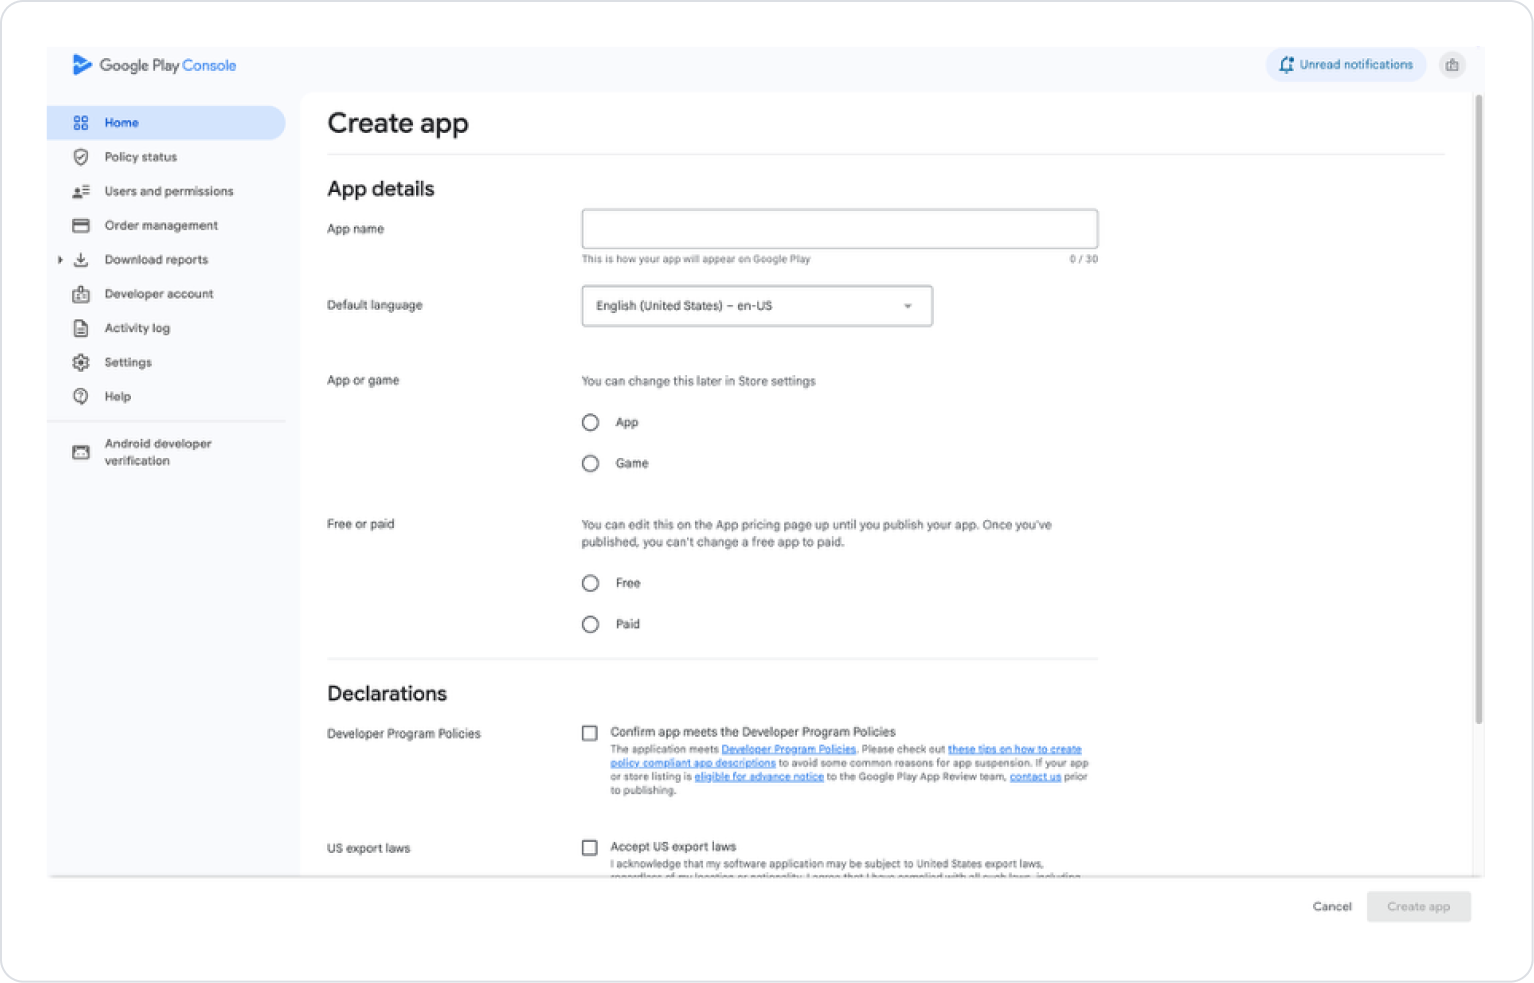
Create a new application with the Create app button.
For user access, it is sufficient to fill in the “App Access” and “Set the price of your app” fields for pricing, depending on whether the app was created as Free/Paid when it was first created.
Creating a Subscription
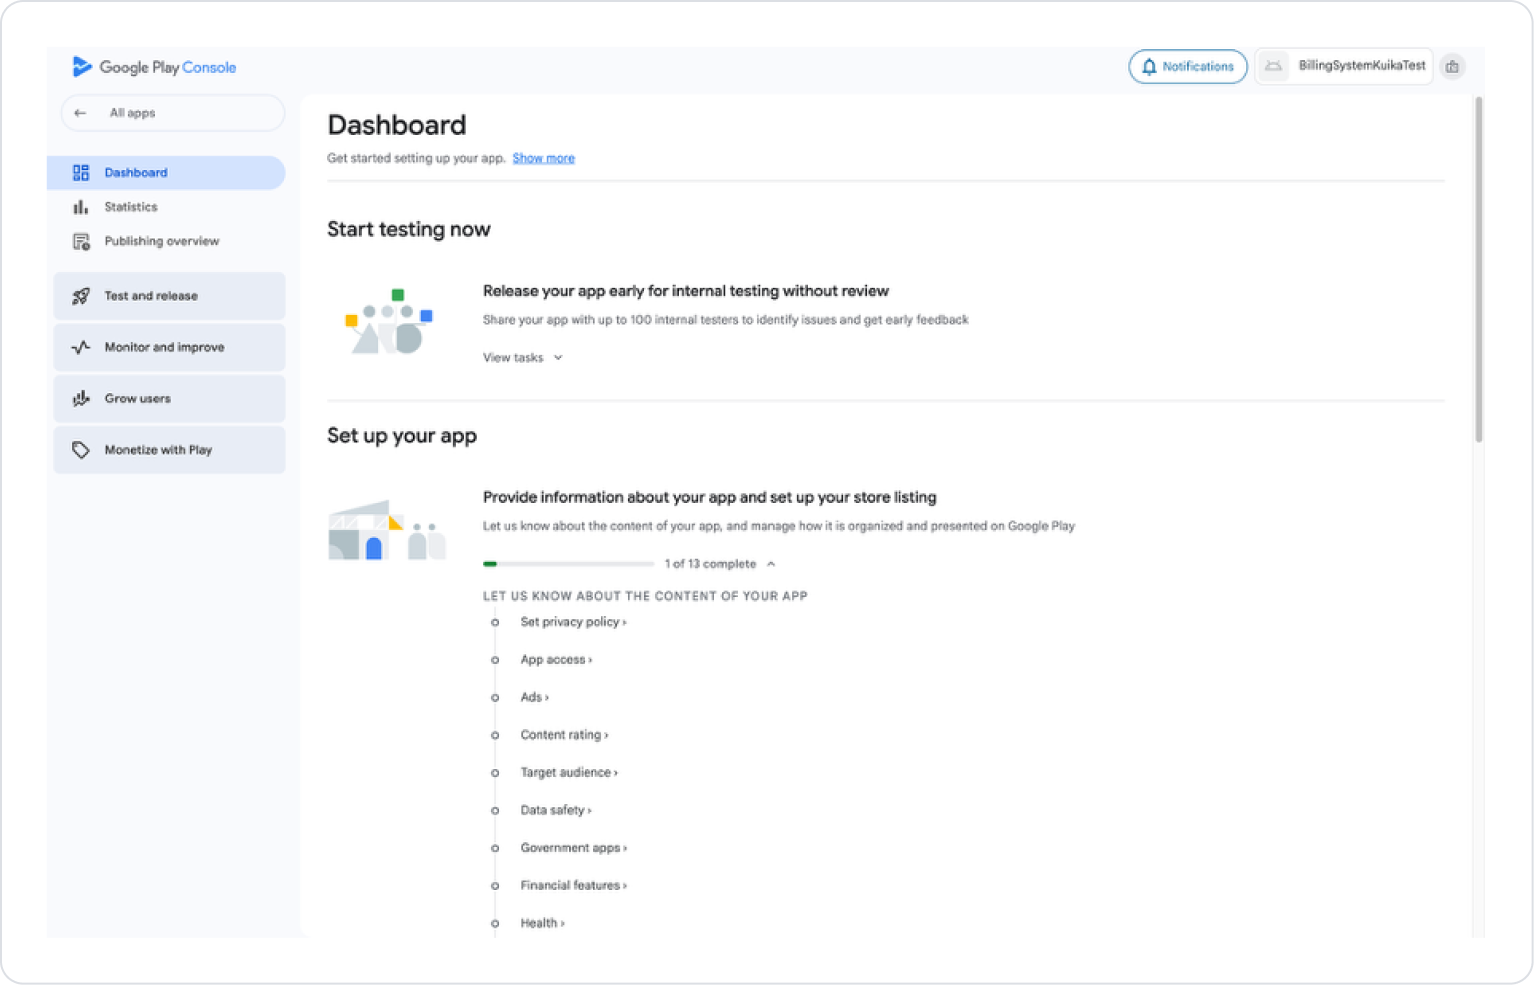
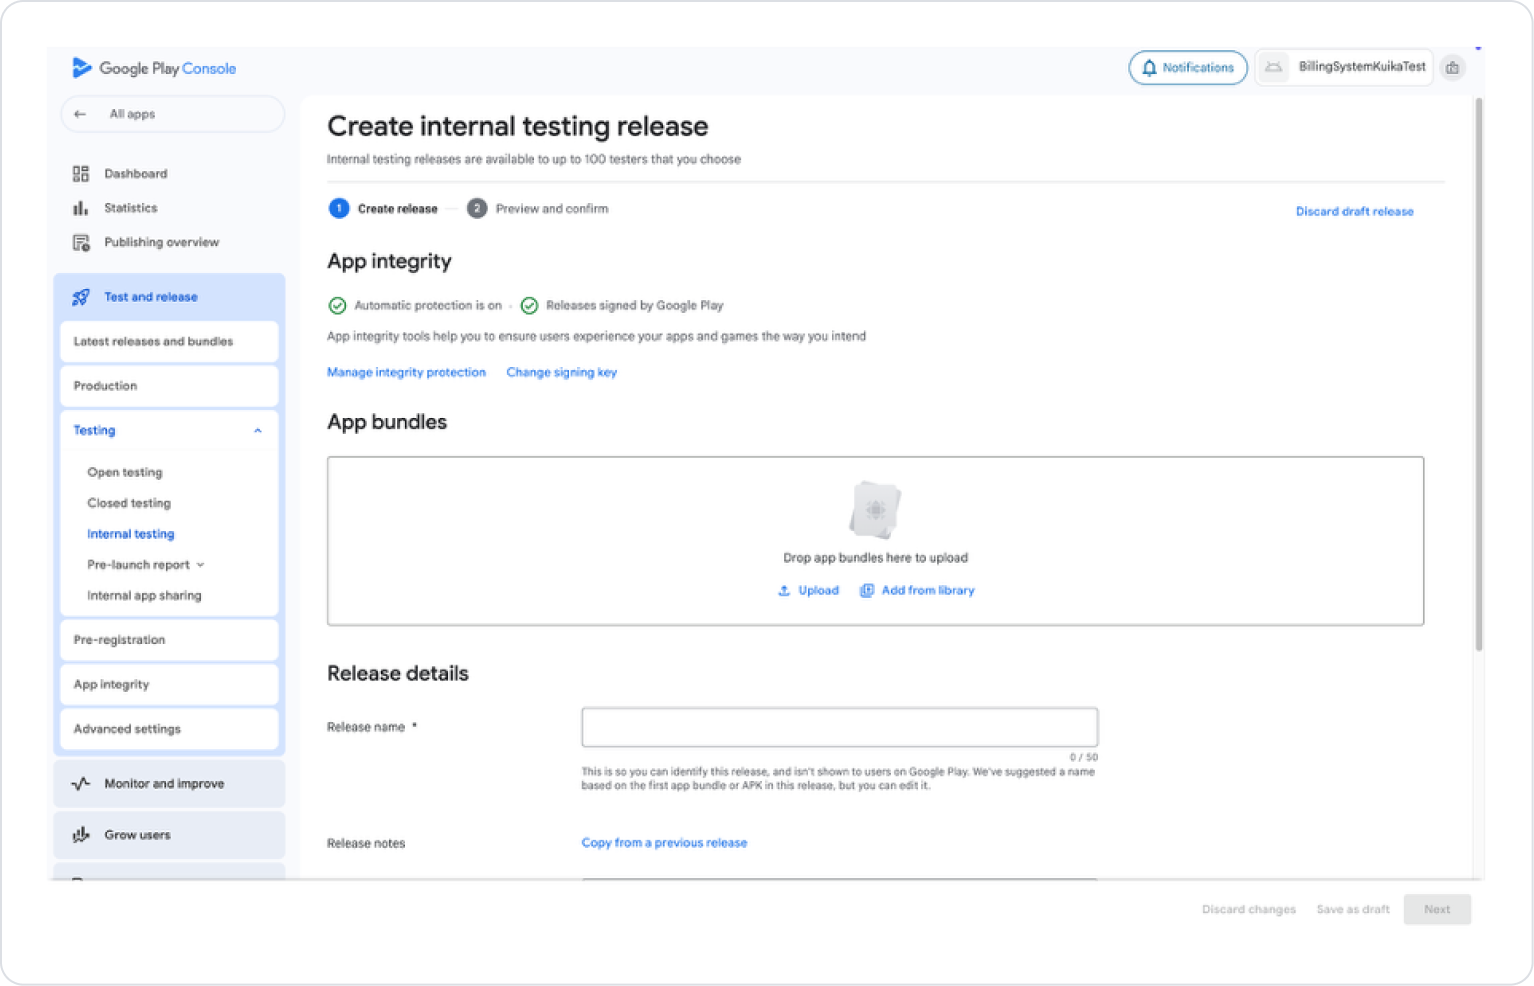
At least 1 AAB file must be uploaded (Internal Testing is sufficient).
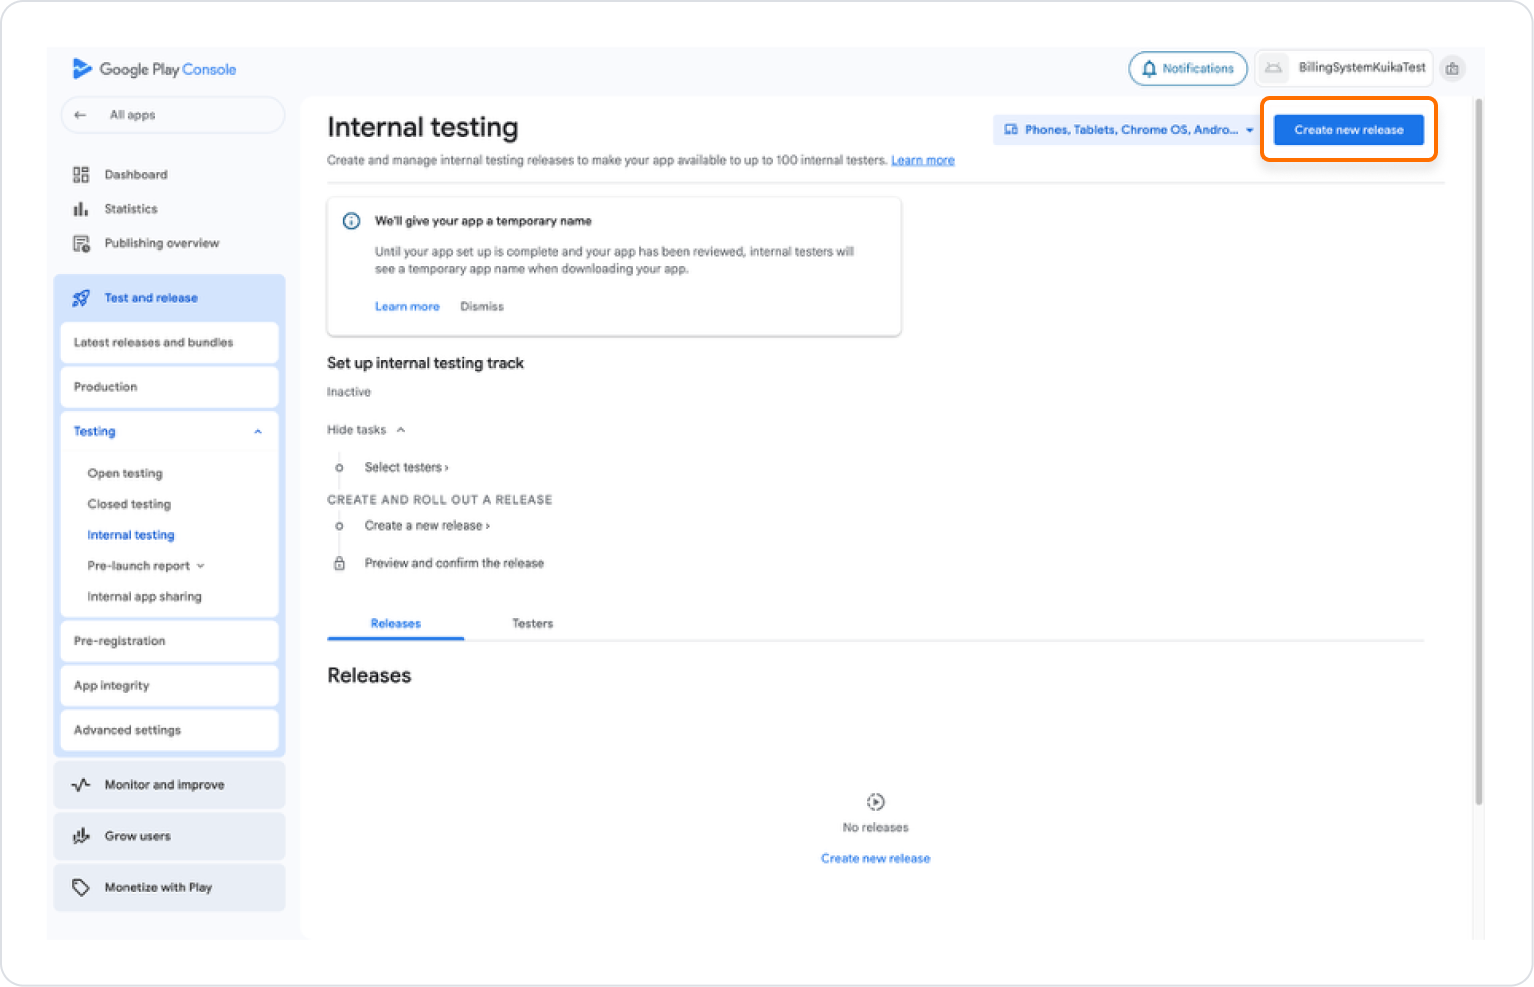
Follow the path Test and release > Internal Testing in the left menu.
On the page that opens, upload the AAB file using Create new release in the upper right.
Fill in the release name and release notes fields, click the “Next” button, and if the necessary settings are complete on the next page, click the “Save and Publish” button.
After publishing:
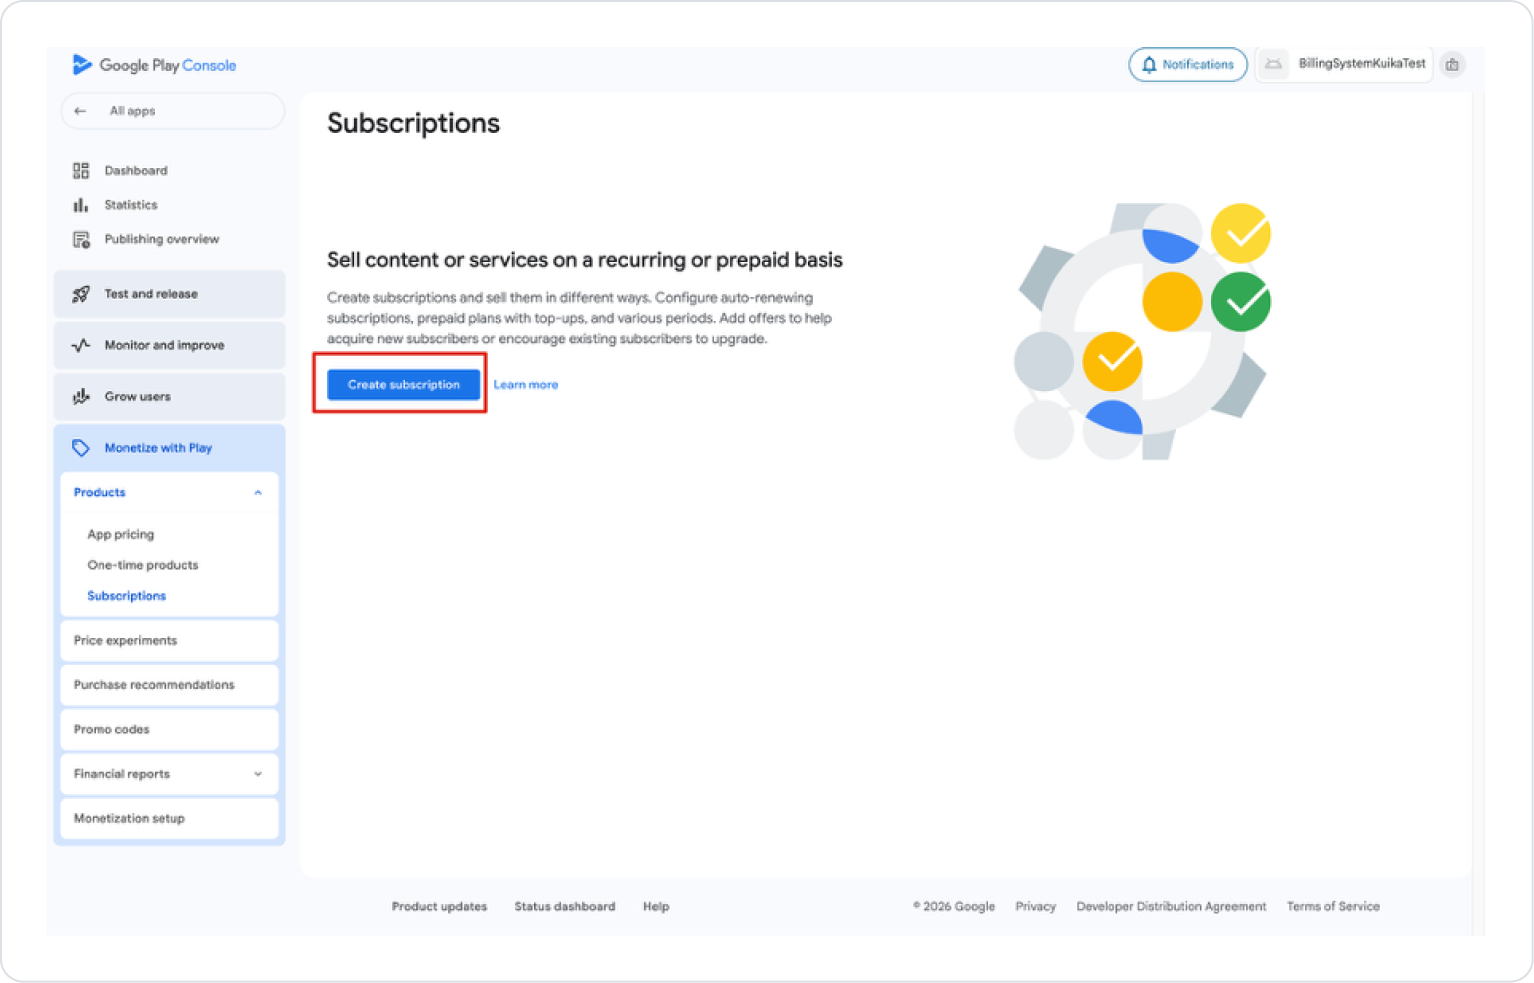
Click the Monetize with Play > Products > Subscriptions button in the left menu.
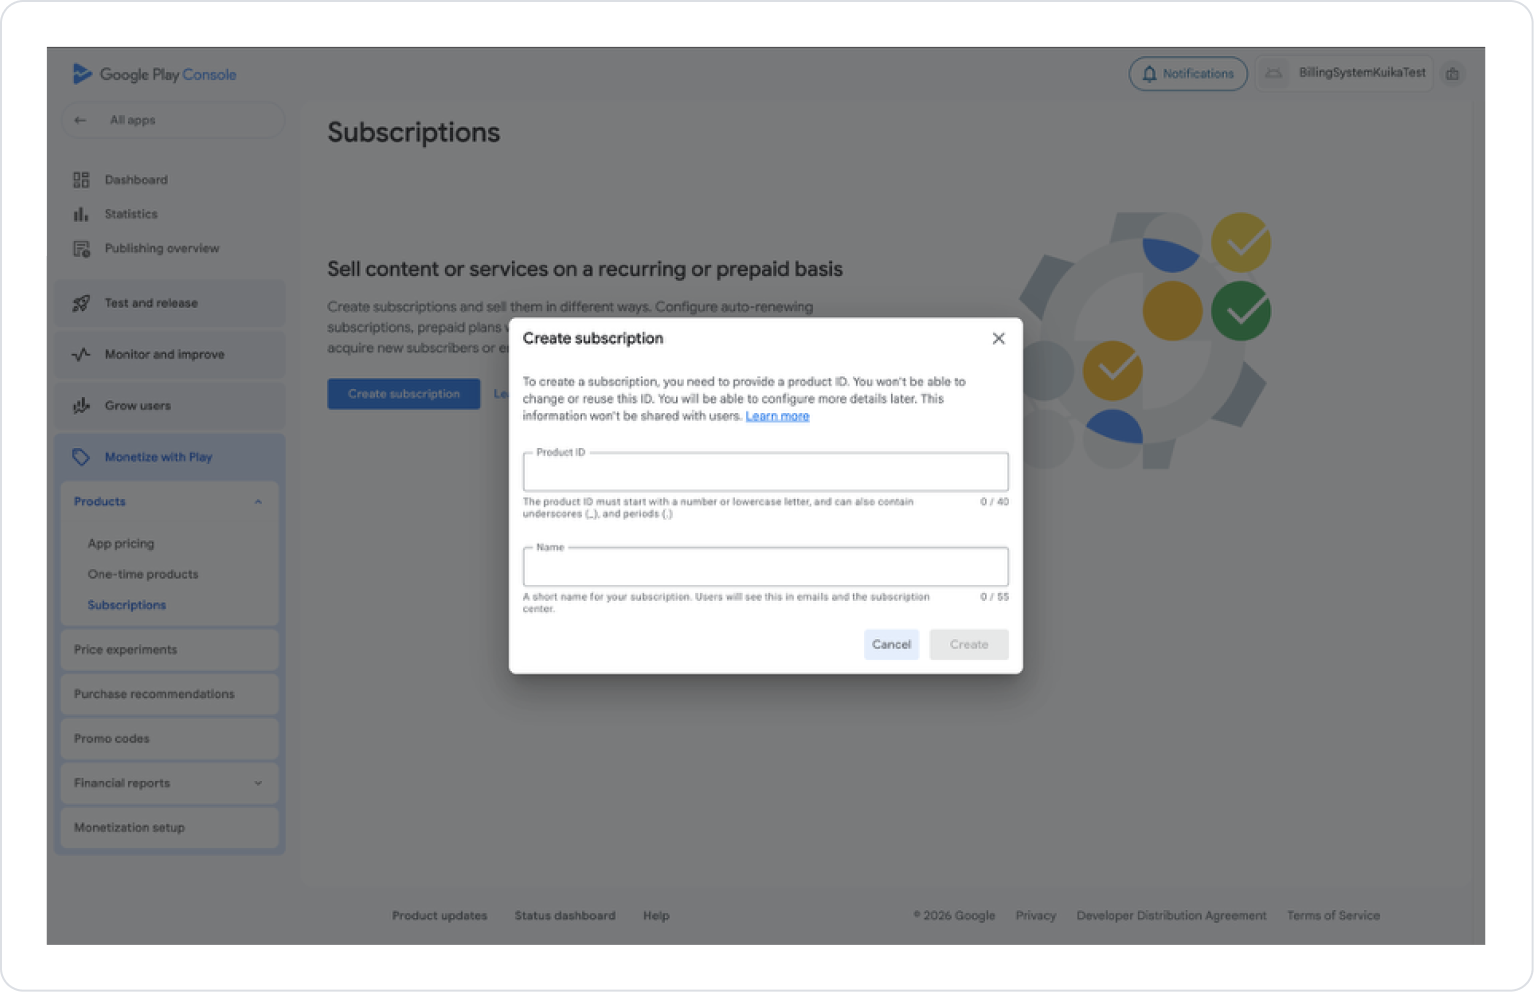
On the next page, click the Create subscription button and fill in the required fields.
Product ID must be carefully determined as it will be used in Kuika.
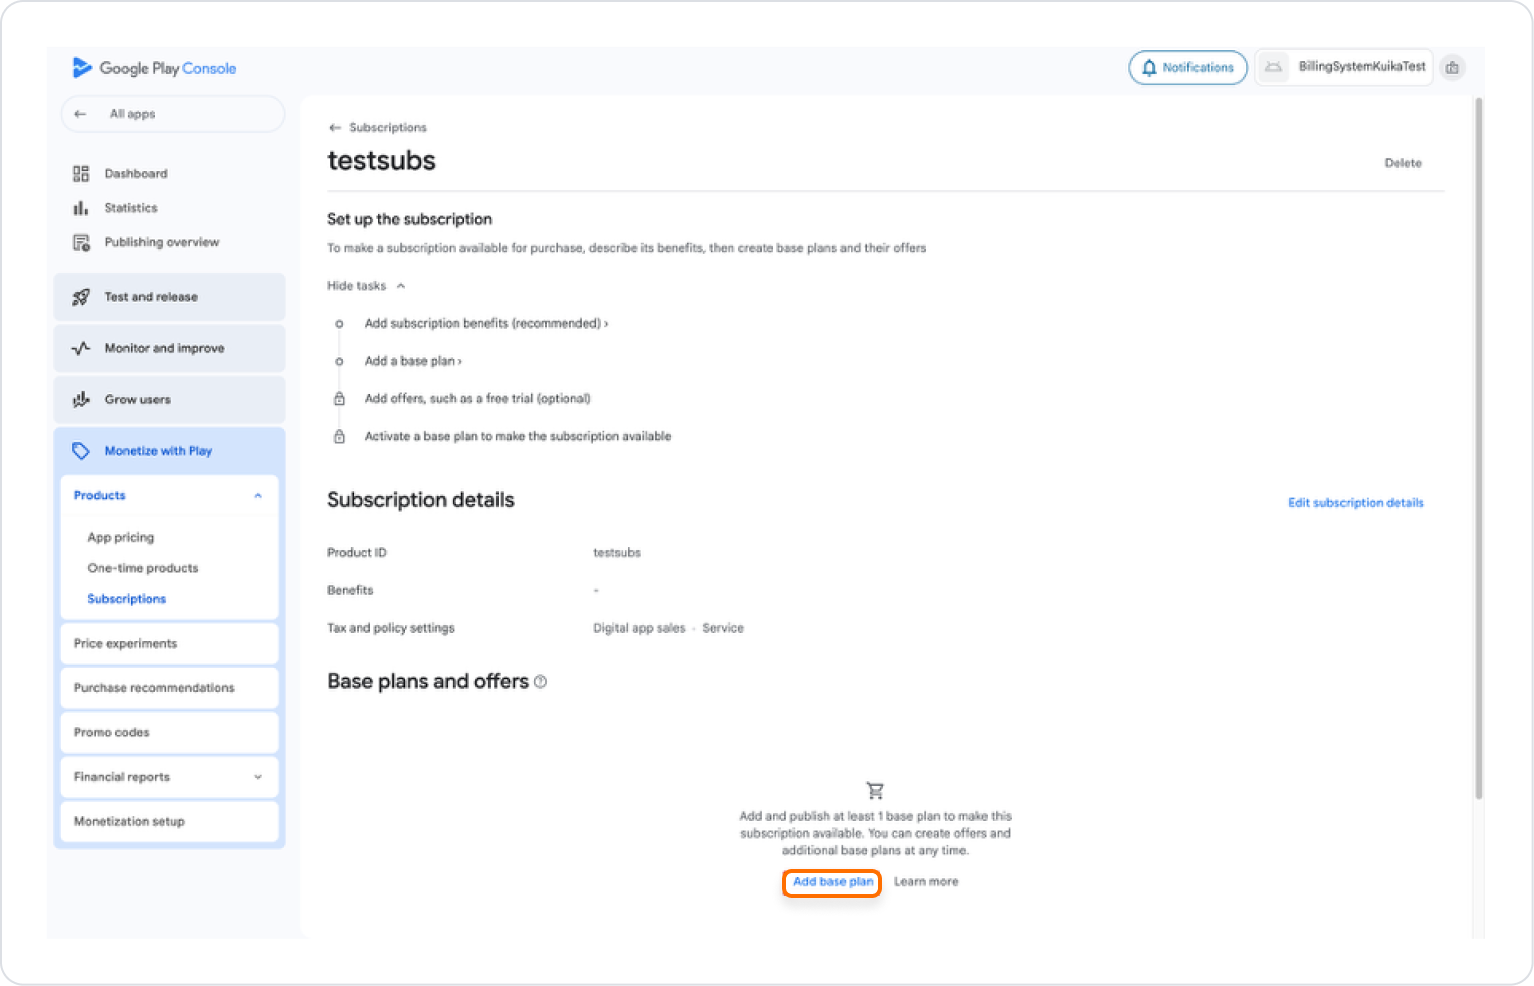
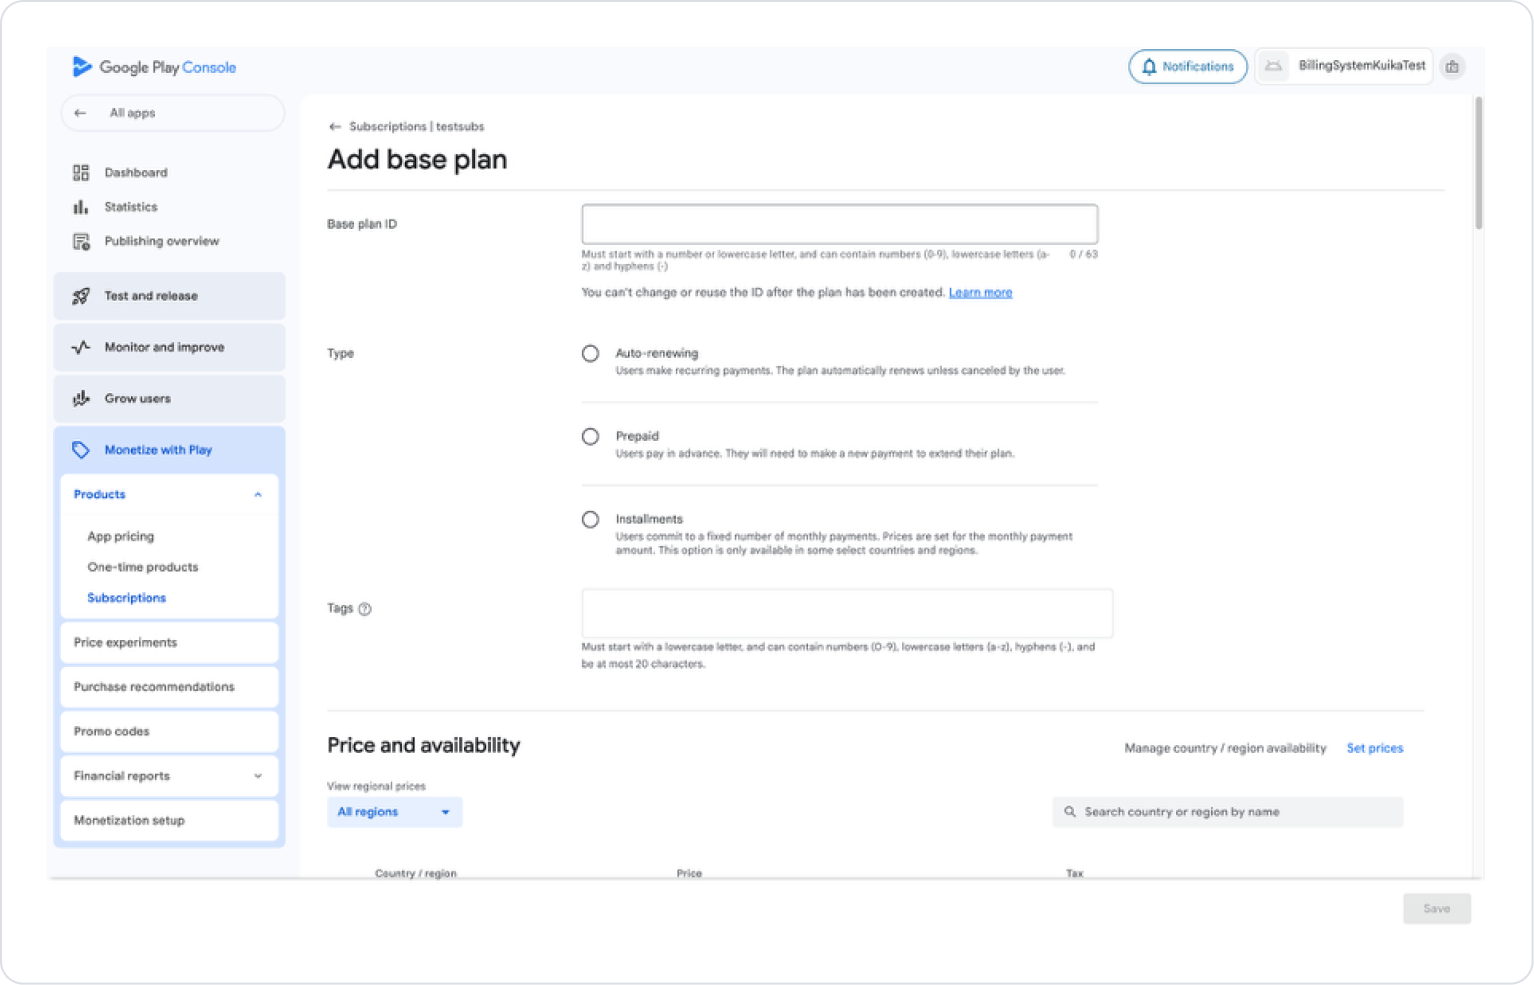
On the page that opens, create the pricing with Base plans and offers > Add base plan and Activate it.
Fill in the Base plan ID, Type, Tags, and Price fields.
Then click the “Save” button and then the “Activate” button.
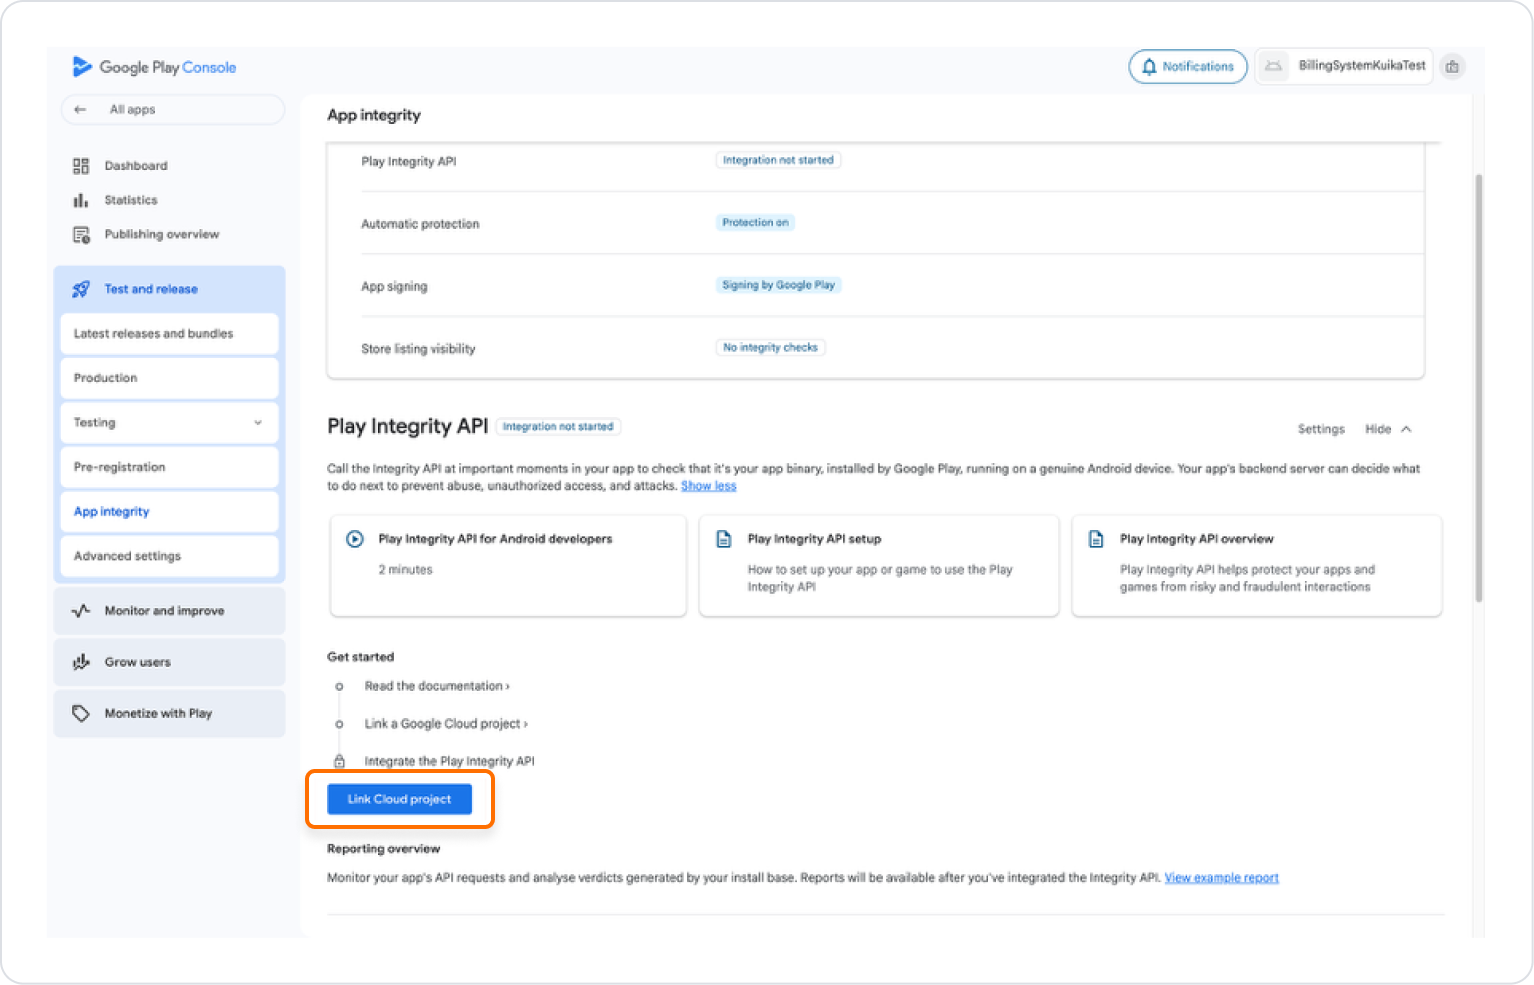
To link the project created in Firebase to the application, click the Test and Release>App integrity option in the left menu.
Link the Firebase project with Play Integrity API > Link Cloud Project.
After the application goes live, the relevant Kuika billing actions can be used.
IAP Billing System (iOS)
The setup steps for the project created for testing in the test environment and the project that will go to the production environment are different.
Test Environment Setup
Configuration Manager (iOS – Test)
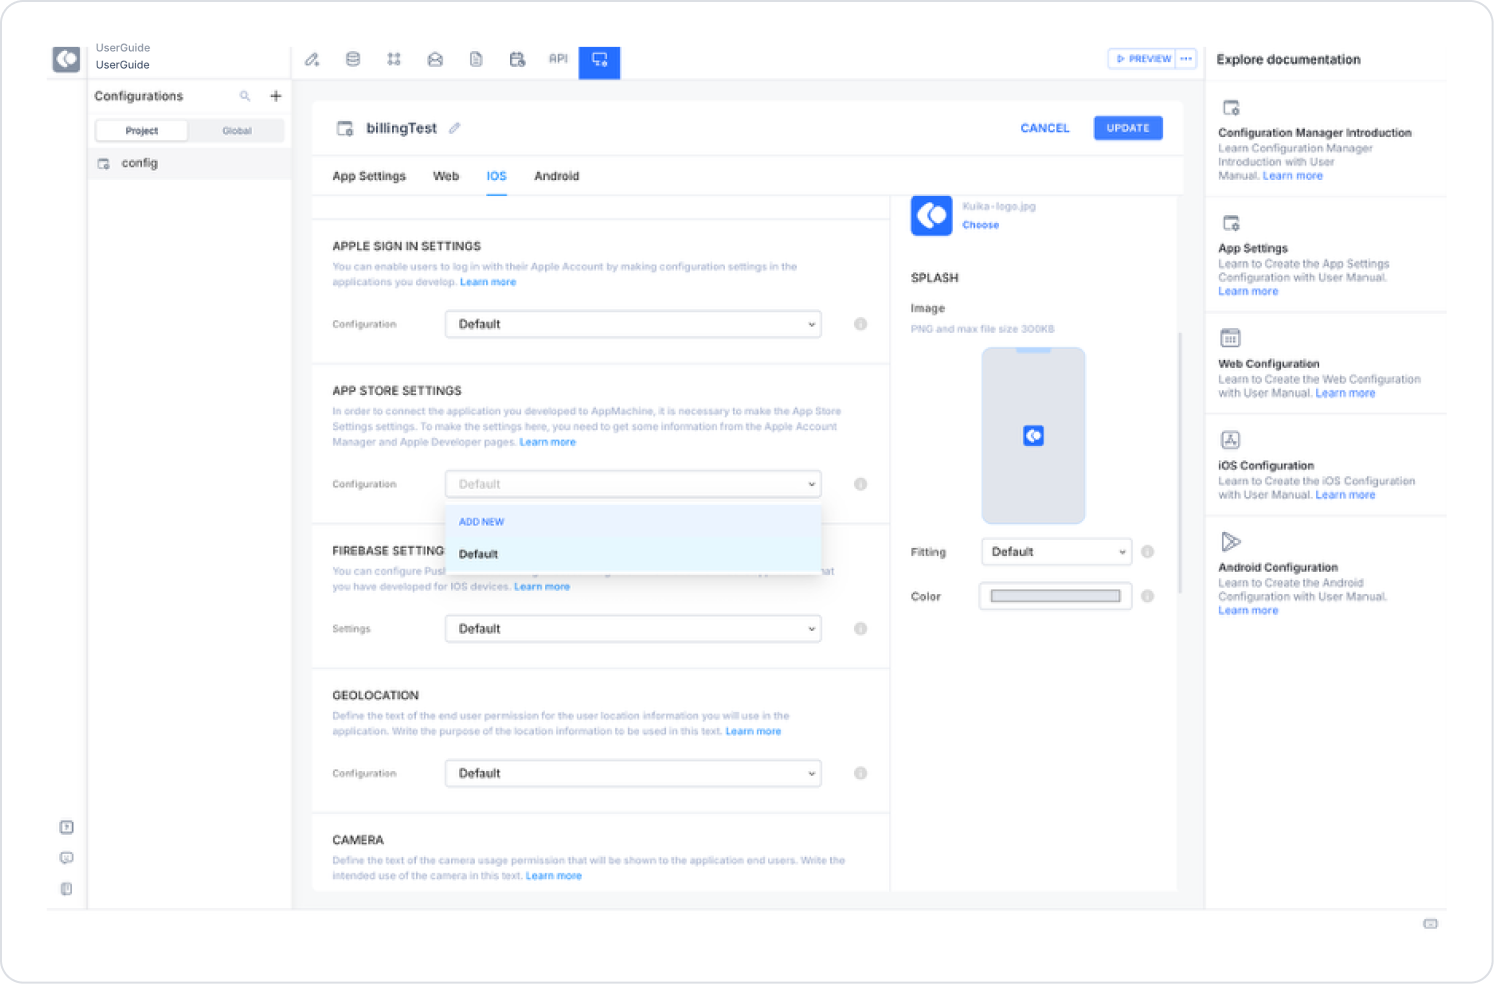
Go to the Configuration Manager > iOS tab.
Create a new configuration under APP STORE SETTINGS.
Fill in the Name, Publish, and Development fields for the test environment.
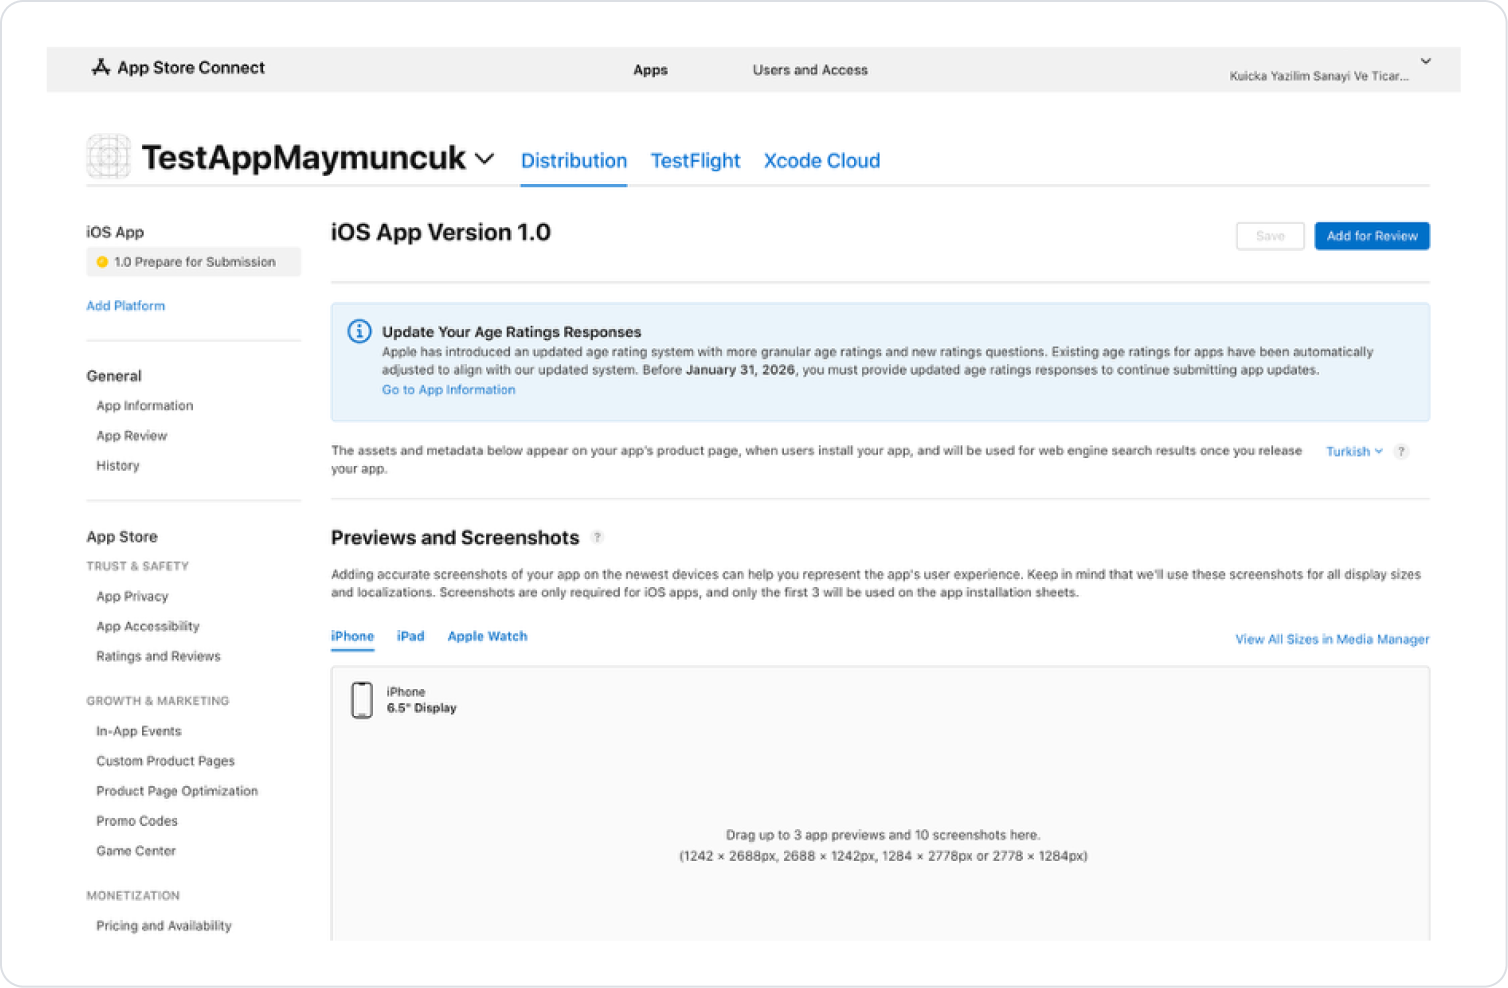
App Store Connect Settings
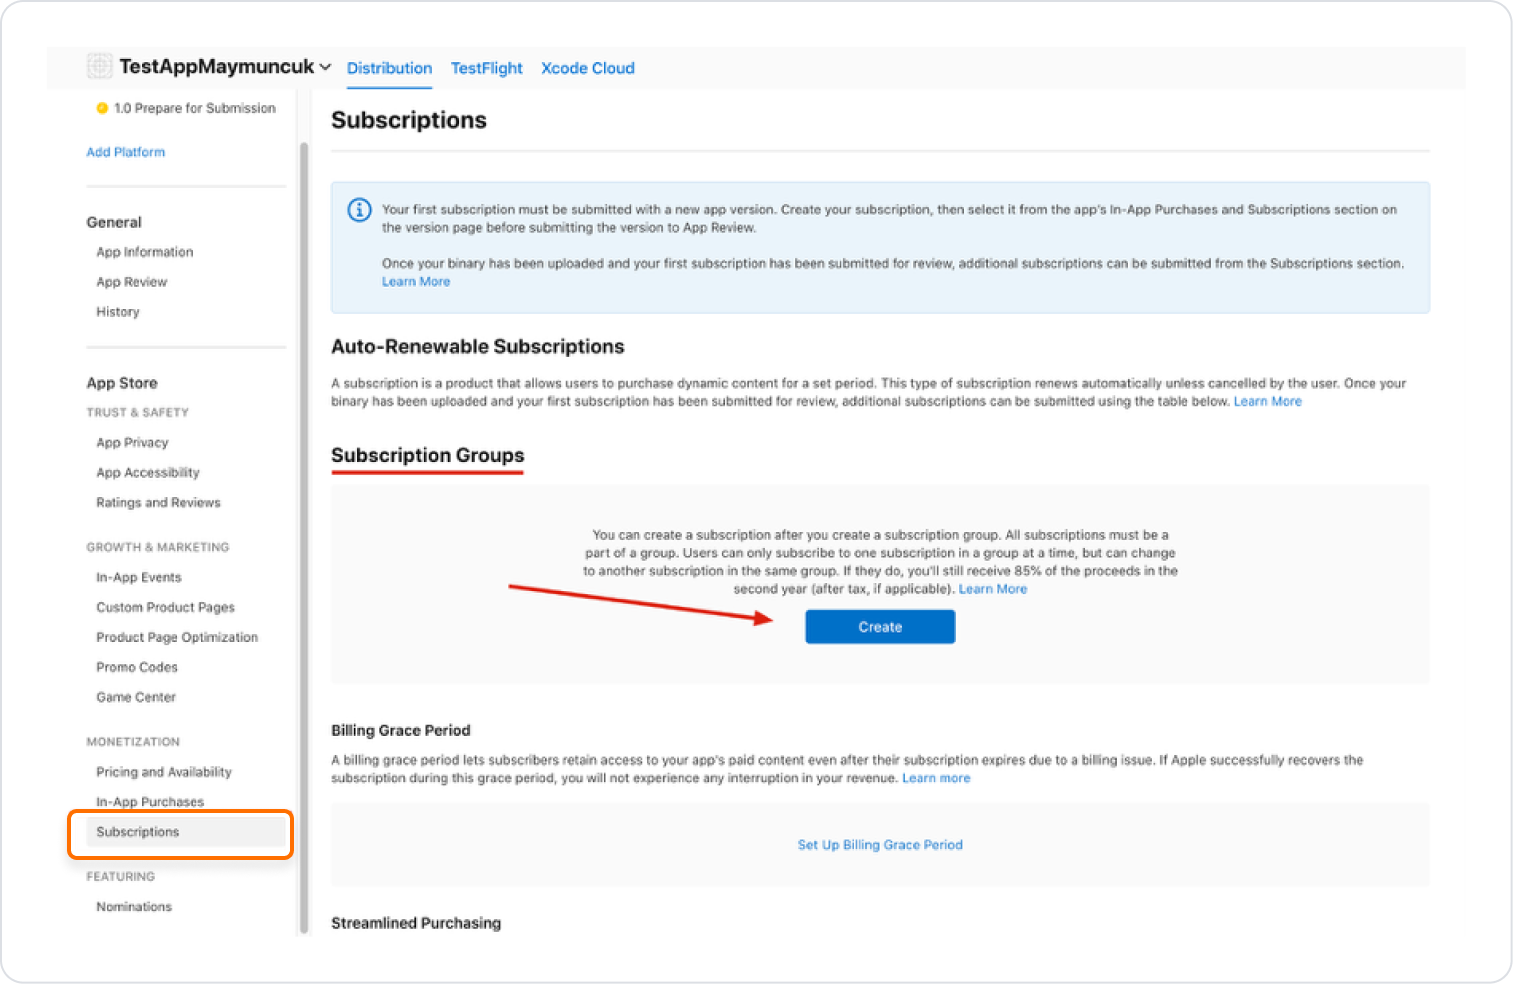
Open the relevant Bundle record in App Store Connect.
Click the Subscriptions > Subscription Groups > Create button.
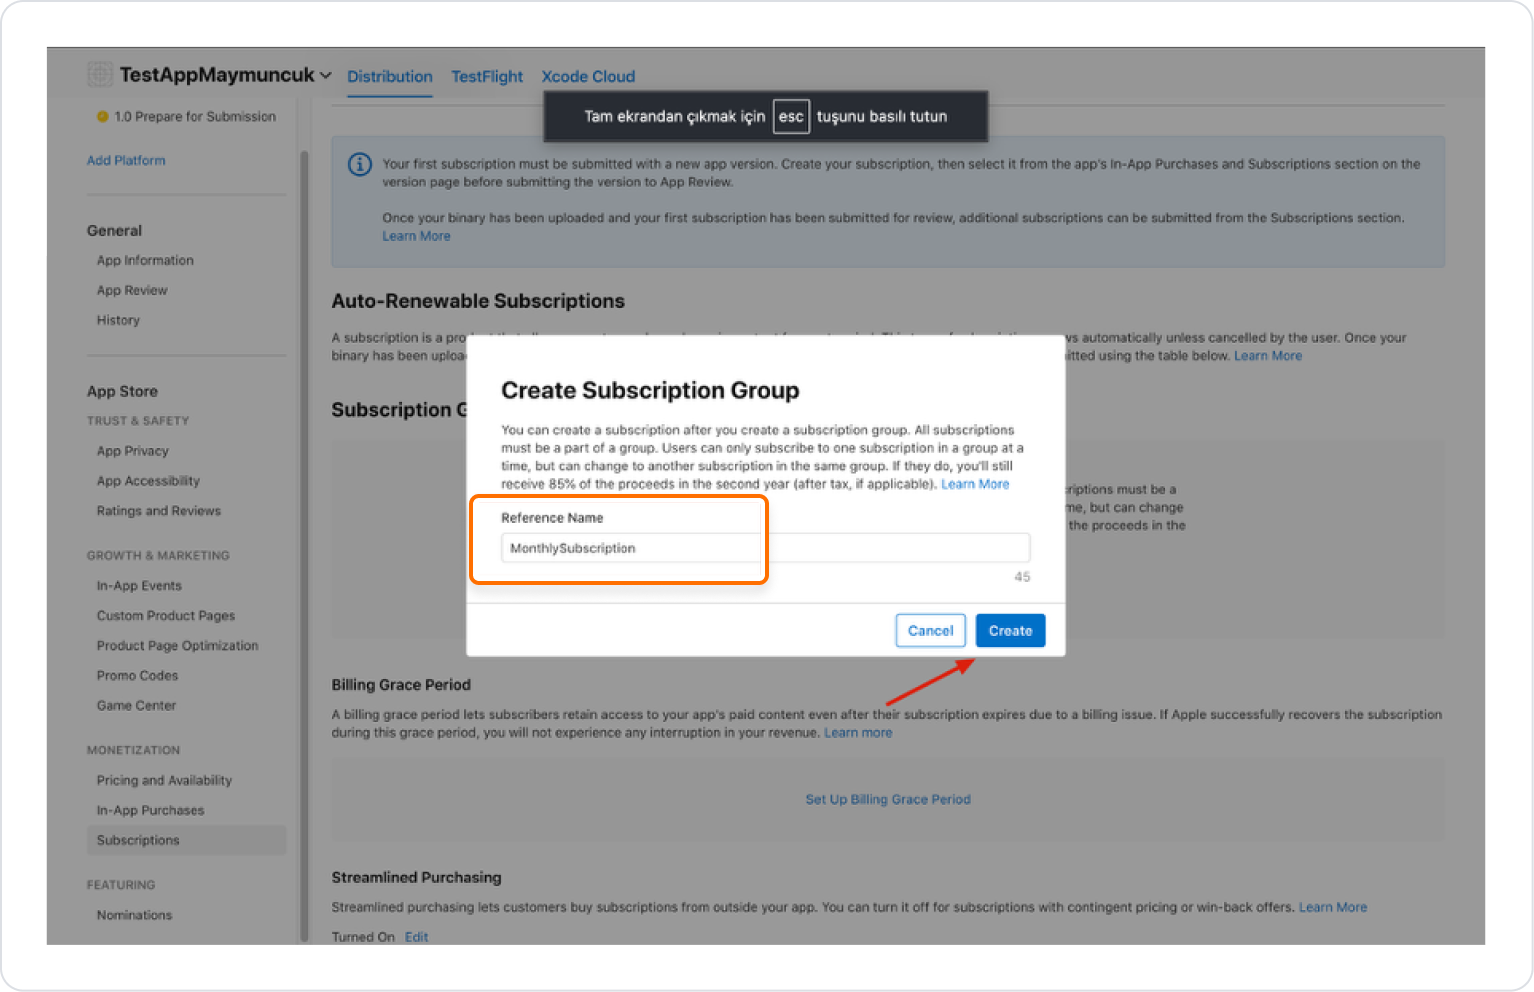
Create a group by entering a reference name (e.g., MonthlySubscription) and click the “Create” button.
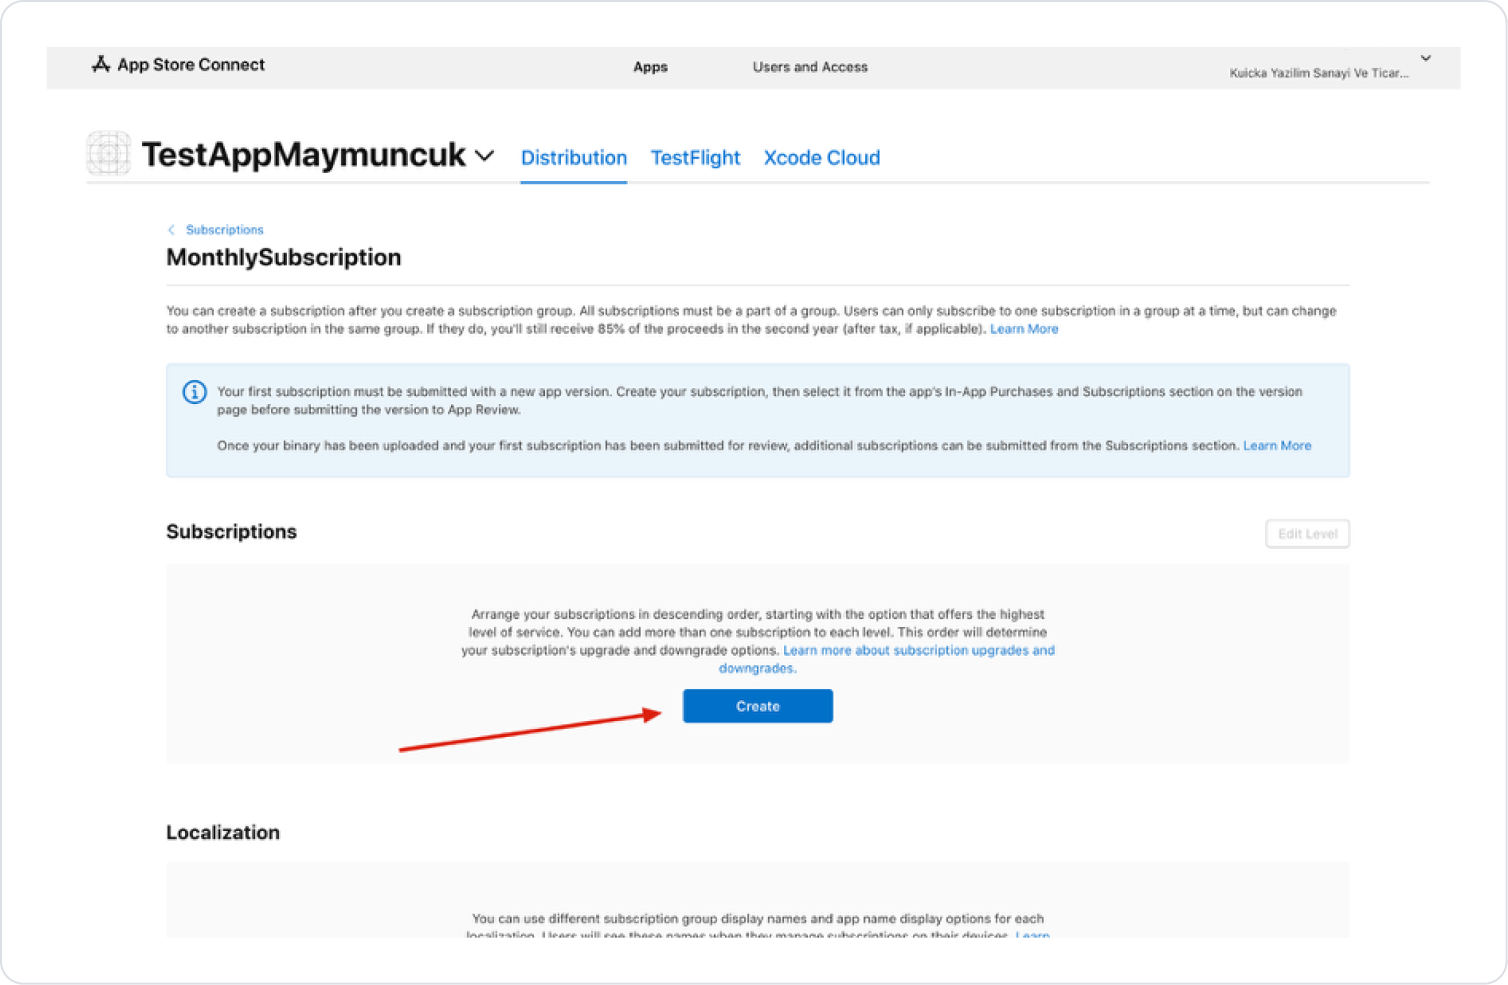
The type(s) of payment to be received are added under the subscription reference we created. Here, you can organize your subscriptions in descending order, starting with the option that offers the highest service level; you can add multiple subscriptions to each level. This order will determine your subscription upgrade and downgrade options.
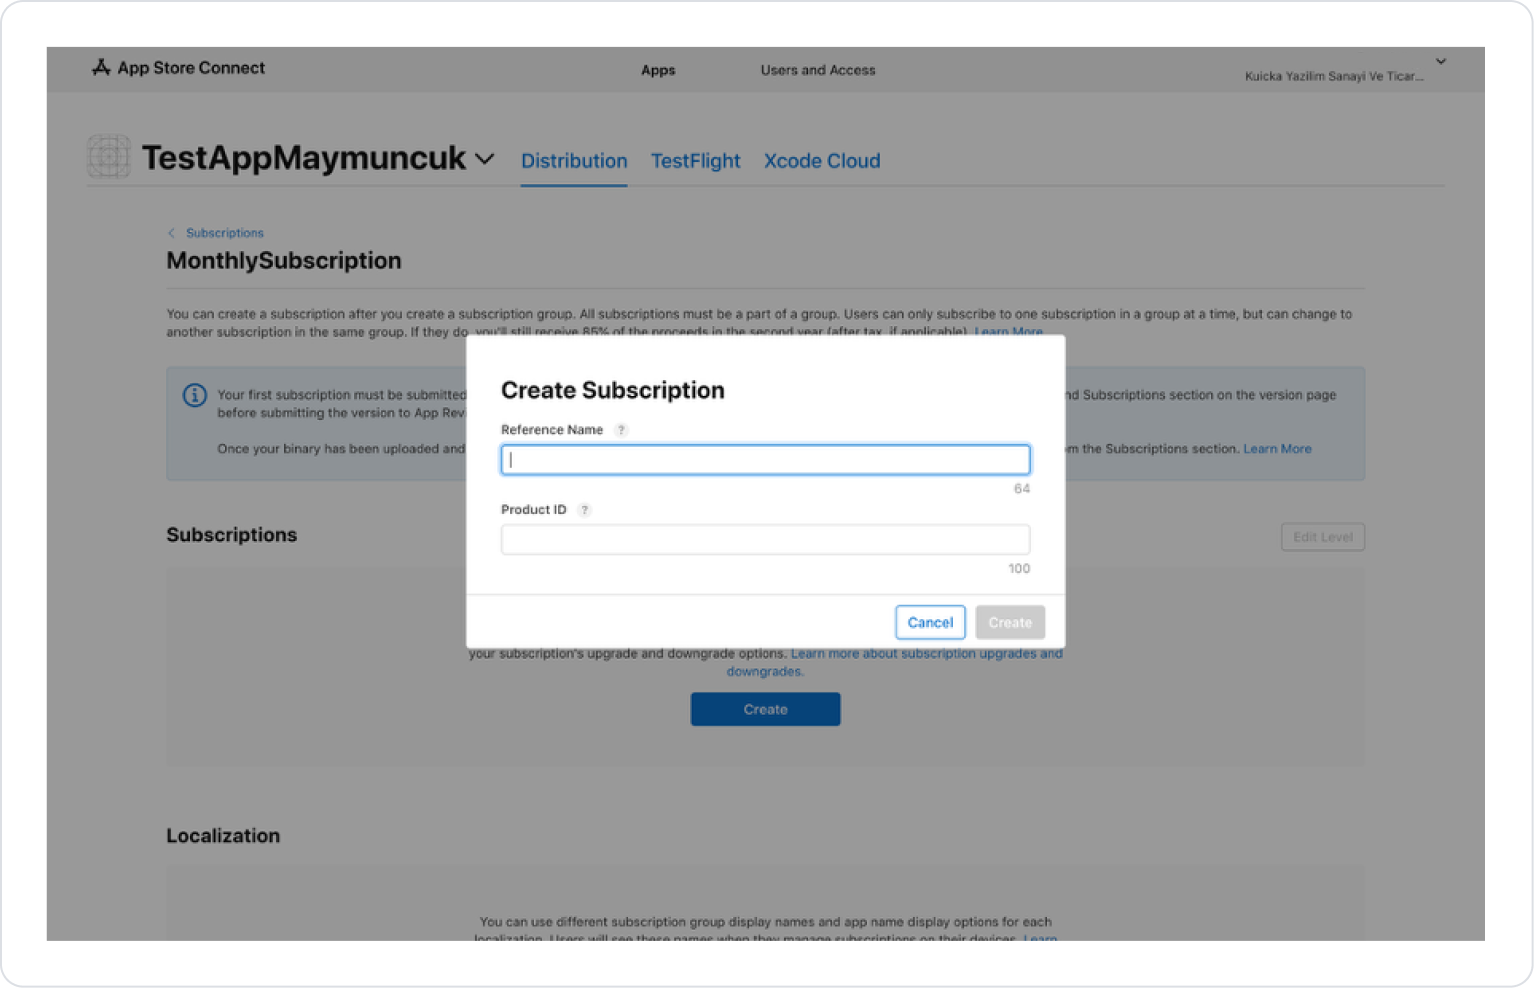
Then enter the Reference name (e.g., Monthly) and Product ID(e.g., MonthlyProduct) information and click the “Create” button.
The “Product ID” entered here should not be forgotten, as it will be used later in the Kuika project within the action.
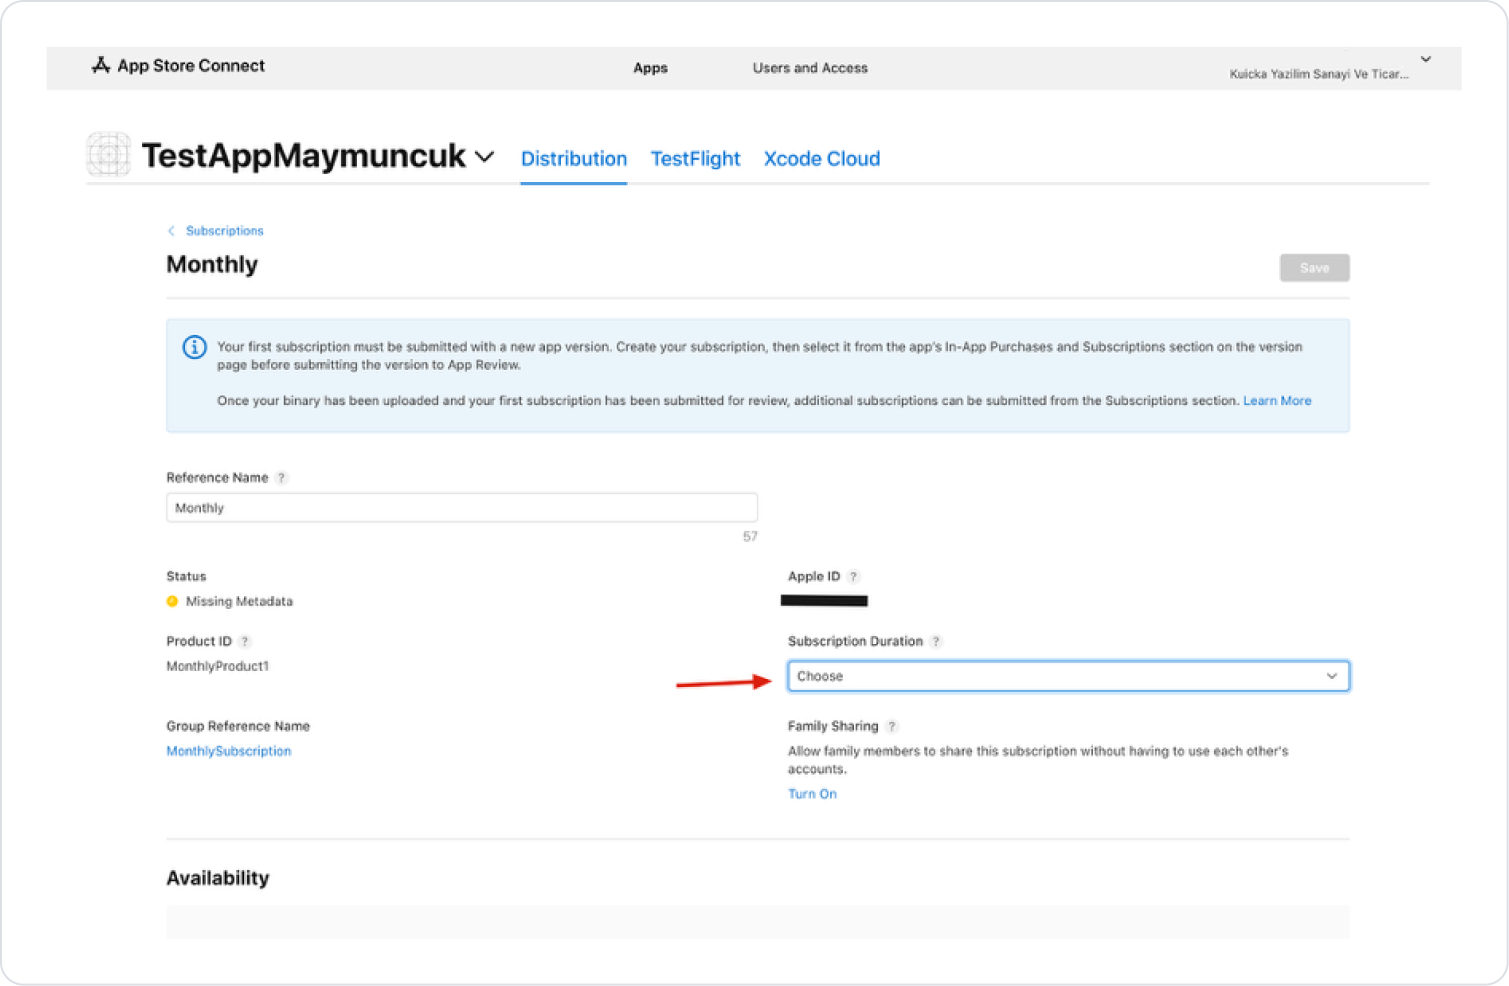
Configure the following settings on the page that opens:
Subscription Duration (e.g., 1 Month)
Availability (in which countries or regions the subscription should be valid)
Subscription Prices (set the initial subscription price; after creating the subscription price, add additional options such as promotional offers - pay-as-you-go, prepayment, free)
Localization (if a display name and description are specified for the subscription, this is how it will appear in the App Store)
Image (if App Store Promotion is enabled for the subscription, this image will also be visible on the app's product page)
Tax Category (tax category for the payment received)
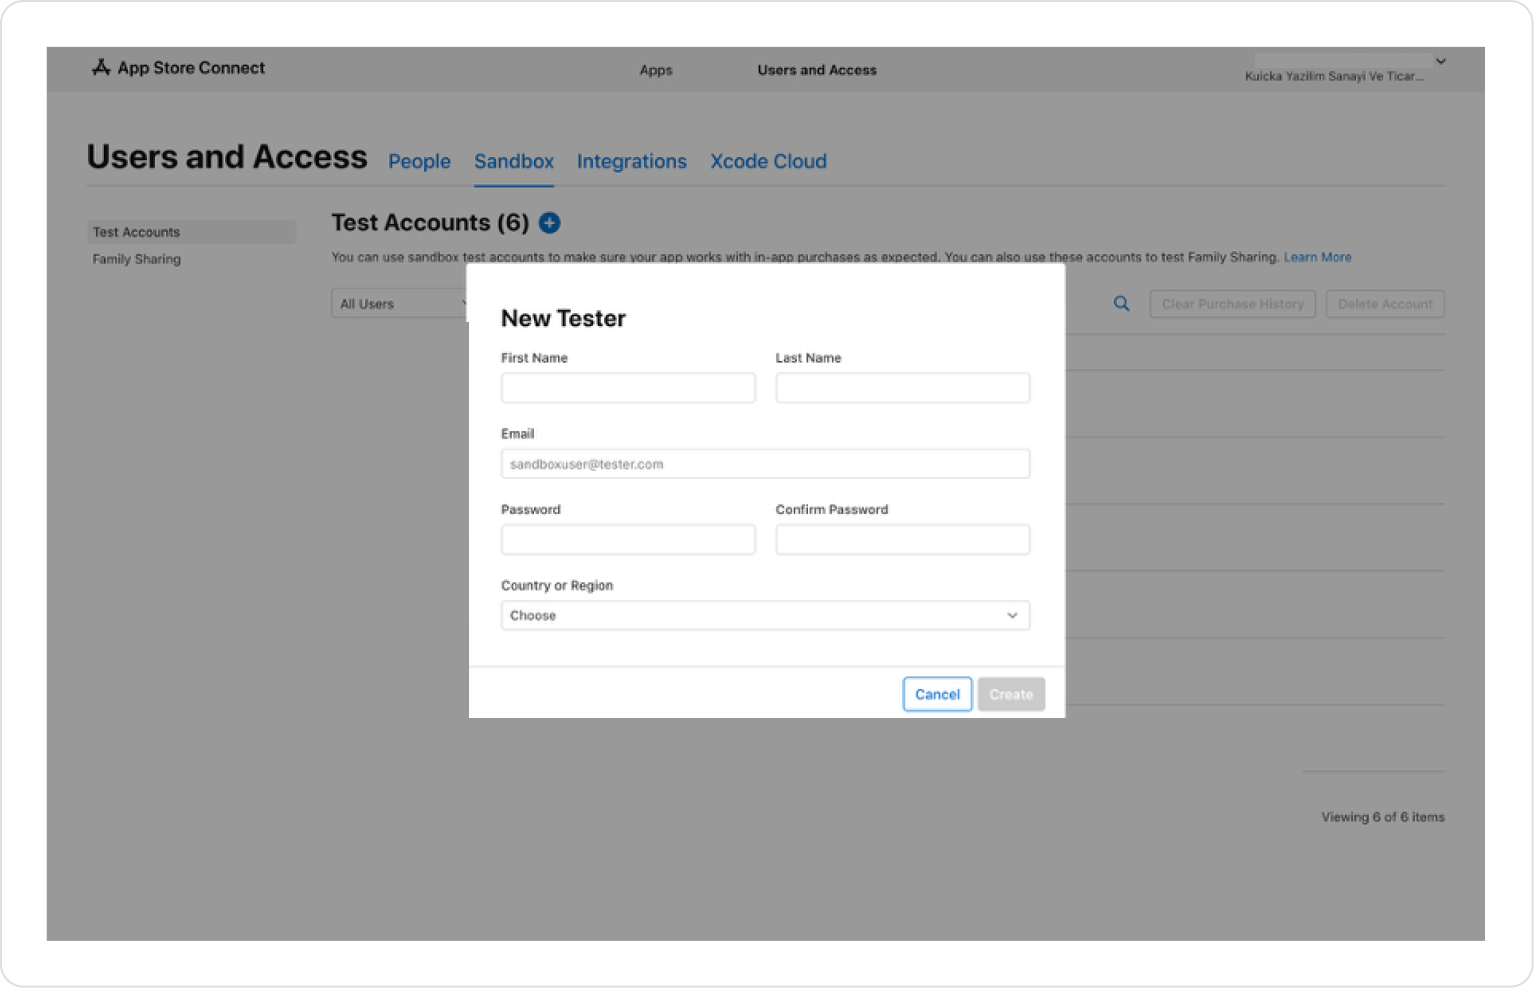
Creating Sandbox Users
In App Store Connect, create Users and Access > Test Accounts.
Click the “+” icon next to the Test Accounts heading.
After filling in the required information, set the renewal frequency (default 5 min) as needed. This indicates that “the subscription will automatically renew every 5 minutes.”
An email address previously used for a Sandbox user cannot be used in the Email field.
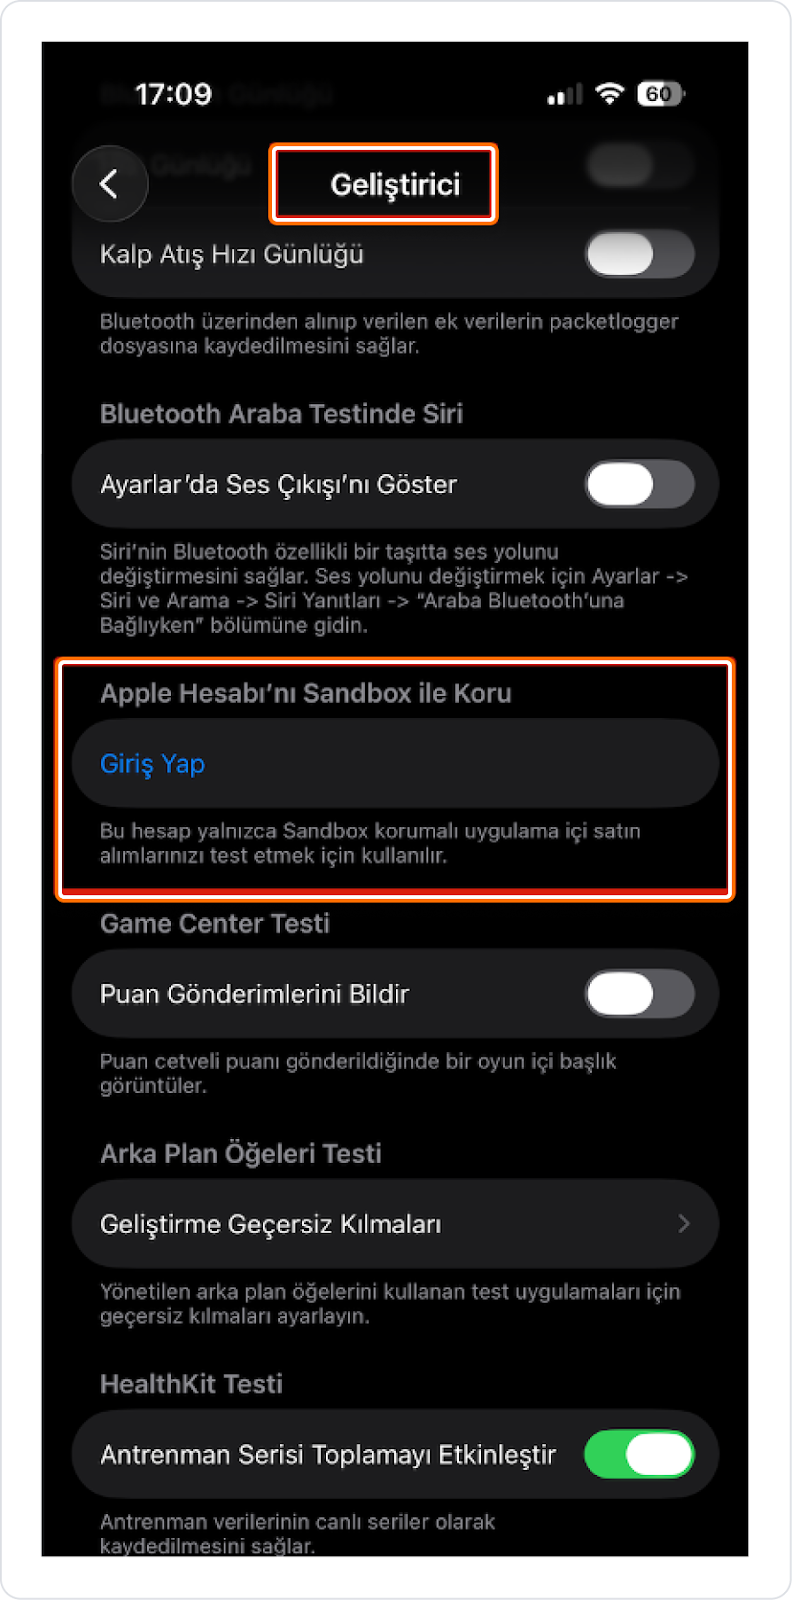
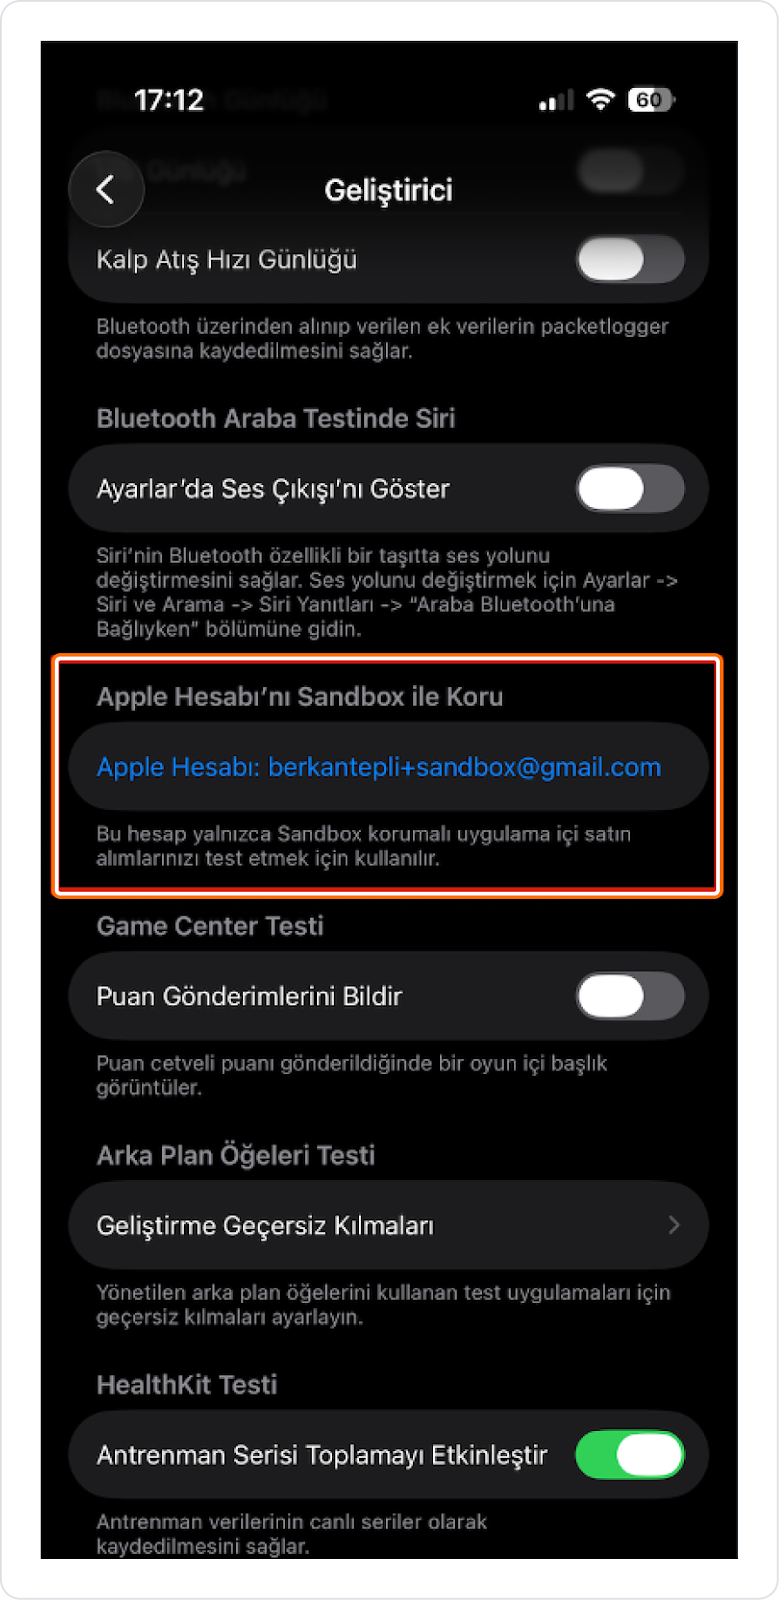
Then, switch to the test device you will be using.
On the test device:
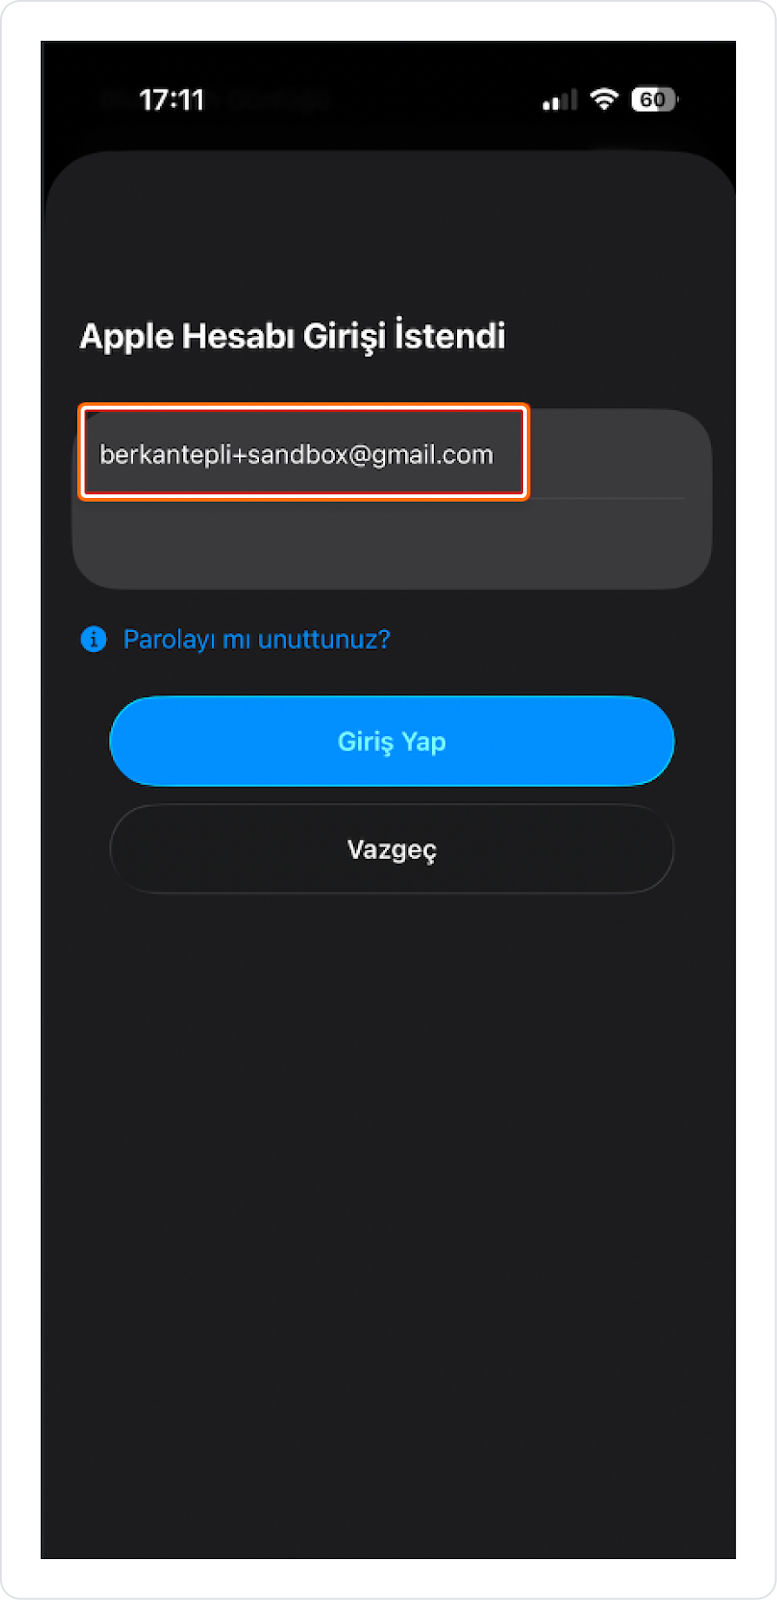
Go to Settings > Developer > Protect Apple Account with Sandbox.
Log in with the Sandbox user.
After creating the Kuika project and adding the relevant actions, checks can be performed on the relevant test device.
Production Environment Setup
Configuration Manager (iOS – Prod)
Go to the Configuration Manager > iOS tab.
Create a new configuration under APP STORE SETTINGS.
Fill in the Name, Publish, and Development fields for the test environment.
App Store Connect Settings
Open the relevant Bundle record in App Store Connect.
Click the Subscriptions > Subscription Groups > Create button.
Create a group by entering a reference name (e.g., MonthlySubscription) and click the “Create” button.
Add the type(s) of payment to be received under the subscription reference we created. Here, you can arrange your subscriptions in descending order, starting with the option that offers the highest service level; you can add more than one subscription to each level. This order will determine your subscription upgrade and downgrade options.
Then enter the Reference name (e.g., Monthly) and Product ID(e.g., MonthlyProduct) information and click the “Create” button.
The “Product ID” entered here will be used later in the Kuika project action, so the entered value should not be forgotten.
Configure the following settings on the page that opens:
Subscription Duration (e.g., 1 Month)
Availability (in which countries or regions the subscription should be valid)
Subscription Prices (set the initial subscription price; after creating the subscription price, add additional conditions such as a promotional offer - pay-as-you-go, prepayment, free)
Localization (if a display name and description are specified for the subscription, this is how it will appear in the App Store)
Image (if App Store Promotion is enabled for the subscription, this image will also be displayed on the app's product page)
Tax Category (the tax category for the payment received)
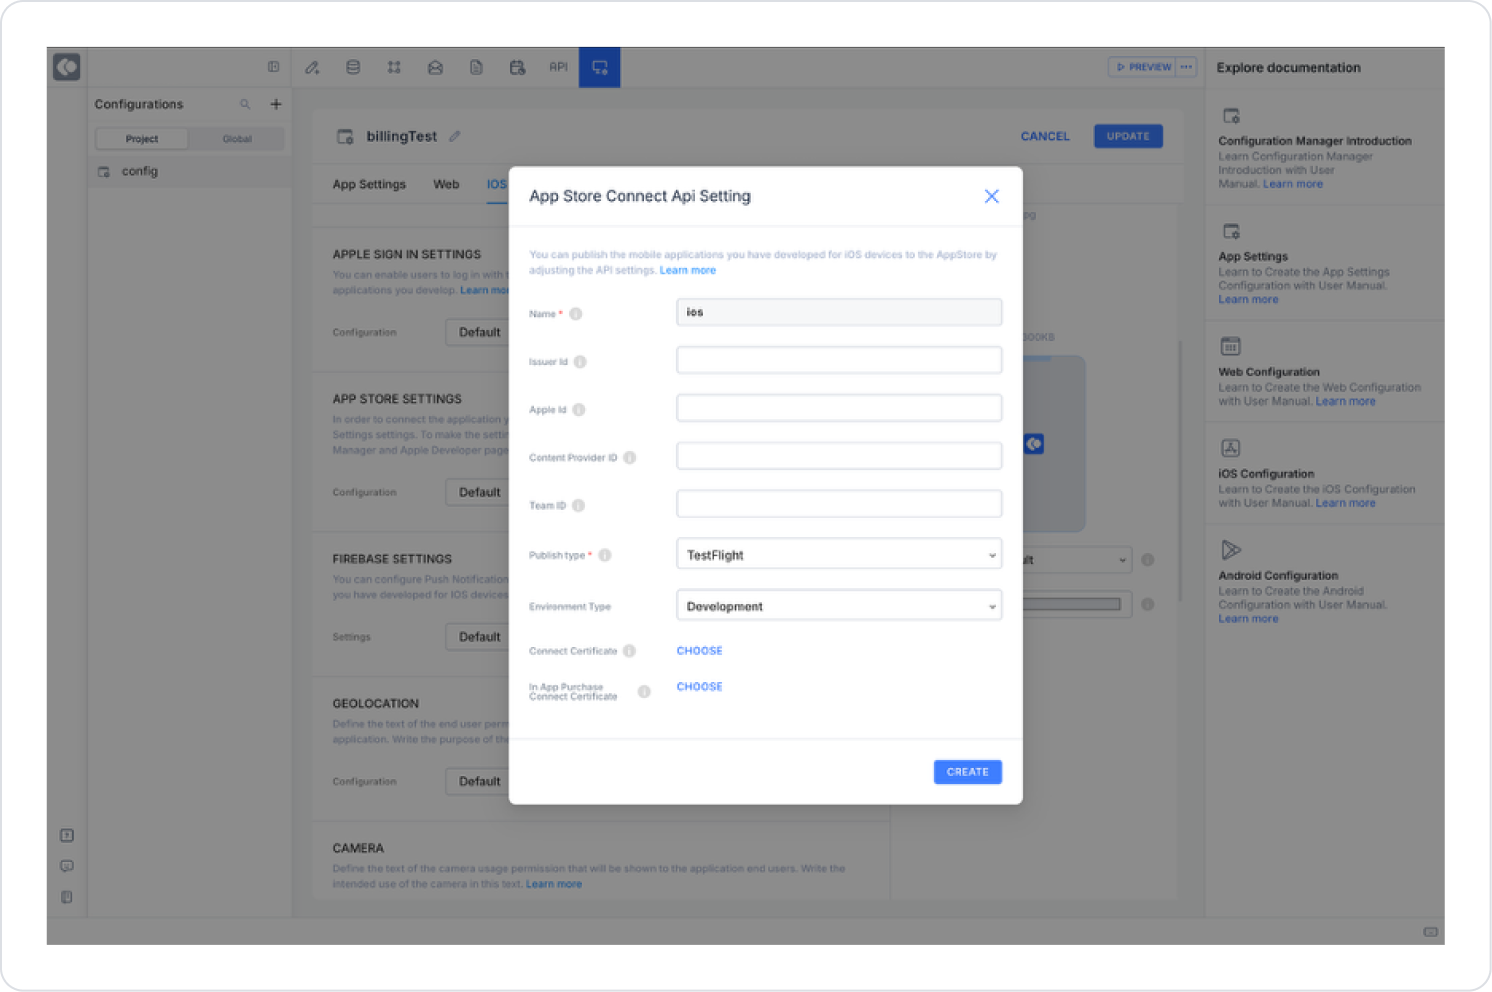
Create a new configuration under APP STORE SETTINGS.
Fill in the following fields:
Issuer Id
Apple Id
Content Provider ID
Team ID
Publish Type
Environment Type
In App Purchase Connect Certificate
After completing these steps, you can use the payment system.