REST API Settings enable your application to communicate securely and centrally with external REST services. These settings are used to define the API’s basic connection information and authentication methods.
A REST API connection is configured in two steps: first, a REST API data source is created in the Datasources module, and then a connection configuration is assigned to this data source in the Config Manager module. Configurations created in Config Manager are shared across the entire project; once created, you can reuse them for your REST, Swagger, or OData data sources.
1. Create a REST API Data Source in the Datasources Module
Log in to the Kuika platform.
Open the project you’ll be working on from the Apps screen.
Go to the Datasources module from the top menu.
Click the Create an API card.
In the list that opens, select the REST API option under the APIs & Services heading.
Click the edit (pencil) icon at the top of the screen to name the data source.
Fill in the following field in the Endpoint section:
Service base URL (required): This is the base address of the REST API (e.g., https://api.example.com/v1). Kuika sends requests by appending the endpoint paths defined in the actions you create under this data source to the end of this address.
Click the Create button in the upper-right corner. The connection is saved and the page closes.
2. Define the REST API Configuration in Config Manager
Go to the Data Source Configurations Setting
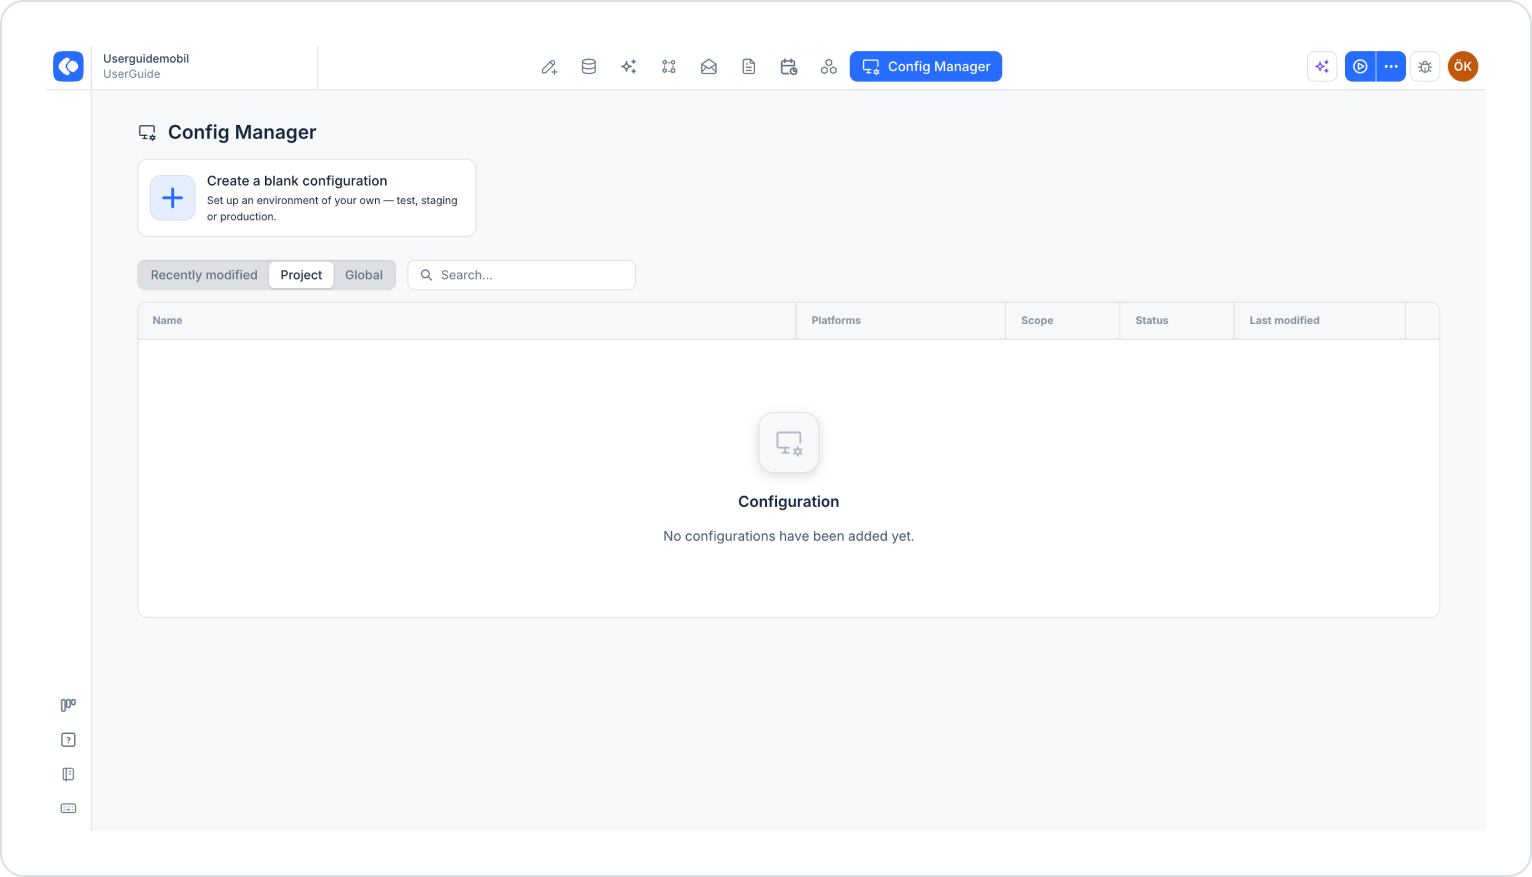
Click the Config Manager module in the top menu.
To edit an existing configuration, click its name in the list, or create a new configuration using the Create a blank configuration card.
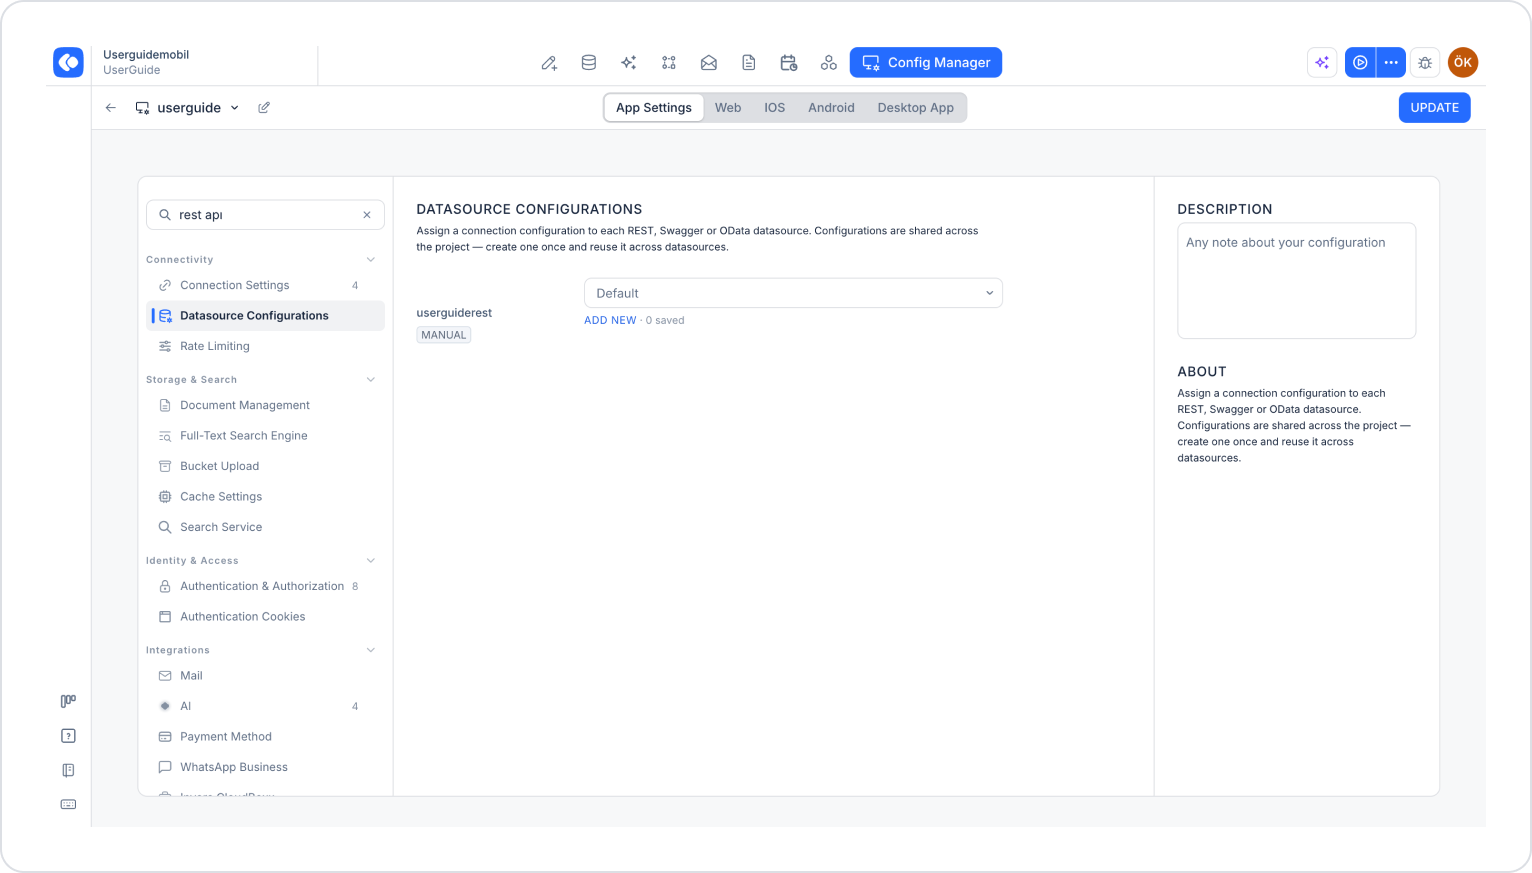
At the top of the configuration screen, make sure the App Settings tab is selected.
In the left menu, click the Datasource Configurations option under the CONNECTIVITY heading.
The REST API data source you created in the Datasources module is listed on the screen. Click the Add New link located below the field next to the data source.
Fill Out the REST API Settings Window
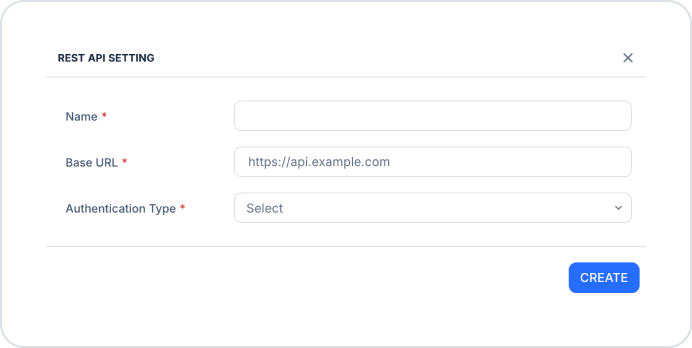
In the REST API Settings window that opens, fill out the following fields:
General Fields
Name (required): The name used to identify the REST API configuration.
Base URL (required): The base address of the API. All endpoint calls are made via this URL (e.g., https://api.example.com).
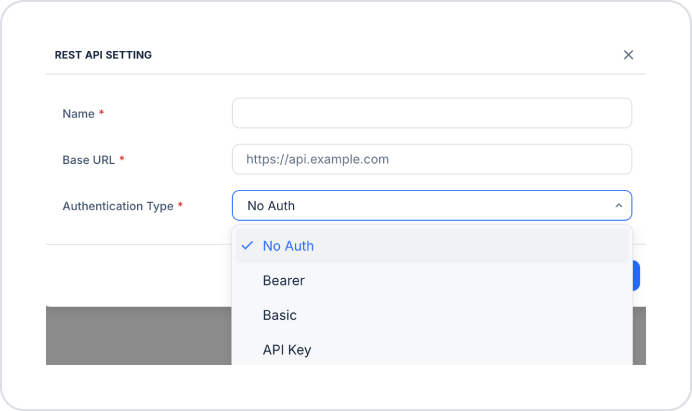
Authentication Type (required)
The REST API Settings window supports various authentication methods:
No Auth: Used for APIs that do not require authentication. When this option is selected, no additional authentication field is displayed.
Bearer: Used for APIs that require token-based authentication. Typically works with the `Authorization: Bearer <token>` header.
Basic: Used for APIs that require authentication with a username and password.
Username (required): The username used to access the API.
Password (required): The password used to access the API.
API Key: Used for services that require authentication via an API key.
Client ID Key Name: Header or parameter name (e.g., client_id).
Client ID: The client ID provided by the API.
Client Secret Key Name: Header or parameter name (e.g., client_secret).
Client Secret: The secret key provided by the API.
Save the REST API Configuration
After filling in all fields, click the Create button.
Select the configuration you created from the drop-down menu next to the data source.
Click the Save button in the upper-right corner to save the changes. (In an existing configuration, this button appears as Update.)
The saved configuration is used when the relevant REST API data source is run with this configuration.