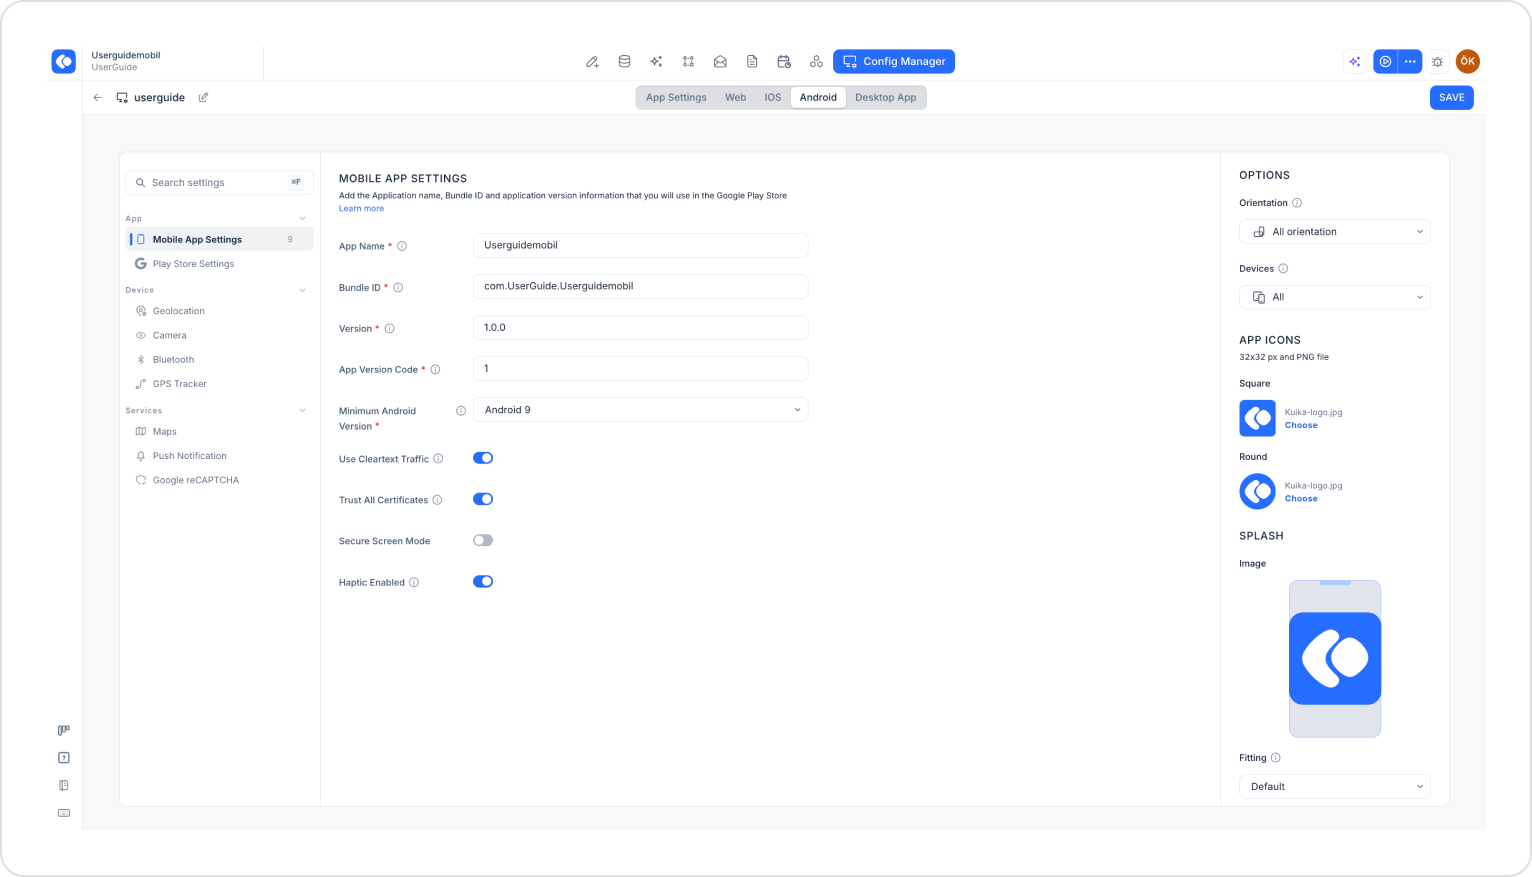
Options settings allow you to configure your mobile app’s screen orientation, supported device types, app icons, and splash (startup) screen. You can configure these settings in the Kuika Config Manager module, in the OPTIONS section located to the right of the iOS and Android tabs.
In this guide, you’ll learn step-by-step how to configure the Options settings.
How to Set Up Options Settings?
1. Open or Create a Configuration
Log in to the Kuika platform.
From the Apps screen, open the project you’ll be working on.
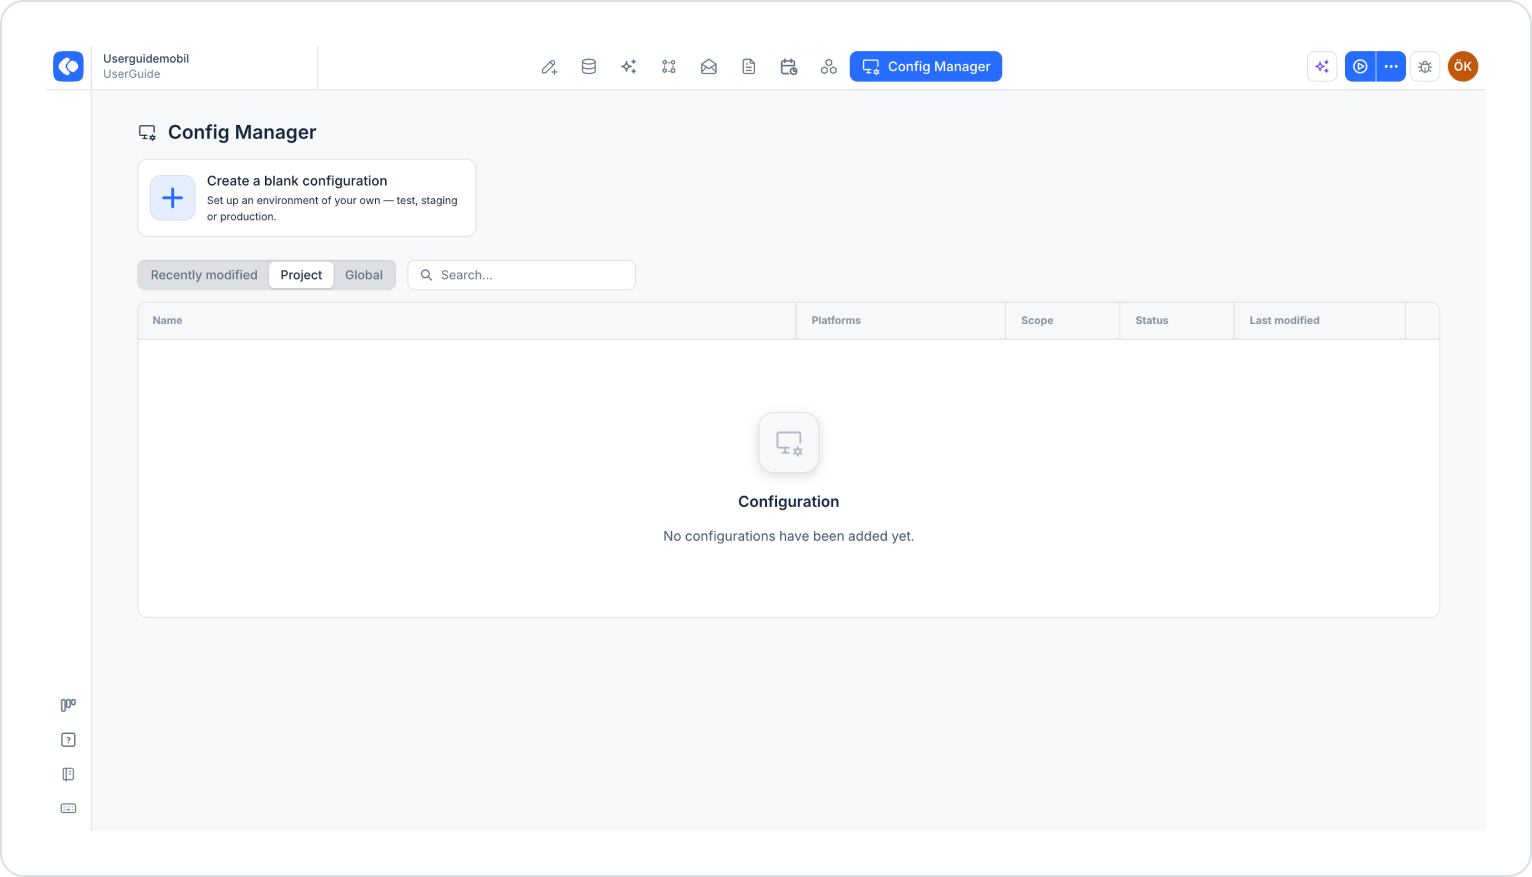
Click the Config Manager module in the top menu.
To create a new configuration, click the Create a blank configuration card, give the configuration a name, and complete the creation process. If you want to use an existing configuration, click its name in the list.
2. Go to the OPTIONS Area
From the tabs at the top of the configuration screen, select the iOS or Android tab depending on the platform you want to configure. For iOS, make sure the Support iOS UI toggle is enabled in the PLATFORM section on the right.
Locate the OPTIONS section on the right side of the screen.
The Options section is available only for mobile apps. You must configure settings for iOS and Android separately in their respective tabs.
3. Select Screen Orientation and Device Type
Orientation: Determines the screen orientation in which the app can be used. By default, All orientations is selected. From the drop-down menu, select the orientation that suits your app’s purpose (both portrait and landscape, portrait only, or landscape only).
Devices: Determines the device type on which the app will run. By default, All is selected. From the drop-down menu, select the device type that suits your target audience (phone and tablet, phone only, or tablet only).
4. Add App Icons
In the APP ICONS section, you specify the icons that will appear for your app on devices. The icon file must be 32x32 px in size and in PNG format.
Square: A square-shaped app icon. Required for all mobile apps.
Round: A round-shaped app icon. Available only in the Android tab and used on Android devices.
To add an icon, click the Choose link next to the relevant icon and upload your PNG file or select a previously uploaded image from the Media Gallery window that opens.
5. Configure the Splash Screen
In the SPLASH section, you can customize the screen displayed when the app opens:
Image: The logo or image to be displayed on the splash screen. Click the preview area and select your image from the Media Gallery window that opens. The image must be in PNG format and no larger than 300 KB.
Fitting: How the image will be positioned on the splash screen. Default is selected by default.
Color: The background color of the splash screen. Enter the Hex code for the color you want to use (e.g., #E1E5EB).
6. Save Settings
Make sure you’ve filled out all required fields completely and correctly.
Click the SAVE button in the top-right corner to save your changes.
Once you’ve completed these steps, your app’s screen orientation, device compatibility, icon, and splash screen settings will be configured.
Important Tips
Test the icons and splash image on devices with different screen sizes to ensure the image doesn’t become distorted.
Choose a splash screen background color that complements your logo and ensures it appears clearly.
Selecting “tablet only” or “phone only” support may affect which devices your app is available on in app stores. Make your selection with your target audience in mind.
By properly configuring the “Options” settings, you can provide your users with a consistent and polished app experience across all devices.