Rate Limiting helps maintain performance, security, and system stability by limiting the number of requests that can be made to your application within a specific time period. With this setting, you can control excessive requests from the same IP address or the same client and protect your application against overload and abuse.
In this guide, you’ll learn step-by-step how to configure Rate Limiting settings through the Kuika Config Manager module.
How to Set Up Rate Limiting?
1. Open or Create a Configuration
Log in to the Kuika platform.
From the Apps screen, open the project you’ll be working on.
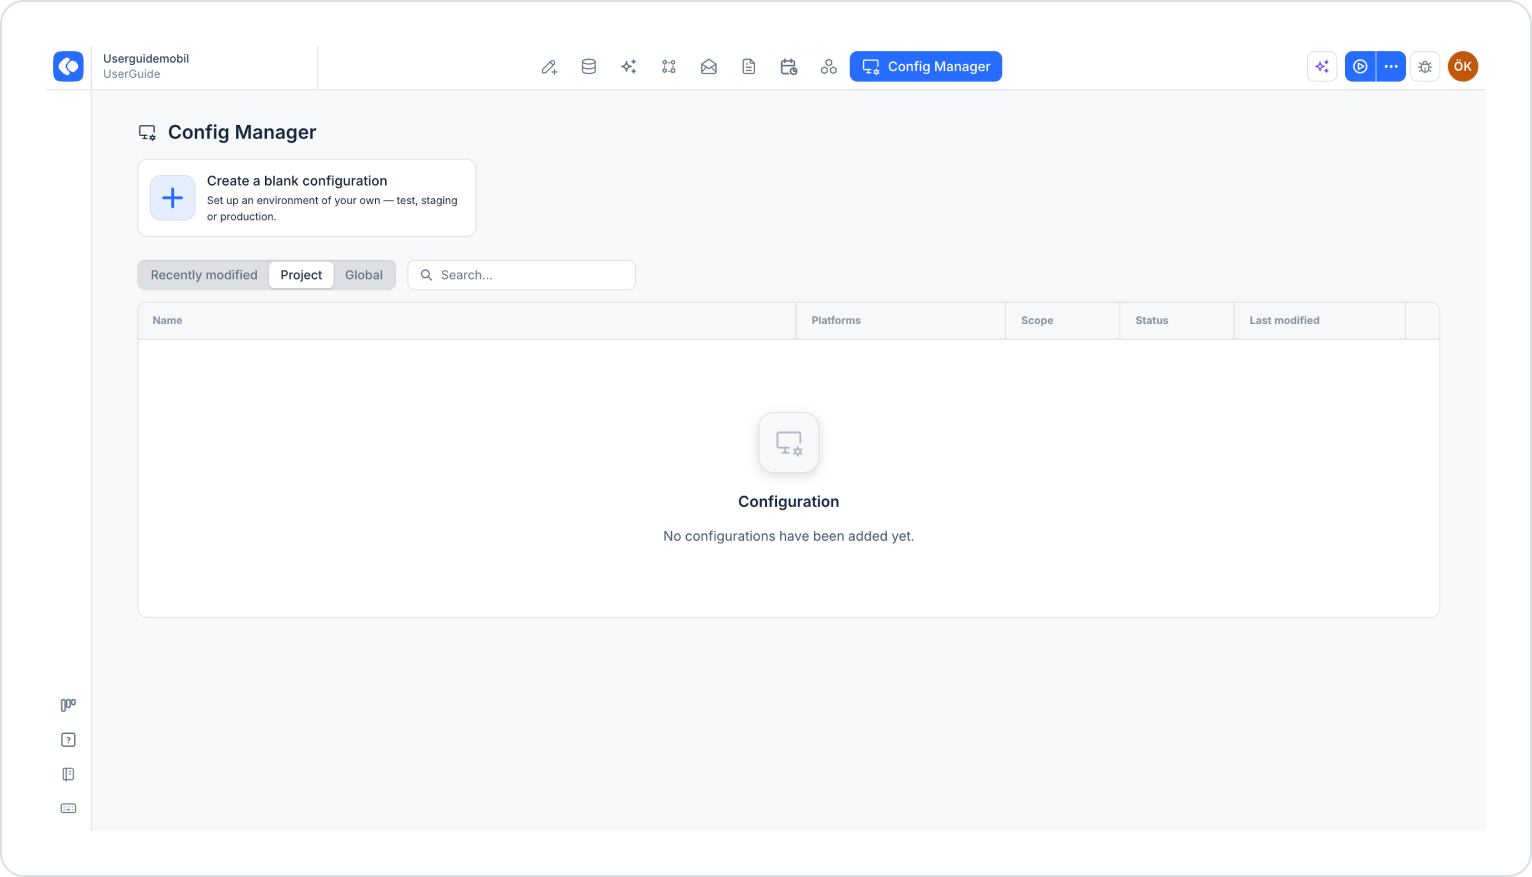
Click the Config Manager module in the top menu.
To create a new configuration, click the Create a blank configuration card, give the configuration a name, and complete the creation process. If you want to use an existing configuration, click its name in the list.
2. Go to the Rate Limiting Settings
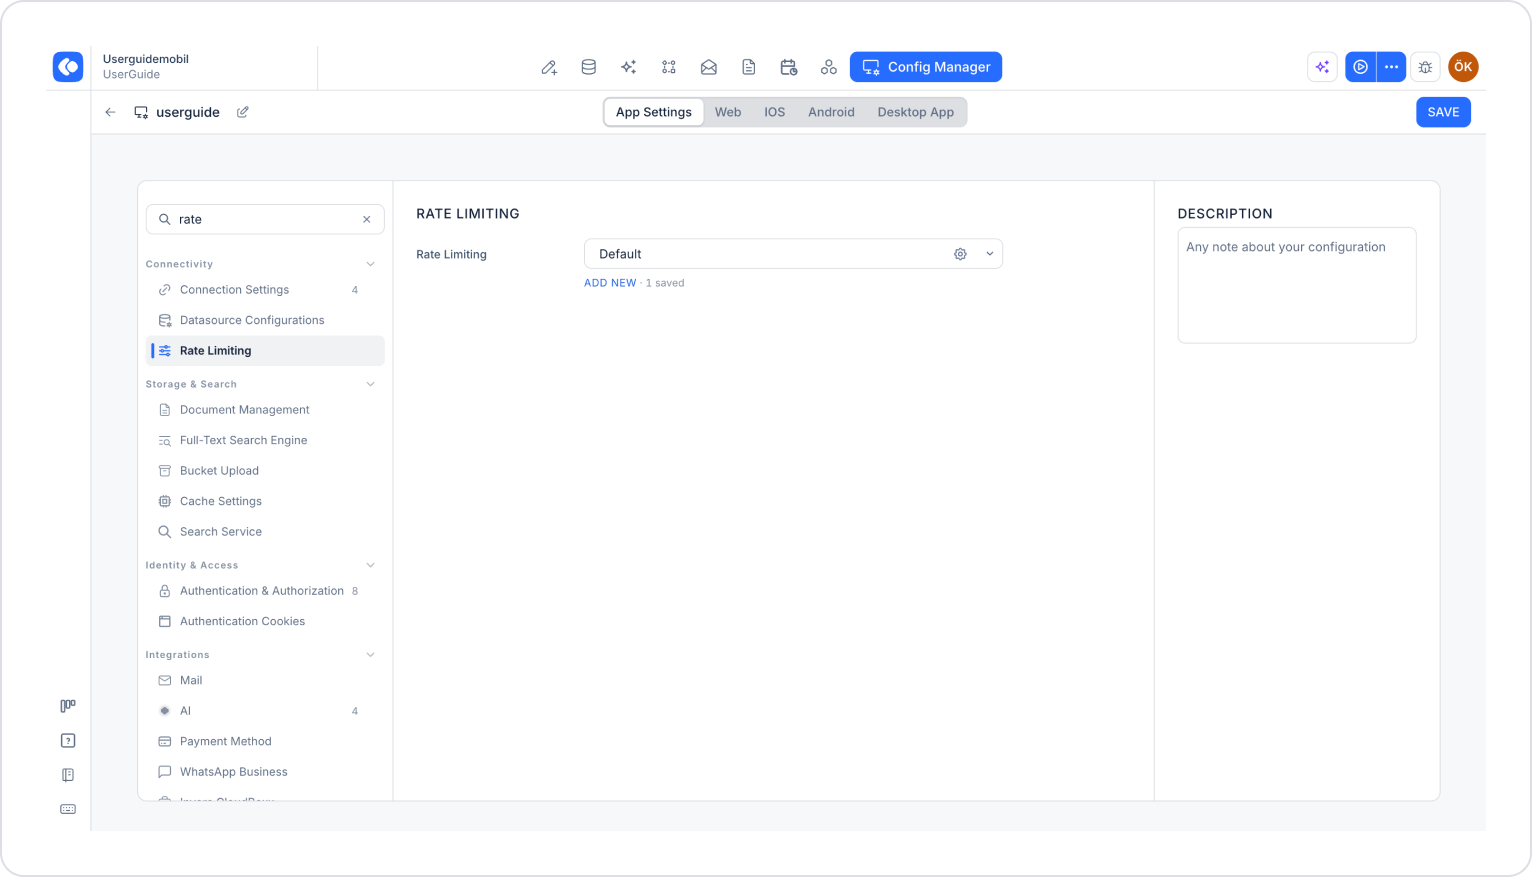
Make sure the App Settings tab is selected at the top of the configuration screen.
In the left menu, click the Rate Limiting option under the Connectivity heading. You can also quickly access this setting by typing “rate” into the Search settings field at the top of the menu.
In the Rate Limiting section, the Default configuration is selected by default. To create a new configuration, click the ADD NEW link below the dropdown menu.
3. Fill Out the Rate Limiting Settings Window
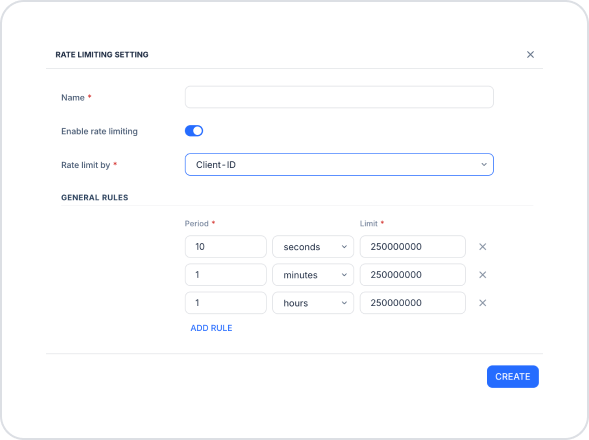
In the Rate Limiting Setting window that opens, fill out the following fields:
Name (required): A descriptive name for the configuration.
Enable rate limiting: Enables or disables rate limiting rules. When this toggle is off, the other fields in the window are disabled, and the rules are not applied.
Rate limit by (required): Determines the criteria by which requests are counted. By default, Client-ID is selected.
IP: Requests are counted and limited based on the client’s IP address.
Client-ID: Requests are counted and limited based on the client ID.
General Rules
In the GENERAL RULES section, you define the maximum number of requests allowed for specific time intervals. The window opens with three default rules: 10 seconds, 1 minute, and 1 hour. Each rule consists of two fields:
Period (required): The time interval over which requests are counted. Enter a number and select the unit from the drop-down menu next to it (seconds, minutes, or hours).
Limit (required): The maximum number of requests that can be made within the specified time interval.
You can define separate limits for different time intervals by creating multiple rules. To add a new rule, click the ADD RULE link; to delete a rule, click the X icon at the end of the row.
After entering the information, click the CREATE button to create the configuration.
4. Save the Settings
Select the configuration you created from the Rate Limiting dropdown menu.
Make sure you have filled out all required fields completely and correctly.
Click the SAVE button in the upper-right corner to save the changes.
Once you’ve completed these steps, requests to your application will be limited according to the rules you’ve defined.
Important Tips
Setting limits too low can result in normal users being blocked as well. Set limits gradually, taking your application’s actual traffic data into account.
Define rules for both short- and long-term time intervals. Short-term rules limit sudden spikes in requests, while long-term rules limit consistently high traffic.
Since configurations represent environments, you can define different limits for test, staging, and production environments. Test the limits in the test environment before moving to production.
In situations where many users connect through the same network (e.g., corporate networks), IP-based throttling may count different users as the same client. In such cases, choose the Client-ID option.
By properly configuring Rate Limiting settings, you can protect your application’s performance and security and ensure balanced traffic management.