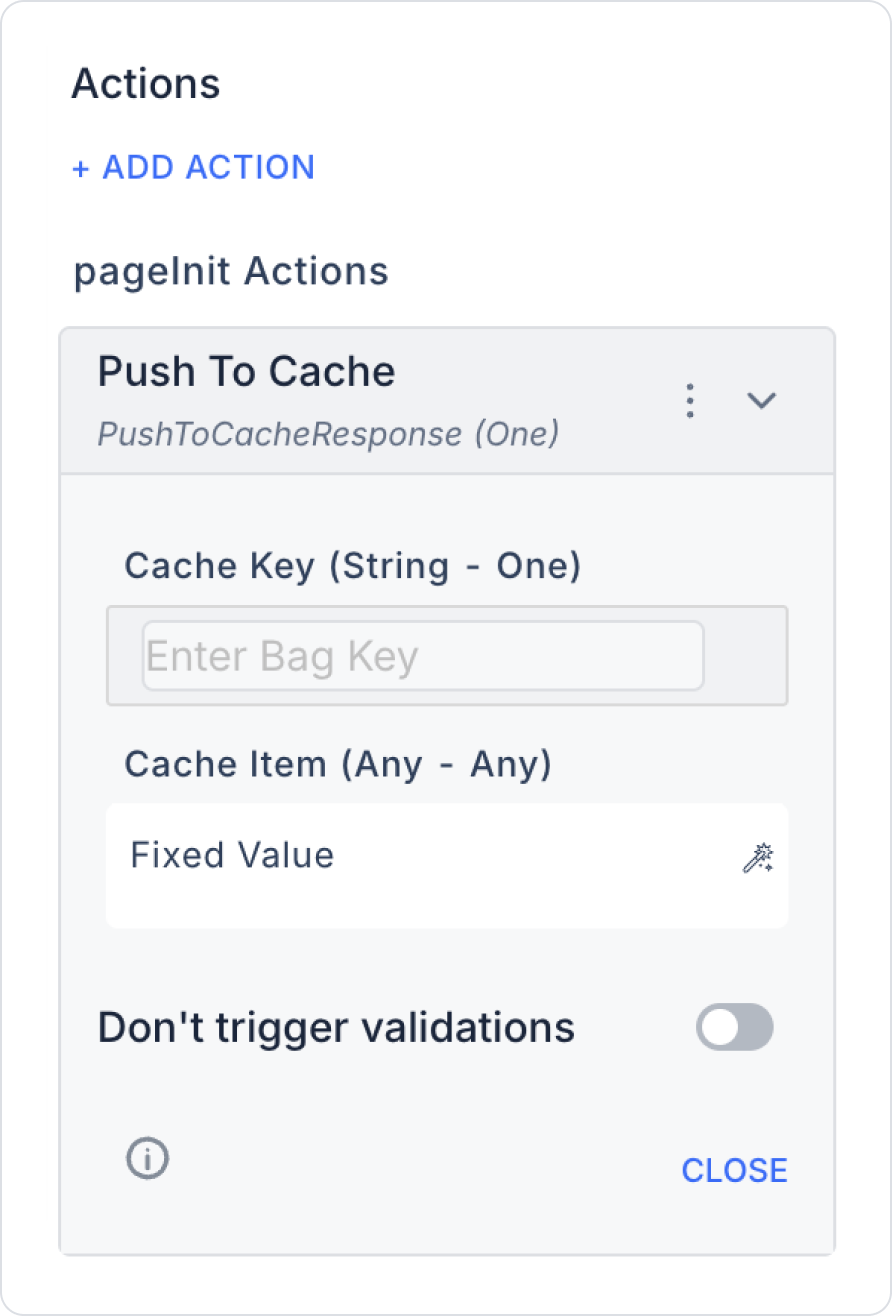
Push To Cache Action Steps
- Action Definition
- Open your project on the Kuika platform.
- Click the Add Action button on the right side and select the Push To Cache action.
- Specify Cache Key
- Assign a unique key to the data you want to add to the cache.
- Example: user_123_profile
- Specify Cache Item
- Define the data to be saved. This data can be in string format or a JSON object.
- Example: { “name”: ‘Joe’, “age”: 26 }
- Selecting the Cache Provider
- Go to the Configuration Manager module.
- Then click the Configuration button in the Cache Settings area.
- You can configure the following settings in the pop-up window that appears:
- InMemory: Default option. Values are stored while the application is running and are deleted when it is restarted.
- Redis: Users can add their own Redis connection string. Example: localhost:6379.
- Mongo / SQL: Configured via connection string.
- Executing and Testing the Action
- Run the action in Preview mode.
- Verify that the cache key and item are saved correctly.
- If you are using Redis, you can view the cache via the terminal with redis-cli -h localhost -p 6379.
Important Points
- If Push To Cache is run again with the same Cache Key, the previous value will be overwritten.
- The key created with Push To Cache can be selected from the menu in other cache actions (Fetch From Cache, Remove From Cache, Check Key Existence).
- When InMemory is selected, the values are deleted when the application is closed.