User Manual

Push To Cache

Push To Cache

Push To Cache allows you to add the result of any Action on the Kuika platform to the Cache at T1. This way, data can be easily retrieved at T2, improving application performance. Supported cache providers are Redis and Memory, each of which is managed through the Configuration Manager.

This action can be used in both web and mobile applications. For Redis usage, users can provide their own connection strings and perform cache operations through their own instances. When InMemory is selected, values are deleted when the application is closed.

Push To Cache Action Steps

  1. Action Definition
    • Open your project on the Kuika platform.
  • Click the Add Action button on the right side and select the Push To Cache action.
  1. Specify Cache Key
  • Assign a unique key to the data you want to add to the cache.
  • Example: user_123_profile
  1. Specify Cache Item
    • Define the data to be saved. This data can be in string format or a JSON object.
    • Example: { “name”: ‘Joe’, “age”: 26 }
  2. Selecting the Cache Provider
    • Go to the Configuration Manager module.
    • Then click the Configuration button in the Cache Settings area.
    • You can configure the following settings in the pop-up window that appears:
      • InMemory: Default option. Values are stored while the application is running and are deleted when it is restarted.
      • Redis: Users can add their own Redis connection string. Example: localhost:6379.
      • Mongo / SQL: Configured via connection string.
  3. Executing and Testing the Action
    • Run the action in Preview mode.
    • Verify that the cache key and item are saved correctly.
    • If you are using Redis, you can view the cache via the terminal with redis-cli -h localhost -p 6379.

Important Points

  • If Push To Cache is run again with the same Cache Key, the previous value will be overwritten.
  • The key created with Push To Cache can be selected from the menu in other cache actions (Fetch From Cache, Remove From Cache, Check Key Existence).
  • When InMemory is selected, the values are deleted when the application is closed.

Push To Cache Usage Scenario: Quick Access to E-Commerce Product Filters

In an e-commerce application, the user selects product filters, and these filter results will be used again in the next step or on another page. With the Push To Cache action, these filters are saved to the cache, so even if the user changes the page or closes the application for a short time, the data can be retrieved quickly.

Step-by-Step Usage

  1. User Filter Selection
    • The user selects filters such as brand, color, and price range on the product list page.
    • Sample data: { “brand”: “Nike”, “color”: “Red”, ‘priceRange’: “500-1000” }
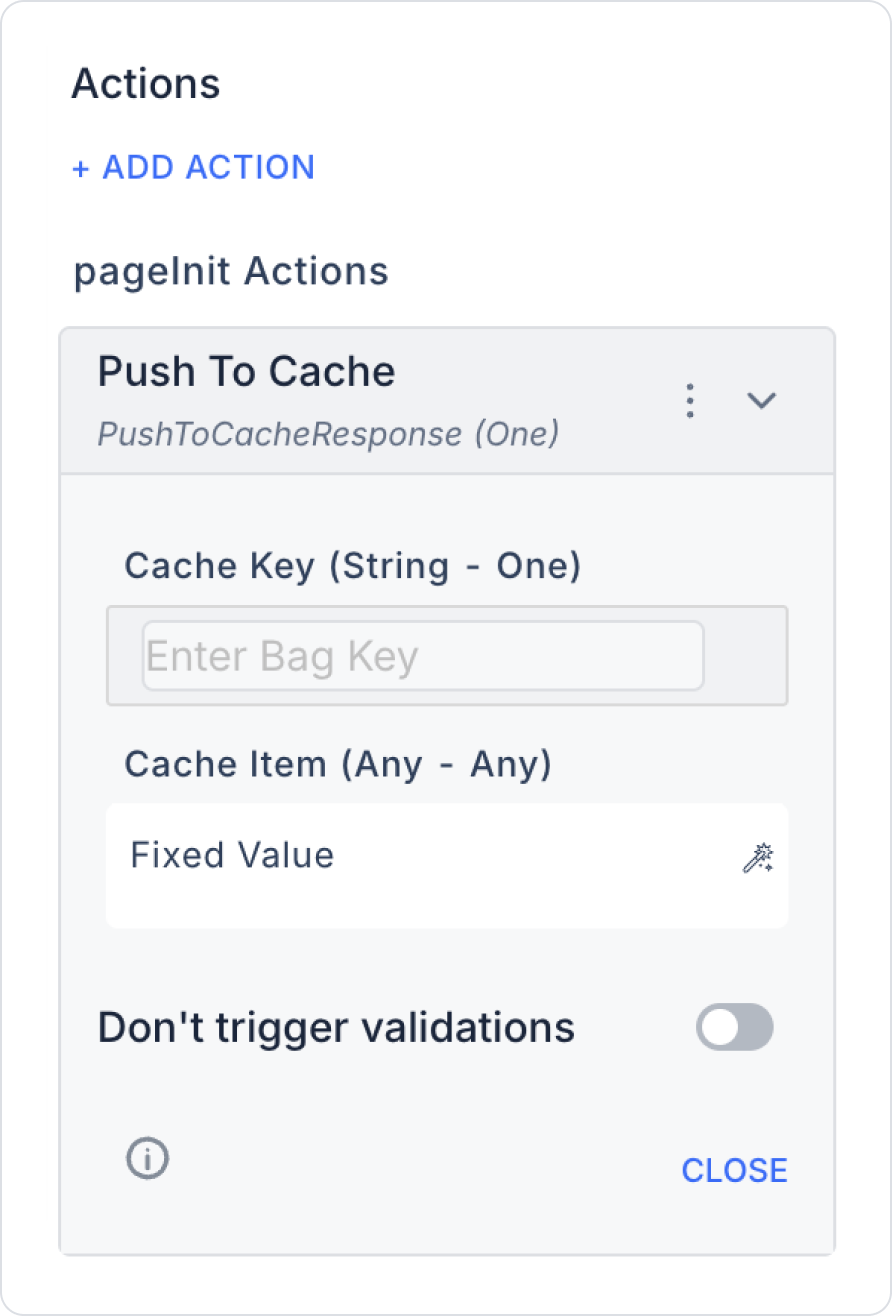
  2. Executing the Push To Cache Action
    • When the user applies the filters, they click the “Apply Filters” button.
    • The Push To Cache action is added to this button as an OnClick action.
    • Parameters:
      • Cache Key: user_123_filters
      • Cache Item: Filter data { “brand”: “Nike”, “color”: “Red”, ‘priceRange’: “500-1000” }
  3. Cache Provider Selection
    • Redis was selected for the web application. The user connected their own Redis instance from the configuration manager.
    • InMemory was selected for the mobile application; data will be deleted when the application is closed.
  4. Data Saving
    • The Push To Cache action saves the filters to the selected cache provider.
    • If the key has been added before, the previous value is overridden with the new data.
  5. Use in Other Actions
    • The product listing page retrieves the data using Fetch From Cache on the next page or in the filter summary panel.
    • Example: When the user clicks the “Saved Filters” button, the user_123_filters key in the cache is read and the filters are populated into the form fields.
  6. Testing and Validation
    • Web: Verify the cache using the KEYS * and GET user_123_filters commands in the Redis CLI.
    • Mobile: Can be tested in InMemory cache preview mode; verify that values are lost when the application is closed.

Push To Cache Action Advanced Customizations

  • Conditional Push: Data can be added to the cache based on specific user roles or screen states.
  • Expiration Dynamics: The expiration time can be determined based on user login or action result.
  • Data Format Control: Data can be stored as JSON, String, or Number types, and type validation can be performed when retrieved.

Technical Risks

  • Repeated Key Usage: If multiple data items are pushed with the same key, the previous value will be overwritten. Important data may be lost.
  • Connection String Errors: If the Redis, Mongo, or SQL connection string is entered incorrectly, the action will fail.
  • Memory Exhaustion: If large data sets are pushed to InMemory or Redis, application performance may decrease or the system may crash.
  • Expiration Time Errors: Data may be deleted early or kept unnecessarily for a long time due to incorrectly set expiration times.
  • Type Mismatch: If the data type of the cache item does not match the data type used in downstream actions, unexpected errors may occur.
  • Beta Risks: Some Redis behaviors may differ in preview and test environments.

Other Related Content

No items found.

Glossary

No items found.

Alt Başlıklar