Integrate WhatsApp Business via Kuika Configuration Manager
Log in to the Kuika platform.
Open your project from the Apps screen.
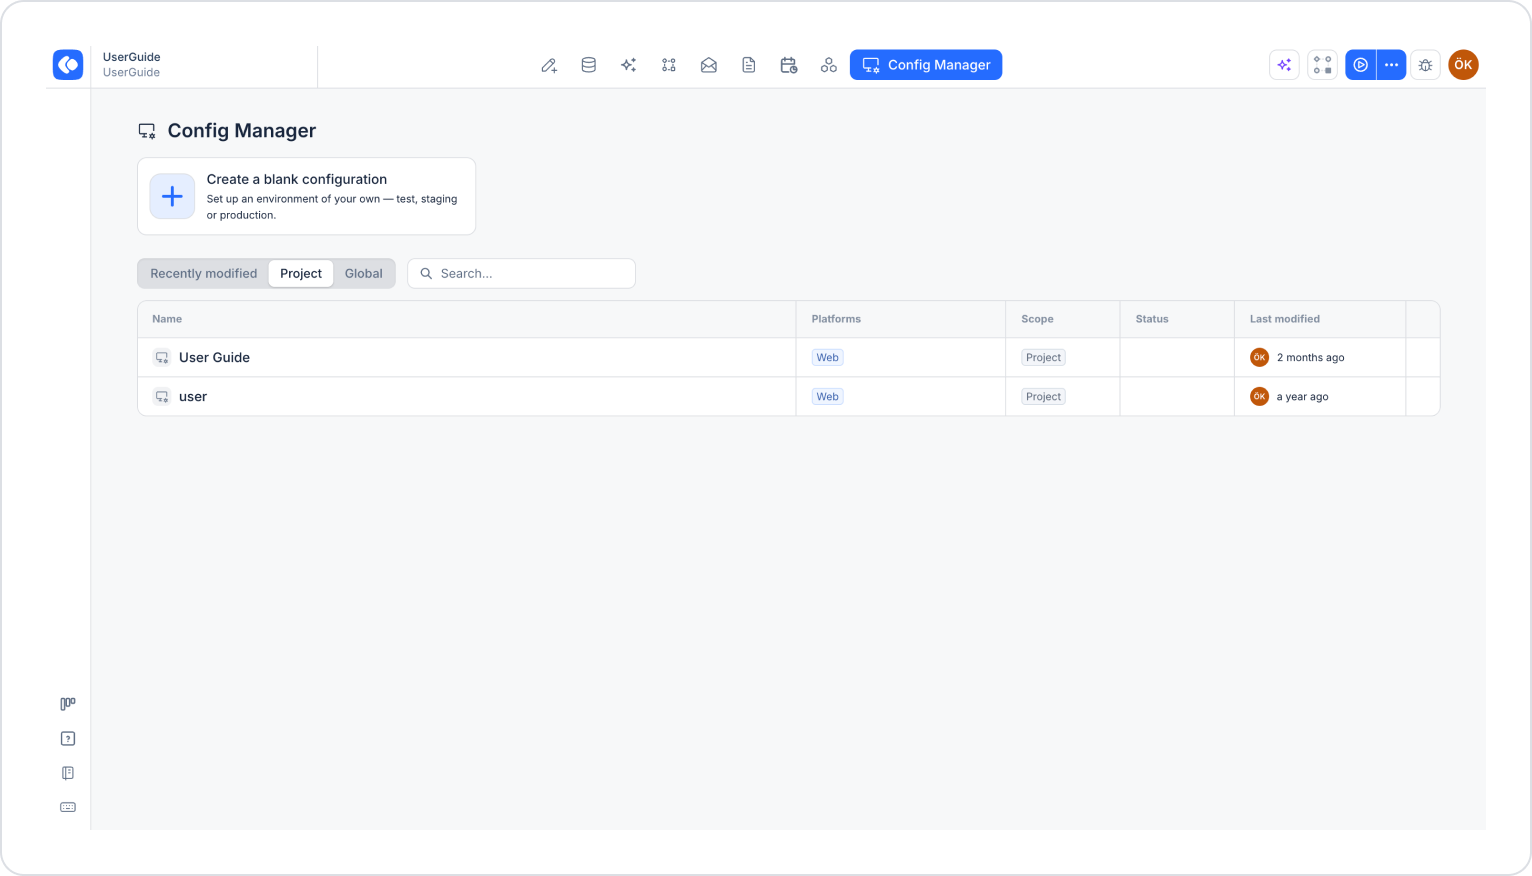
Click the Config Manager module in the top menu.
To create a new configuration, click the Create a blank configuration card, give the configuration a name, and complete the creation process. If you want to use an existing configuration, click its name in the list.
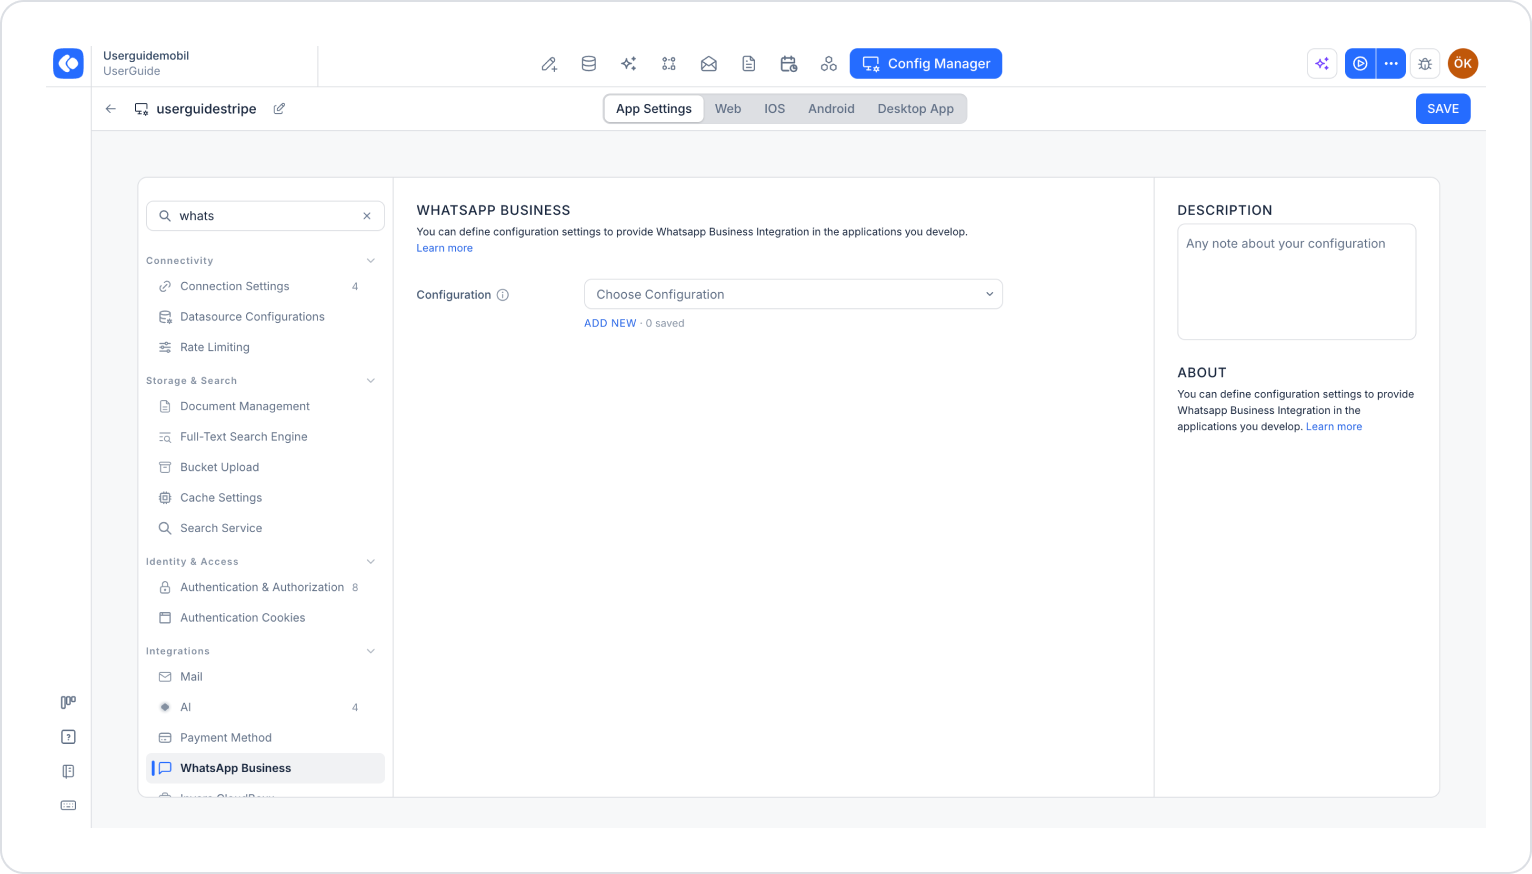
Make sure the App Settings tab is selected at the top of the configuration screen.
In the left menu, click the WhatsApp Business option under the Integrations heading. You can also quickly access this setting by typing “whatsapp” into the Search settings field at the top of the menu.
Click the ADD NEW link under the Configuration section.
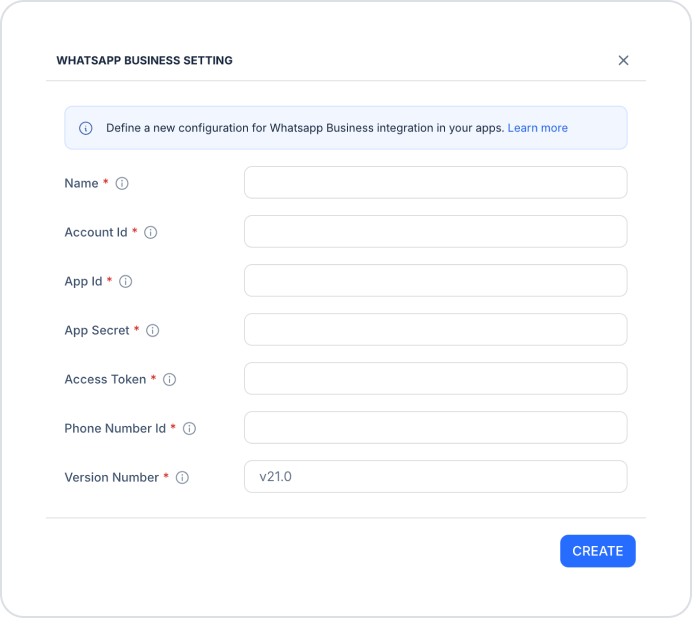
In the WhatsApp Business Settings window that opens, fill in the following fields (all fields are required):
Name: The descriptive name to assign to the configuration.
Account Id
App Id
App Secret
Access Token
Phone Number Id
Version Number: The WhatsApp API version to be used. The default value is v21.0.
After filling in all fields, click the CREATE button.
Select the configuration you created from the Configuration dropdown menu.
Click the SAVE button in the top-right corner to complete the process. (In an existing configuration, this button appears as UPDATE.)