Go to the UI Design module and select the relevant screen.
Create a button (e.g., “Delegate Permission”).
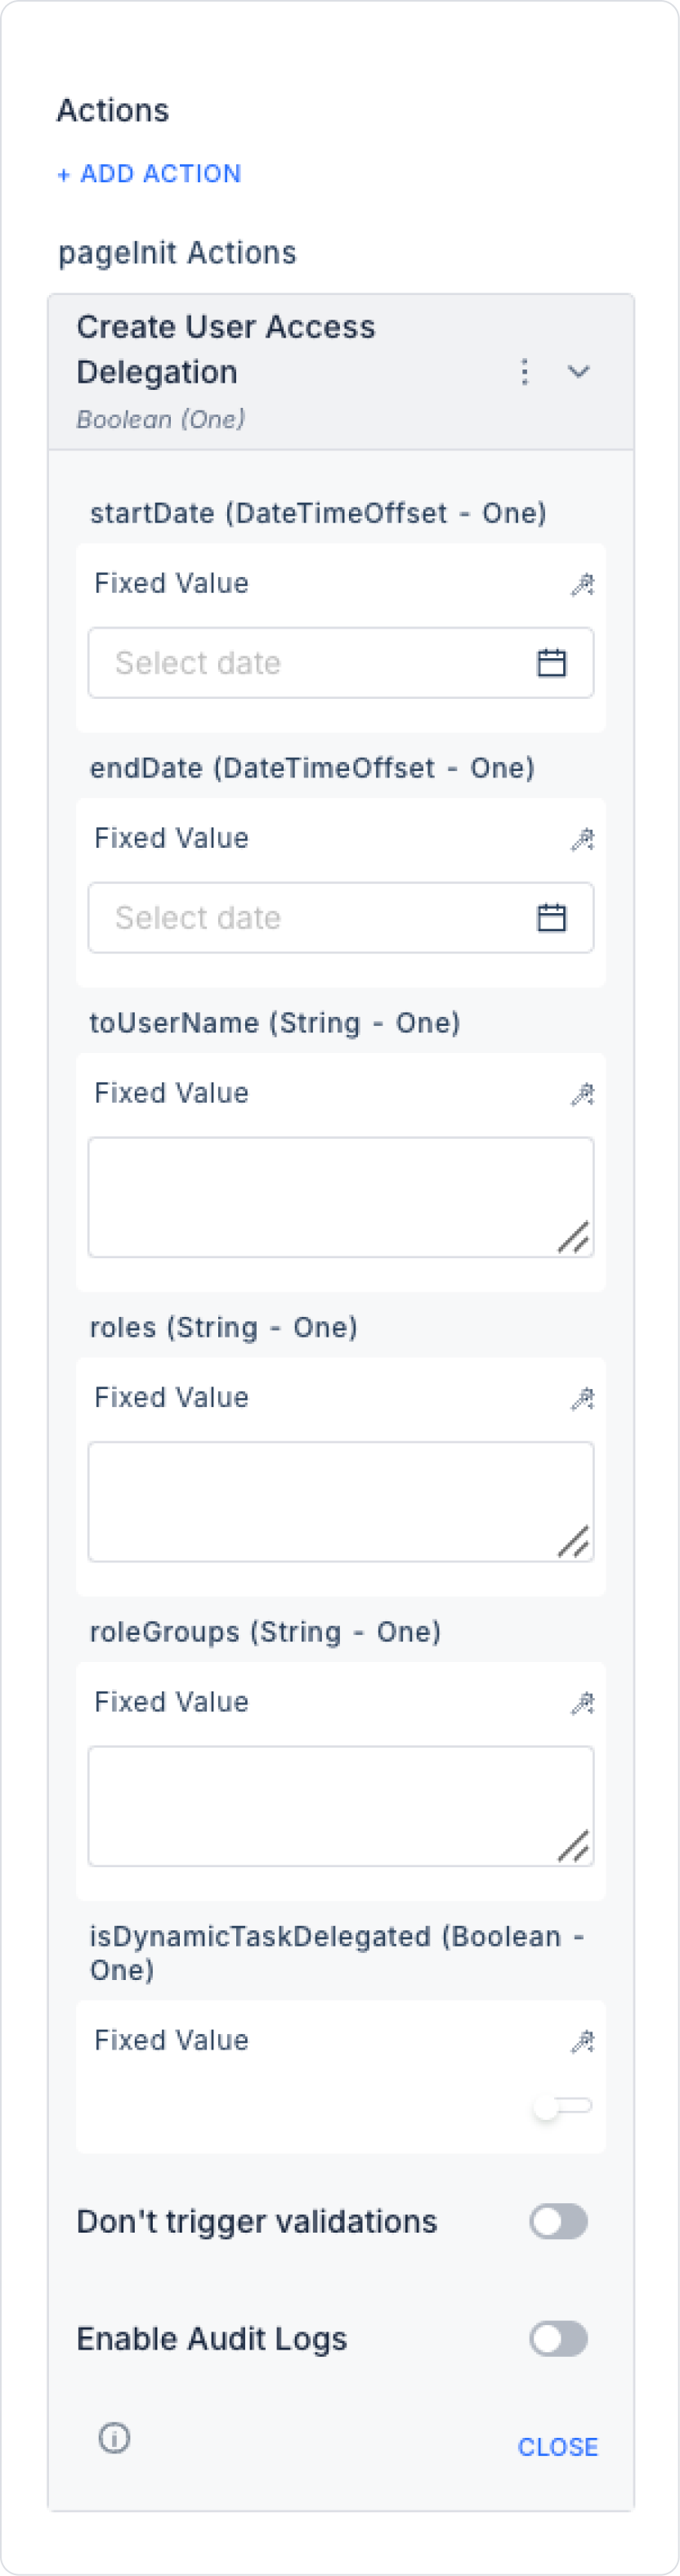
+ ADD ACTION menu, add the Authorization > Create User Access Delegation action according to the desired trigger event (Initial Actions, OnClick, OnBlur, etc.).
Define the following parameters using the Symbol Picker:
StartDate (DateTime - required): The start date of the delegation.
EndDate (DateTime - required): The end date of the delegation.
ToUserName (String - required): The email address of the user who will temporarily take over the role.
Roles (String[] - required): The list of roles to be delegated. Multiple roles can be assigned.
Is Dynamic Task Delegated: When enabled, newly created tasks (dynamic tasks) during the delegation period are also assigned to the delegated user. When disabled, only tasks existing at the time of delegation are included. It is particularly preferred in process-based workflows and applications with high User Task intensity.
Role Groups: Specifies the role groups to be delegated. When this field is used, all roles associated with the selected role groups are automatically included in the delegation. It enables group-based rather than role-based delegation and simplifies configuration in complex scenarios.
Enable Audit Logs: When enabled, user delegation operations are added to audit log records. This allows the system to track who created the delegation, to which user, with which roles or role groups, and within which date range.