
Used for services that do not require authentication. No additional configuration is required; if you wish, you can define additional fields using the Custom row in the header table (see odata4.png).
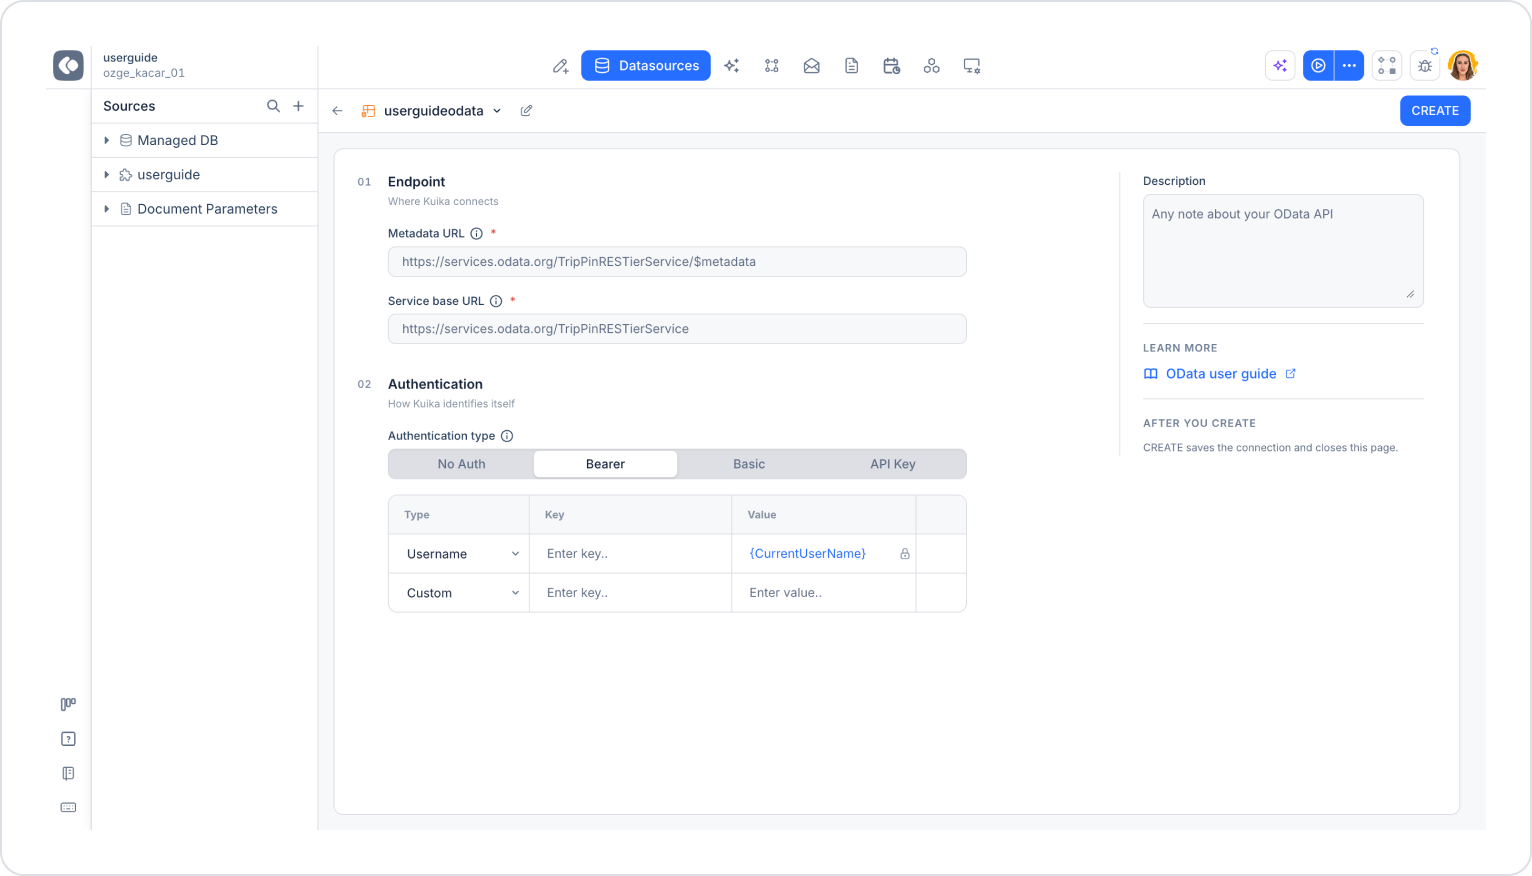
This is a token-based authentication method. The token is sent in the request header as follows:
Authorization: Bearer YOUR_ACCESS_TOKEN
When Bearer is selected, a row of type Username is automatically added to the header table. The value of this row is fixed as {CurrentUserName} and represents the name of the user logged into the application; you can enter the header name to which this value will be sent in the Key field.
If the token is obtained using a username and password, a “login” process must be performed first, and then the operation must continue using the obtained token.
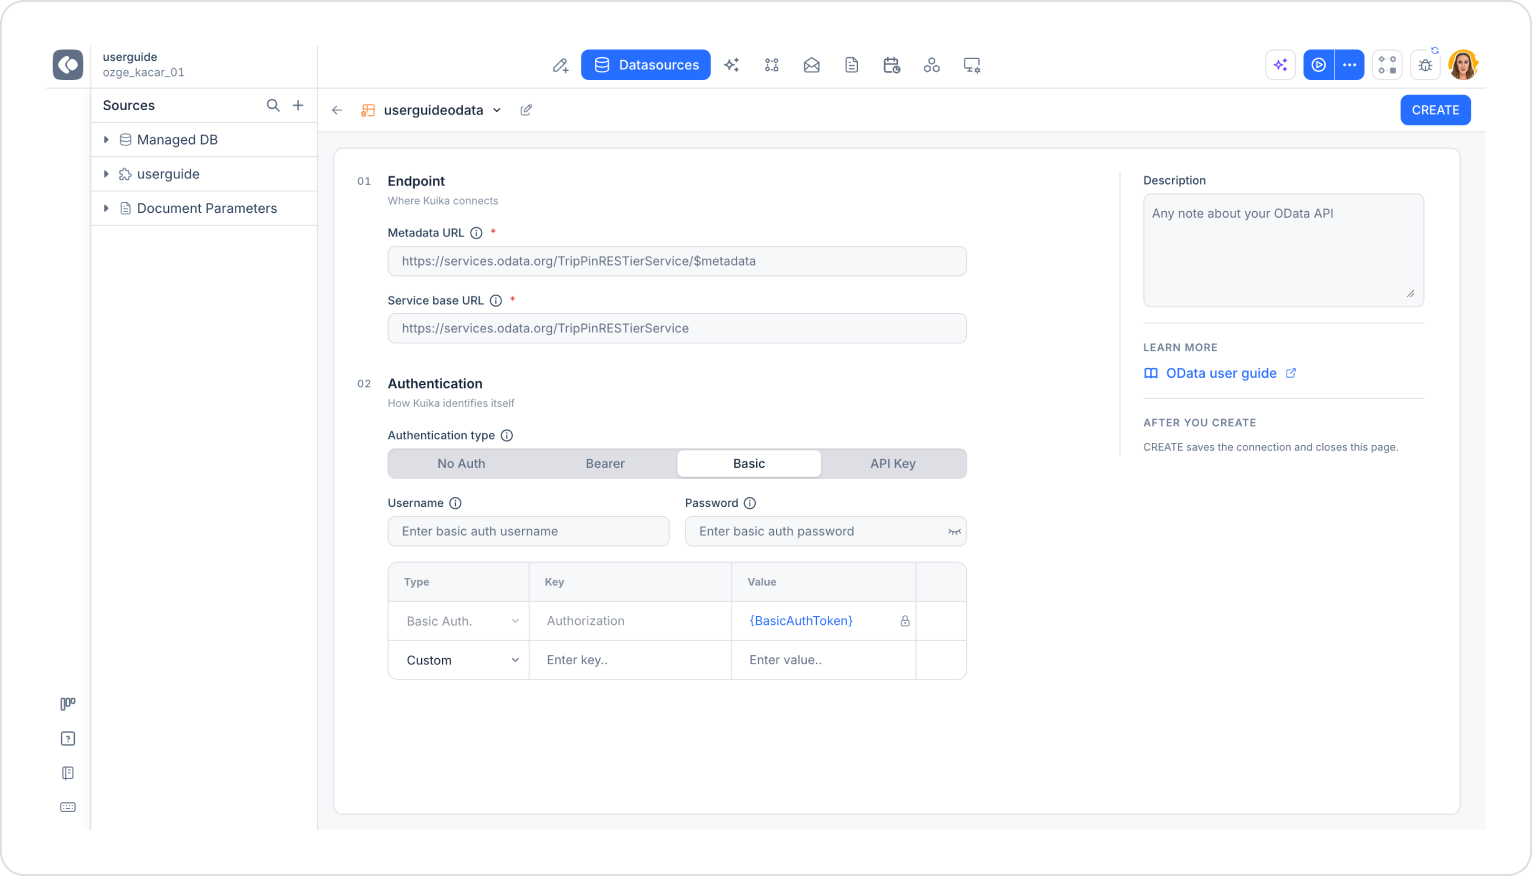
Authentication is performed using a username and password.
When Basic is selected, a row of type Basic Auth., with the Authorization key and the value {BasicAuthToken}, is automatically added to the header table. This row is locked and sends the token generated from the information you entered as follows:
Authorization: Basic base64(username:password)
If you wish, you can add custom parameters using Custom rows.
An API key and, if required, a secret key are used to access the API. This information is typically provided by the API provider.
If you wish, you can define additional fields using the Custom rows in the header table.
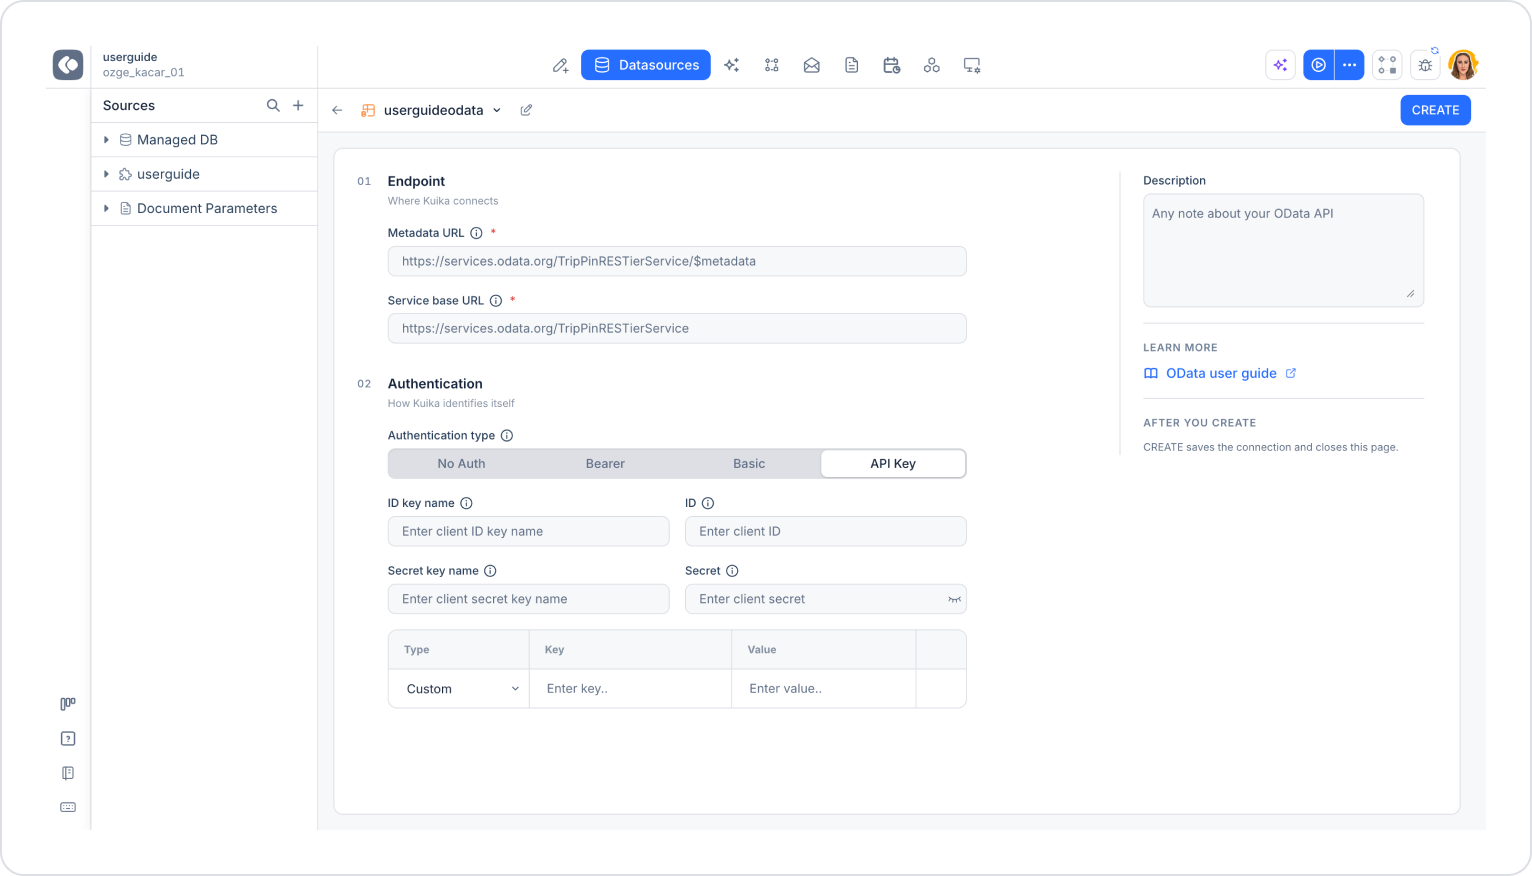
These values are sent as headers or query parameters depending on the API provider:
Depending on the API provider’s documentation, these values may have different names. In Kuika, you can complete the integration by defining these values with the correct header names.
By following these steps, you can easily integrate the OData API data source into your Kuika applications.
