Create a configuration using the Configuration Manager module.
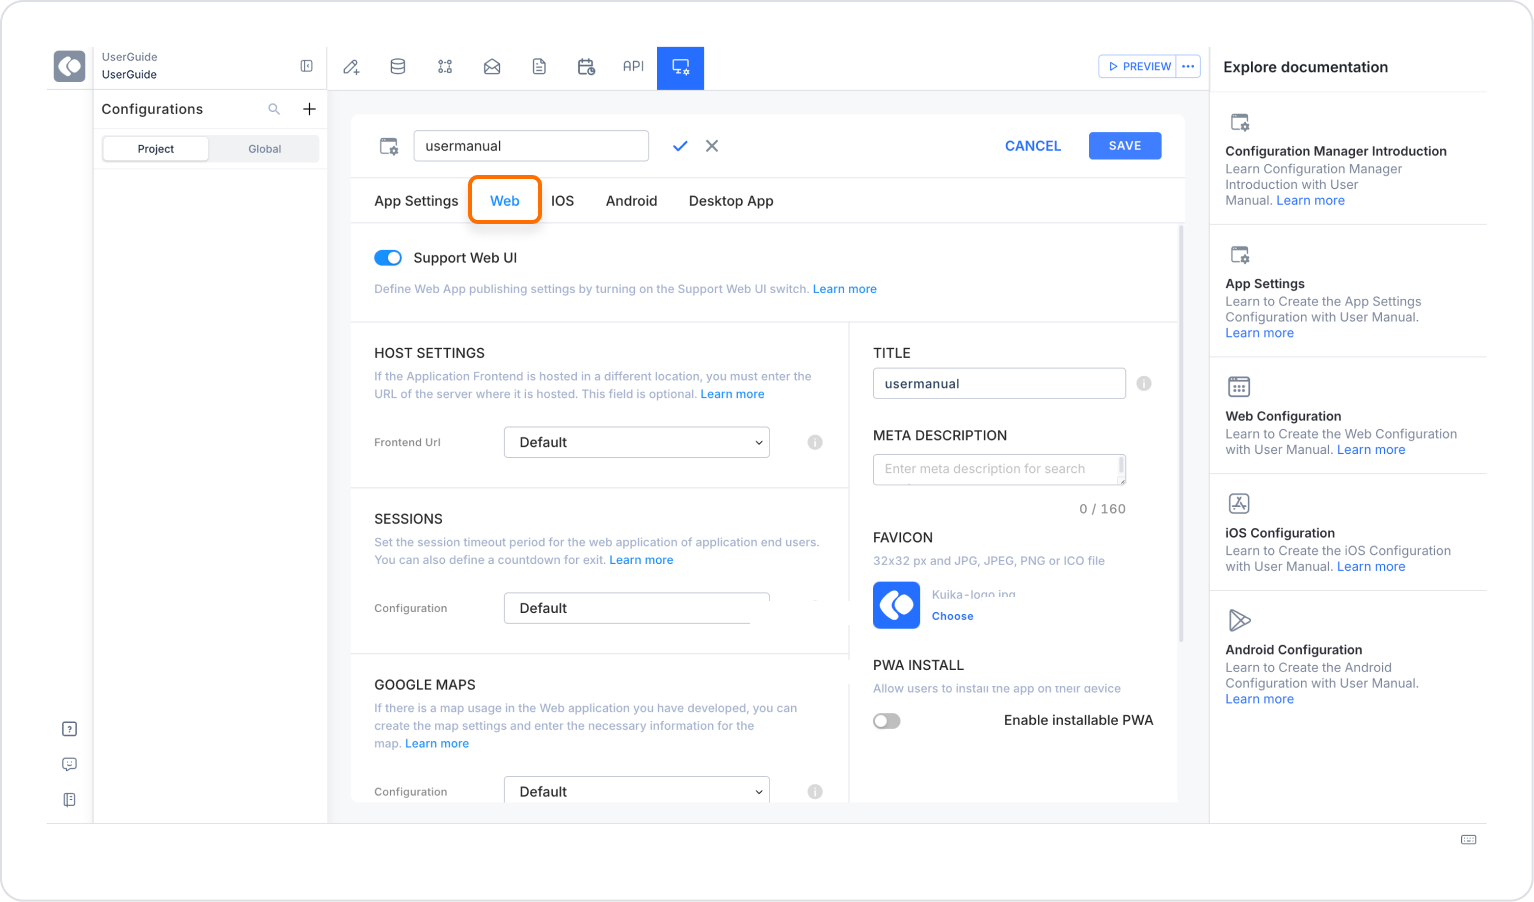
From the App Settings modal, click the Web tab.
Configure fields such as Host Settings, Sessions and Google Maps.
HOST SETTINGS: Determines how a service or app will run and interact with other devices.
SESSIONS: Allows you to set the session timeout period of the web app for the end users of your app.
GOOGLE MAPS: If a web application you have developed uses maps, you can create map settings and enter the necessary information for the map.
Title: The title displayed in the browser tab.
Meta Description: The description used in SEO and social sharing previews.
Favicon: The application icon displayed in browser tabs and bookmarks.
PWA Install: When enabled, the application can be installed as a Progressive Web App.
Save your settings by clicking the SAVE button.
Configure Your iOS Applications
Create a configuration using the Configuration Manager module.
From the App Settings modal, click the iOS tab.
Configure settings such as Mobile App Settings, Apple Sign In, App Store Settings.
MOBILE APP SETTINGS: This is the area where you will enter the application name, Bundle ID and application version information that you will use in the Apple App Store.
APPLE SIGN IN SETTINGS: You can sign in with your Apple accounts by making configuration settings in the applications you develop.
APP STORE SETTINGS: You can make App Store settings to connect the application you developed with AppMachine.
FIREBASE SETTINGS: You can integrate the services and features offered by the Firebase platform into your application.
GEOLOCATION: You can define the location information permission you will use in your app.
CAMERA: You can define the camera usage permission text to be shown to end users.
BLUETOOTH: You can define the Bluetooth permission text to be shown to end users.
PUSH NOTIFICATIONS: You can define the permission text to be shown to end users to send push notifications.
GPS TRACKER: You can set the GPS tracking function you use in your application.
Options:
Orientation: Determines the screen orientation of the application. All orientation, landscape, and portrait options are available.
Devices: Determines the device types on which the application will run. All, phones, and tablet options are available.
APP Icon: The main icon image for the application.
Splash:
Image: The image to be displayed when the application opens.
Fitting: Determines how the image used in the Splash Screen will be adapted to the screen size. The options available are Default and Stretch.
Color: The background color to be used in the Splash screen.
Save your settings by clicking the SAVE button.
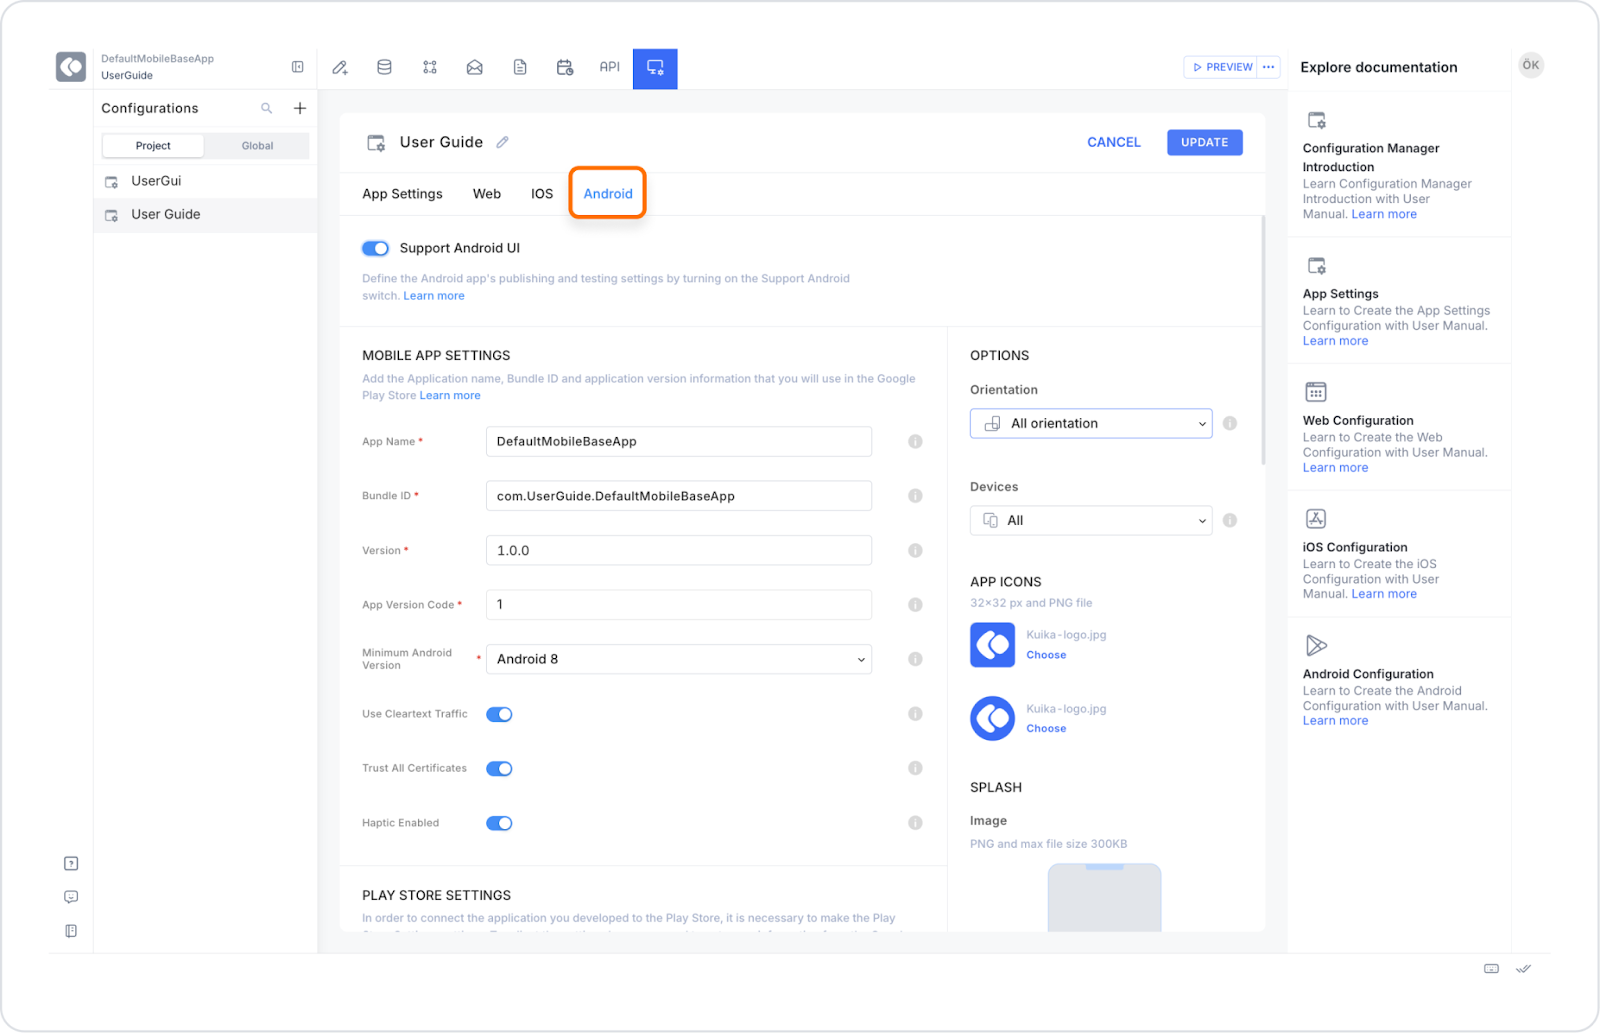
Configure your Android Apps
The Kuika platform has been made compatible with Android 16 support. Additionally, Android applications must now meet the 16 KB page size requirement.
Create a configuration using the Configuration Manager module.
From the App Settings modal, click on the Android tab.
Configure settings such as Mobile App Settings, Play Store Settings, Maps, Geolocation.
MOBILE APP SETTINGS: This is the area where you will enter the application name, Bundle ID, application version information and minimum Android version that you will use in the Play Store.
PLAY STORE SETTINGS: You can configure the application you developed to connect it to the Play Store.
MAPS: If the Android application you developed uses maps, you can create map settings and enter the necessary information.
GEOLOCATION: You can define the location information permission you will use in your application.
CAMERA: You can define the camera usage permission text to be shown to end users.
BLUETOOTH: You can define the Bluetooth permission text to be shown to end users.
PUSH NOTIFICATIONS: You can define the permission text to be shown to end users to send push notifications.
GPS TRACKER: You can set the GPS tracking function you use in your application.
Options:
Orientation: Determines the screen orientation of the application. All orientation, landscape, and portrait options are available.
Devices: Determines the device types on which the application will run. All, phones, and tablet options are available.
APP Icon: The main icon image for the application.
Splash:
Image: The image to be displayed when the application opens.
Fitting: Determines how the image used in the Splash Screen will be adapted to the screen size. The options available are Default and Stretch.
Color: The background color to be used in the Splash screen.
Save your settings by clicking the SAVE button.
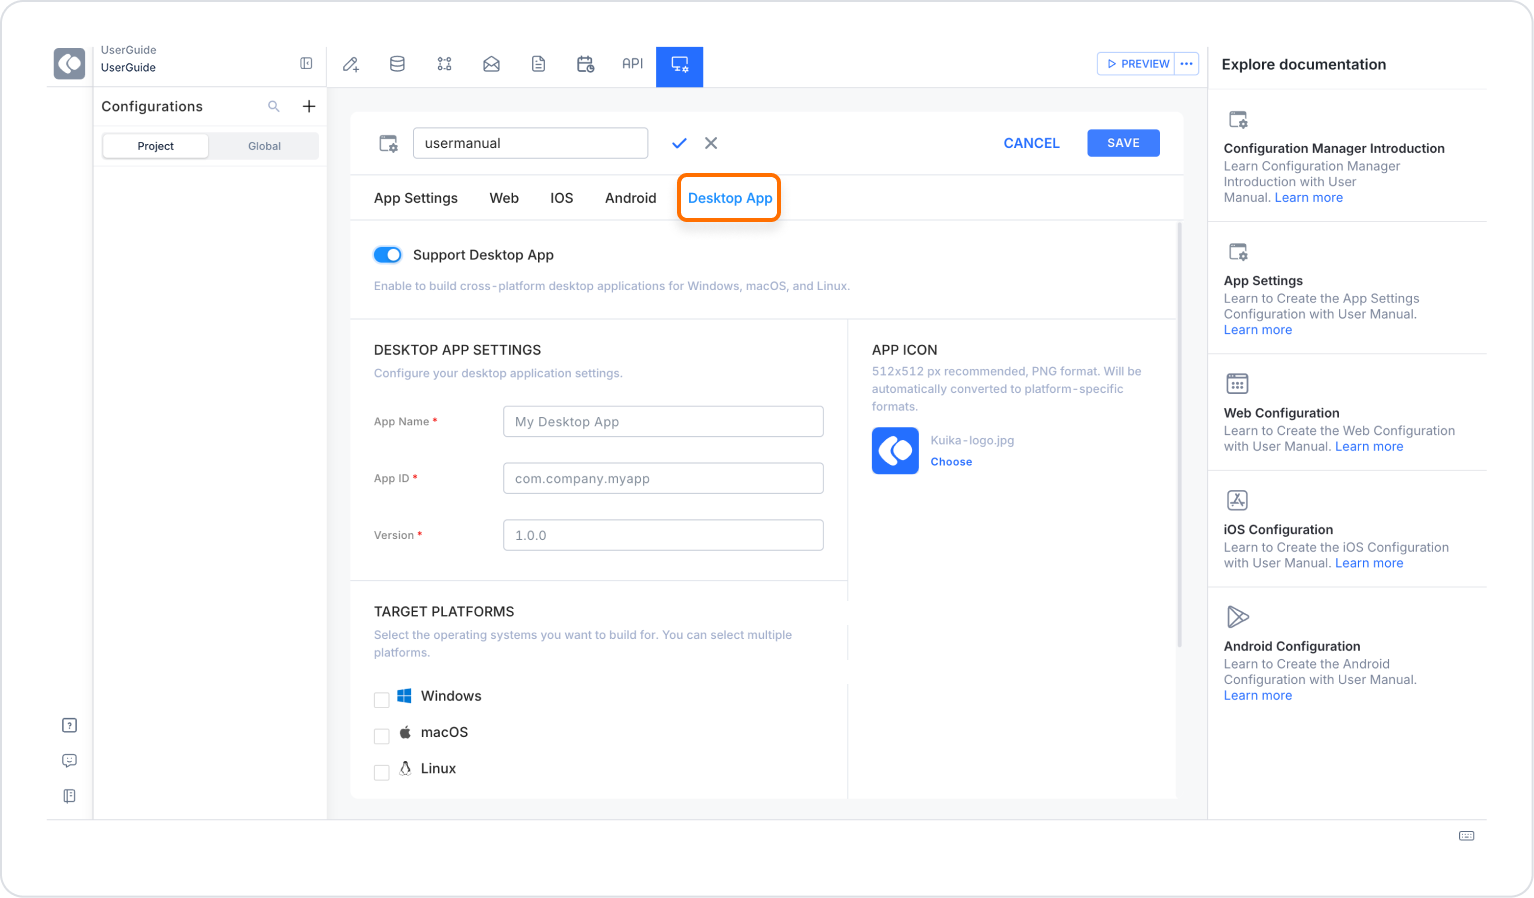
Configure Your Desktop Applications
Create a configuration using the Configuration Manager module.
Click the Desktop App tab in the App Settings modal.
Configure settings such as Desktop App Settings, Target Platforms, and Architectures.
DESKTOP APP SETTINGS: This is where you enter the application name, App ID, and application version information to be used for your desktop application.
APP ICON: This is the main icon image to be used in your desktop application. It is recommended to upload it in 512×512 px size and PNG format. The uploaded icon is automatically converted to formats suitable for target platforms.
TARGET PLATFORMS: This allows you to specify which operating systems the application will be compiled for.
Windows, macOS, and Linux options are available.
ARCHITECTURES: Allows you to specify the processor architecture on which the application will run. x64 (Intel/AMD 64-bit) and arm64 (ARM 64-bit) options are available.