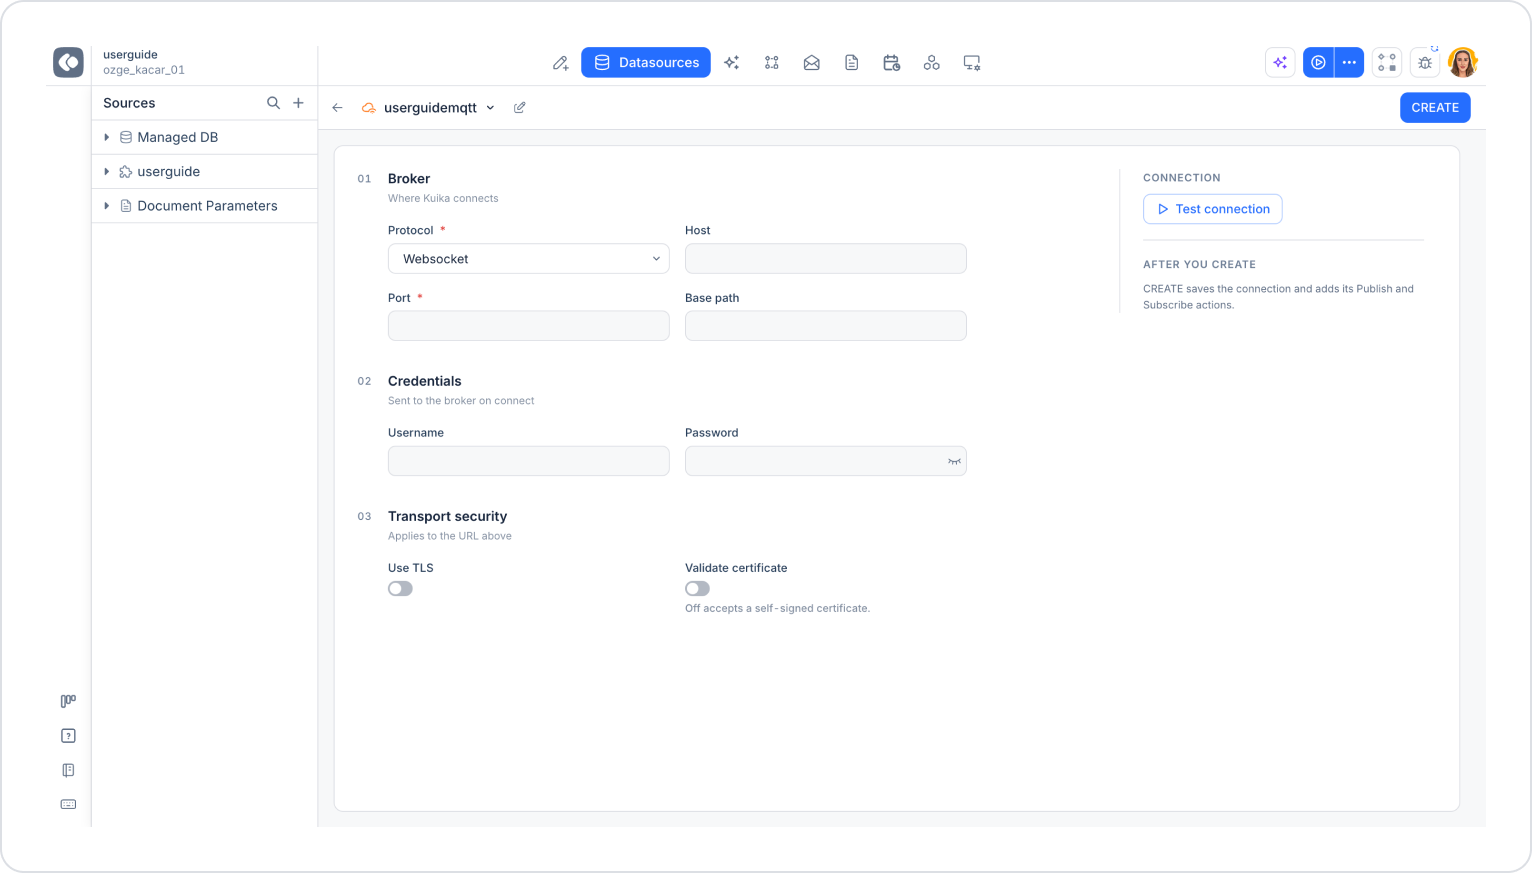
After creating the MQTT data source, enter the connection details on the screen that appears. At the top of the screen, you’ll find the back button (←), the data source name (pencil icon to edit the name), and the CREATE button to save the settings.
01 Broker
Contains the broker information Kuika will connect to.
Protocol (required): The connection protocol. WebSocket is selected by default.
Host: The MQTT broker address (e.g., mqtt.example.com).
Port (required): The broker’s connection port (e.g., 1883 for unsecured, 8883 for secure/TLS-supported).
Base path: Required for WebSocket connections (e.g., /mqtt).
02 Credentials
These are the authentication credentials sent to the broker during connection.
Username: MQTT server username.
Password: MQTT server password. You can show or hide the password using the eye icon.
03 Transport Security
These are the security settings applied to the connection address defined in the Broker section.
Use TLS: Enhances security by encrypting the connection.
Validate certificate: Verifies the connection’s TLS certificate. When disabled, self-signed certificates are also accepted.
Testing and Saving the Connection
Click the Test connection button in the Connection section on the right to test the connection.
If the connection is successful, click the CREATE button in the upper-right corner.
The CREATE button saves the connection and automatically adds the Publish and Subscribe actions associated with this data source. You can use these actions in your application in later steps.