On the Kuika platform, users can be associated with specific roles to restrict their access to screens and elements.
1.1. Creating a Role
Log in to the Kuika platform and select your project from the Apps screen.
In the UI Design module, add and select an element from the Elements panel.
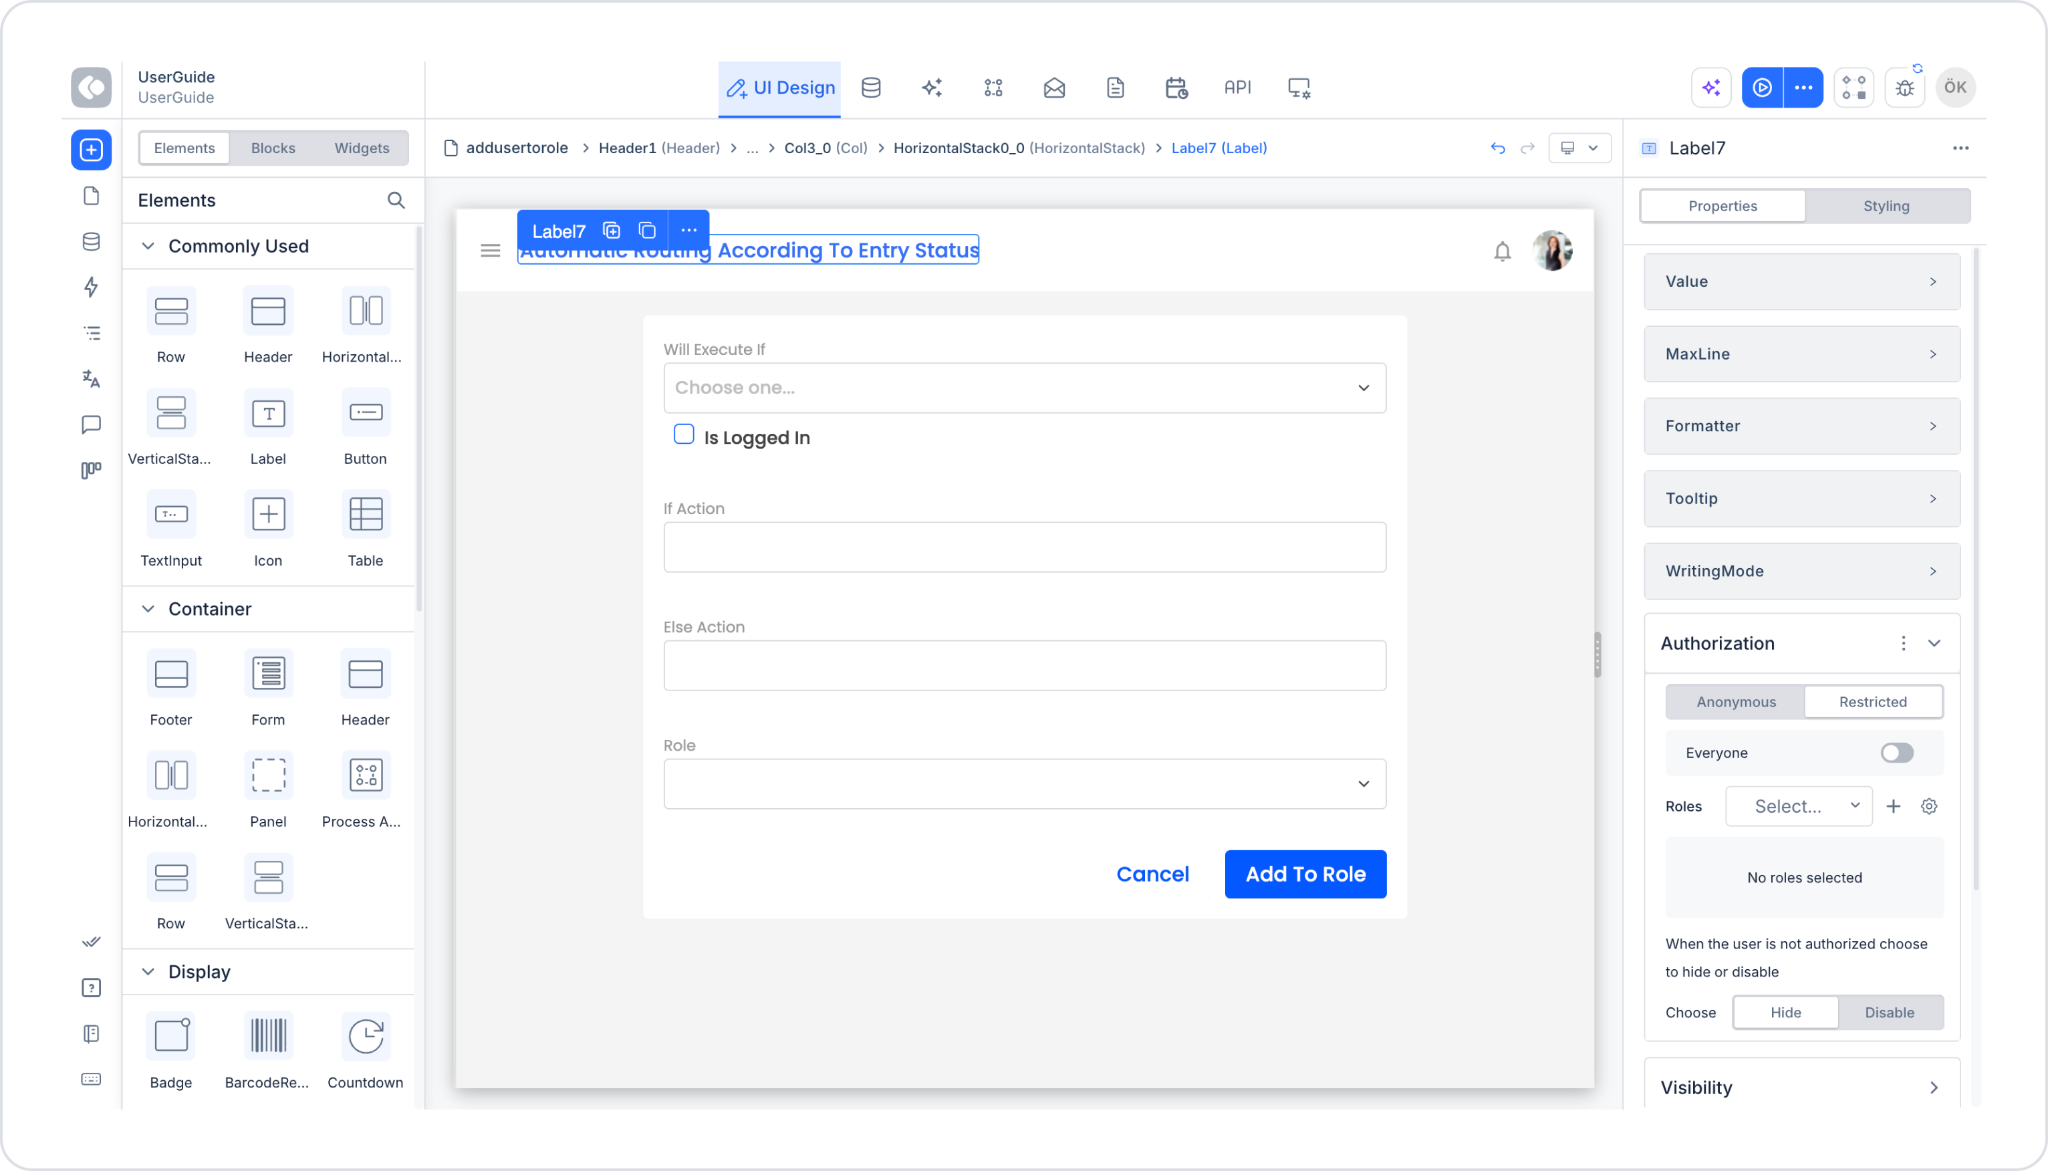
In the Authorization section of the Properties panel, select Restricted from the Anonymous / Restricted options.
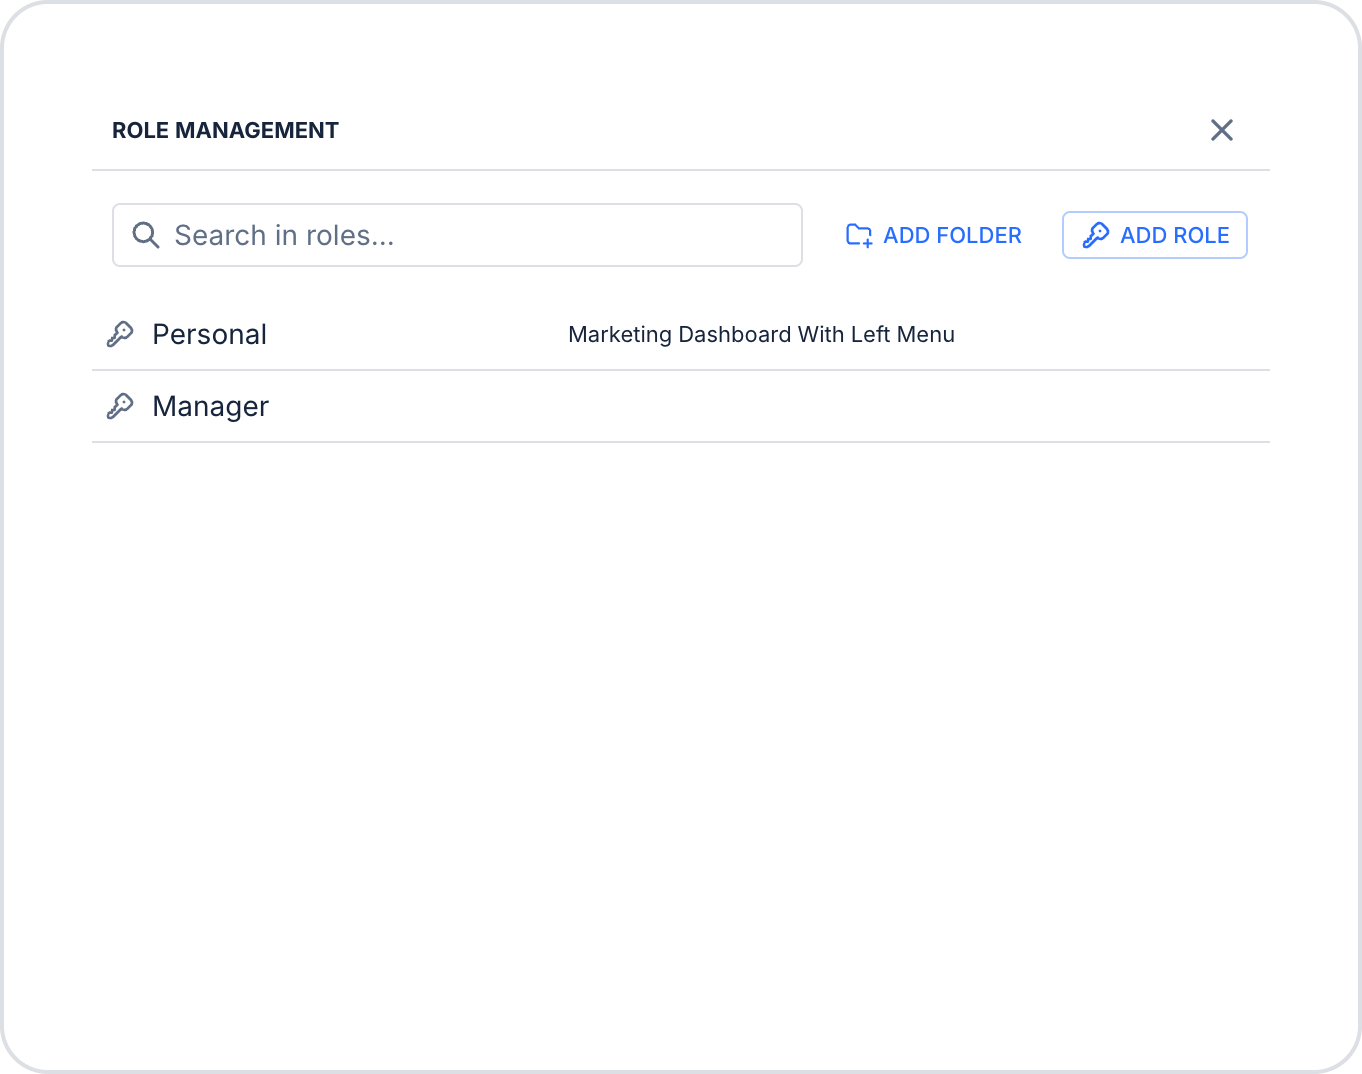
Click the + icon next to the Roles heading to open the Role Management modal.
In the modal that opens, you can use the Search in roles... field to search among roles; click the ADD FOLDER button to create a new role group, or the ADD ROLE button to define a new role.
Enter the role name and save to create it.
The roles you create are stored in the KRole table in the Datasources module.
You can write SQL queries using the KUserRole table to determine which roles users have.
A “Clear” icon has been added to the role search field in the Role Management modal. This allows users to clear the text they entered in the search box with a single click, quickly resetting the role list.
1.2. Element Authorization by Role
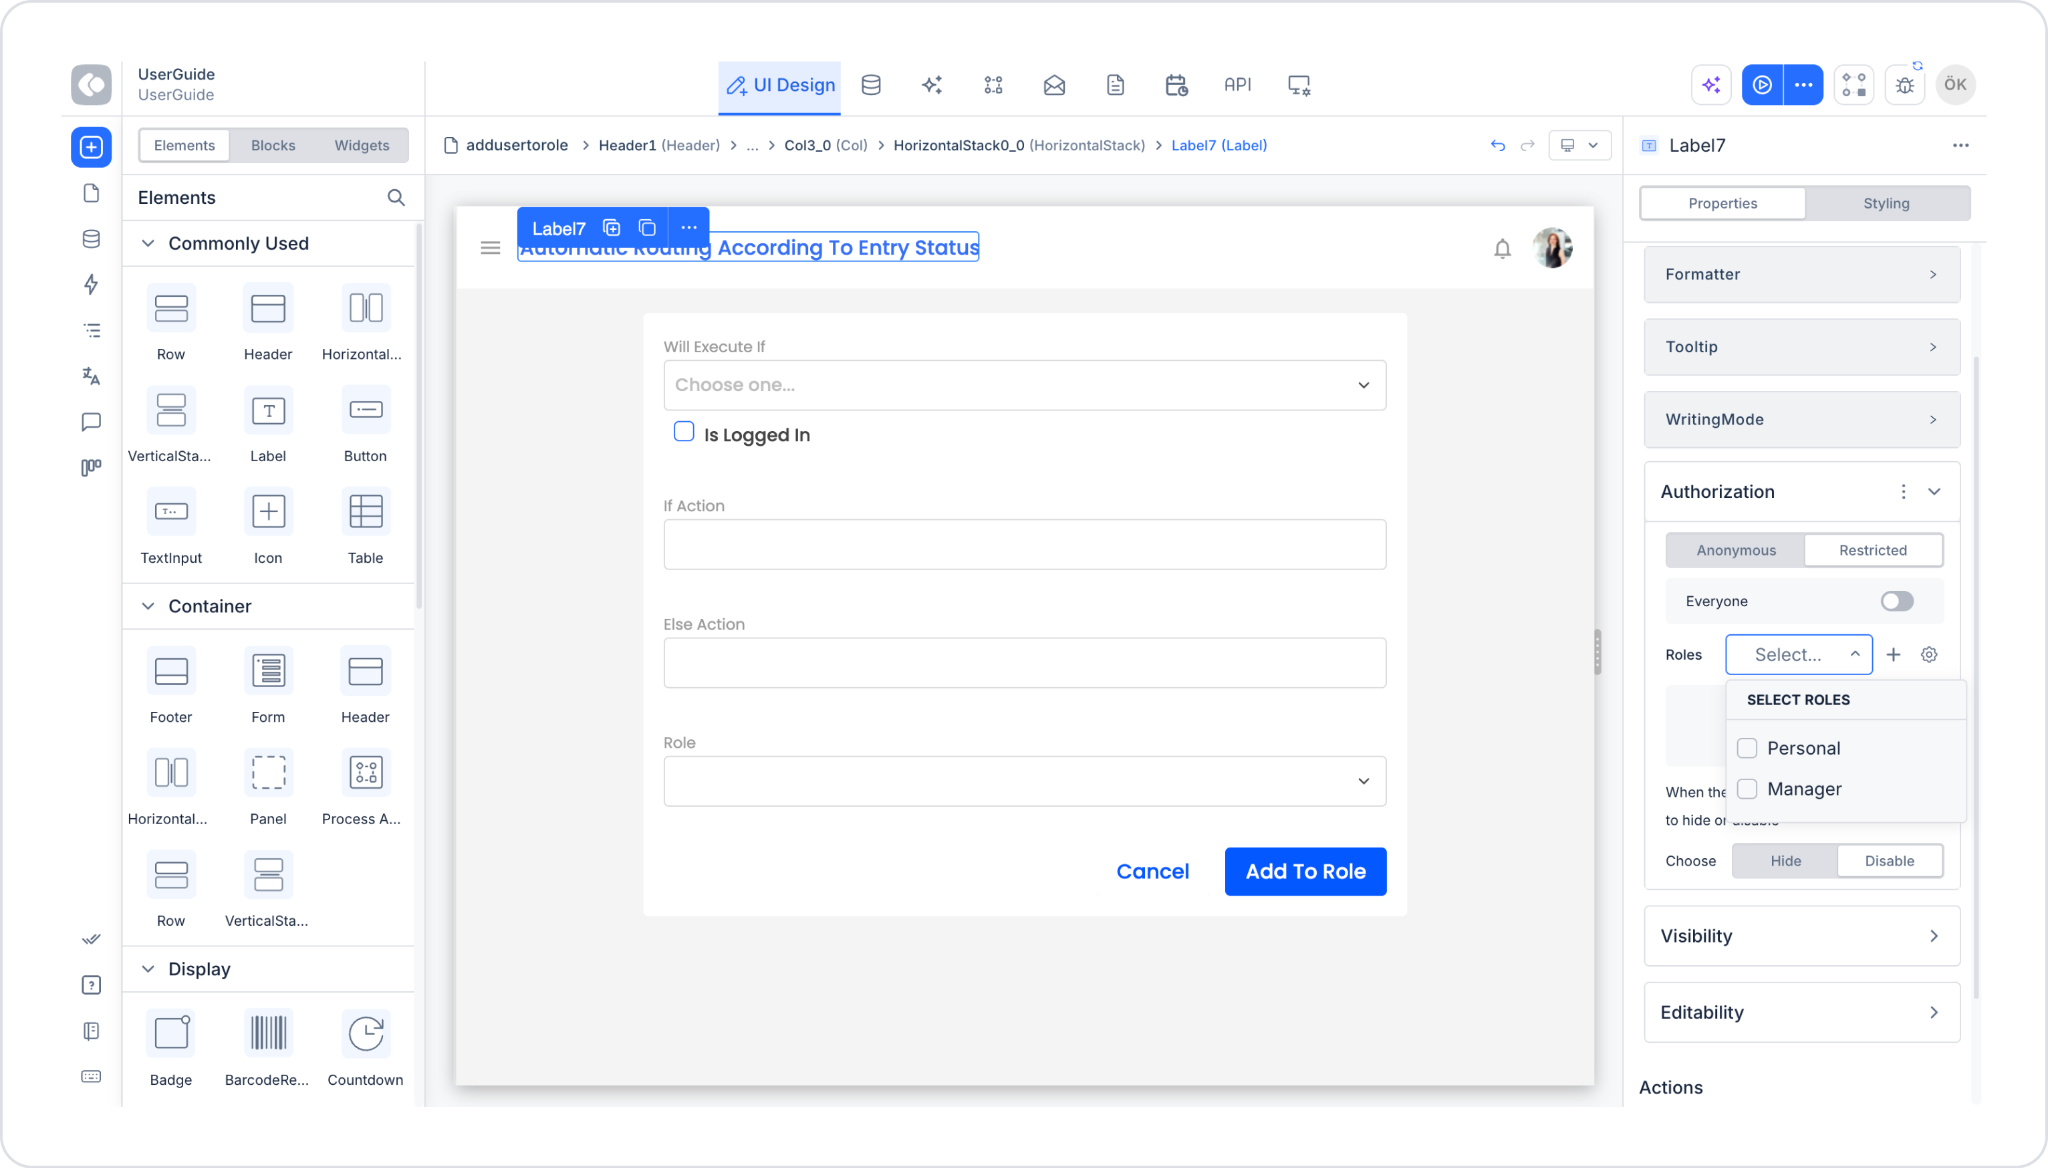
To ensure that an element is viewable only by a specific role, check the Restricted option in the Authorization field and select the relevant role(s) (e.g., Personal, Manager) from the SELECT ROLES list via the Select... button in the Roles field. If no roles are selected, the message “No roles selected” appears in the field.
If you want all users (regardless of role) to have access, enable the Everyone checkbox.
To determine the element’s behavior for unauthorized users, select either the Hide or Disable option under the Choose heading: Hide completely hides the element, while Disable leaves the element visible but inactive (non-interactive).
1.3. Assigning the Start Screen by Role
To specify the start screen based on the user’s role, select the role from the corresponding Select dropdown.
Click the corresponding save button to complete the configuration.
If all roles need to view the same elements, enable the Everyone option.
To provide access without requiring a login, you can use the Anonymous option in the Authorization section.