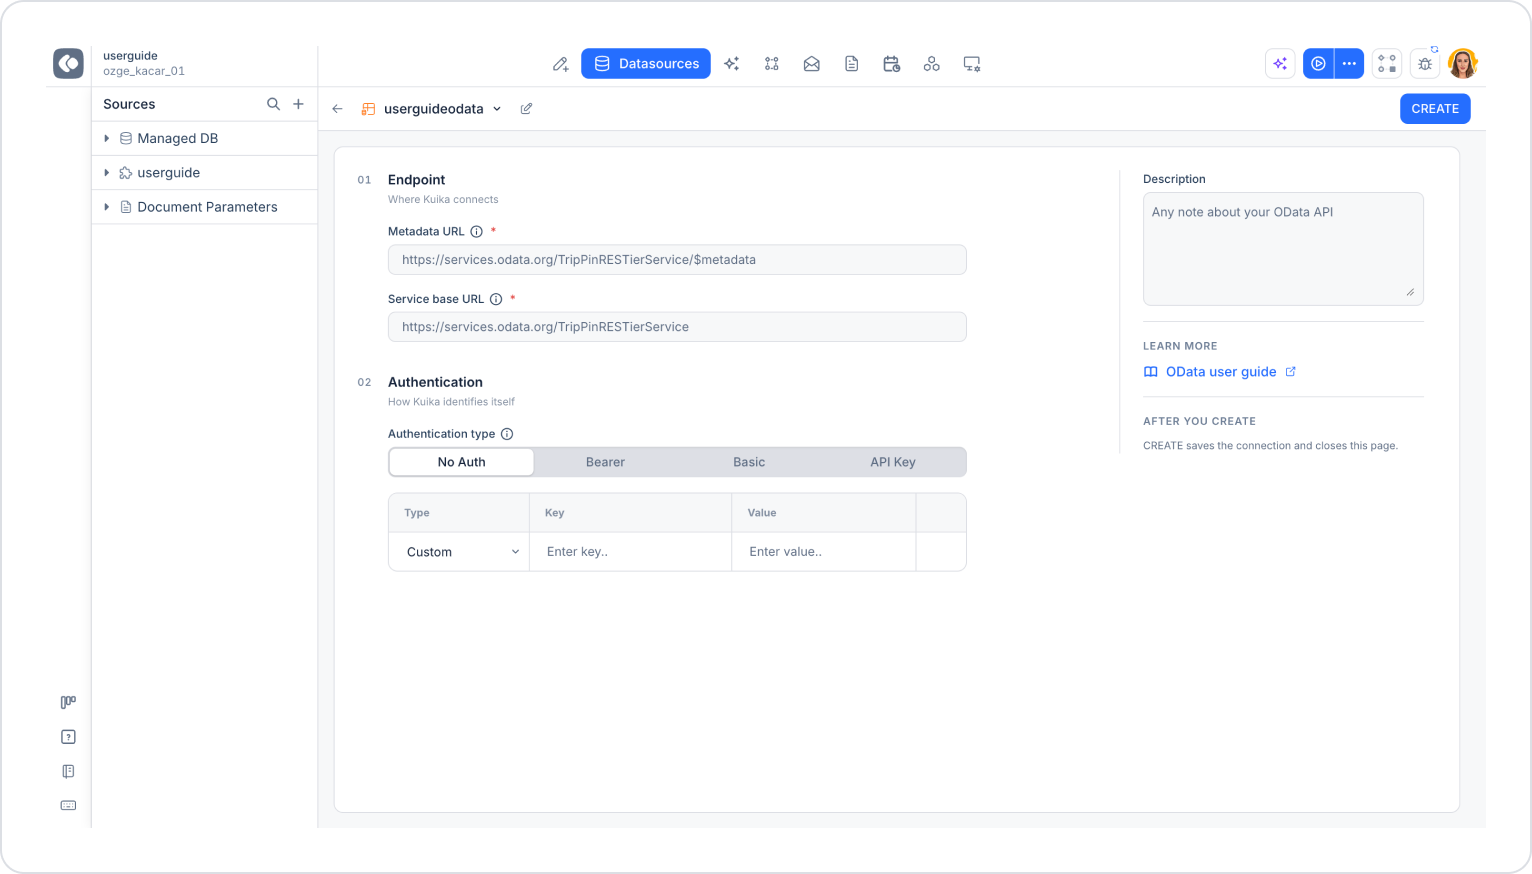
Back Button (←): Takes you back to the Datasources screen.
Data Source Name: Displays the name of the OData data source you created (e.g., userguideodata). Use the dropdown arrow next to it to switch between data sources, and the pencil icon to edit the name.
CREATE Button: Saves the connection settings and closes the screen.
B. 01 Endpoint
Contains the service information that Kuika will connect to.
You can view descriptions of the fields by hovering over the (i) icons next to them.
C. 02 Authentication
Determines how Kuika will authenticate itself with the service.
Authentication type: This field allows you to select the authentication type for API access. Options include No Auth, Bearer, Basic, and API Key.
Header Table: Consists of the Type, Key, and Value columns. The necessary rows are automatically added to the table based on the selected authentication type. Custom-type rows allow you to define optional additional fields.
D. Right Panel
Description: This is where you can add notes about the data source.
Learn More: You can access the relevant documentation via the OData user guide link.
After You Create: Indicates that clicking the CREATE button saves the connection and closes this screen.