Office365 MCP enables you to use email services (mail listing, detail viewing, folder querying, and mail sending) in your Kuika application.
Configuring Settings via Config Manager
A configuration setting can only be used in a single project. If you want to use it in other projects, you must create it again.
Log in to the Kuika platform.
Open the project you want to work on from the Apps screen.
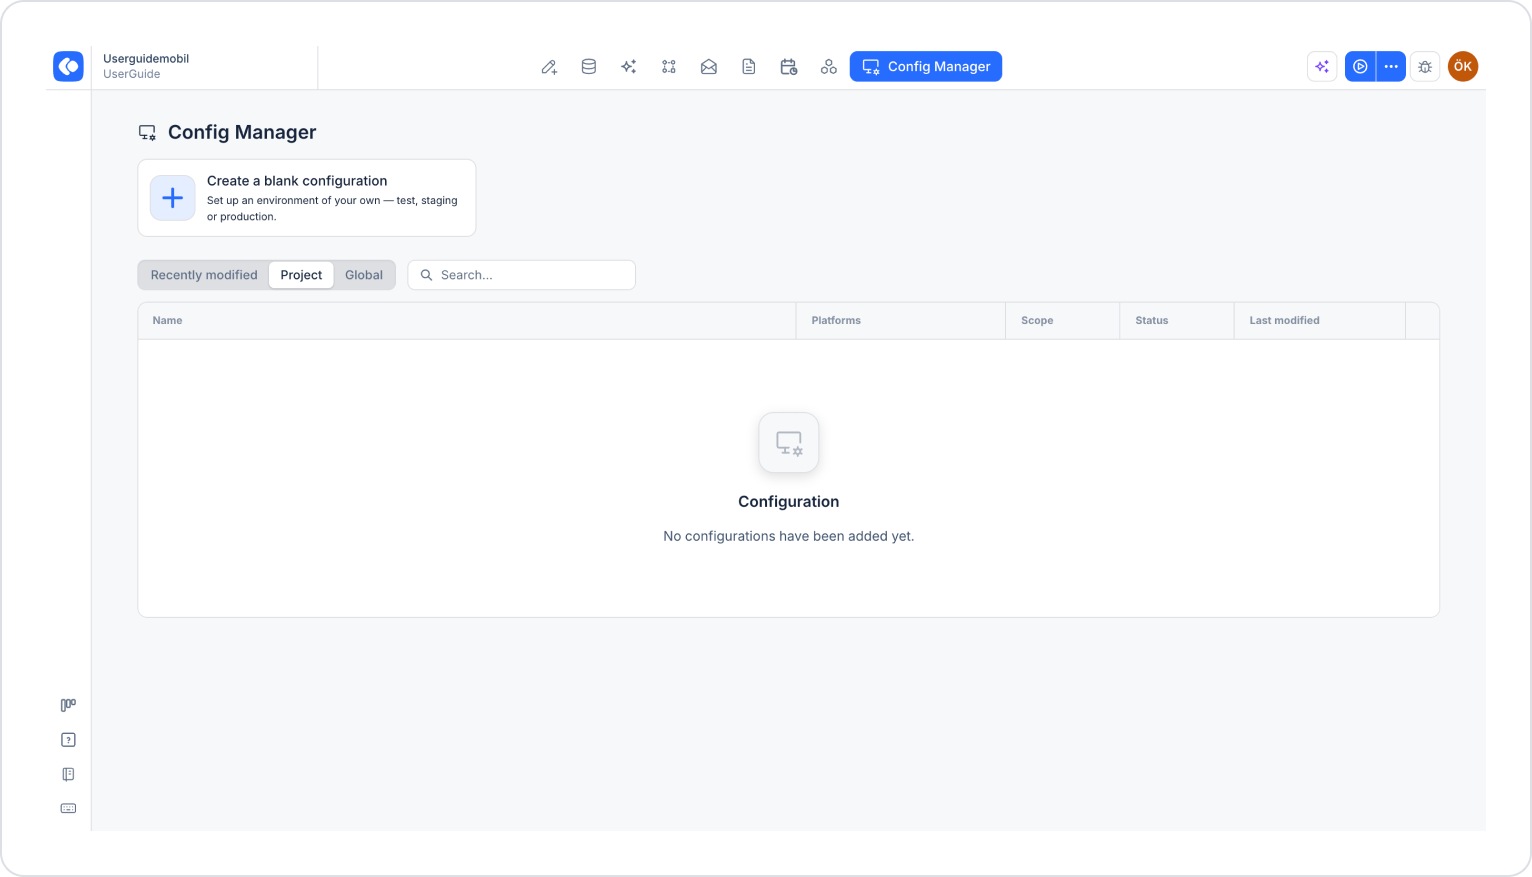
Click the Config Manager module in the top menu.
To edit an existing configuration, click its name in the list, or create a new configuration using the Create a blank configuration card.
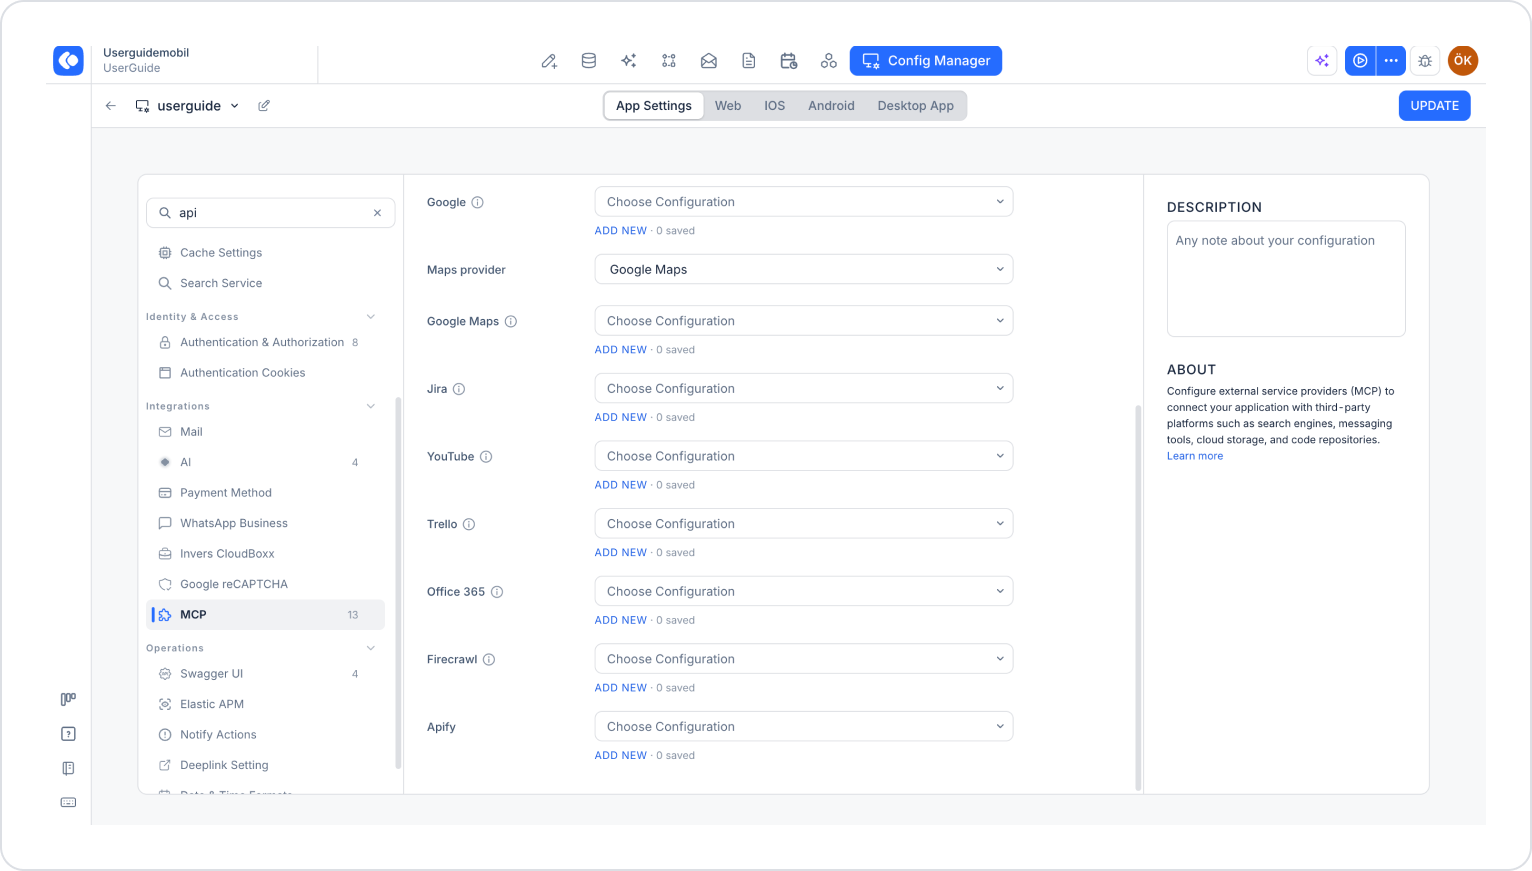
Make sure the App Settings tab is selected at the top of the configuration screen.
In the left menu, click the MCP option under the INTEGRATIONS heading.
Click the Add New link under the Office 365 section.
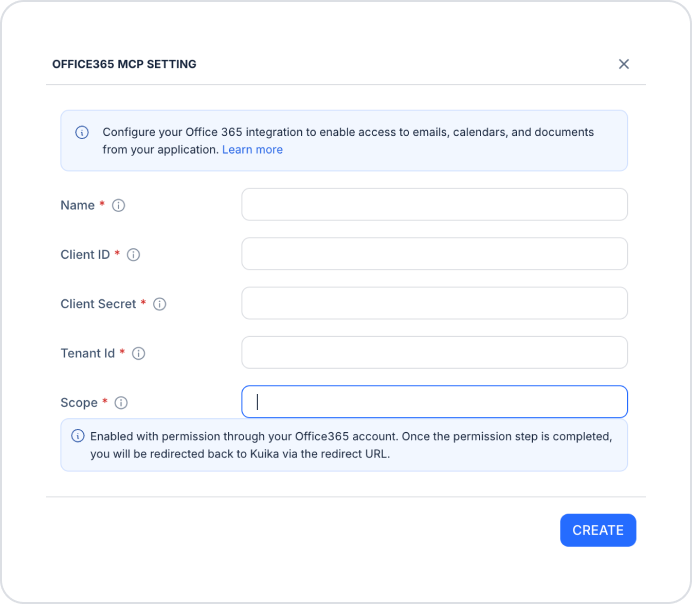
In the Office365 MCP Setting window that opens, fill in the following fields.
Required Fields
All fields are required. The Client ID, Client Secret, Tenant ID, and Scope information are retrieved from the application you registered in the Azure Portal under Microsoft Entra ID > App registrations.
Name: The name to be given to the configuration.
Client ID: The Application (client) ID value from your application’s Overview page.
Client Secret: The value of the secret key you created on your application’s Certificates & secrets page.
Tenant ID: The Directory (tenant) ID value on your application’s Overview page.
Scope: The application’s access permissions (e.g., User.Read, Mail.Read, Files.Read). If multiple permissions are required, list them separated by spaces. These permissions must also be defined on your application’s API permissions page.
Complete the Configuration
After filling in all fields, click the Create button.
You will be redirected to your Office 365 account. Grant the required permission; once the permission step is complete, you’ll be redirected back to Kuika via the redirect URL.
Office 365 Select the configuration you created from the dropdown menu.
Click the Save button in the top-right corner to save your changes. (In an existing configuration, this button appears as Update.)
Creating Information via Azure
Go to the Azure Portal and log in.
Follow the steps Microsoft Entra ID → Application Registrations → New Registration.
Name: You can enter any name you want.
Supported account types: Multi-tenant and personal accounts should be selected.
Redirect URI:
For Kuika → https://platformapi.kuika.com/v1/api/McpClient/office365-callback
For custom domain → <DOMAIN_NAME>/v1/api/McpClient/office365-callback
After saving:
Application (Client) ID → Client ID
Certificates & Secrets → New Client Secret step to create a Client Secret.
API Permissions → Add Permission → Microsoft Graph → Application Permissions section, add the following permissions:
Mail.ReadBasic
Mail.Read
Mail.ReadWrite
Mail.Send
After adding the permissions, grant Admin Consent.
Registration in Configuration Manager
For Tenant ID → common
For Scope → offline_access Mail.ReadBasic Mail.Read Mail.ReadWrite Mail.Send
After filling in the fields, press the Create button.
The Microsoft sign-in screen will appear; sign in and grant consent.
After receiving the success message, click the Create button again to complete the process.
The setting is now available in Office365 Actions.
Action Types
1. Office365 List Mails
Lists the user's emails.
Input
settings (Config – required): Office365 setting defined in Configuration Manager.
includeHiddenMessages (Boolean – optional): Should hidden/system emails also be retrieved?