User Manual

Get All Users

21/5/25
Get All Users

The Get All Users action is used to list all user records within your application developed in Kuika. This action is ideal for roles such as administrators, human resources, or system auditors to view and manage user lists. It also provides preliminary information for tasks such as editing user roles, disabling users, or re-enabling them.

Technical Features

  • User Listing: Lists all user information in the system.
  • Disabled Users: Can include disabled users in the list if necessary.
  • Web and Mobile Compatibility: Works on both web and mobile applications.
  • Authorisation Compatible: The listing process should only be performed by authorised users.

Get All Users Action Application Steps

1. Adding the Get All Users Action

  • Log in to the Kuika platform.
  • Open the project you will be working on from the Apps screen.
  • Go to the UI Design module.
  • Select an appropriate component (e.g., ‘List Users’ button) on the page where the user list will be displayed.
  • Select the button and add the Authorisation > Add User To Role action from the + ADD ACTION menu according to the desired trigger event (Initial Actions, OnClick, OnBlur, etc.).

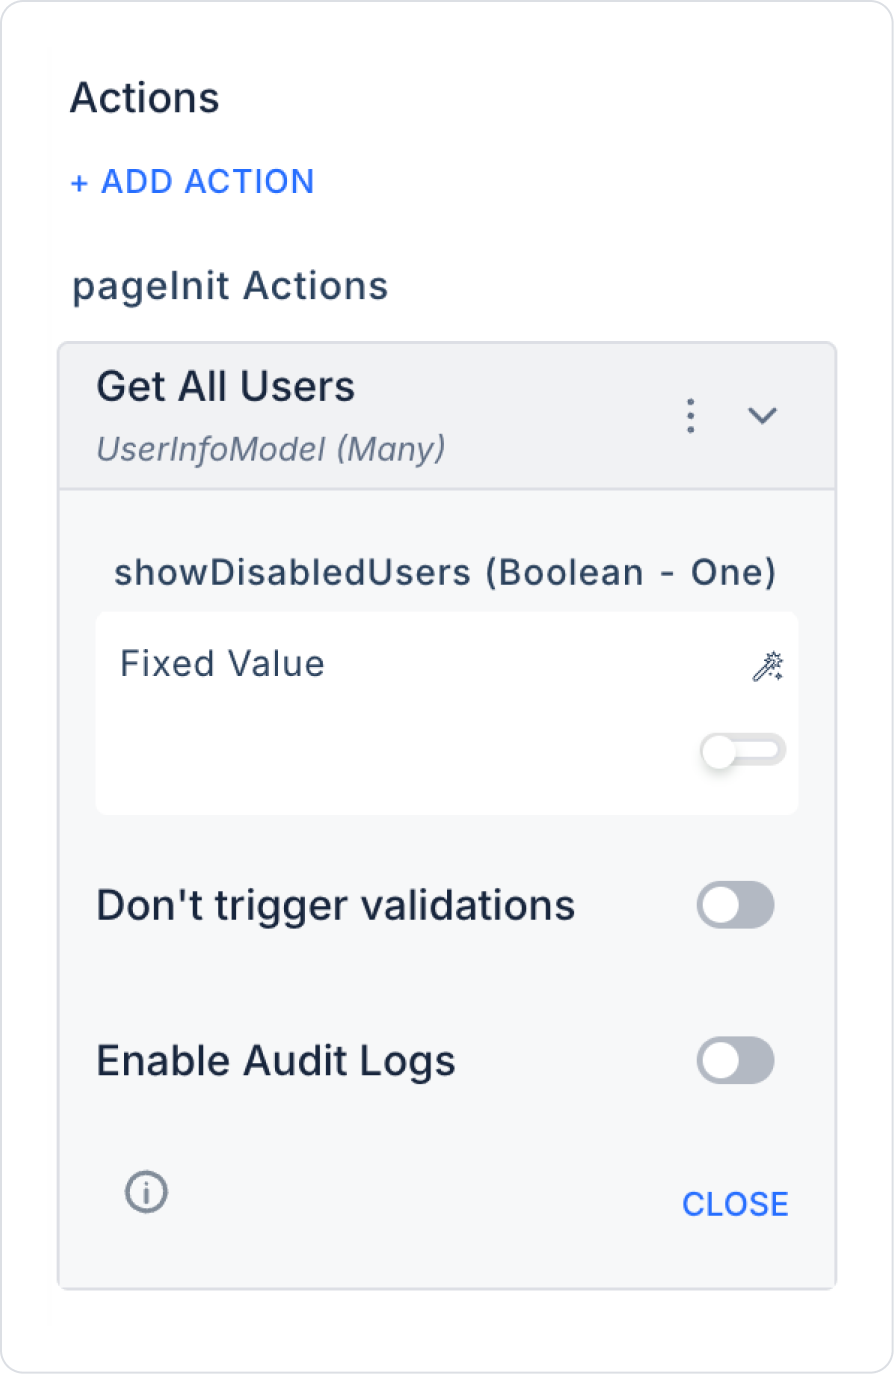
2. Parameter Configuration

  • Show Disabled Users (Boolean-Optional): Specifies whether disabled users are also listed. When set to true, inactive users are also included in the results.
  • It is usually defined using data sources such as Action Result, Current, Form Component, Screen Input, or Fixed, and can be linked via the Symbol Picker.

Usage Scenario: Listing All Users in the Administrator Panel

An administrator needs to see all system users on the user management screen. User information can be viewed, users can be disabled, or roles can be assigned from this screen.

Scenario Implementation

  • Element: ‘View Users’ button
  • Trigger: OnClick
  • Action: Authorisation → Get All Users
  • Show Disabled Users: true (Both active and disabled users will be listed)

This configuration initiates a listing process. The retrieved user data can be connected to a Data Grid, List, or Repeater component to provide a detailed user view.

Get All Users Action Advanced Customisations

  • Filtering & Searching: The retrieved user list can be filtered using components such as a Search Box (e.g., user name, email, role).
  • Sorting and Paging: Users can be sorted by name or displayed page by page using list components.
  • Combining with Other Actions: Actions such as Disable, Enable, Assign Role can be added to the user row to create a complete management panel.
  • Authority Control: This action can be restricted to only authorised roles such as Admin using If Then Else or Authorisation Visibility.

Technical Risks and Precautions

  • Unauthorised Access: This action should only be used by specific roles, otherwise user information may be viewed by unauthorised persons.
  • Performance: If there are a large number of users, listing all users at once without pagination may cause performance issues.
  • Privacy: Obtained user data (especially email, phone, etc.) should be masked appropriately or processed according to privacy policies.
  • Disabled Information: When Show Disabled Users = true, disabled users' information should not be used in active operations by mistake.

The ‘Get All Users’ action is a fundamental operation for user management in the application you develop in Kuika. It allows you to list users in bulk, filter them based on their status, and manage them. You can create a powerful user management interface with advanced integration, filtering, and role-based restrictions.

Other Related Content

No items found.

Glossary

No items found.

Alt Başlıklar