User Manual

Form Usage Scenario

Form Usage Scenario

Kuika's Form element is one of the core components that enables users to enter data. Data can be directly connected to a data source (Data Table, Excel, Action, Custom) or collected through forms created from scratch. This allows you to easily implement functions such as registration, updating, and triggering actions in your applications.

The Form element is supported in both web and mobile applications.

Areas of Use

  • User registration and login forms,
  • Survey and information collection forms,
  • Department/role assignment processes,
  • Order, reservation, or request collection screens, etc.

Use Case – User Registration Form

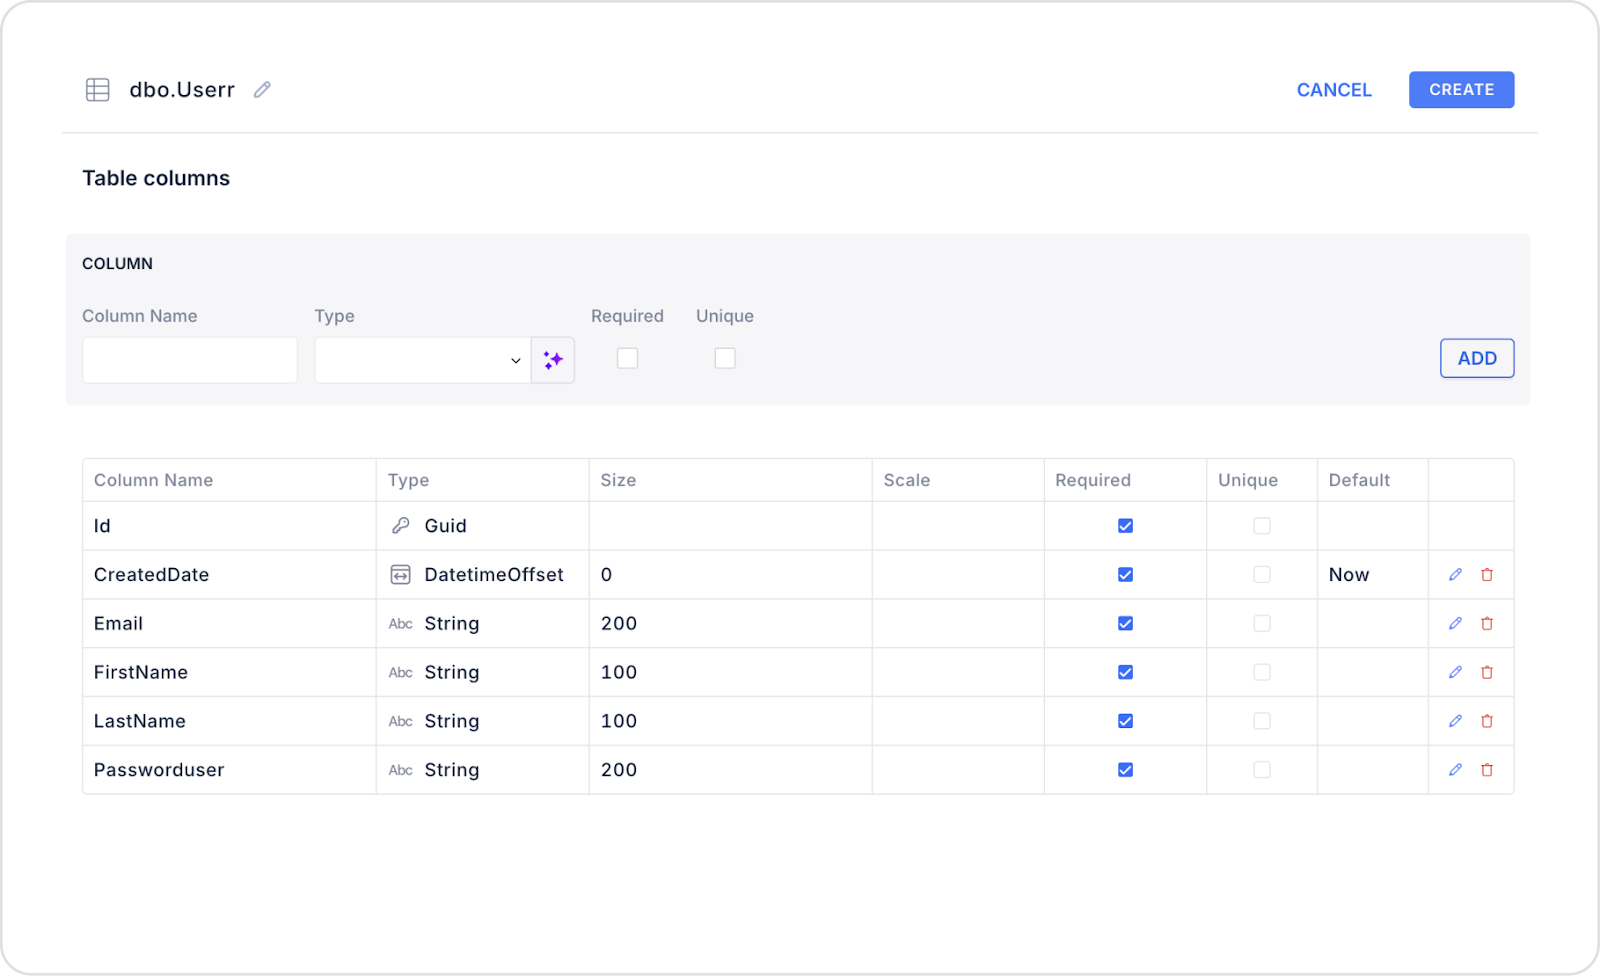
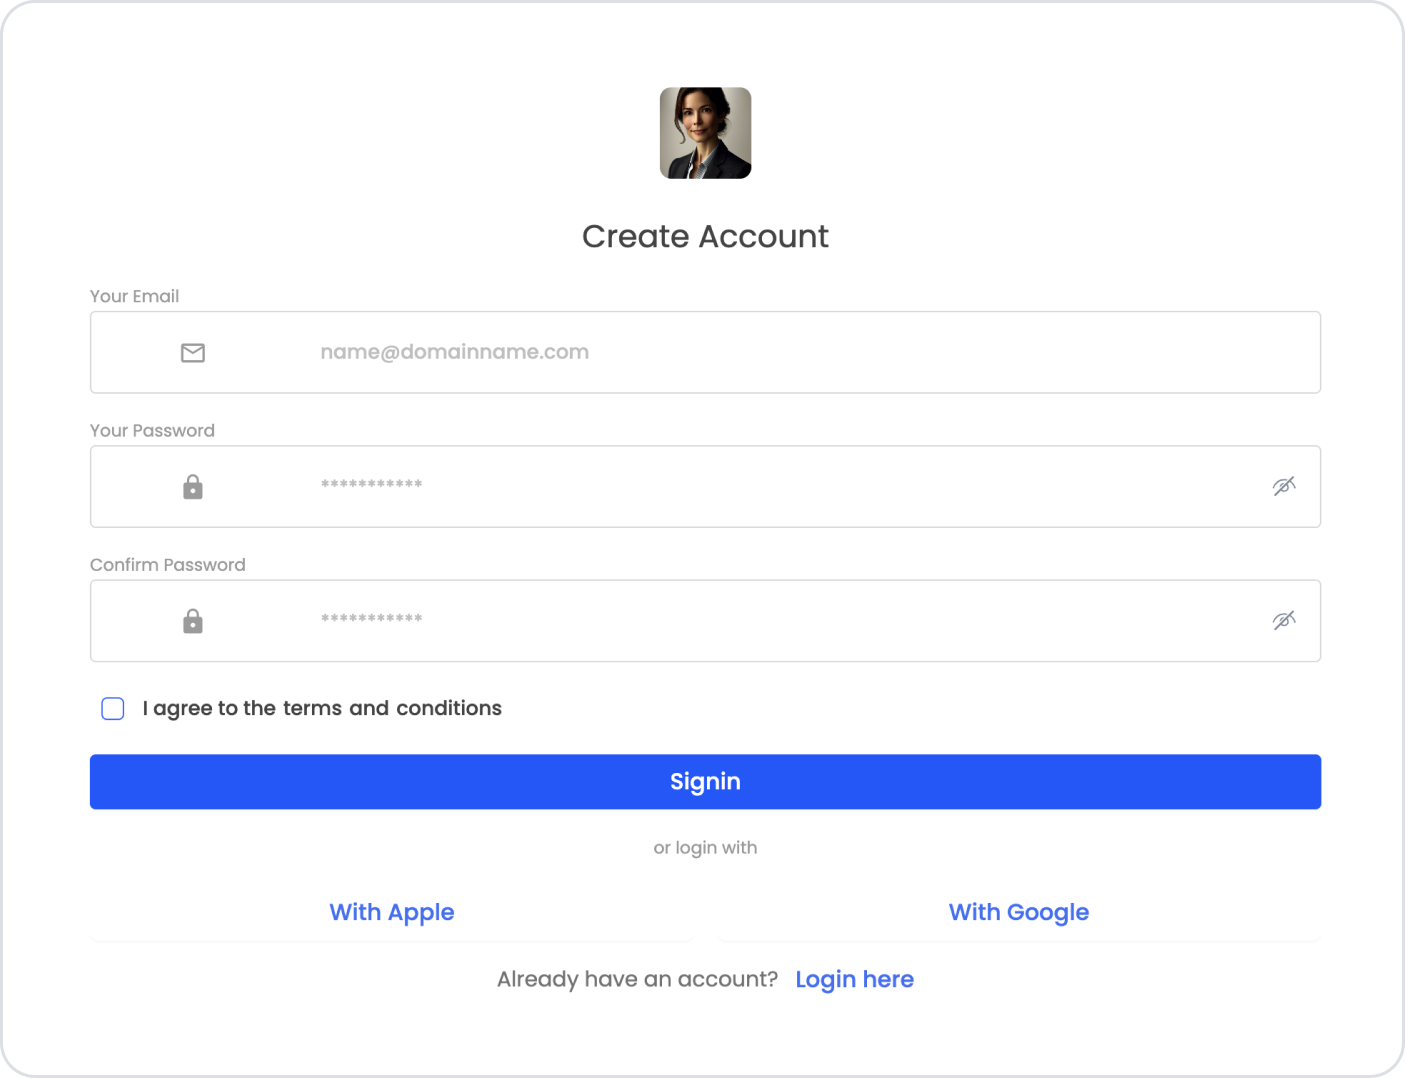
In an application developing a membership system, the Form element is used to allow users to create accounts by entering their First Name, Last Name, Email, Password information.

  1. Form Structure
    • The form typically includes the following fields:
    • Your Email → User's email address (required field).
    • Your Password → The user's password (required field).
    • Confirm Password → Password confirmation (required field).
    • Checkbox → For the user to indicate that they accept the terms of use.
    • Sign in / Create Account button → Submits the form and saves the data.
    • Social login buttons → Added so users can quickly log in with their Apple or Google accounts.
    • Login link → Redirects users who already have an account to the login page.
  2. Connecting Data Sources
    • Types of data sources you can connect to when creating the form:
    • Data Table
      • Select the User table on Managed DB.
  • Fields are automatically matched with table columns (e.g., Email, Password).
  • Excel
    • Columns in an externally uploaded file in .xls/.xlsx format are converted to form fields.
    • E.g., a quick prototype form can be created with the FirstName, LastName, and Email columns.
  • Action
    • For example, the parameters of the CreateUser action (Email, Passworduser, Role) automatically become form fields.
    • When the form is submitted, this action is executed directly.
INSERT INTO Users (Id, FirstName, LastName, Email, Passworduser, CreatedDate)VALUES (NEWID(), ‘John’, ‘Doe’, ‘john.doe@email.com’, ‘EncryptedPassword’, GETDATE());
  • Custom
    • Completely custom fields are defined without being linked to any table.
    • Can be used in prototype or API integration scenarios.

Using Properties in a Scenario Context

  • Label
    • The visible name of the form field.
    • E.g. Your Email, Your Password.
  • Field Type
    • Defines the data type.
    • E.g. String for Email, String but Encrypted for Password.
  • Element Type
    • Specifies the UI type.
    • E.g. TextInput, PasswordInput, Checkbox.
  • Required (Req)
    • Marked for email and password fields.
    • The form cannot be submitted if the user leaves these fields blank.
  • Section Layout
    • Used to set a 2-column view on desktop and a 1-column view on mobile.
    • The form in the image is designed for a single column.
  • Detach
    • Form elements can be made independent.
    • For example, this can be used if you want to display only the Email input on a separate screen.

When the Scenario Step is Complete

  • The user fills in the Email, Password, and Confirm Password fields.
  • They check the “I agree to the terms and conditions” box.
  • When the Sign in / Create Account button is clicked, the information is saved to the data source.
  • The user can log in with Apple or Google if they wish.
  • If they already have an account, they are redirected to the login screen by clicking the Login here link at the bottom.

Tips and Best Practices

Unique should be checked for the Email field → this prevents a second registration with the same email address.

  • The Password field should use a masked (PasswordInput) input type.
  • For form readability on mobile screens, the Section Layout should be set to a single column.
  • The user agreement checkbox should be a required field → registration should not be completed without checking it.
  • Placing social login buttons at the bottom enhances the user experience.
No items found.

Other Related Content

No items found.

Glossary

No items found.

Alt Başlıklar