
The Document Uploader element is a drag-and-drop-enabled UI element that allows users to upload files to the DMS. Files are transferred to the backend using the chunked upload method. This ensures a more secure and stable upload process by sending large files in chunks.
With this element, users can add files via drag-and-drop or by selecting a file. File type validation is performed before upload, and a magic byte analysis is applied for security purposes. This ensures that only permitted and secure files are uploaded to the system.
The Document Uploader element can be used in scenarios requiring document management systems, application forms, support requests, onboarding flows, and folder-based file uploads.
The Document Uploader element is commonly used in the following scenarios:
The Document Uploader element offers the following key features for file upload processes:
When you select the DocumentUploader element, you can configure the upload behavior and the content displayed to the user via the Properties panel on the right.
The key settings for this element are as follows:
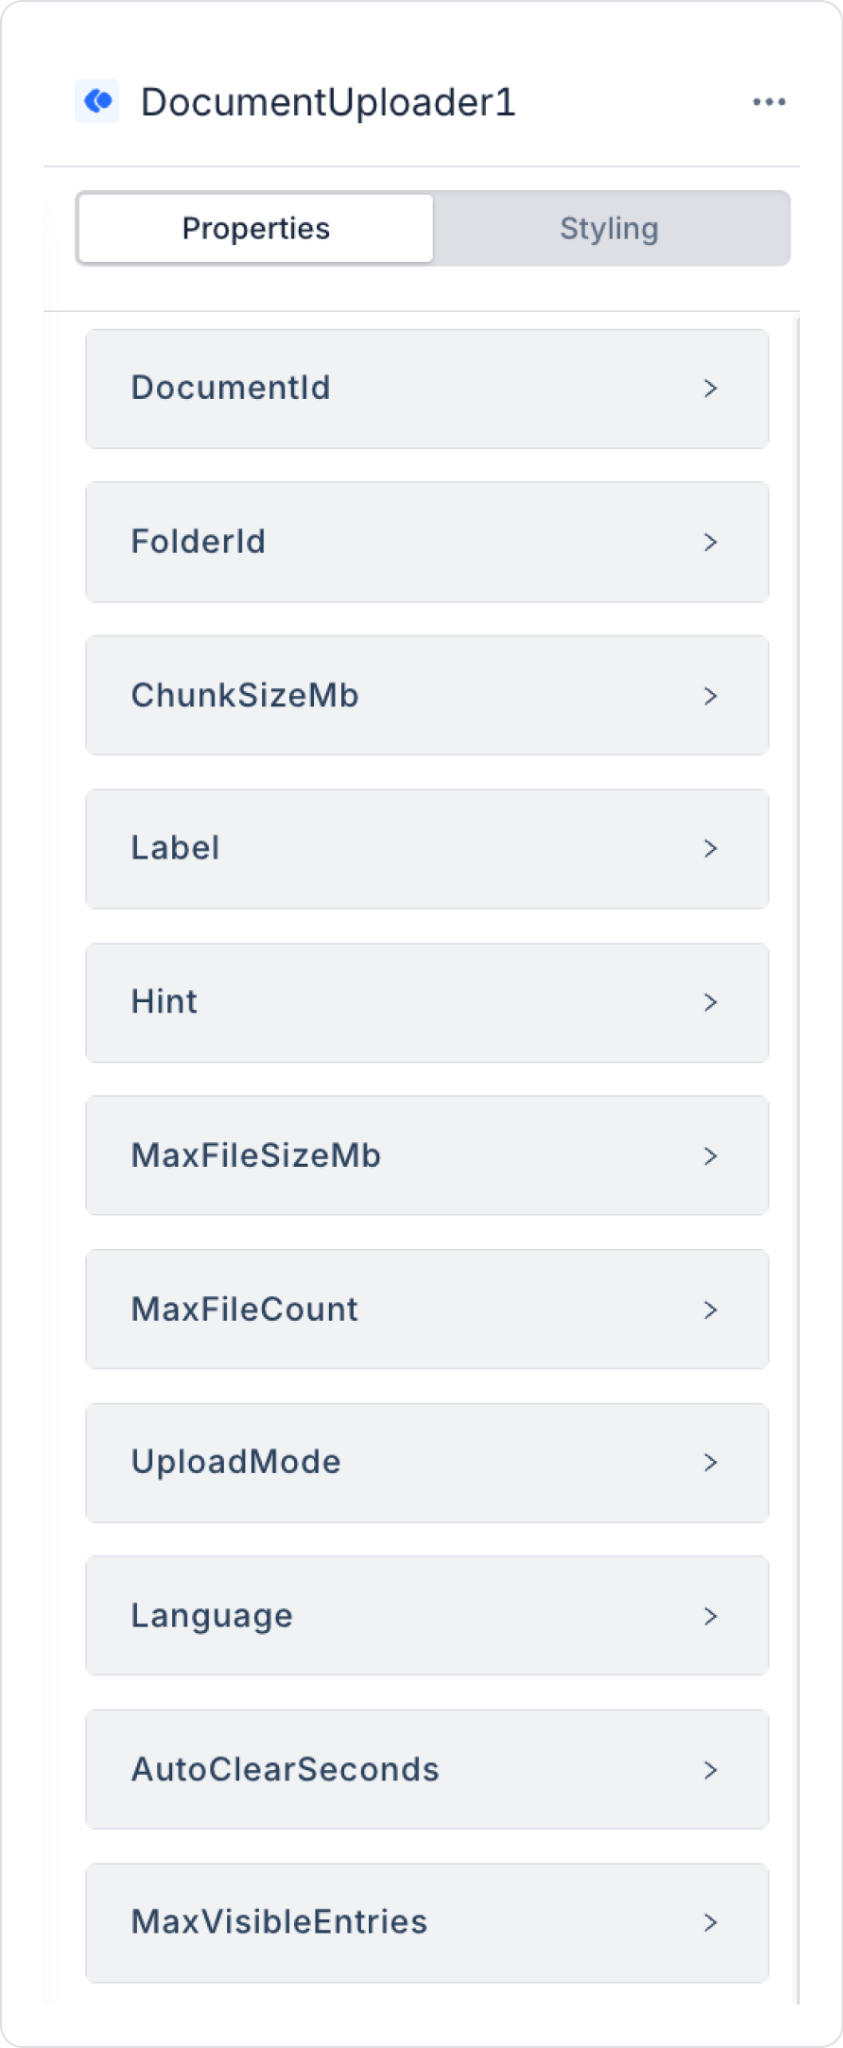
folderId: Specifies the ID of the target folder where uploaded files will be saved. It can be bound to the selectedFolderId binding of the Directory element. When this field is defined, all uploaded documents are created under the relevant folder.
documentId: This ID determines whether the upload will occur on an existing document or as a new document.
uploadMode: Determines the upload behavior.
maxFileSizeMb: Specifies the maximum allowed size for a single file in MB. Files exceeding this limit will not be uploaded, and a warning will be displayed to the user.
maxFileCount: Determines the maximum number of files that can be added to the upload queue at the same time. If the specified limit is exceeded, excess files are rejected.
chunkSizeMb: Determines the size of the chunks (in MB) into which files are split when sent to the backend. The default value is 10 MB. Used to ensure more stable uploads for large files.
Label: The main text displayed to the user in the drag-and-drop area. It is used to clearly explain the purpose of this area to the user.
Hint: A supplementary text that provides additional information to the user. Details such as supported file types, maximum size, or intended use can be displayed here.
autoClearSeconds: Ensures that successful uploads are automatically removed from the list after the specified time (in seconds).
maxVisibleEntries: Determines the maximum number of rows to be displayed in the file list at the same time. Additional entries are displayed via scrolling.
Language: Determines the interface language of the upload component.
The DocumentUploader element provides events that can trigger actions based on user interactions. These events can be used to control the upload process and define additional workflows.
onUploadFinish: Triggered when the upload process for all files in the queue is complete (regardless of whether it was successful or failed). It is typically used for post-upload data refresh operations. For example, the GetDocumentTree action can be called via this event to update the Document tree.
onFileSelect: Triggered when one or more valid files are added to the upload queue. It can be used to capture the moment the user selects a file and perform related checks or provide notifications.
onUploadStart: Triggered when the user clicks the “Upload” button to start the upload process. It can be used in scenarios such as pre-upload preparation tasks, logging, or displaying notifications to the user.
The DocumentUploader element is built on the Ant Design Dragger component and offers the following features:
Multiple file selection: The `multiple` attribute works as expected. The user can drag and drop or select multiple files at the same time.
Accept filter: Allowed file extensions are automatically transferred to the `accept` HTML attribute. This ensures the browser displays only supported file types as selectable.
Client-side validation: The following checks are performed for each file before upload:
User notification in case of error: Toast notifications are displayed to the user for rejected files. Different messages are shown depending on the error cause:
The displayed notifications automatically close after approximately 3.2 seconds.
The DocumentUploader element uses the chunked upload mechanism to ensure large files can be uploaded securely and reliably.
New document upload (uploadMode: “newDocument”)
The upload process consists of the following steps:
1. Init (Initialization): POST /documentmanagement/chunks/init. The file name, MIME type, target folder, total number of chunks, and size information are sent. The server returns an uploadId in response to this request.
2. Chunk Submission: POST /documentmanagement/chunks/{uploadId}/{chunkIndex} The file is split into chunks according to the specified chunk size, and each chunk is sent sequentially in application/octet-stream format. The progress bar is updated after each chunk.
3. Finalize (Completion): POST /documentmanagement/chunks/{uploadId}/finalize
After all chunks are sent, the server combines them, creates the document, and returns the documentId.
4. Error Handling: If an error occurs at any step of the upload process:
The upload session is cleared via the DELETE /documentmanagement/chunks/{uploadId} call.
Version upload (uploadMode: “newVersion” / “draft”)
Chunked upload is not used in these modes. The upload process is performed directly in a single step via the following endpoint:
PUT /documentmanagement/{documentId}/file
The file is sent in FormData format and saved as a version or draft of the existing document.
The DocumentUploader element supports the following file categories:
Visual info tags are displayed on each upload row based on the operation performed. These tags clearly indicate the upload type to the user:
After the upload is complete, a “Clear completed” button appears for successful uploads.
When this button is clicked, all successfully uploaded files are removed from the list.
If the autoClearSeconds property is defined, successful uploads are automatically cleared from the list after the specified time.
Scenario: The user selects the “Contracts” folder in the left panel and uploads a new PDF document to this folder.
Flow
1. Folder Selection: When the user selects a folder via Directory:
Directory.onFolderSelect
2. File Selection: The user drags and drops the file or selects it manually:
DocumentUploader.onFileSelect
→ Selected files are added to the upload queue
→ The user can edit the file name if necessary
3. Upload Start: When the user clicks the “Upload” button:
DocumentUploader.onUploadStart
→ The upload process begins
→ A progress bar is displayed for each file
4. Upload Completion: When all files have finished uploading:
DocumentUploader.onUploadFinish
1. GetDocumentTree → dsDocumentTree
→ The current document tree is retrieved from the backend
2. SetValueOf(Directory.options, dsDocumentTree)
→ The Directory is re-rendered and the new documents appear
3. ShowNotification(“Upload complete!”)
→ The result is communicated to the user

