User Manual

Change Enabled Of

7/7/25
Change Enabled Of

Kuika's Change Enabled Of action is used to dynamically change the activity (enabled/disabled) status of a component in the user interface. It is particularly useful for controlling interactive components such as forms, buttons, or input fields based on usage conditions. It is effective in making components active or inactive based on user actions or system conditions.

Technical Features

  • Activity Status Management (UI Control Panel): The Change Enabled Of action allows a specific component to be set to Enabled (enabled) or Disabled (disabled) status. This status can be determined by user interactions or system decision mechanisms.
  • Data Source Compatibility: Typically triggered by events such as button clicks or page loads. The action can manage the activity status of multiple components simultaneously based on different conditions.
  • Web & Mobile Support: This action is available for both web and mobile applications.

Change Enabled Of Action Application Steps

1. Define the Action in UI Design

UI Design module and select the screen where you want to apply the action.

  • Add an element (e.g. a button).
  • Example: The ‘Submit’ button may need to be disabled before the user checks a specific checkbox.
  • Select the button and add the UI Control > Change Enabled Of action by selecting the appropriate trigger event (Initial Actions, OnClick, etc.) from the + ADD ACTION menu.

2. Configure Action Parameters

  • Component To Change: Select the component whose activity status will be changed. Example: Submit Button (SubmitButton)
  • Editability: Select one of the Enabled or Disabled options to define the status of the component.
    • Enabled → The element becomes active.
    • Disabled → The element becomes inactive.

This parameter can be set as a fixed value or dynamically controlled using conditional expressions (e.g., Add Condition).

Use Case: Conditional Button Activation

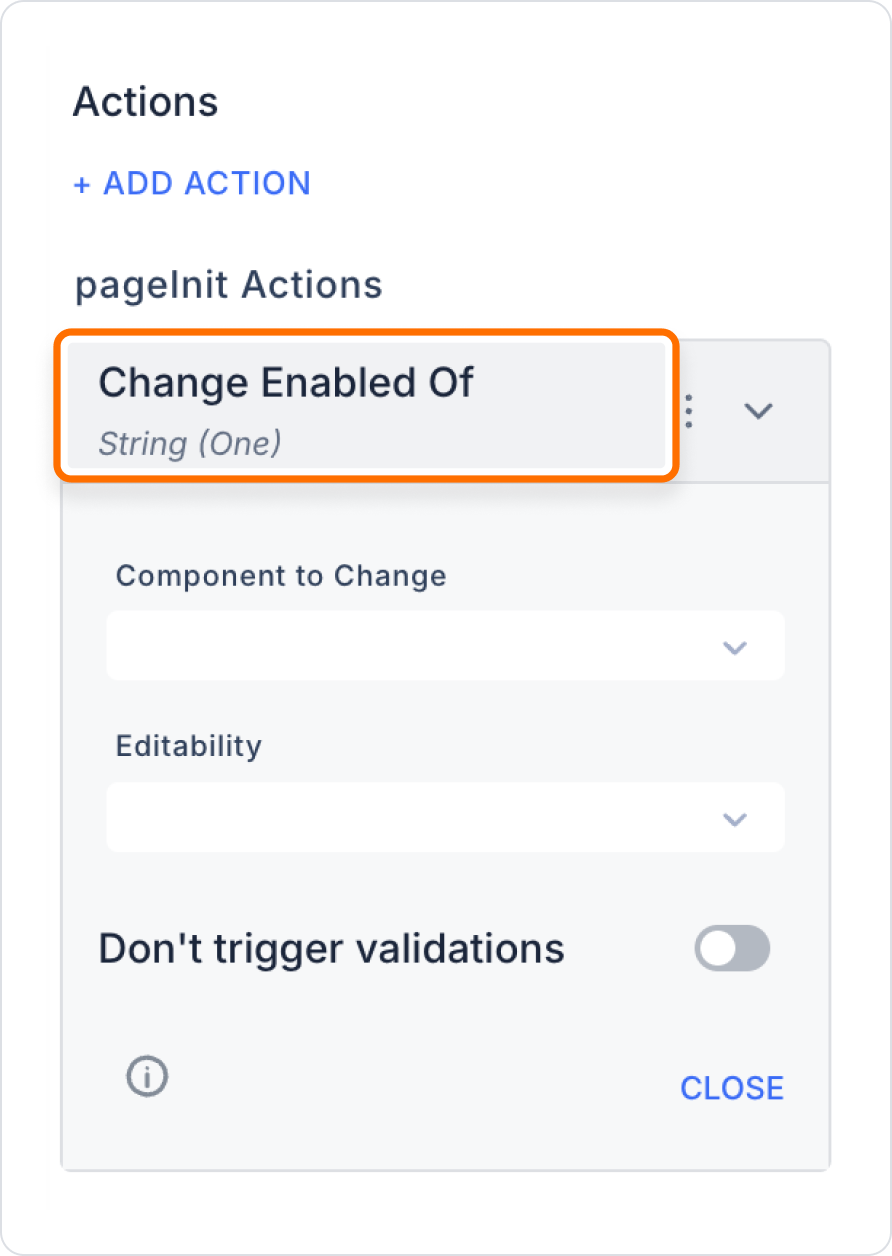
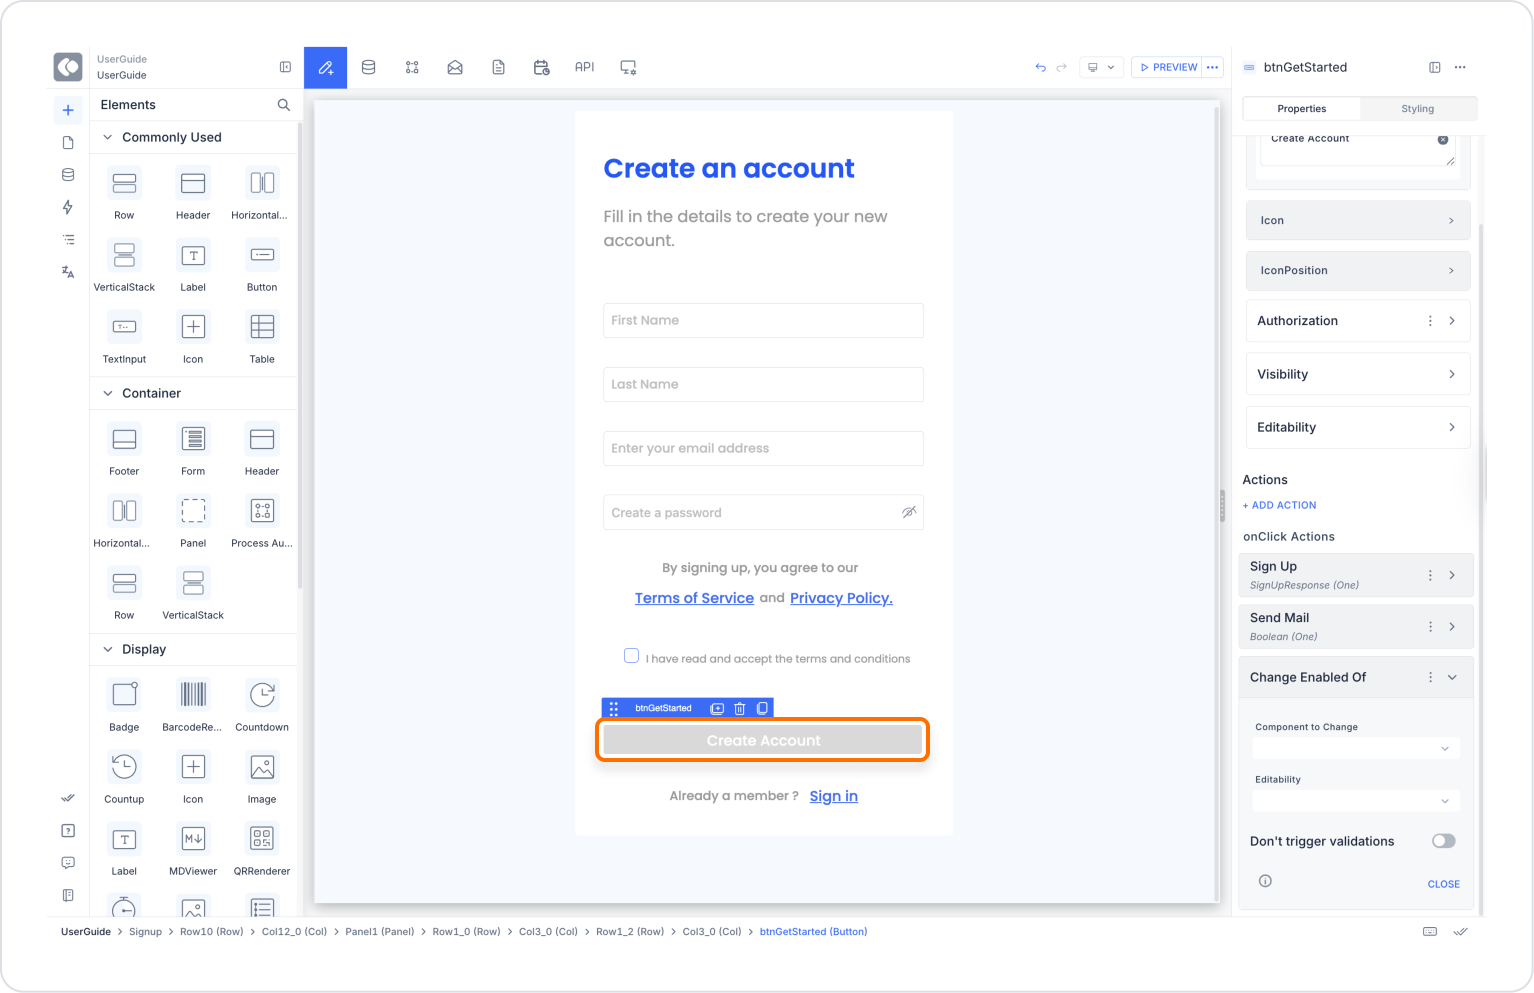
On a form screen, we do not want the ‘Create Account’ button to be active unless the ‘I have read the Terms of Use’ box is checked.

Application Steps:

  1. Go to the UI Design module.
  2. Add a Checkbox element and name it ‘AgreementCheck’.
  3. Add a Button element and name it ‘Create Account Button’.
  4. Click on the Checkbox element, then define the following action from the +ADD ACTION menu:
    • OnChange → UI Control → Change Enabled Of
  5. Action Parameters:
    • Component To Change: CreateAccountButton

Change Enabled Of Action Advanced Customisations

  • Control with Dynamic Conditions: With the Add Condition feature, you can define the activity status of different components based on user selections or form status. Example: Disabling input fields until a specific Select Box is selected.
  • Multiple Component Management: The activity status of multiple components can be controlled under the same action. Example: Both the ‘Save’ and ‘Cancel’ buttons are deactivated at the same time.

Technical Risks and Controls

  • Component Not Found: If the defined component has been deleted or renamed, the action will not work. An update may be required.
  • Complex Conditions: When multiple conditions are defined, there is an increased likelihood of the action not working or causing confusion. A clean and understandable structure is recommended.

The ‘Change Enabled Of’ action is a functional tool in the Kuika platform user interface that enables or disables components based on conditions. It is preferred in many user experience scenarios, such as form validation and step-by-step progress controls. It has a wide range of applications thanks to its web and mobile support.

Other Related Content

No items found.

Glossary

No items found.

Alt Başlıklar