
If your Kuika-developed app includes functionalities such as Camera usage, Location/Geolocation access and Notification sending, you will need to obtain user permission to access these functionalities. For each permission, it is important that you clearly indicate to users why these accesses are needed, how they will be used, and what impact these permissions may have on users' privacy. You need to add these permission descriptions in detail in the Permission Labels section of your application's configuration settings.
You can follow the steps below to create permission texts correctly:
Step 1: Navigate to Permission Labels
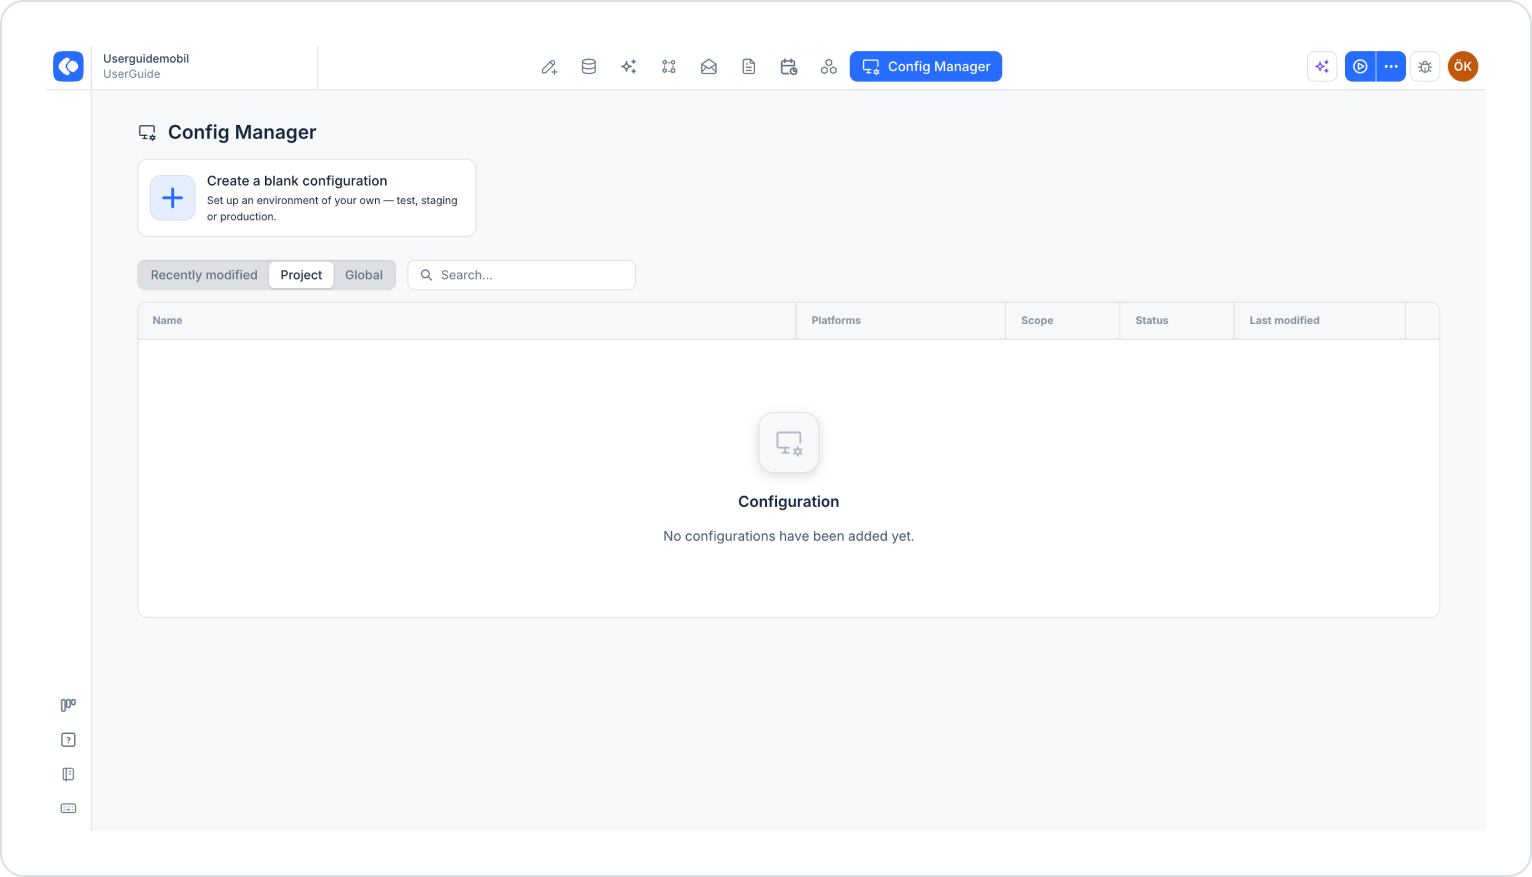
You can edit these permissions in your application's configuration settings under Permission Labels. This section is used to manage the messages required to request permission to the user. Permission descriptions should be entered according to the respective platform (Web, iOS or Android).
Step 2: Adding a New Permission


Step 3: Languages Supported by the App
Before entering permission descriptions, a list of supported languages will open in your application. It is important to provide user-friendly descriptions in each language so that each user can understand the permission correctly.
Step 4: Create Permission Content
After entering the permission descriptions for all languages, create the permission by clicking the CREATE button. This will create the permission text that will be shown to users.

In mobile apps developed with Kuika, you must obtain user permission to use device features such as location, camera, or Bluetooth. The text displayed to the user when permission is requested must clearly state why access is required and how it will be used. You can define these texts separately for each device feature through the Kuika Config Manager module.
In this guide, you’ll learn step-by-step how to create permission texts and add them to your app, using the GPS Tracker feature as an example.
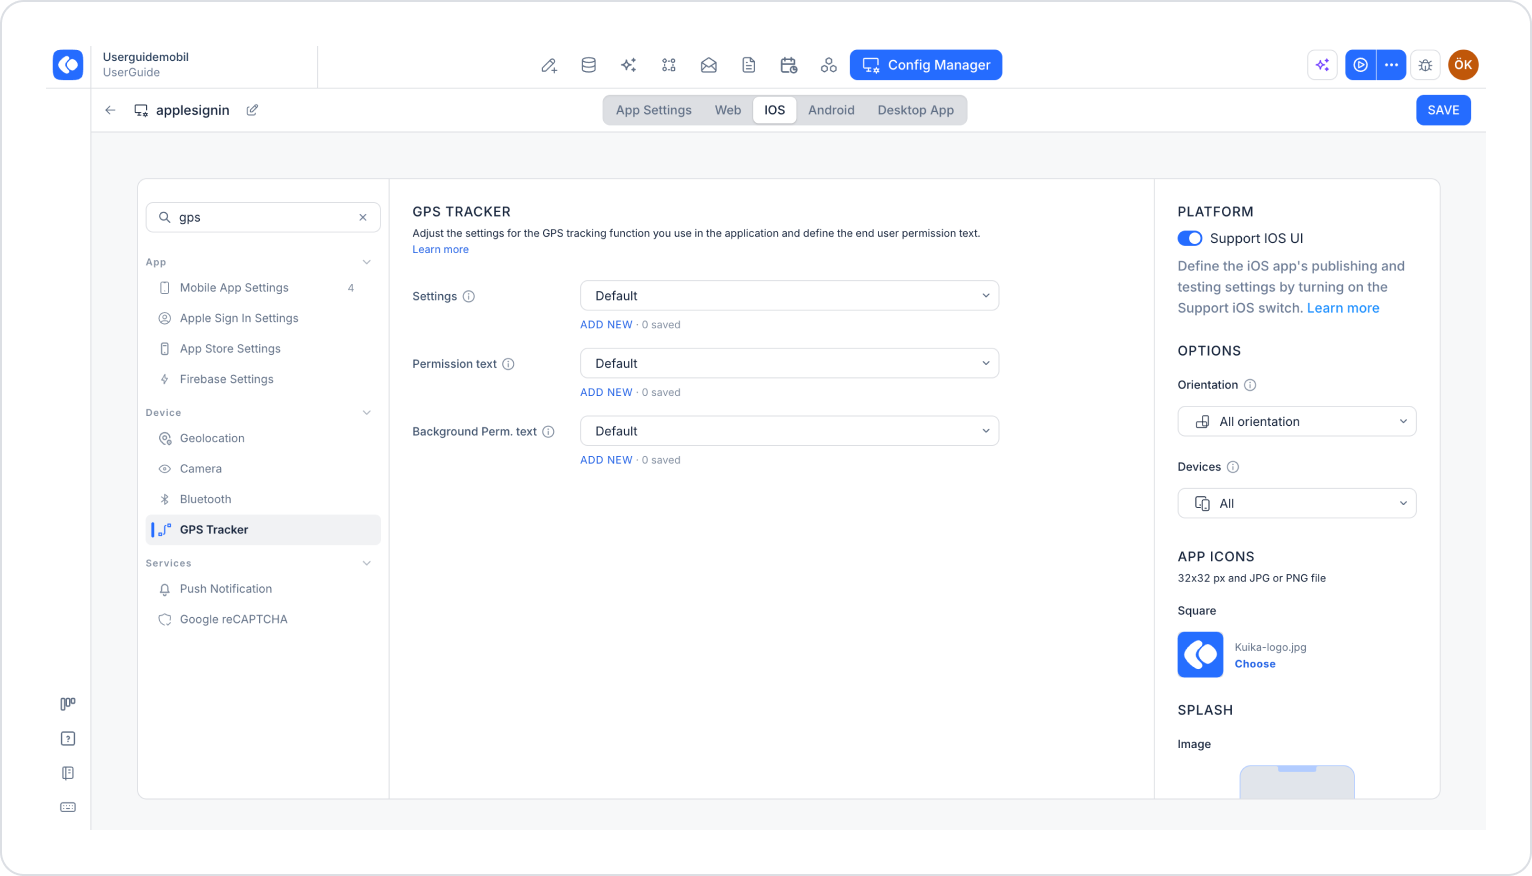
Fill out the following fields in the window that opens. A window titled GPS Tracking Permission Text opens for Permission text, and a window titled GPS Tracking Background Permission Text opens for Background Perm. text:
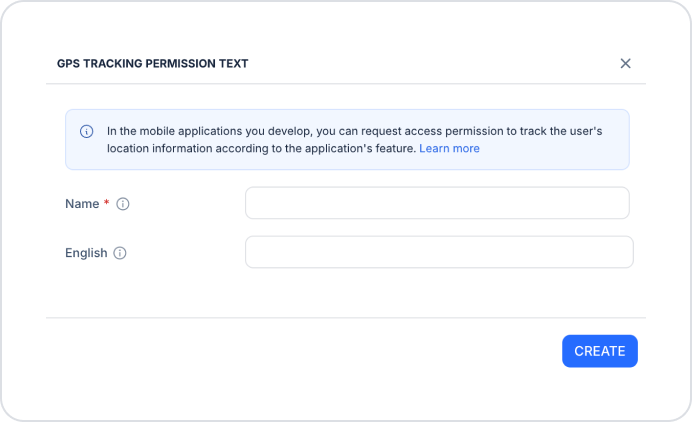
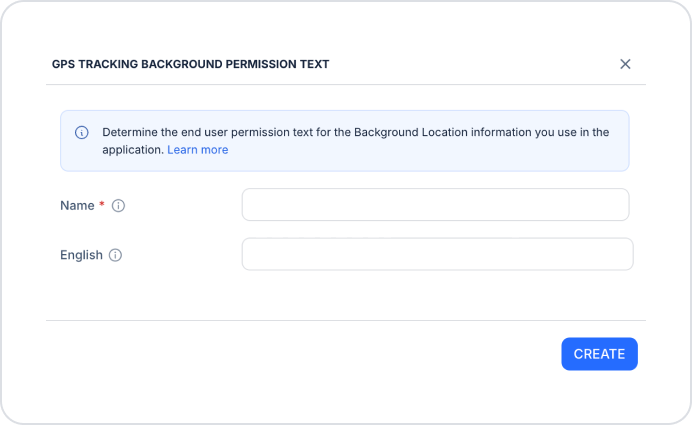
When writing the permission texts, briefly and clearly state the purpose for which the access will be used. Examples:
After entering the information, click the CREATE button to generate the permission text.
Once you’ve completed these steps, your app will display the permission text you defined to the user whenever it requests access to the relevant device feature.
By configuring permission texts correctly, you can transparently communicate to your users why your app uses device features.


