Select the data entry element from the UI Design module.
Open the Properties Panel:
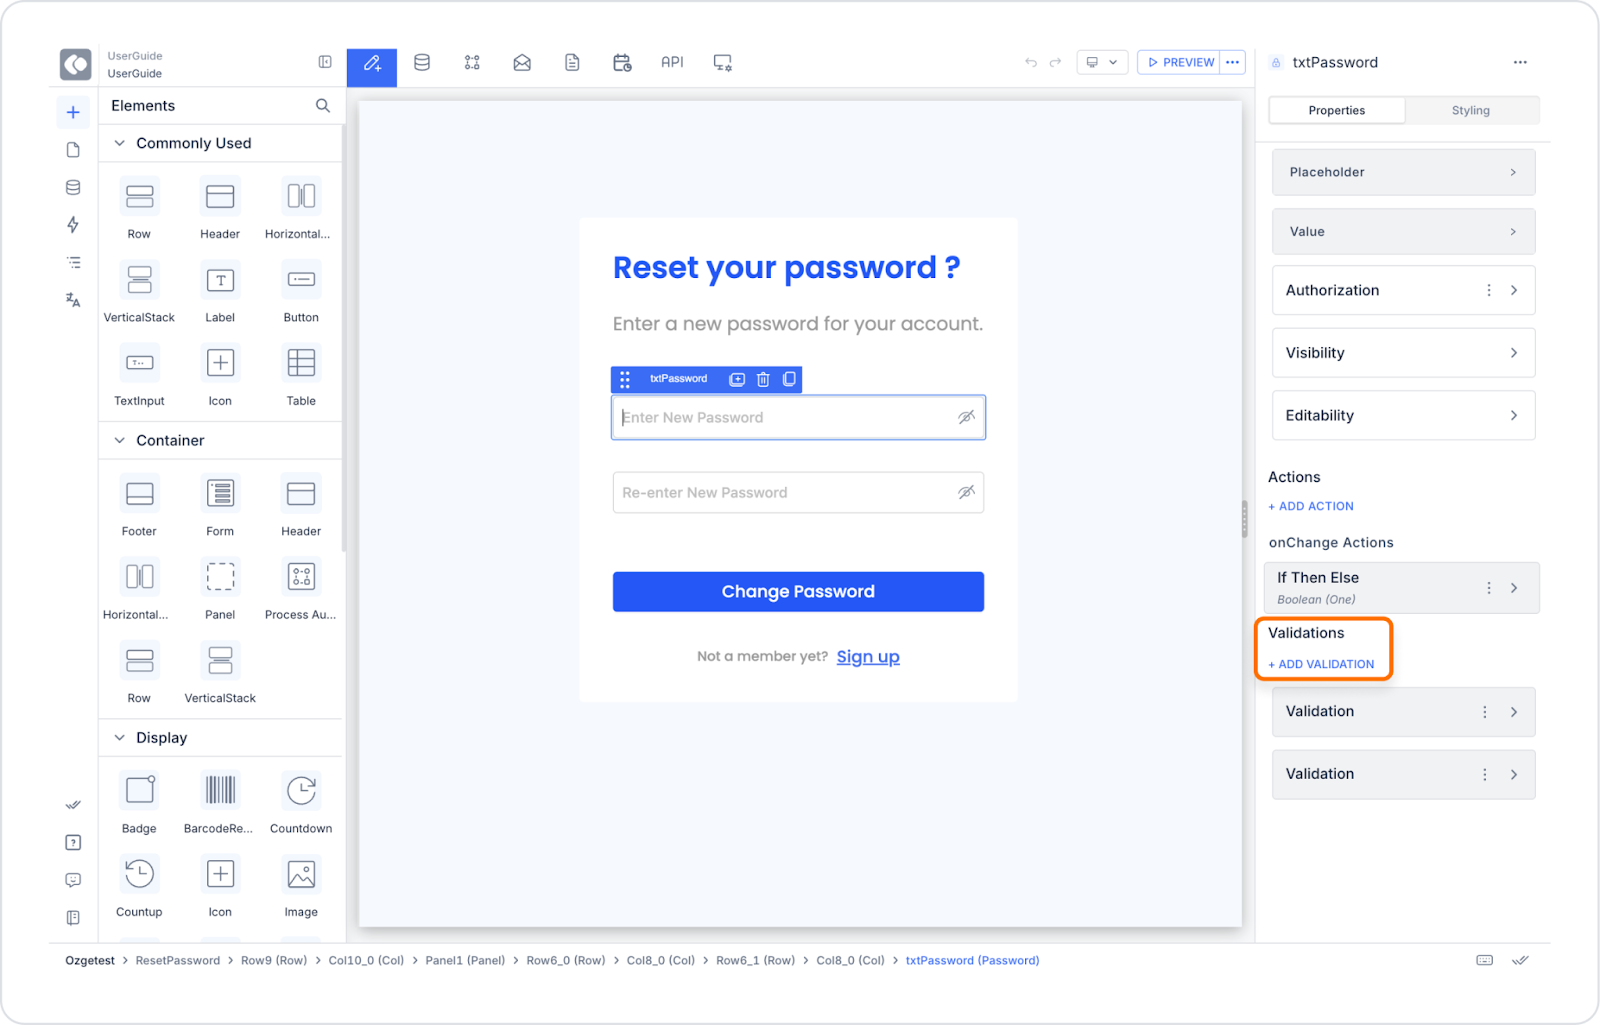
Open the Properties panel on the right side.
Specify Validation Type:
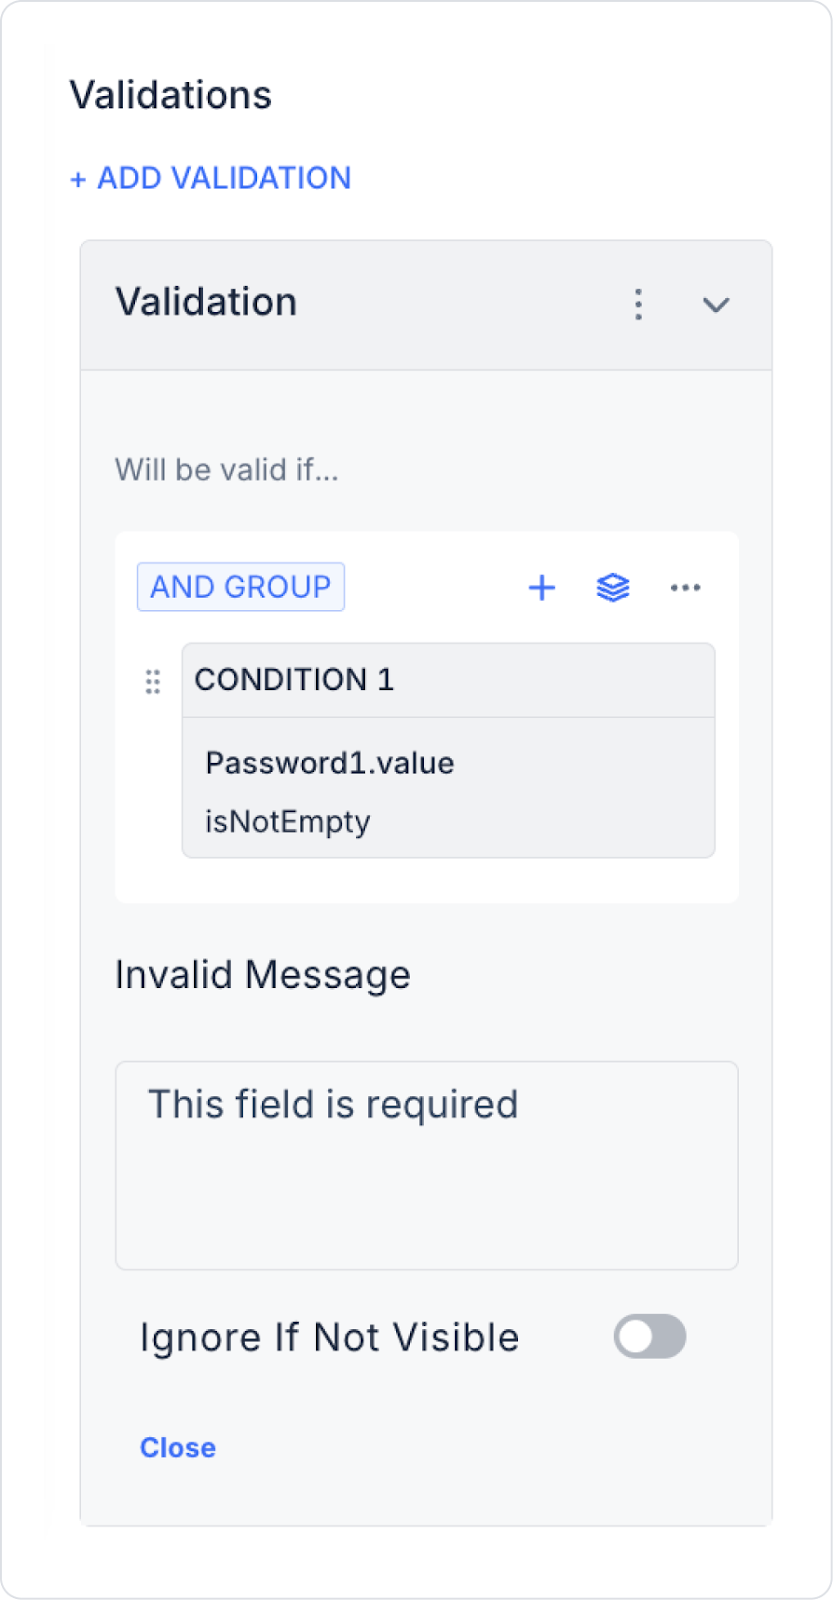
Click the ADD VALIDATION button under the Properties panel. In the Validation field that opens, define the conditions under which the validation will be valid in the Will be valid if… section.
Select the relevant validation type (for example, Cannot be left blank or Format Check).
Define Conditions and Standards:
By default, an AND GROUP is created.
From the three-dot menu:
AND GROUP → OR GROUP conversion can be performed
Add Nested Group can be used to add nested conditions
Conditions can be added with the + button
When defining conditions, using the Symbol Picker:
Default values
The .value fields of the elements under Components can be selected.
Creating Error Messages:
Write the error message to be displayed to the user in the Invalid Message field.
Saving Validation:
Save the validation after completing all settings. If necessary, the Ignore If Not Visible option can be enabled to prevent validation from working when the element is not visible.
Advantages of Using Validation
Data Integrity: Prevents incorrect data entry.
User Experience: Guides users with error messages.
Flexibility: You can create custom validation rules.
Time and Cost Savings: Simplifies the resolution process by preventing errors early on.
By following these steps, you can add validation to your data entry elements on the Kuika platform, making your application more reliable and user-friendly.