User Manual

URL Usage Scenario

URL Usage Scenario

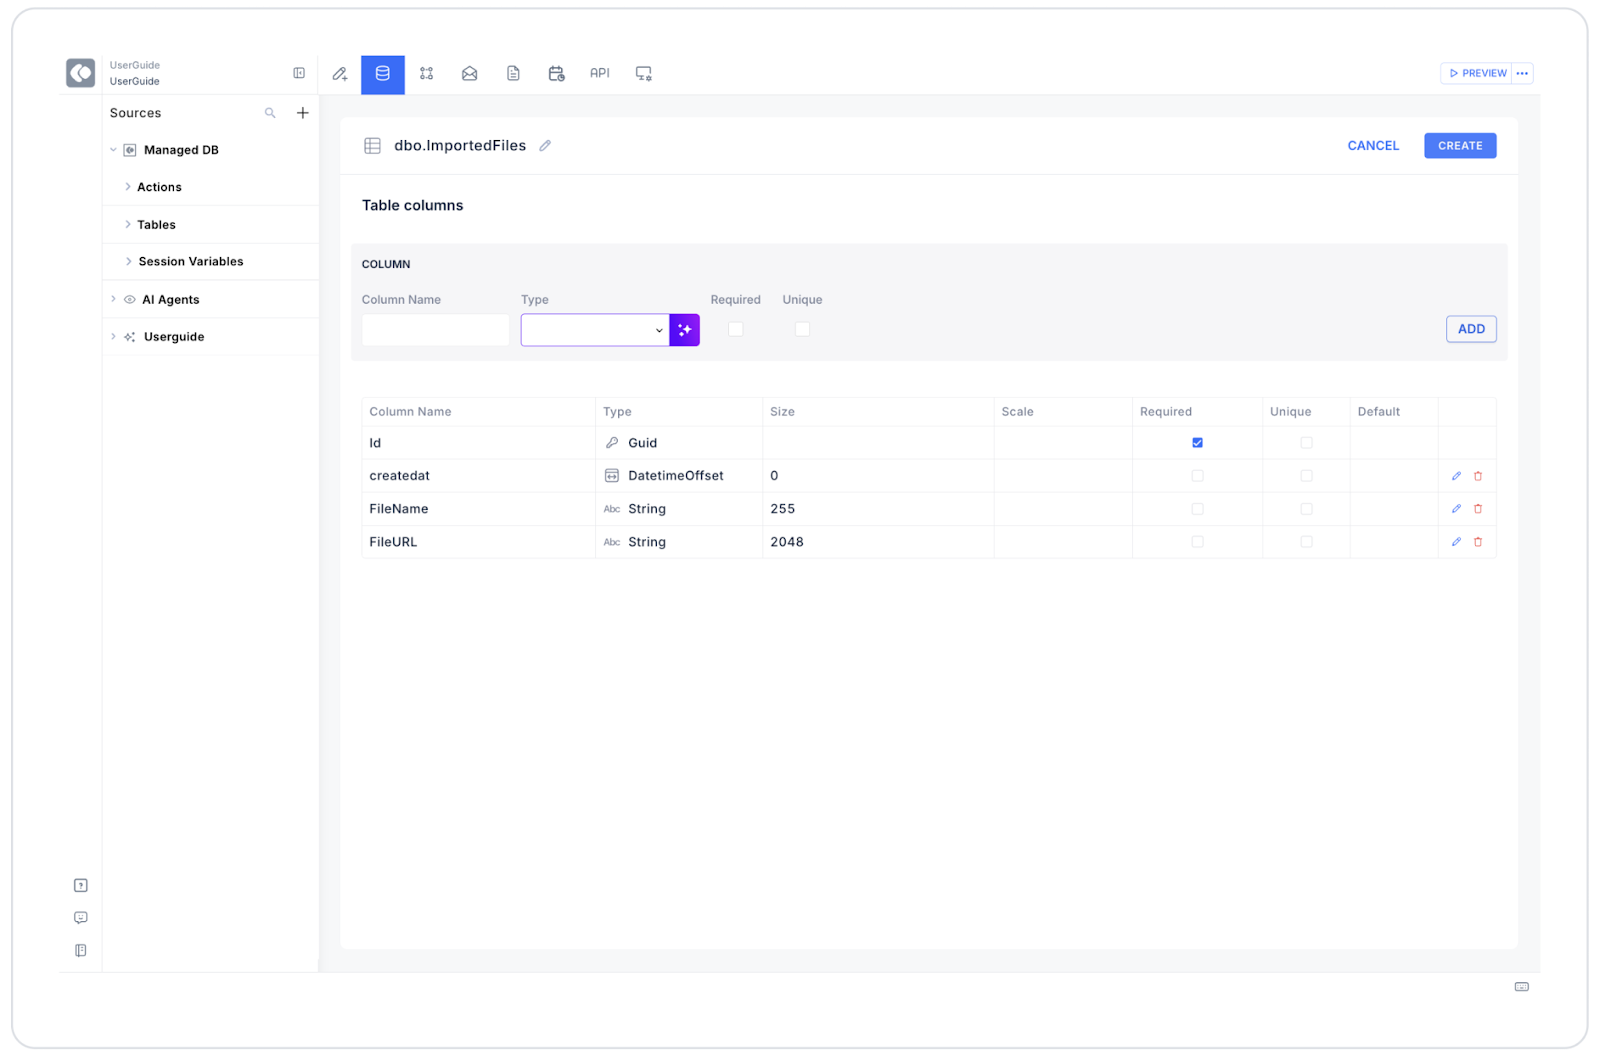
Kuika's URL element ensures that users enter valid web addresses (e.g., a website, file path, or API link) correctly. The entered URL is automatically validated, and the user is alerted if it is entered in an incorrect format. The element can also allow the user to visit the link directly by clicking on it.

The URL element can be used in both web and mobile applications.

Usage Areas

  • File upload or external link addition forms
  • Website or portfolio link entry
  • Dynamic retrieval of image, document, or media links
  • Product page or external source link displays
  • API or webhook address entry fields

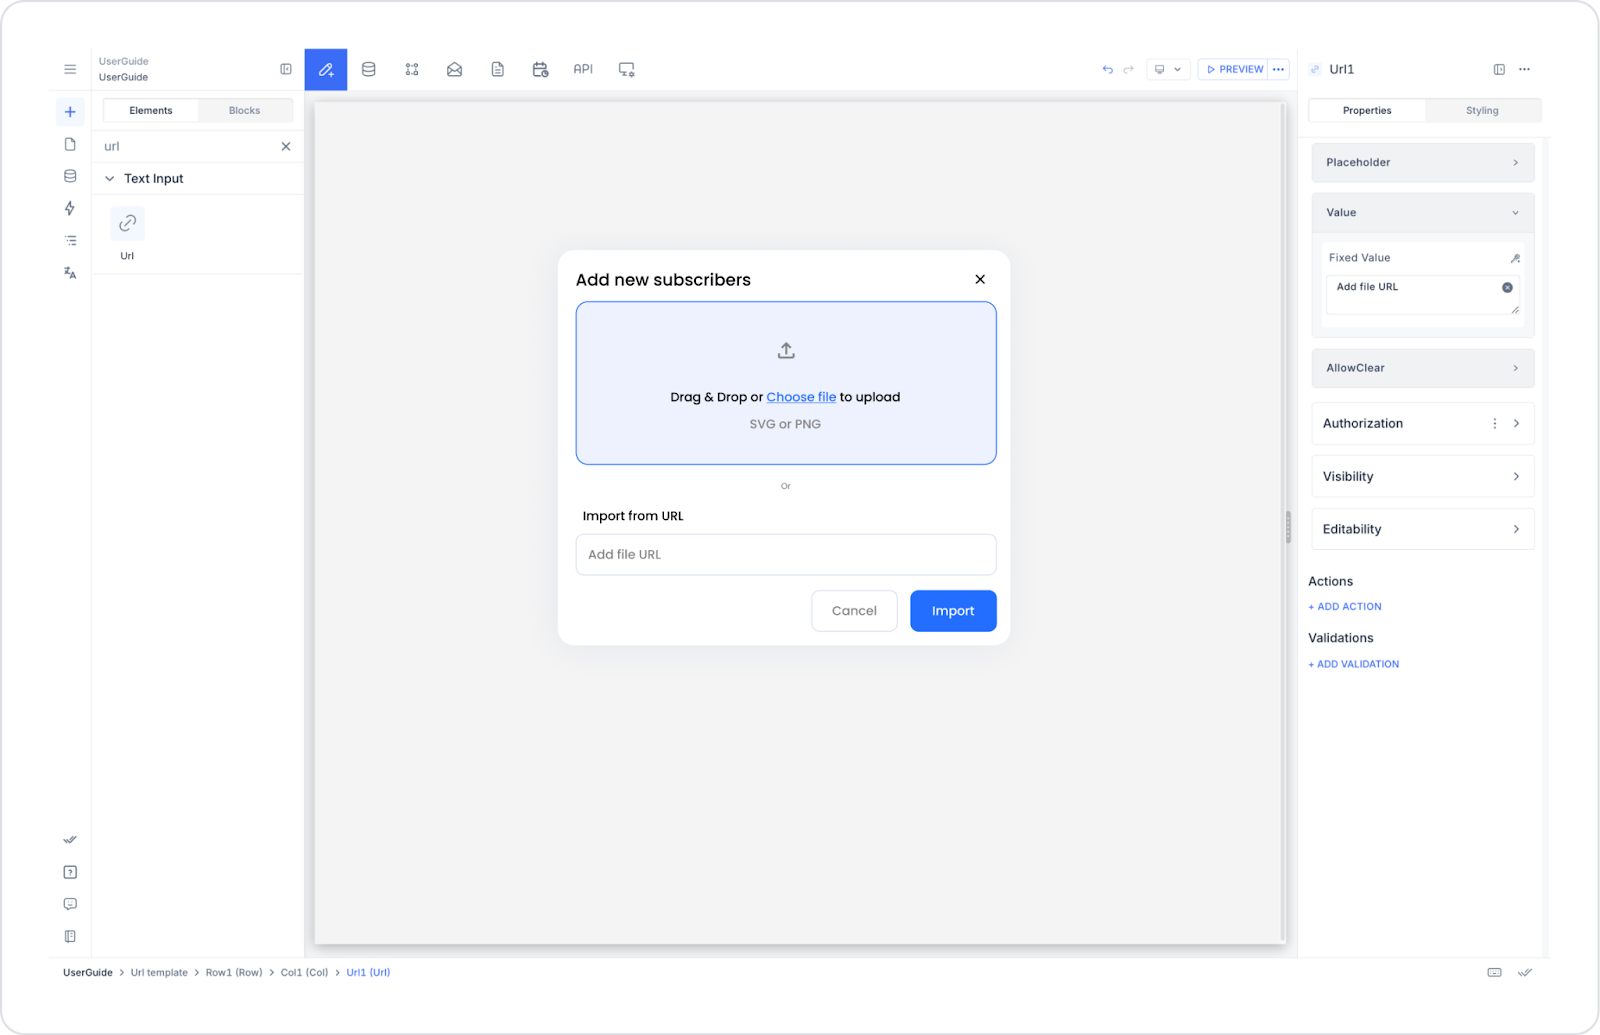
Usage Scenario – File Upload (Import from URL)

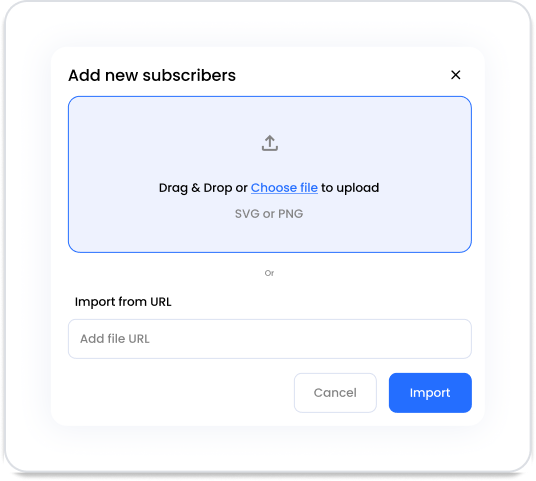
In an email subscription management screen, users can use two methods to upload a new subscriber list: Drag and drop the file or import it from an external link via the URL element.

In the scenario:

  • The user opens the “Add new subscribers” window.
  • Instead of the “Choose file” field, they enter the file link in the “Import from URL” box.
  • (example: https://kuika.com/files/subscribers.csv)
  • The system checks whether the URL is valid.
  • When the “Import” button is pressed, the file link is read by the system and the data is imported.

Connecting the Data Source

  1. Go to the Datasources module.
  2. Create a new table in the Tables tab: ImportedFiles
  3. Add the following fields:
  1. Then go to the SQL Actions tab.
  2. Create a new action: SaveImportedFile
  3. Enter the following SQL query:
INSERT INTO ImportedFiles (FileName, FileUrl, CreatedAt)VALUES (@FileName, @FileUrl, SYSDATETIMEOFFSET());

This query saves the file link (URL) entered by the user.

UI Design Module Operations

  1. Go to the UI Design module.
  2. Select the URL element from the Elements → Text Input → URL category on the left side.
  3. Drag and drop it onto the screen.
  4. Configure the following settings via the Properties Panel:
  • Placeholder: “Add file URL”
  • Value: fileUrl
  • Allow Clear: Active
  1. Add a Button (Import) element below it.
  2. Define the following action for the button:
    • onClick → Managed DB → Custom SQL Action (SaveImportedFile)
    • Parameters:
      • FileName → Extract(FileUrl, “filename”)
      • FileUrl → URLElement1.value
  3. When the action is complete, display the “File imported successfully.” notification to the user.

Using Properties in the Scenario Context

  • Value: Represents the full value of the entered link.
  • Placeholder: Shows the user the expected format. Example: Add file URL
  • Allow Clear: Allows the entered link to be cleared with a single click.

When the Scenario Step is Complete

  • The user enters a valid link in the URL field.
  • When the “Import” button is pressed, the system checks the link.
  • If valid, the file link is saved to the database.
  • If the “Cancel” button is selected, the process is canceled.

Restrictions

  • Invalid links (e.g., “ftp://”, “file://”) will result in a validation error.
  • For very long links, the Max Length value must be specified (e.g., 500 characters).
  • Links other than HTTPS may be blocked due to security policies.

Tips and Best Practices

  • Add placeholder text showing the user an example format.
  • Enable “Allow Clear” to allow easy editing.
  • Use validation to test the accessibility of external links.
  • Make the link clickable when necessary (e.g., Open URL action).
No items found.

Other Related Content

No items found.

Glossary

No items found.

Alt Başlıklar