User Manual

Upload File to Bucket

Upload File to Bucket

Upload File to Bucket allows you to upload a file to the selected Bucket by decoding it from Base64 format on the Kuika platform. This action enables files dynamically generated during application runtime or uploaded by users to be securely stored. Supported Bucket providers are Amazon S3 and Google Cloud Storage, each managed through the Configuration Manager.

This action can be used in both web and mobile applications. Files can also be stored in encrypted form using the Encrypt parameter during file upload.

Upload File to Bucket Action Steps

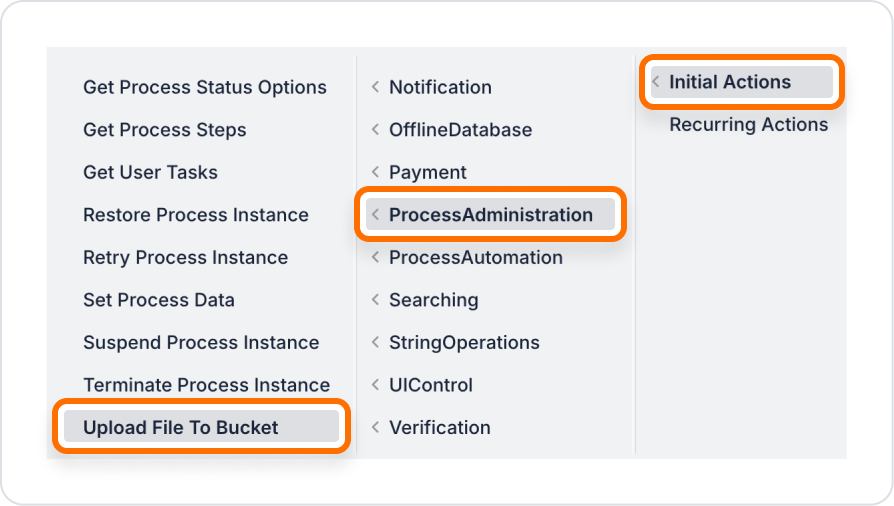
1. Action Definition

  • Open your project on the Kuika platform.
  • In the UI Design module, click the Add Action button on the right side and select the Upload File to Bucket action.

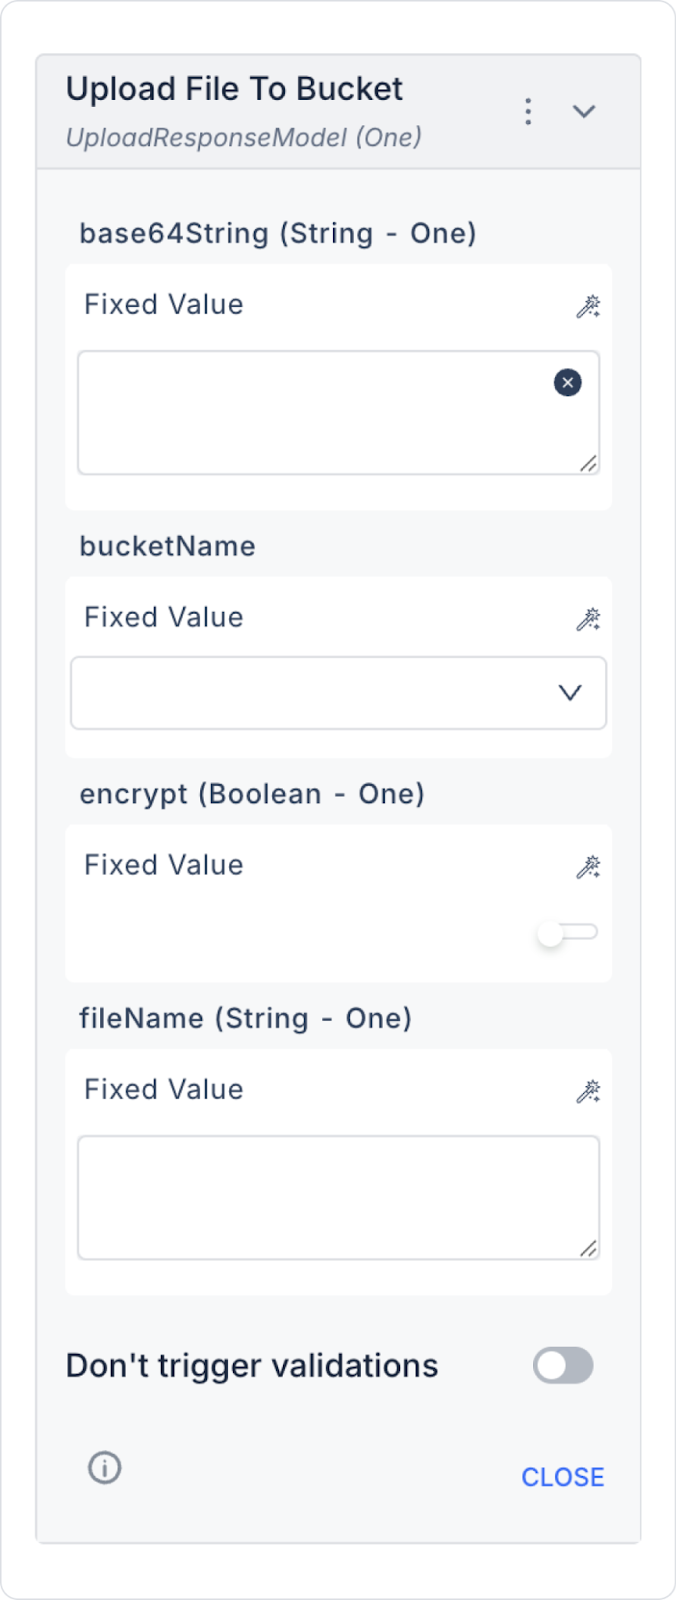
2. Specifying File Content

  • Specify the file to be uploaded using the Base64String parameter.
  • Example: JVBERi0xLjQKJ....

3. Bucket Selection

  • Select the target Bucket where the file will be uploaded.
  • You can only select AWS or Google as the cloud provider.

4. Specifying File Name

  • Enter the name under which the file will be saved in the Bucket.
  • Example: invoice_123.pdf

5. Using Encryption

  • If Encrypt = true is selected, the file will be uploaded in encrypted form.
  • If false or left blank, the file will be uploaded normally.

6. Running and Testing the Action

  • Run the action in Preview mode.
  • Verify that the file has been successfully uploaded to the Bucket.

Important Points

  • Base64String must be correct and complete; incorrect content will result in a failed upload.
  • The file extension must be added to the FileName parameter (e.g., .pdf, .png).
  • The Encrypt parameter is optional; if not used, the file will be uploaded unencrypted.
  • Incorrectly entering the Bucket Name or if it is not defined in Configuration Manager will result in an upload error.

Usage Scenario: Uploading a User Profile Photo

In a social media application, a user wants to select and upload their profile photo. The photo is converted to Base64 format in the application and then uploaded to the profile-pictures Bucket using the Upload File to Bucket action.

Step-by-Step Usage

  1. Photo Selection: The user selects a photo from their device.
  2. Base64 Conversion: The photo is converted to Base64 format.
  3. Upload File to Bucket Action:
    • Base64String: ...
    • BucketName: You can only select AWS or Google as the cloud provider.
    • FileName: user_456.png
    • Encrypt: false
  4. Next Actions: The URL of the uploaded file is saved to the database and displayed to the user.

Upload File to Bucket Action Advanced Customizations

  • Versioning: Strategies for overwriting the previous version or saving as a new version can be applied for uploads with the same file name.
  • Dynamic Bucket Selection: The Bucket Name parameter can be made dynamic based on the user, environment (test/prod), or role.
  • Encryption Policies: The Encrypt parameter can be made mandatory for sensitive data.
  • FileName Rules: File naming can be automated using date, user ID, or custom prefixes.

Technical Risks

  • Incorrect Base64: Missing or corrupt Base64 strings prevent the file from uploading.
  • Incorrect FileName: Files without extensions may not open correctly.
  • Bucket Errors: Selecting an incorrect or inaccessible Bucket will cause the upload to fail.
  • Encryption Incompatibilities: If the Encrypt feature is enabled, the lack of encryption support on the Bucket side may cause an error.
  • Performance Limits: Converting large files to Base64 may strain device memory.

Other Related Content

No items found.

Glossary

No items found.

Alt Başlıklar