Twin Dashboard is a feature that allows you to embed a live, tenant-specific, and verified KuikaAgents (Twin) dashboard into your Kuika application. This integration is not a one-way “embedding,” but rather a two-way live synchronization: Changes made in the KuikaAgents app (e.g., adding a new dashboard) are automatically reflected in the AgentDashboard element on the Kuika platform; similarly, actions performed on the Kuika platform become visible in KuikaAgents.
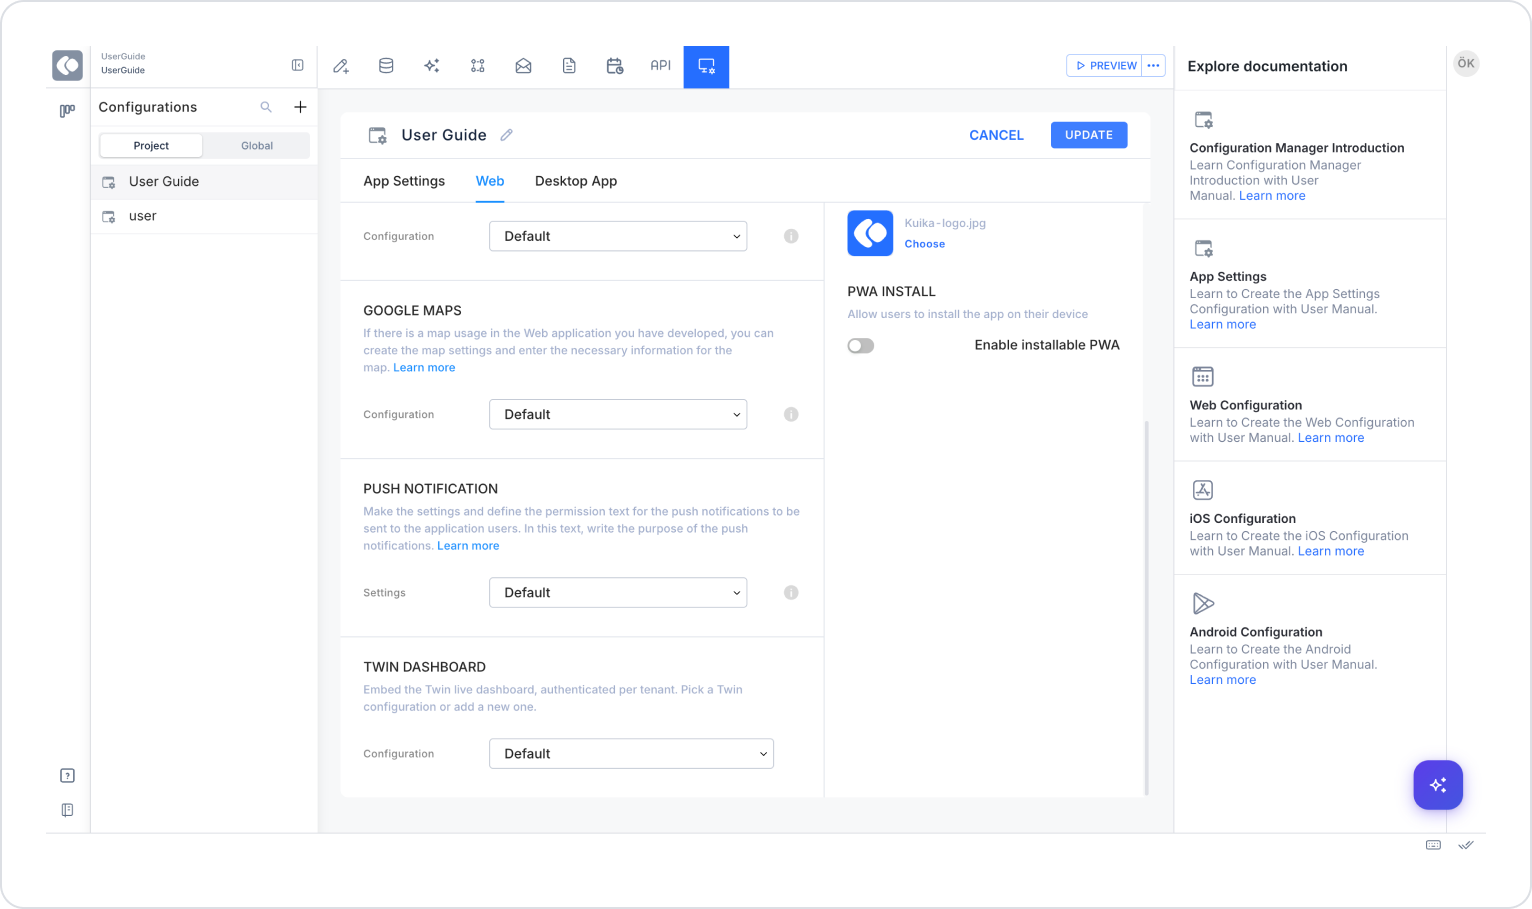
Twin Dashboard settings are located in Kuika’s Configuration Manager module, under Web configuration.
2. Steps for Twin Dashboard Settings
Step 1 – Obtaining the Token and Secret in the KuikaAgents App
Before setting up the configuration on the Kuika side, you must obtain the required Access Secret and Identity Secret values through the KuikaAgents app:
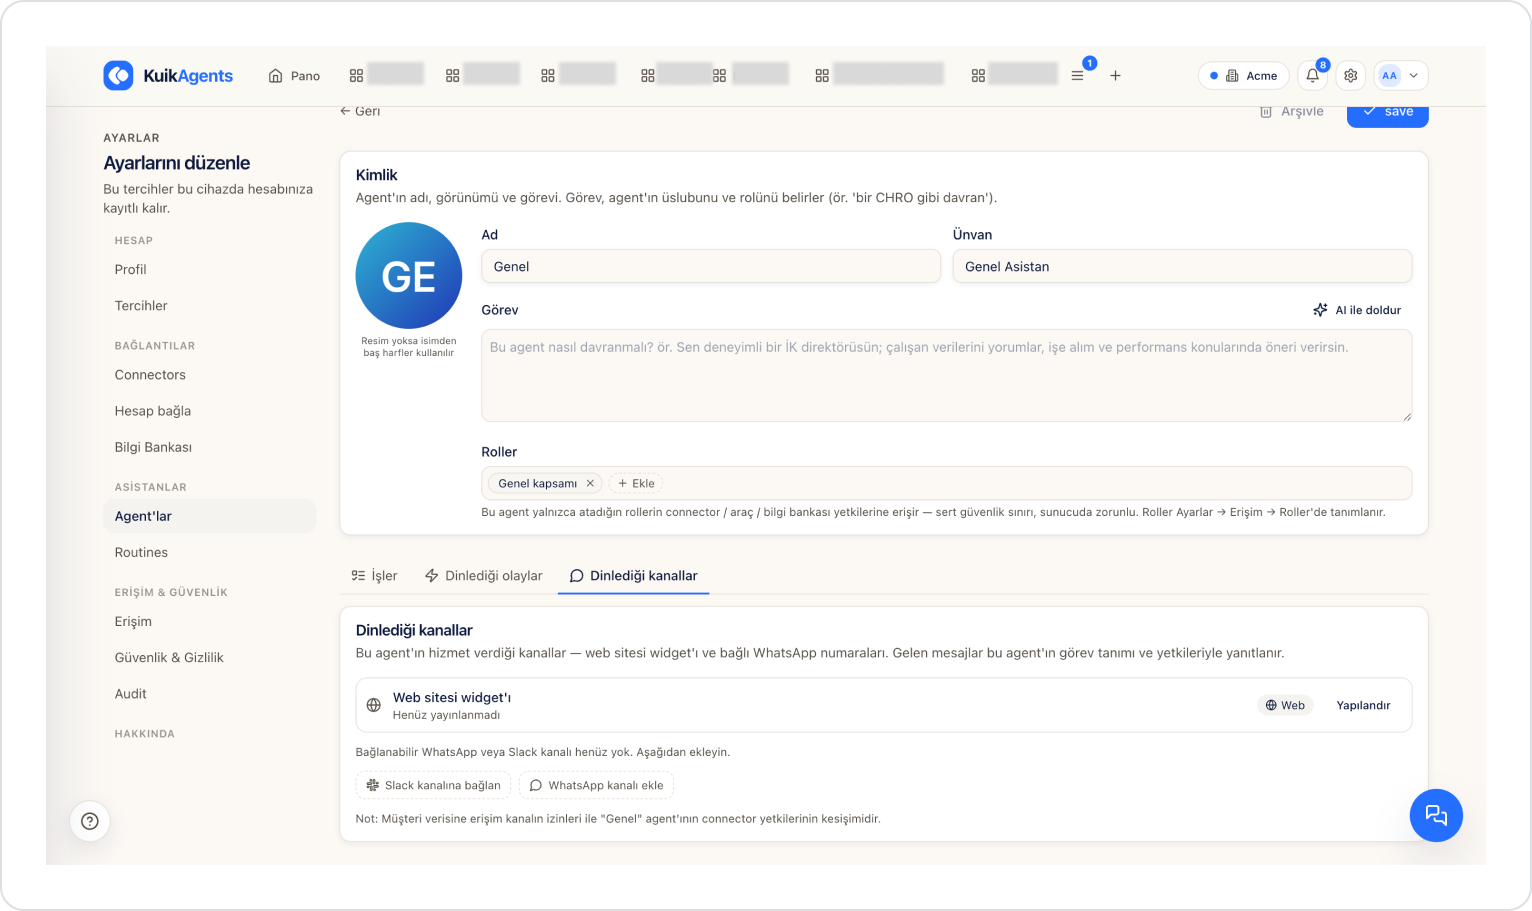
Click the Configure option for the Website widget.
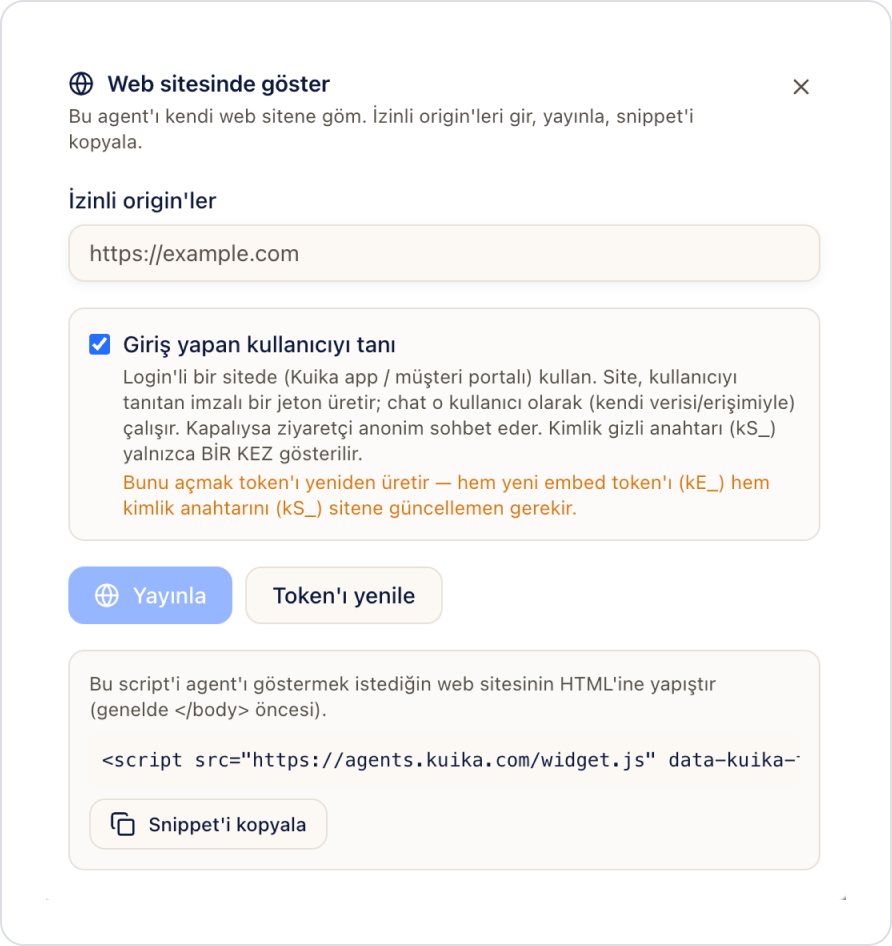
In the “Display on Website” window that opens:
In the Allowed Origins field, enter the domain address of the Kuika application where you will display the dashboard (e.g., https://uygulamaniz.com).
Check the “Recognize logged-in user” option. This option allows users who are logged into your Kuika app to view the dashboard using their own data and access; if left unchecked, visitors will view it anonymously.
Click the “Publish” button.
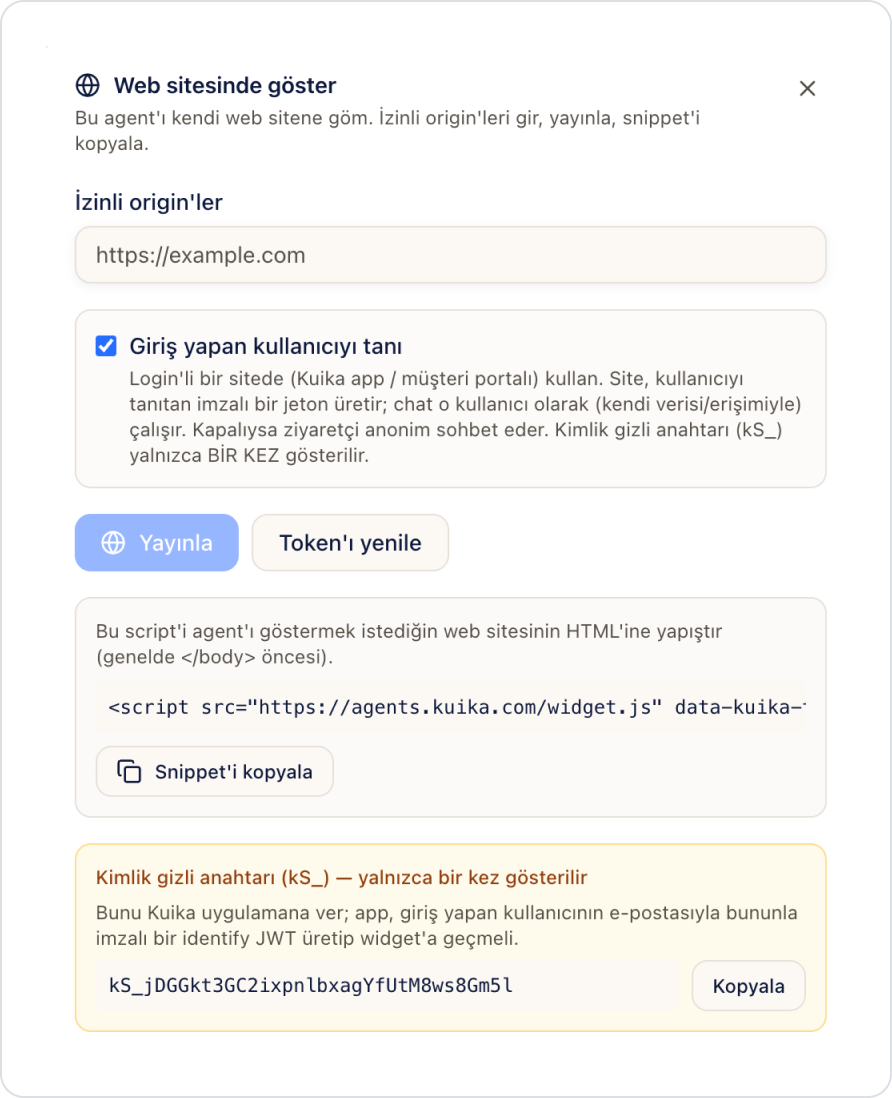
Click the Refresh Token button. This action generates the Identity Secret (kS_...).
The “Renew Token” operation may break the integration if there is an active tenant using that token. It is safe to renew the token only on a tenant used for testing or demonstration purposes, not in production. Before renewing the token for a tenant used in production, check with the relevant team.
Click the Copy Snippet button in the script box below to copy the embed script (which contains the Access Secret).
The Identity Secret (kS_...) is displayed only once. Be sure to save it using the Copy button before closing the window; if you lose it, you’ll need to generate a new one using “Refresh Token,” and the previous one will become invalid.
Step 2 – Add Configuration to Your Application (Kuika Platform)
Log in to the Kuika platform.
From the Apps screen, open the project you’ll be working on.
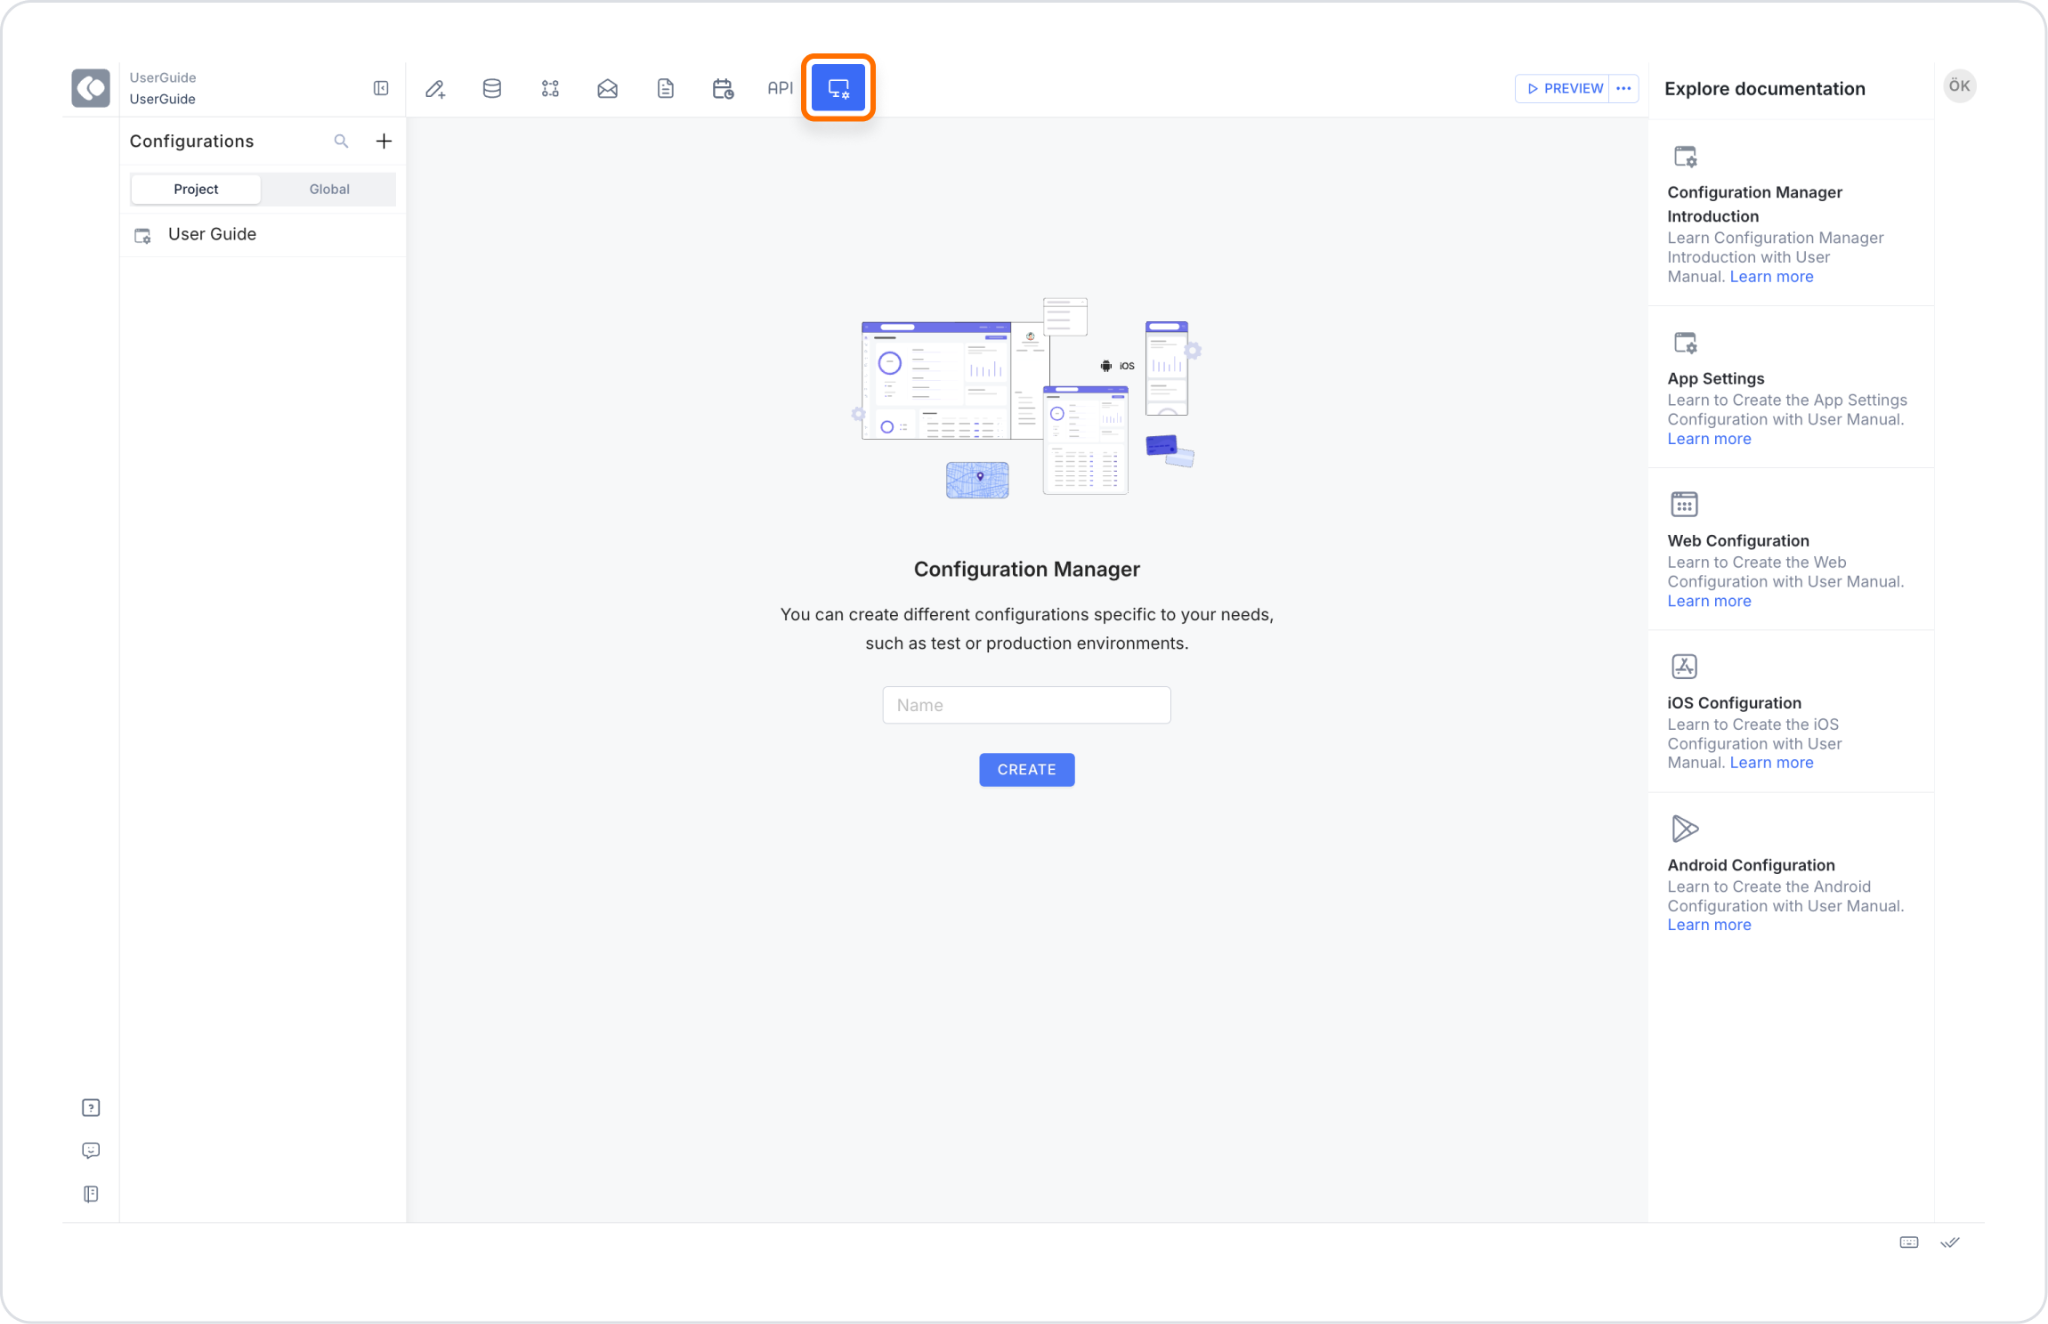
Click the Configuration Manager module.
On the screen that opens, give the configuration a name and click the CREATE button.
Step 3 - Configure Twin Dashboard Settings
In the configuration you created, open the Web tab.
Go to the TWIN DASHBOARD section.
Click the Default dropdown menu next to the Configuration heading.
Select the ADD NEW option from the dropdown menu.
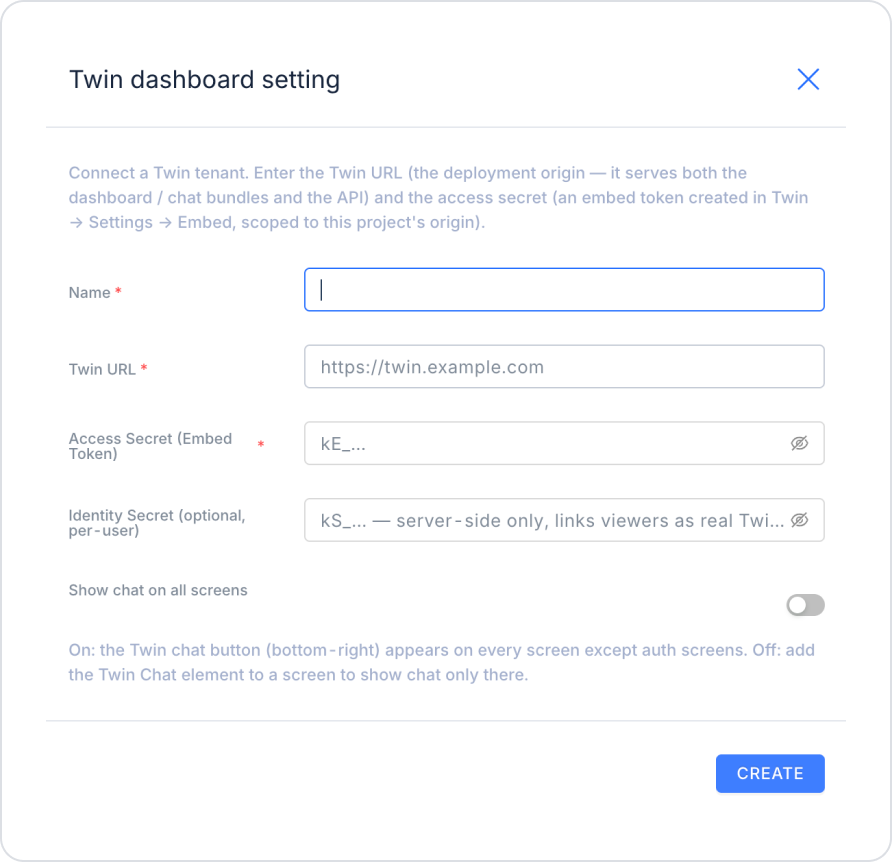
Fill in the following fields in the pop-up window that appears:
Name: The name to be given to the Twin Dashboard setting.
Twin URL: The deployment origin address (e.g., https://twin.example.com) that provides the dashboard and chat bundles, as well as the API. KuikaAgents are typically installed on-premises (to ensure customer data does not leave the premises); therefore, a fixed address is not assumed, and the URL must be entered on a per-project basis.
Access Secret (Embed Token): The token value from the script you obtained in Step 1 in KuikaAgents by clicking Copy Snippet.
Identity Secret (optional, user-based): The Identity secret (kS_...) value displayed after clicking Refresh Token in Step 1. This should be stored only on the server side.
Show chat on all screens: When enabled, the Twin Chat button (bottom-right corner) appears on all screens except the auth screens. If disabled, the Twin Chat element must be added to a specific screen to display the chat there.
Step 4 - Save Settings
After filling in the required fields, click the CREATE button.
Activate the created Twin Dashboard configuration via App Settings by selecting it from the Configuration dropdown menu.
Click the UPDATE button in the top-right corner to save the changes.
Since the Access Secret and Identity Secret fields contain sensitive information, you can control their visibility by clicking the eye icon.
3. Two-Way Synchronization
Once this configuration is complete, when you add the AgentDashboard element to a page in the UI Design screen, the dashboard content defined for that tenant in KuikaAgents will automatically be displayed. Synchronization is two-way:
If you add a new dashboard in the KuikaAgents app, this change will automatically appear when you preview the screen containing the AgentDashboard element on the Kuika platform.
Any related changes made on the Kuika platform are similarly reflected on the KuikaAgents side.
When the AgentCustomDashboard/AgentDashboard element is added, it appears blank if no dashboard has yet been designed for the relevant agent in KuikaAgents. The content is displayed only after a design has been created in KuikaAgents.
This eliminates the need for separate synchronization or manual data transfer between the two platforms.