User Manual

Text Input Usage Scenario

Text Input Usage Scenario

Kuika's Text Input element allows users to enter text in applications. It is used for entering information such as user names, addresses, ID numbers, phone numbers, or other text-based information. Its validation, masking, and formatting features ensure that the entered data is consistent and in the correct format.

The Text Input element can be used in both web and mobile applications.

Areas of Use

  • Registration or Login forms
  • Profile editing screens
  • Contact and support forms
  • Search boxes or filtering fields
  • Product/order information entry fields

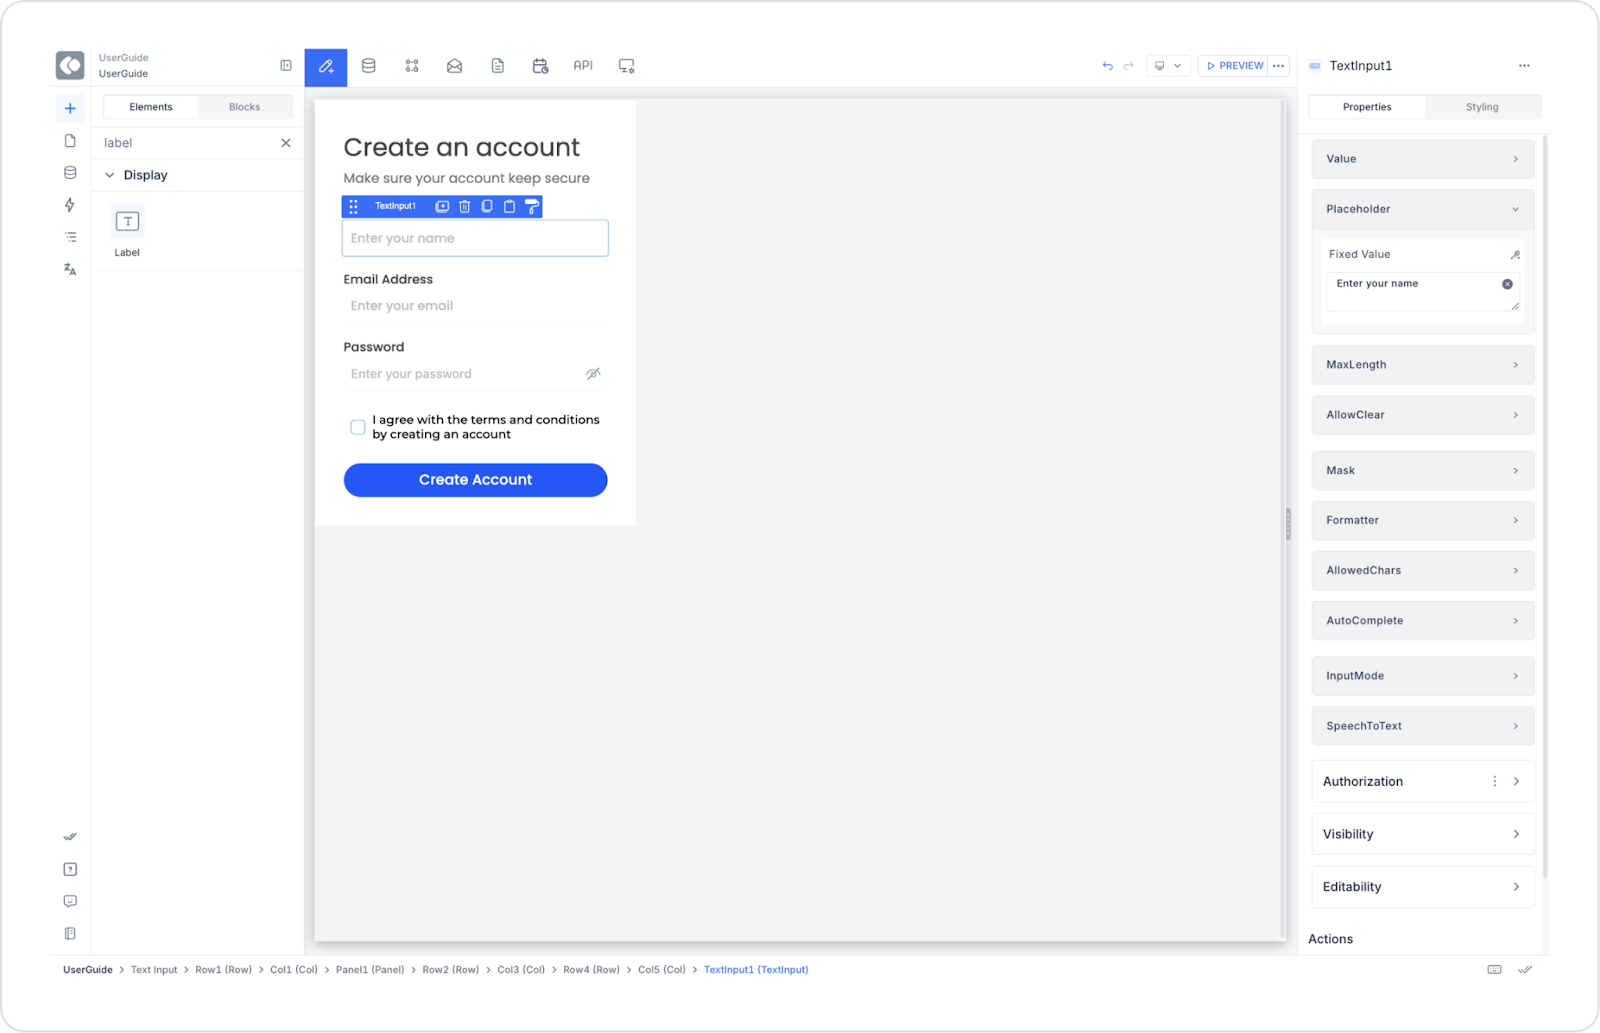
Usage Scenario – Create Account

On a membership creation screen, users must enter their name, email, and password information. The Text Input element is used for the “Username” entry in these fields.

In the scenario:

  • The user arrives at the “Create Your Account” screen.
  • They enter their name in the ‘Username’ field (e.g., Özge Kaçar).
  • They fill in the “Email Address” and “Password” fields.
  • After entering all the information, they click the “Create Account” button to create their account.
  • The application validates the entered data and registers the user.

Connecting the Data Source

  1. Go to the Datasources module.
  2. Click on the Tables tab.
  3. Create a new table: CreateUsersTextInput
  4. Add the following fields:
  1. Then go to the SQL Actions tab.
  2. Create a new action: CreateUserTextInput
  3. Enter the following SQL query:
INSERT INTO Users (Username, Email, PasswordUser, CreatedAt)VALUES (@Username, @Email, @PasswordUser, SYSDATETIMEOFFSET());

This query saves the data from the Text Input and other input fields.

UI Design Module Operations

  1. Go to the UI Design module.
  2. Select the Text Input element from the Elements → Text Input category on the left side.
  3. Drag and drop it onto the screen.
  4. Configure the following settings via the Properties Panel:
  • Placeholder: “Enter your name”
  • Value: userName
  • Max Length: 50
  • Allow Clear: Active
  • Formatter: Uppercase (optional)
  • Input Mode: char
  1. Add the “Email Address” and “Password” fields as well.
  2. Add a Checkbox below: “I agree with the terms and conditions...”
  3. Add a Button (Create Account) element at the bottom.
  4. Define the following action for the Button:
    • onClick → Managed DB → Custom SQL Action (CreateUser)
    • Parameters:
      • Username → TextInput1.value
      • Email → EmailInput1.value
      • Password → PasswordInput1.value

Using Properties in the Scenario Context

  • Value: Represents the text entered by the user or assigned initially.
  • Placeholder: Descriptive text visible before the user enters data. Example: “Enter your name”
  • Max Length: Sets the character limit. Example: Usernames longer than 50 characters cannot be entered.
  • Allow Clear: Allows the user to clear the entered text with a single click.
  • Mask: Restricts text entry according to specific formats (e.g., phone or date format).
  • Formatter: Formats the entered text. Example: Uppercase → writes all letters in uppercase.
  • Speech To Text: Allows text entry via voice command.

Using Text Input Masking

Masking ensures that data is entered by the user in a specific format.

This feature is particularly useful for entering dates, phone numbers, or license plates.

Basic Mask Symbols:

  • 9: Number (0–9)
  • a: Letter (A–Z, a–z)
  • *: Alphanumeric character (A–Z, a–z, 0–9)

Example Mask Formats:

  • 99/99/9999 → Date (example: 01/01/2025)
  • (999)-999-9999 → Phone (example: (555)-444-1212
  • AA 9999 → License plate (example: TR 1234)
  • $999,999.00 → Currency (example: $125,340.00)

When the Scenario Step is Complete

  • Enter the username and other information.
  • When the “Create Account” button is pressed, the data is saved to the table.
  • When registration is successful, the user is redirected to the “Login” screen.
  • If incorrect or incomplete data is entered, a warning message is displayed.

Restrictions

  • Max Length should be used for very long entries.
  • Data loss may occur if the mask format is defined incorrectly.
  • Empty fields should be validated before submission.

Tips and Best Practices

  • Keep placeholder text instructive: “Enter your name”, for example.
  • Avoid unnecessary formatting; keep the user experience simple.
  • Increase mobile accessibility with the Speech To Text feature.
  • Perform preview tests when using the Mask and Formatter features simultaneously.
  • Provide immediate feedback to the user for incorrect entries (e.g., “Please enter your name”).
No items found.

Other Related Content

No items found.

Glossary

No items found.

Alt Başlıklar