User Manual

Text Area Usage Scenario

Text Area Usage Scenario

Kuika's Text Area element allows users to enter long texts or descriptions. By offering a wider area than the classic Text Input element, it allows users to comfortably write and edit multi-line texts. It supports features such as auto-resizing, character limits, speech-to-text, and character counters.

The Text Area element can be used in both web and mobile applications.

Areas of Use

  • Comment or review forms
  • Feedback or complaint screens
  • Profile descriptions or biography fields
  • Blog, note, or description texts
  • Support forms or customer message boards

Use Case – Cafe Review

A restaurant or cafe app has a rating and Text Area field for users to rate the products they order.

Users give a star rating, then write their comments in the Text Area.

In the scenario:

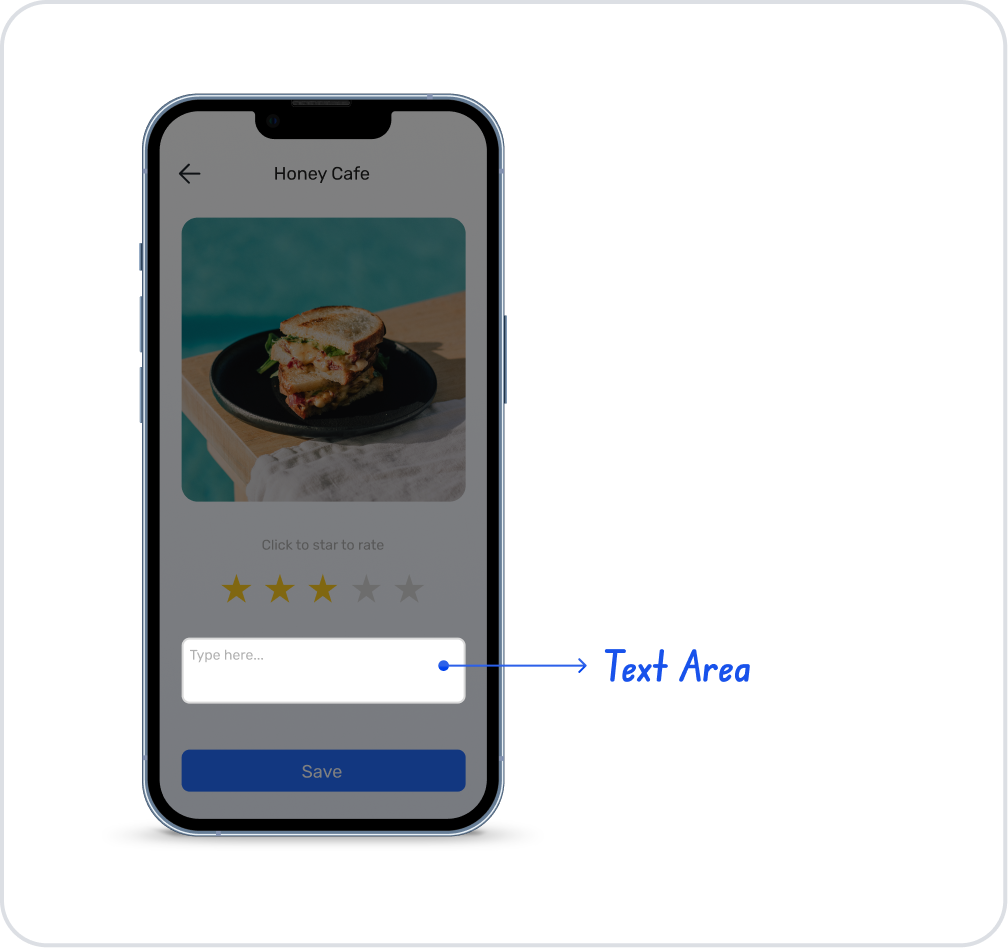
  • The user arrives at the “Honey Cafe” screen.
  • They click on one of the stars to rate the product.
  • They enter a comment such as “The sandwich was delicious, the service was fast” in the Text Area field below.
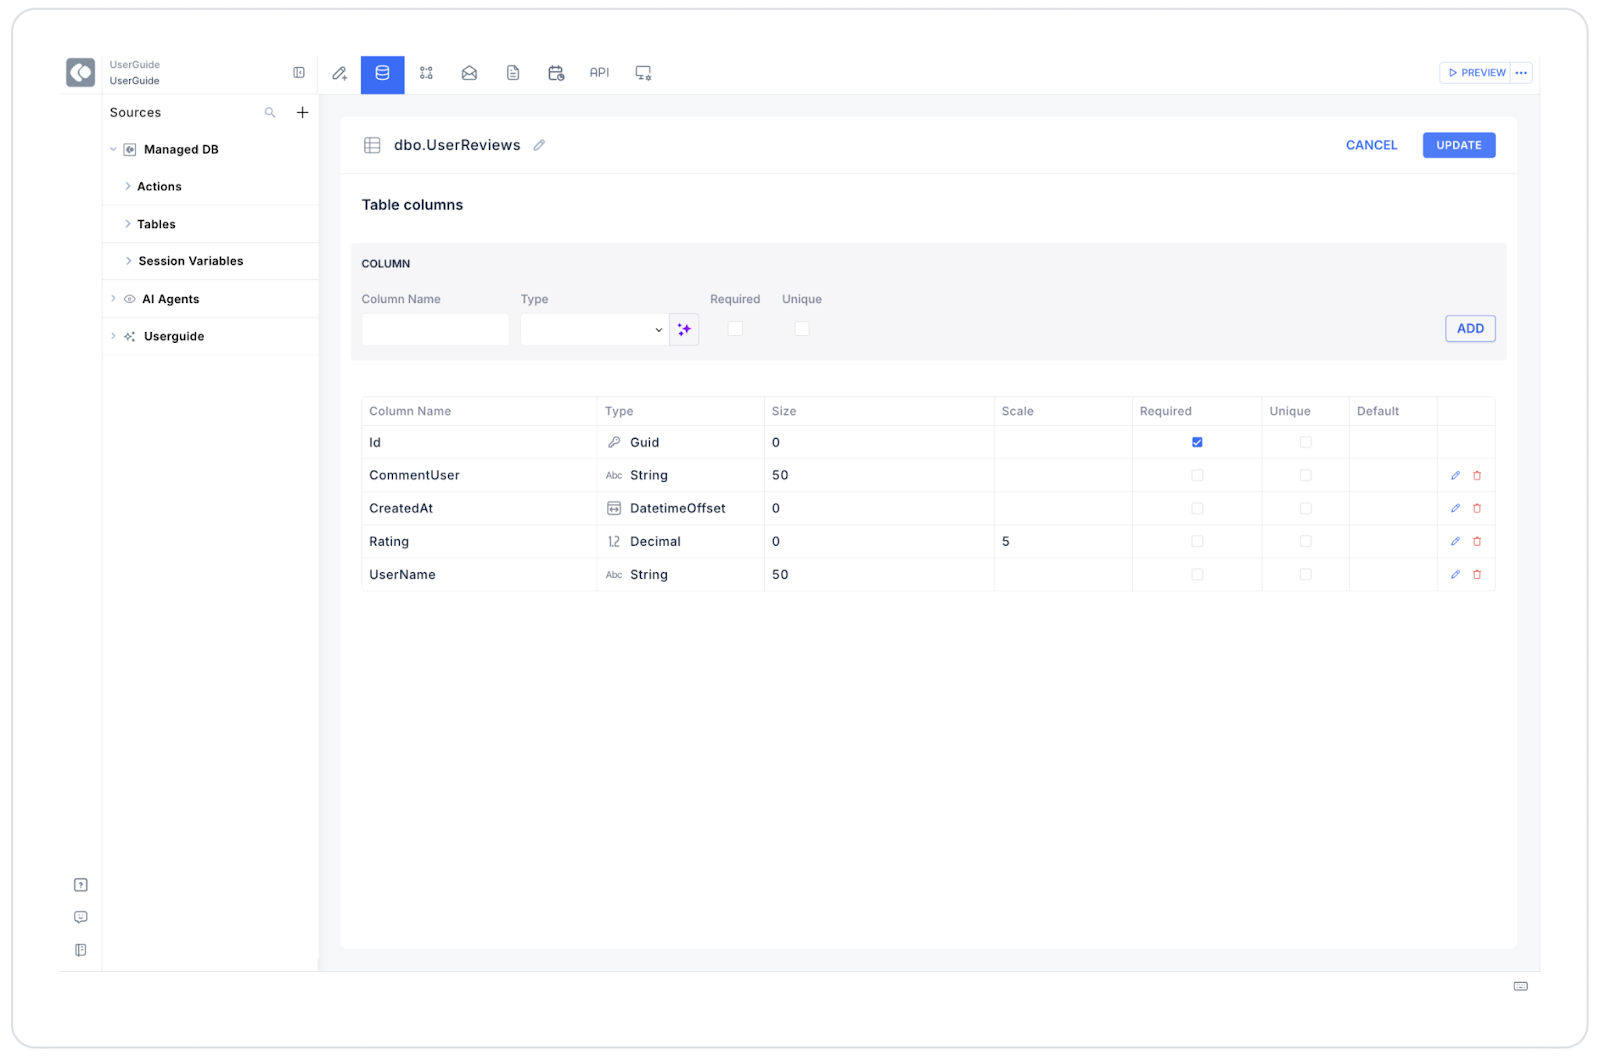
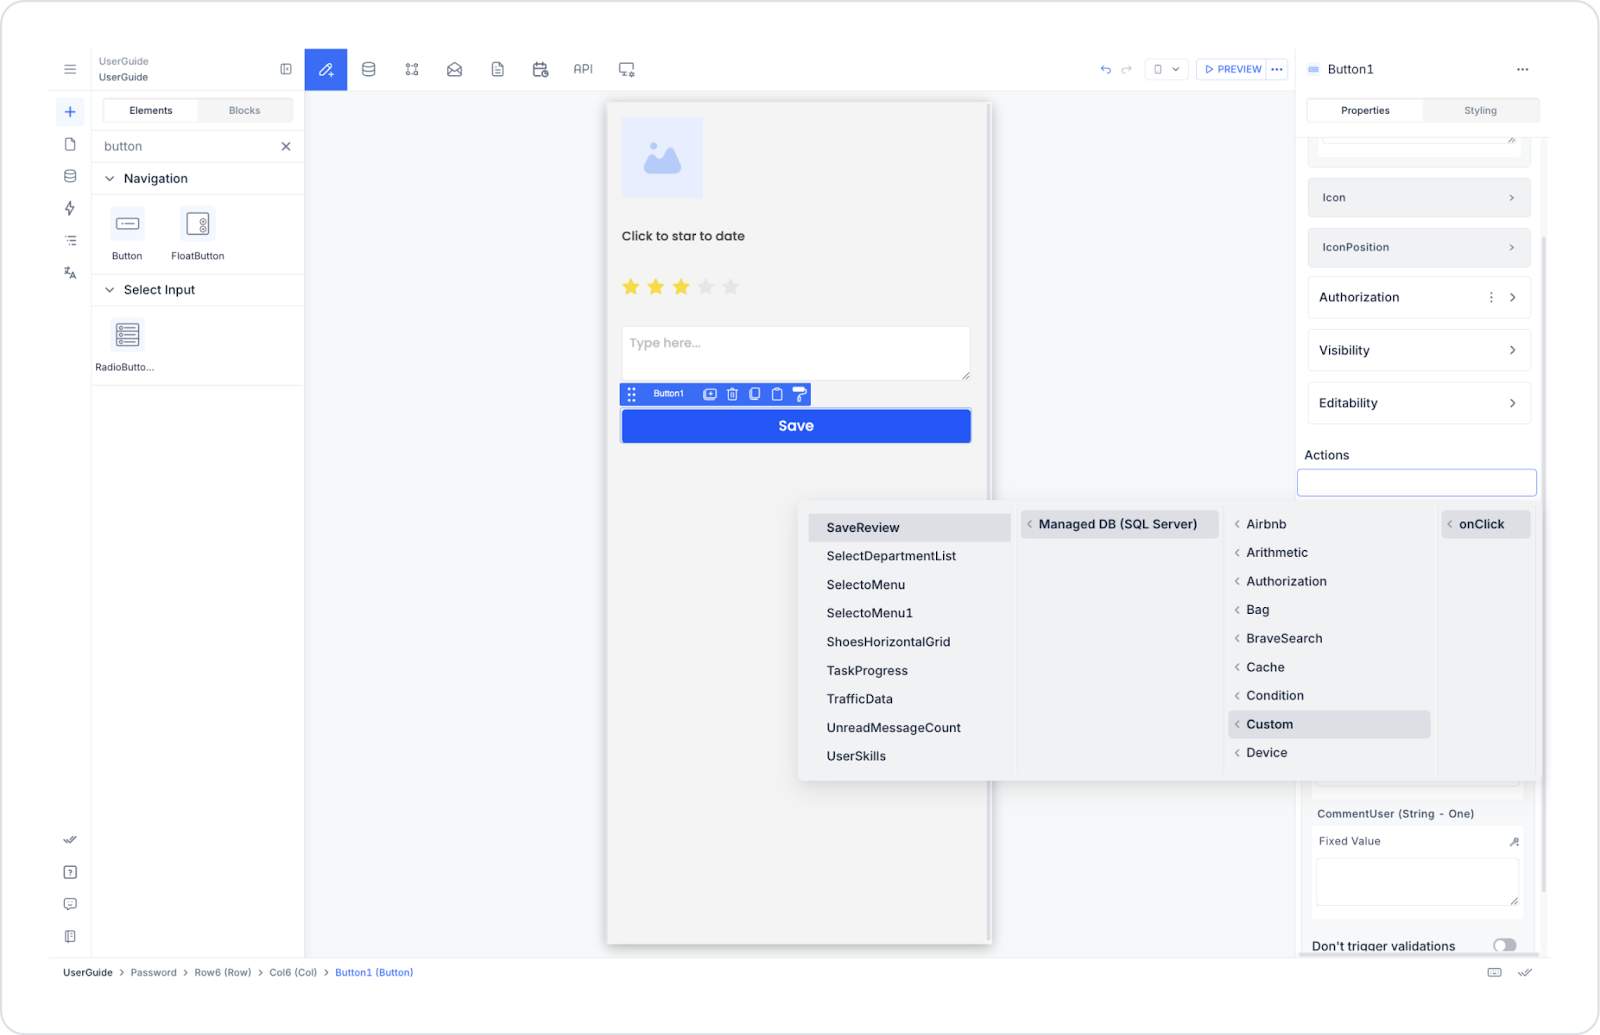
  • When they click the “Save” button, the comment and rating are saved to the data source.
  • The comment can be viewed by other users in the future.

Connecting the Data Source

  1. Go to the Datasources module.
  2. Click on the Tables tab.
  3. Create a new table: UserReviews
  4. Add the following fields:
  1. Then go to the SQL Actions tab.
  2. Create a new action: SaveReview
  3. Enter the following SQL query:
INSERT INTO UserReviews (UserName, Rating, CommentUser, CreatedAt)VALUES (@UserName, @Rating, @CommentUser, SYSDATETIMEOFFSET());

This query saves the review data entered by the user.

UI Design Module Operations

  1. Go to the UI Design module.
  2. Select the Text Area element from the Elements → Text Input → Text Area category on the left side.
  3. Drag and drop it onto the screen.
  4. Configure the following settings via the Properties Panel:
  • Placeholder: “Type here...”
  • Value: reviewComment
  • Autosize: Active
  • Max Length: 200
  • Show Count: Active
  • Allow Clear: Active
  • Speech To Text: Active
  1. Add a Button (Save) element below it.
  2. Define the following action for the button:
  1. onClick → Managed DB → Custom SQL Action (SaveReview)
  2. Parameters:
    • UserName → loggedInUser.name
    • Rating → Rating1.value
    • Comment → TextArea1.value
  3. When the action is complete, display the message “Your review has been saved successfully.” to the user.

Using Properties in the Scenario Context

  • Value: Represents the text entered by the user.
  • Placeholder: Descriptive text that the user will see before entering data. Example: “Enter your comment here.”
  • Autosize: Automatically adjusts the height of the Text Area according to the length of the text.
  • Show Count: Displays the number of characters entered.
  • Max Length: Sets the text length limit.
  • Speech To Text: Allows the user to enter comments by speaking into the microphone.

When the Scenario Step is Complete

  • The user gives a rating and writes a comment.
  • When the “Save” button is pressed, the data is saved to the database.
  • The comment screen is cleared or a notification is displayed to the user.
  • Other users can see this comment later.

Limitations

  • Performance may decrease when the character limit is not used for very long texts.
  • Empty comment submissions should be prevented (example: if TextArea1.value == “”).
  • Voice input is only supported on mobile browsers.

Tips and Best Practices

  • Keep the Autosize feature active to enhance the user experience.
  • Maintain data integrity by setting a maximum character limit (e.g., 200–500).
  • Increase accessibility for mobile users with the Speech To Text feature.
  • Use simple and instructive phrases in placeholder text:
  • “Comment on the taste, service, or your experience.”
  • Clear the Text Area content after form submission (Clear Value Action).
No items found.

Other Related Content

No items found.

Glossary

No items found.

Alt Başlıklar