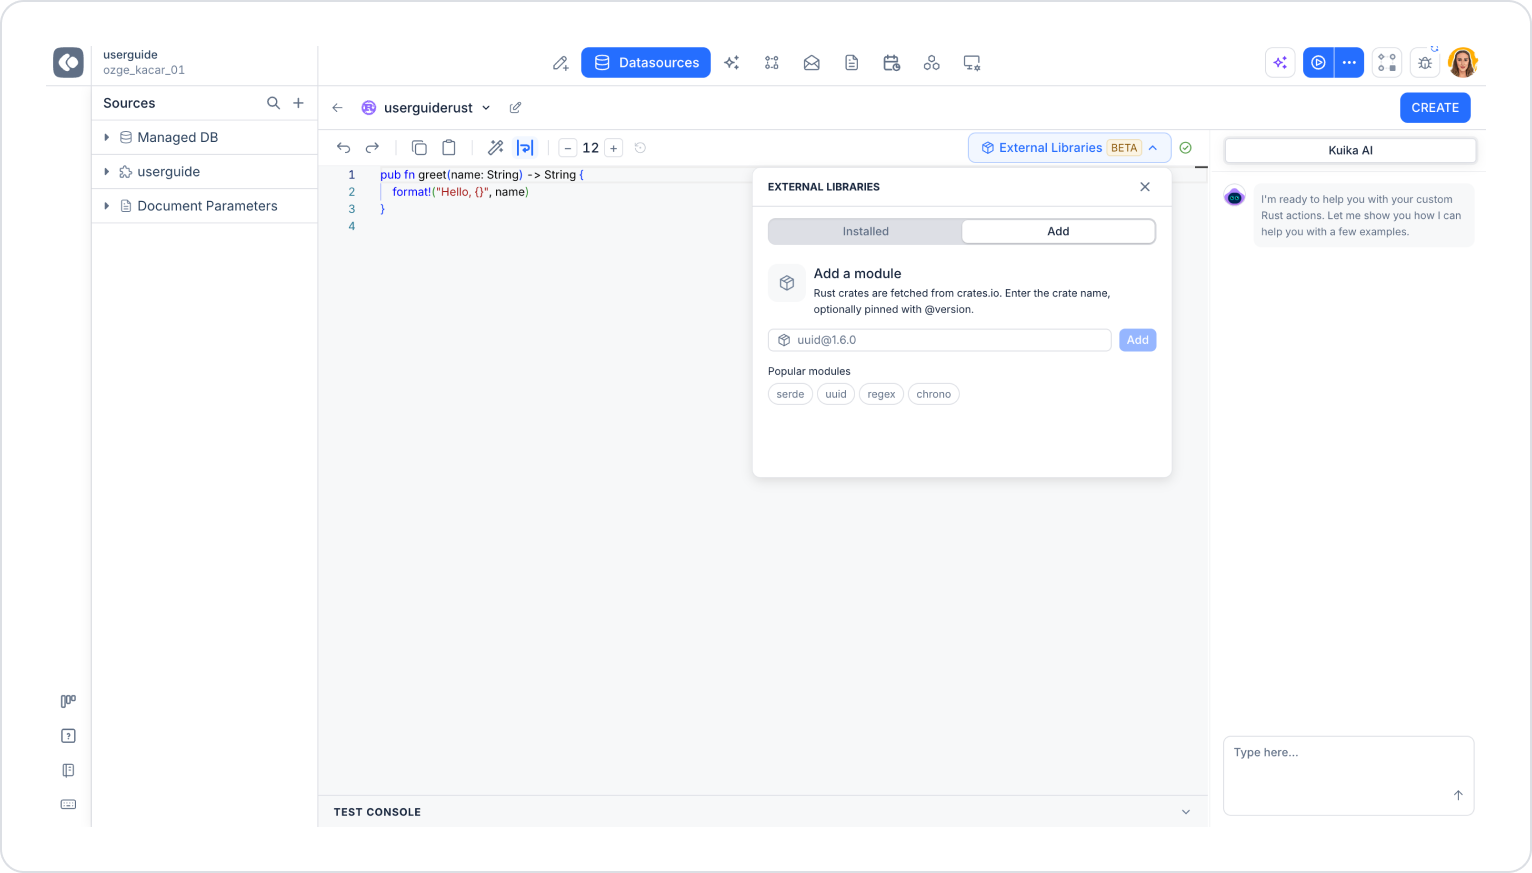
The Rust data source is one of the integration methods available on the Kuika platform that allows you to develop custom functions and business logic. Using Rust, you can define custom operations within your application, create functions that accept parameters, and use these functions in application workflows.
With the Rust data source, you can write custom code to address needs not covered by pre-built actions, customize data processing workflows, and create reusable functions.
Add a Data Source Connection to Your Application Using Rust
Log in to the Kuika platform and open the project you’ll be working on from the Apps screen.
Open the Datasources module from the top menu.
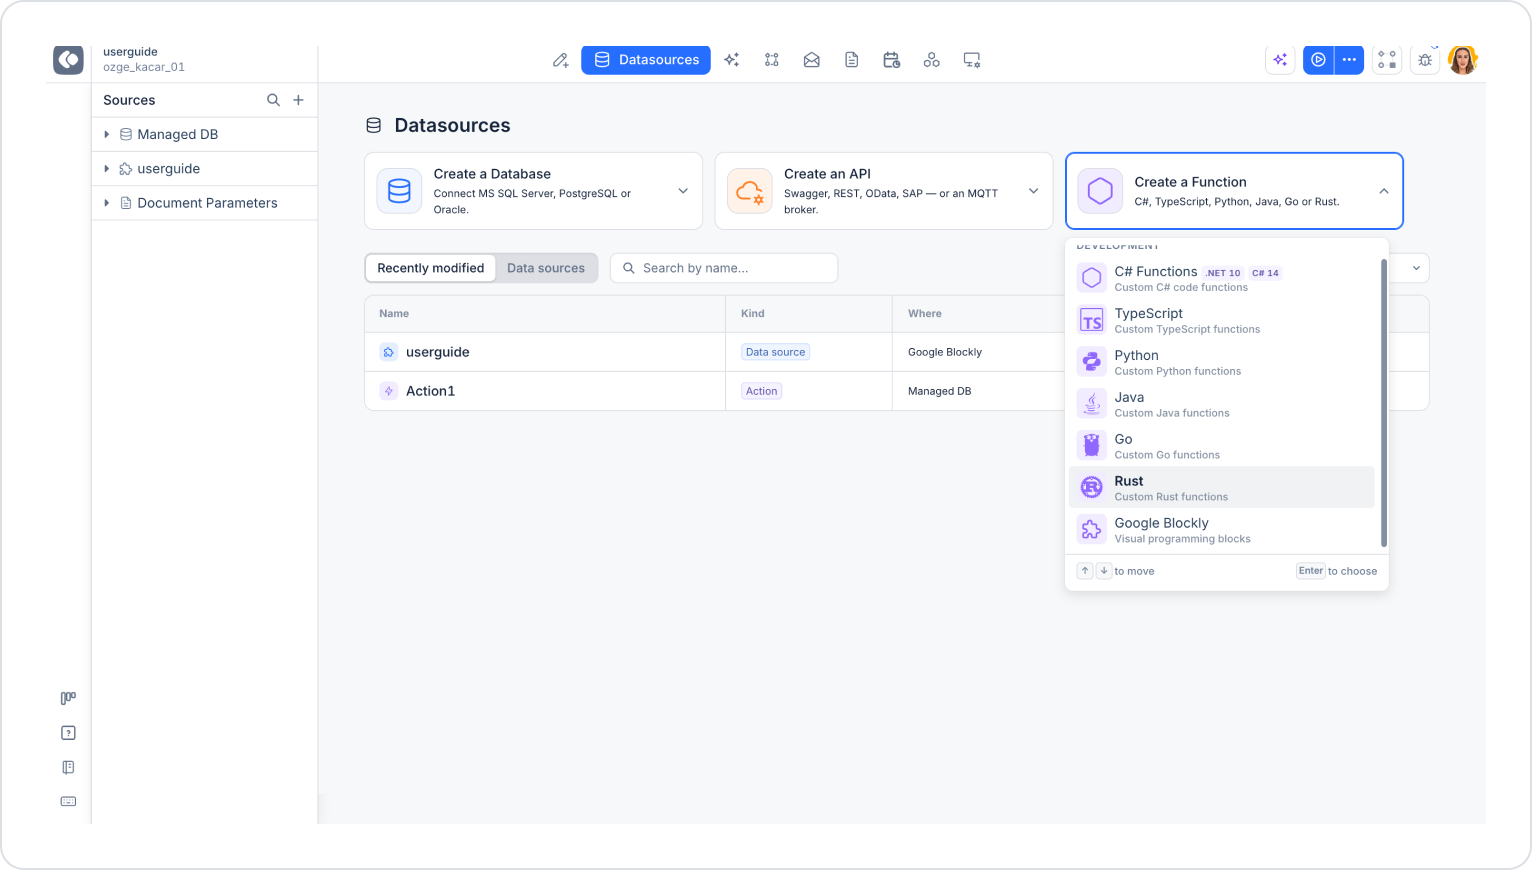
On the Datasources screen that opens, you can view your existing data sources under the Recently modified and Data sources tabs, and search using the Search by name field.
Click the Create a Function card among the cards at the top of the screen. This card allows you to create custom functions using C#, TypeScript, Python, Java, Go, and Rust.
From the Development list that opens, select the Rust (Custom Rust functions) option. You can use the ↑/↓ keys to navigate the list and the Enter key to make a selection.
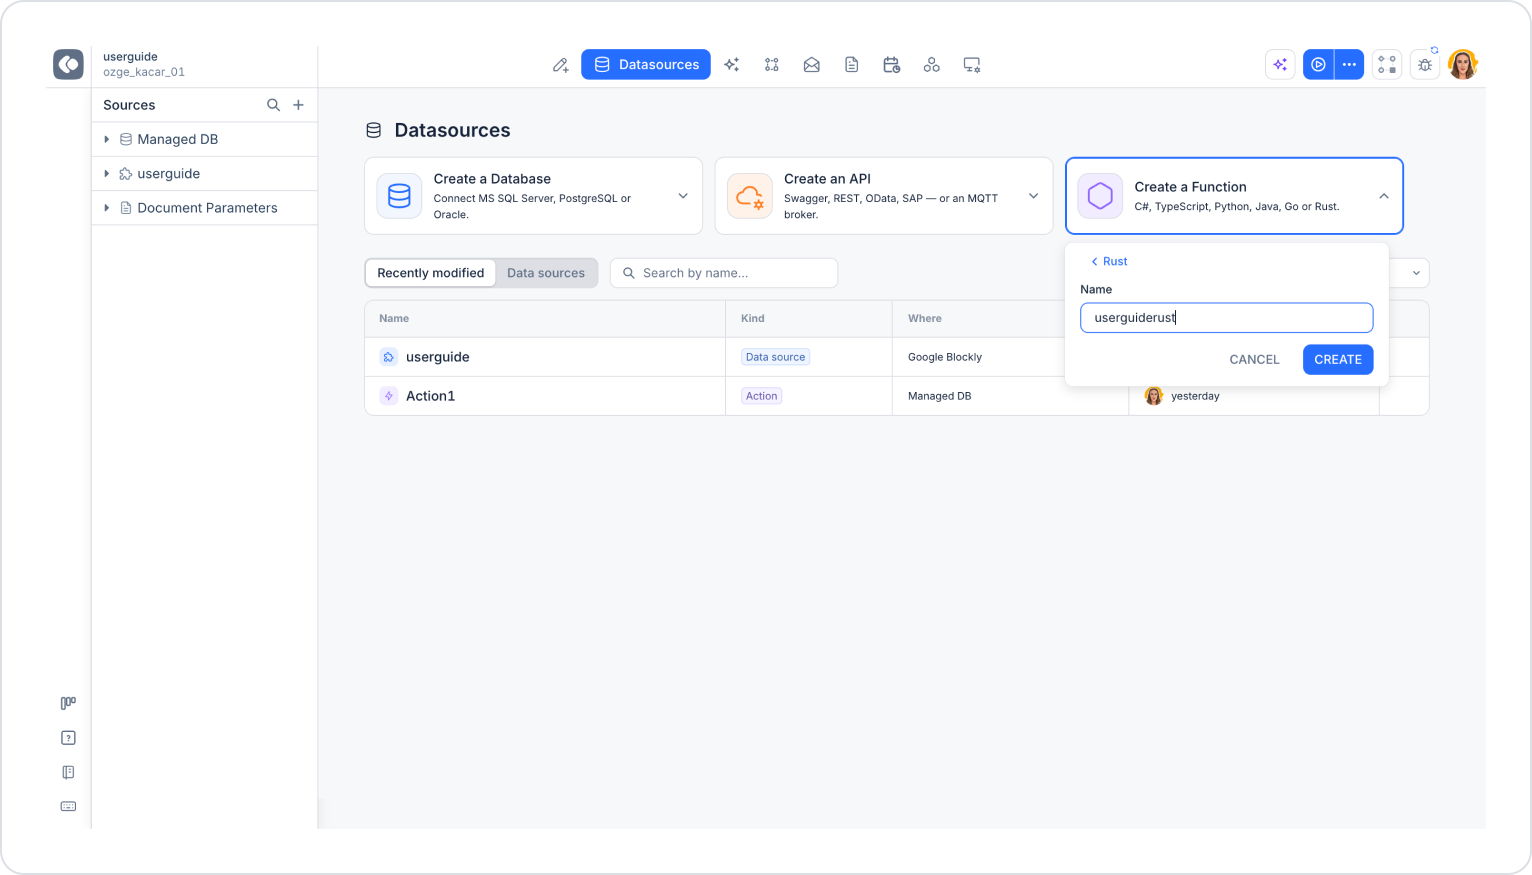
Enter a name for your data source in the Name field (e.g., userguiderust).
Click the CREATE button to complete the process. To cancel the process, use the CANCEL button; to return to the language selection, use the < Rust link.
Note: You can also start the process of adding a new data source by clicking the + icon next to the Sources heading in the left panel.
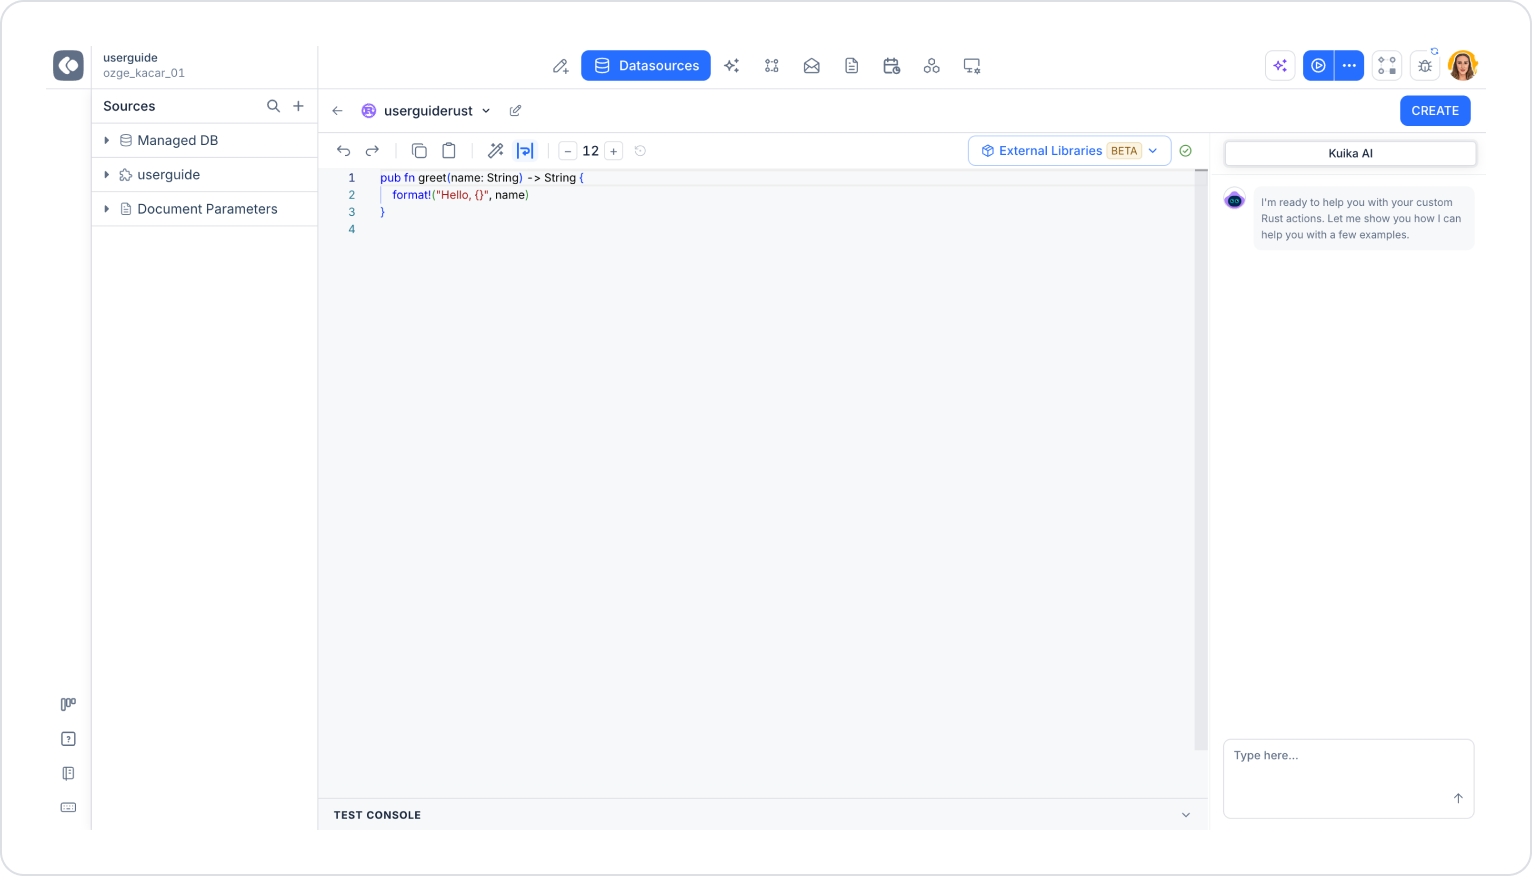
Anatomy of the Rust Editor Screen
A. Top Menu
Back Button (←): Takes you back to the Datasources screen.
Data Source Name: The name of the Rust data source you created (e.g., userguiderust) is displayed alongside the Rust icon. You can switch between data sources using the drop-down arrow next to it, or edit the name using the pencil icon.
CREATE Button: Used to save the Rust data source you’ve created.
B. Editor Toolbar
Undo / Redo: Lets you undo or redo changes you’ve made.
Copy / Paste: Used to copy code and paste it into the editor.
Tidy Up Code: With the magic wand icon, you can tidy up, align, and make your code more readable.
Word Wrap: Toggles whether long lines are wrapped to the next line based on the editor’s width.
Font Size (− 12 +): Lets you increase or decrease the font size in the editor; you can return to the default size using the icon next to it.
External Libraries (BETA): Opens the panel that allows you to add external crates (dependencies) for use in your Rust code. It is currently labeled as BETA. The green checkmark icon next to it indicates that your code is valid.
C. Rust Editor
This is the code editing area. All custom functions are defined here.
Functions are defined using the `pub fn` keyword (marked as externally accessible/public).
They can accept parameters.
The parameter type can be specified (e.g., String).
The return type can be defined using the -> symbol (e.g., String).
The format! macro can be used in the function body to generate formatted text.
D. Kuika AI Panel
This is the AI assistant located on the right side of the screen. By typing your needs into the Type here... field, you can get code suggestions for your Rust actions and make use of examples.
E. Test Console
This area, located at the bottom of the screen, is used to test the functions you’ve written. It can be opened and closed using the arrow on the right.
In this section:
The function list is displayed.
Parameter input fields appear.
The result output can be viewed.
Configuring Rust Data Source Settings
Manual Code Writing
You can write your code manually directly in the editor.
You can generate code automatically by entering a description in the Kuika AI field on the right panel.
Example command:
Create a function that converts the entered text to uppercase.
Using External Libraries (BETA)
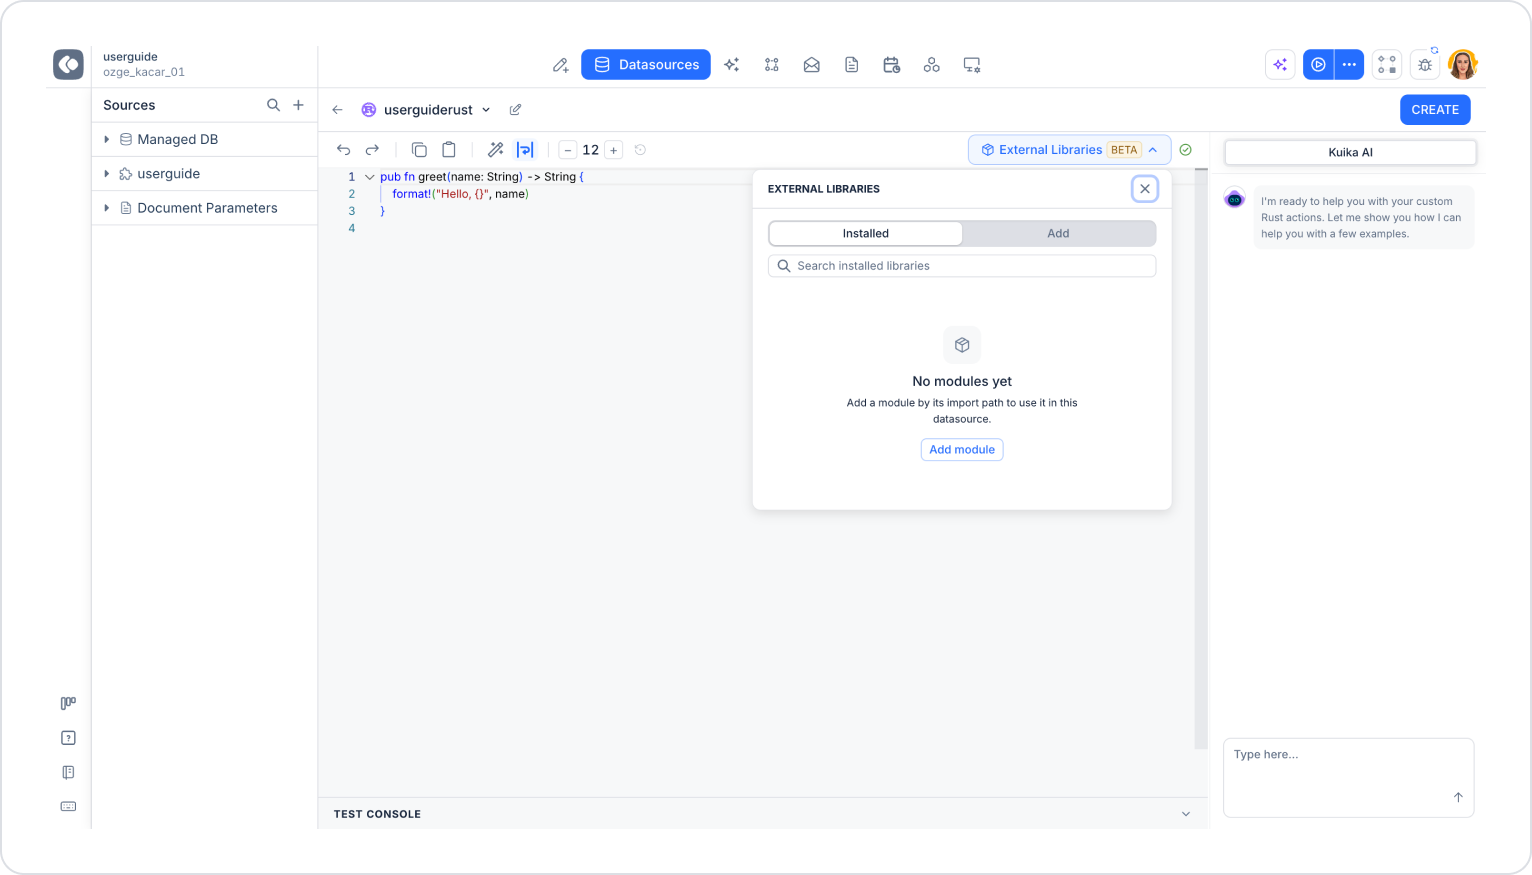
By clicking the External Libraries button on the toolbar, you can include additional crates in your project beyond the standard Rust library (std). The panel that opens consists of two tabs; you can close the panel using the X in the top right corner. This feature is currently in BETA.
Installed tab: Lists the libraries added to your project. You can search among the installed libraries using the Search installed libraries field. If no libraries have been added yet, the message “No modules yet” and the Add module button will appear; this button takes you to the Add tab.
“Add” tab: Used to add new crates. Crates are fetched from crates.io.
Type the crate name in the input field. If you wish, you can specify a version using @ (e.g., uuid@1.6.0).
Click the Add button.
You can quickly select commonly used crates via the serde, uuid, regex, and chrono shortcuts under Popular modules.
This function takes two numbers and returns their sum.
Specifying the Return Type
The return type must be specified with the -> symbol at the end of the function signature. Example types: String, i32 / i64, f64, bool, Vec<T> (array/list), Option<T>.
Testing Functions with the Test Console
After writing your code, you can open and use the Test Console area in the lower section.
After completing and testing your code, you can save the Rust data source by clicking the CREATE button in the top right corner. The saved data source becomes available for use within the application.
Expected Output / Result
Once these steps are complete:
The Rust data source is added to the Sources list.
The defined functions become available for use in the system.
Custom business rules can be managed through code.