User Manual

Password Usage Scenario

Password Usage Scenario

Kuika's Password element allows users to securely enter passwords in applications. Characters entered are hidden for security purposes using asterisk (*) or dot (•) symbols. Users can make the password visible by clicking the “Show” (eye) icon. The Password element also integrates with Configuration Manager → Password Policy settings to support strong password creation rules.

The Password element can be used in both web and mobile applications.

Usage Areas

  • Login screens
  • Sign Up or Password Creation screens
  • Change Password flows
  • Reset Password forms
  • Access to secure areas (e.g., admin panel)

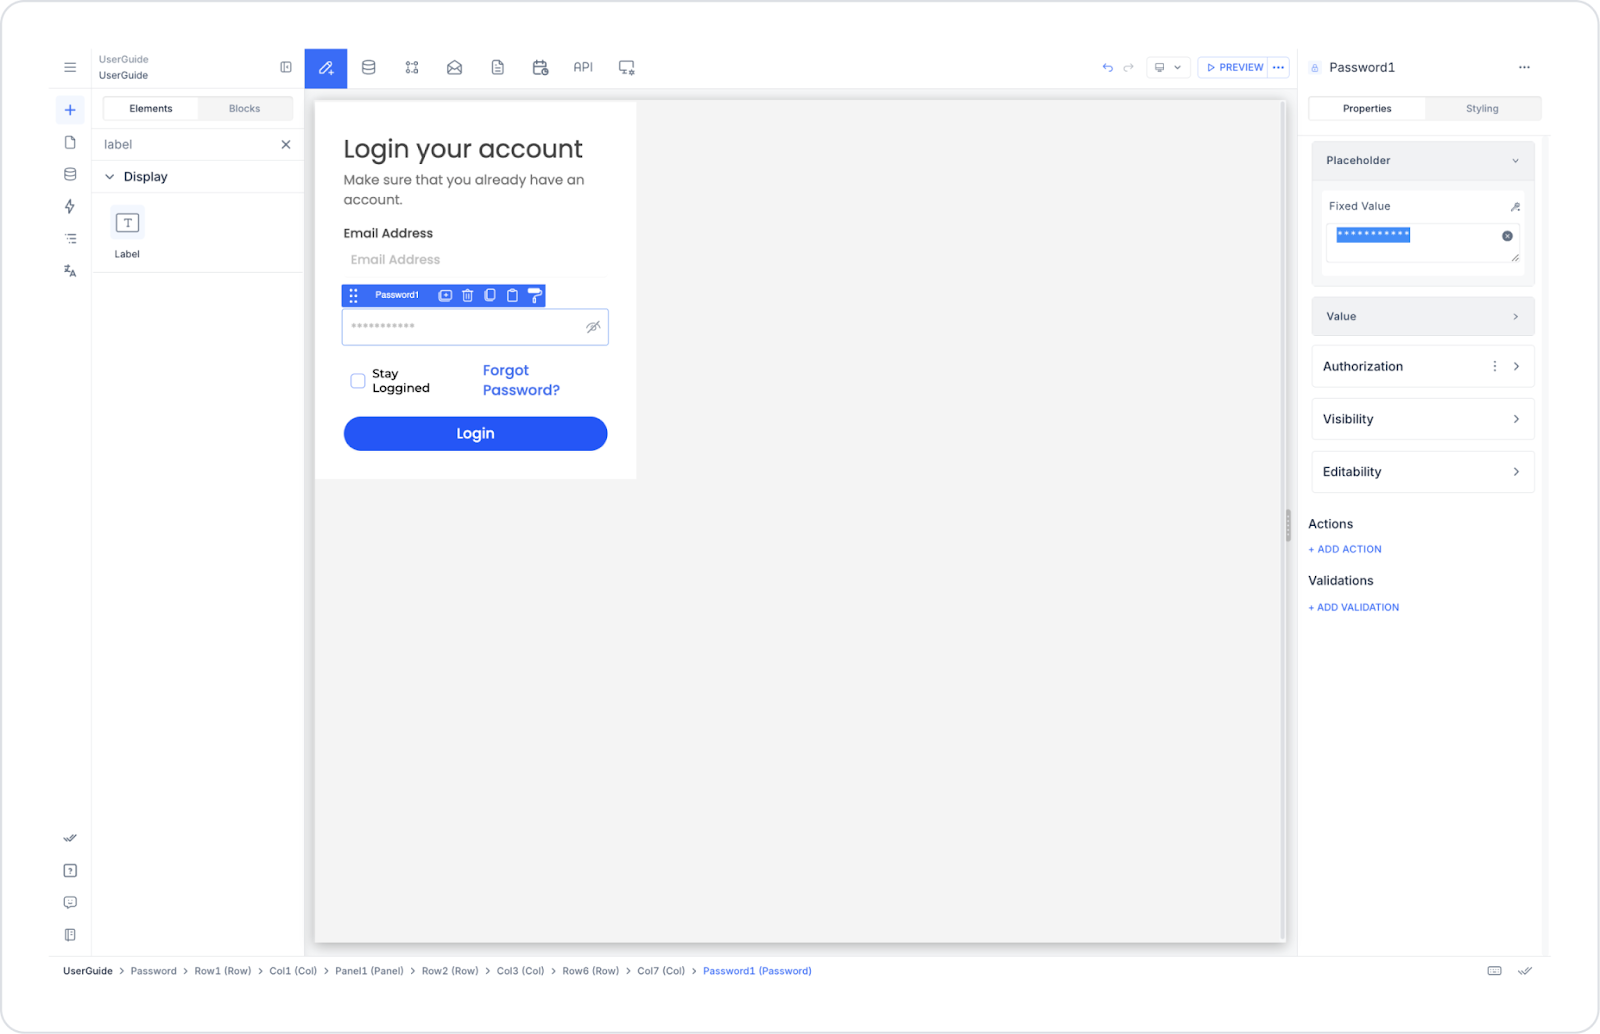
Use Case – User Login (Login Screen)

The Email and Password elements are used together in an application to allow users to log in securely. The Password element ensures that the entered password remains hidden and can be displayed at the user's request.
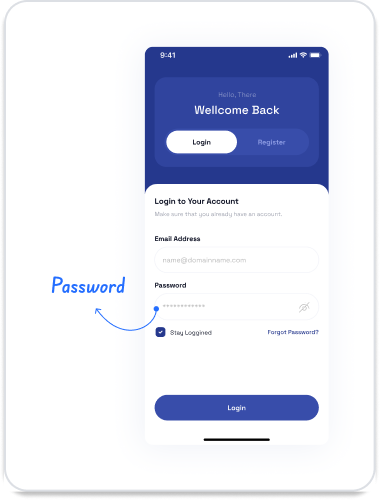
In the scenario:

  • The user arrives at the “Welcome Back” screen.
  • They enter their email address in the “Email Address” field and their password in the “Password” field.
  • The Password field hides the characters entered.
  • If the user wishes, they can click on the “eye” icon to make the password visible.
  • If the “Stay Logged In” option is active, the user's information is stored for the duration of the session.
  • When the “Login” button is pressed, the system compares the information entered with the record in the database.

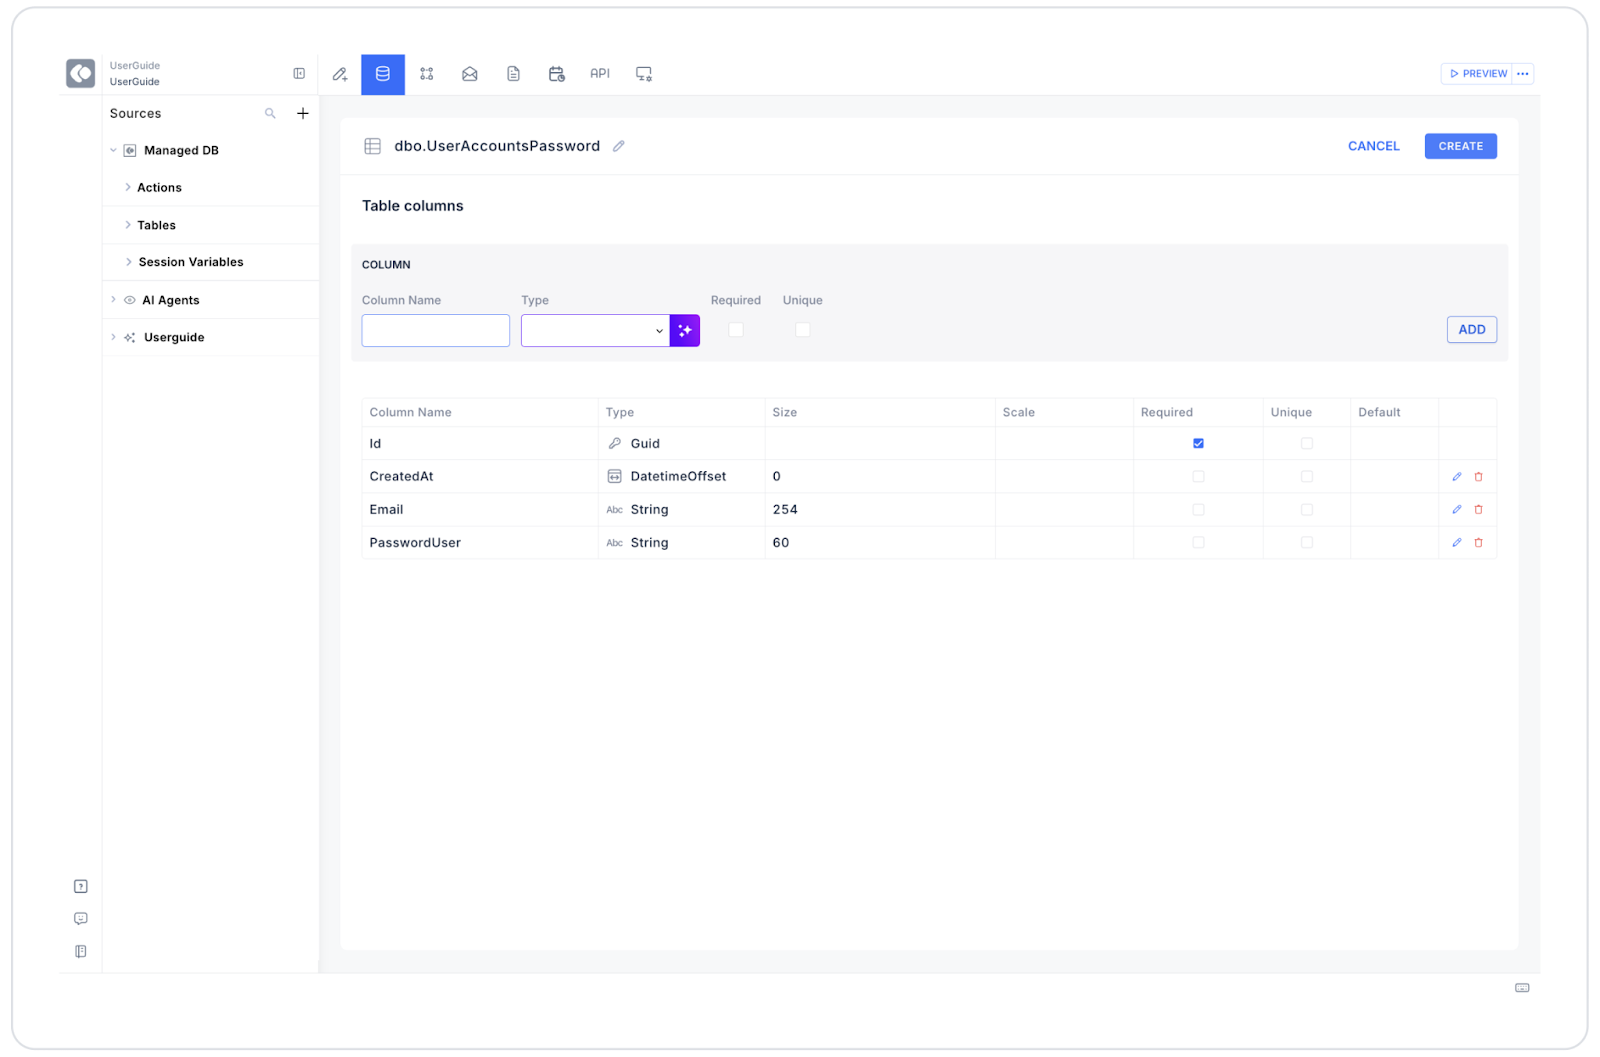
Connecting the Data Source

  1. Go to the Datasources module.
  2. Create a new table in the Tables tab and name it UserAccountsPassword.
  3. Add the following fields:
  1. Then go to the SQL Actions tab.
  2. Create a new action: LoginUser
  3. Enter the following SQL query:
SELECT *FROM UserAccountsWHERE Email = @Email AND Password = @Password;

This query checks the email and password combination received from the user.

UI Design Module Operations

  1. Go to the UI Design module.
  2. Select the Password element from the Elements → Text Input → Password category on the left side.
  3. Drag and drop it onto the screen.
  4. Configure the following settings via the Properties Panel:
  • Placeholder: “***********”
  • Value: userPassword
  1. Place it below the Email element.
  2. Add a Checkbox below it → Label: “Stay Logged In”
  3. Add a URL element right next to it → Label: “Forgot Password?”
  4. Add a Button (Login) element at the very bottom.
  5. Define the following action for the Button:
  • onClick → Managed DB → Custom SQL Action (LoginUser)
  1. Parameters:
    • Email → EmailInput.value
    • Password → PasswordInput.value
  2. If the user is authenticated as a result of the action, they are redirected to the “Home” screen.

Using Properties in the Scenario Context

  • Value: Represents the password entered by the user.
  • Placeholder: The informational text displayed when the user has not entered any data. Example: “Enter your password”

When the Scenario Step is Complete

  • The user enters their email and password.
  • The password is securely hidden.
  • When the “Login” button is pressed, the system checks the information.
  • If correct, the user logs in; if incorrect, an error message is displayed.
  • If “Stay Logged In” is selected, the user can access the system without logging in during the session.

Restrictions

  • The form will not be submitted if the Password field is empty.
  • Password verification should not be performed without backend validation.
  • To prevent the acceptance of very short or weak passwords, the Configuration Manager → Password Policy settings should be enabled.

Tips and Best Practices

  • Show the user the password requirements (e.g., minimum length, capital letters, numbers, etc.) in advance.
  • Design a separate screen for the Forgot Password flow.
  • Ensure that the virtual keyboard on mobile devices opens in “password mode” automatically.
No items found.

Other Related Content

No items found.

Glossary

No items found.

Alt Başlıklar