In Kuika, you can use the Board feature to manage your projects more efficiently. The Board allows you to manage processes such as creating issues, tracking status, sprint planning, and team coordination all from a single screen. By selecting either a Scrum or Kanban workflow, you can set up the structure that best suits your project and accelerate your work processes with automation and AI-powered tools.
What You Can Do with Board:
You can create Project Boards and Multi-project Boards.
You can create issues, assign priorities and types, and assign tasks to team members.
You can track the overall status of your project using the Backlog, Roadmap, and Reports views.
You can automate repetitive tasks by defining automation rules.
You can ask instant questions about the board using the AI assistant (Ask the Board).
How to Add a Board?
Accessing the Board
Log in to the Kuika platform and select your project from the Apps screen.
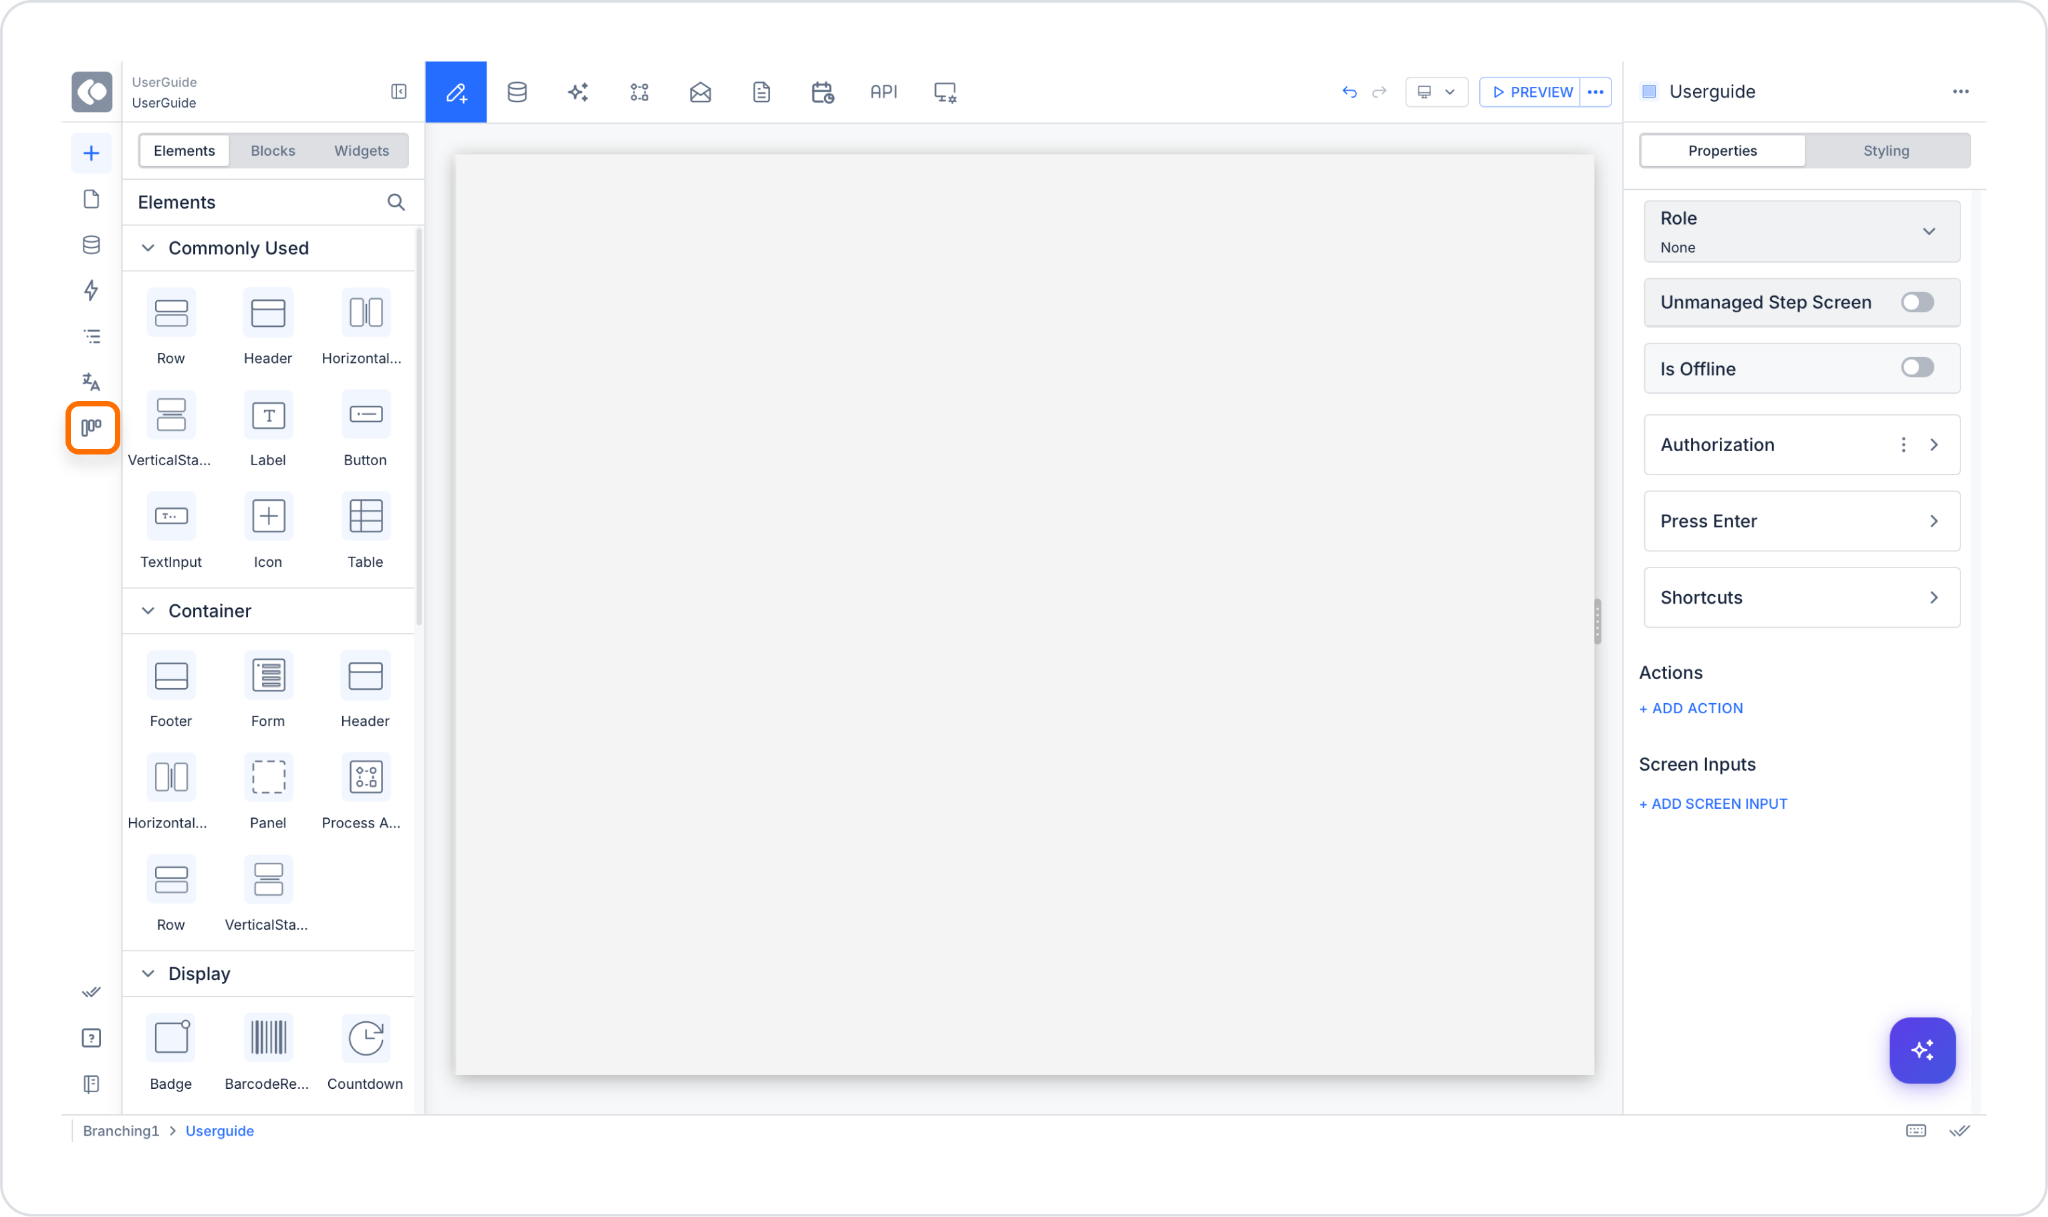
Click the BOARDS heading in the left panel.
On the screen that opens, click the Open in Board View button in the top-right corner.
1. Creating a Board
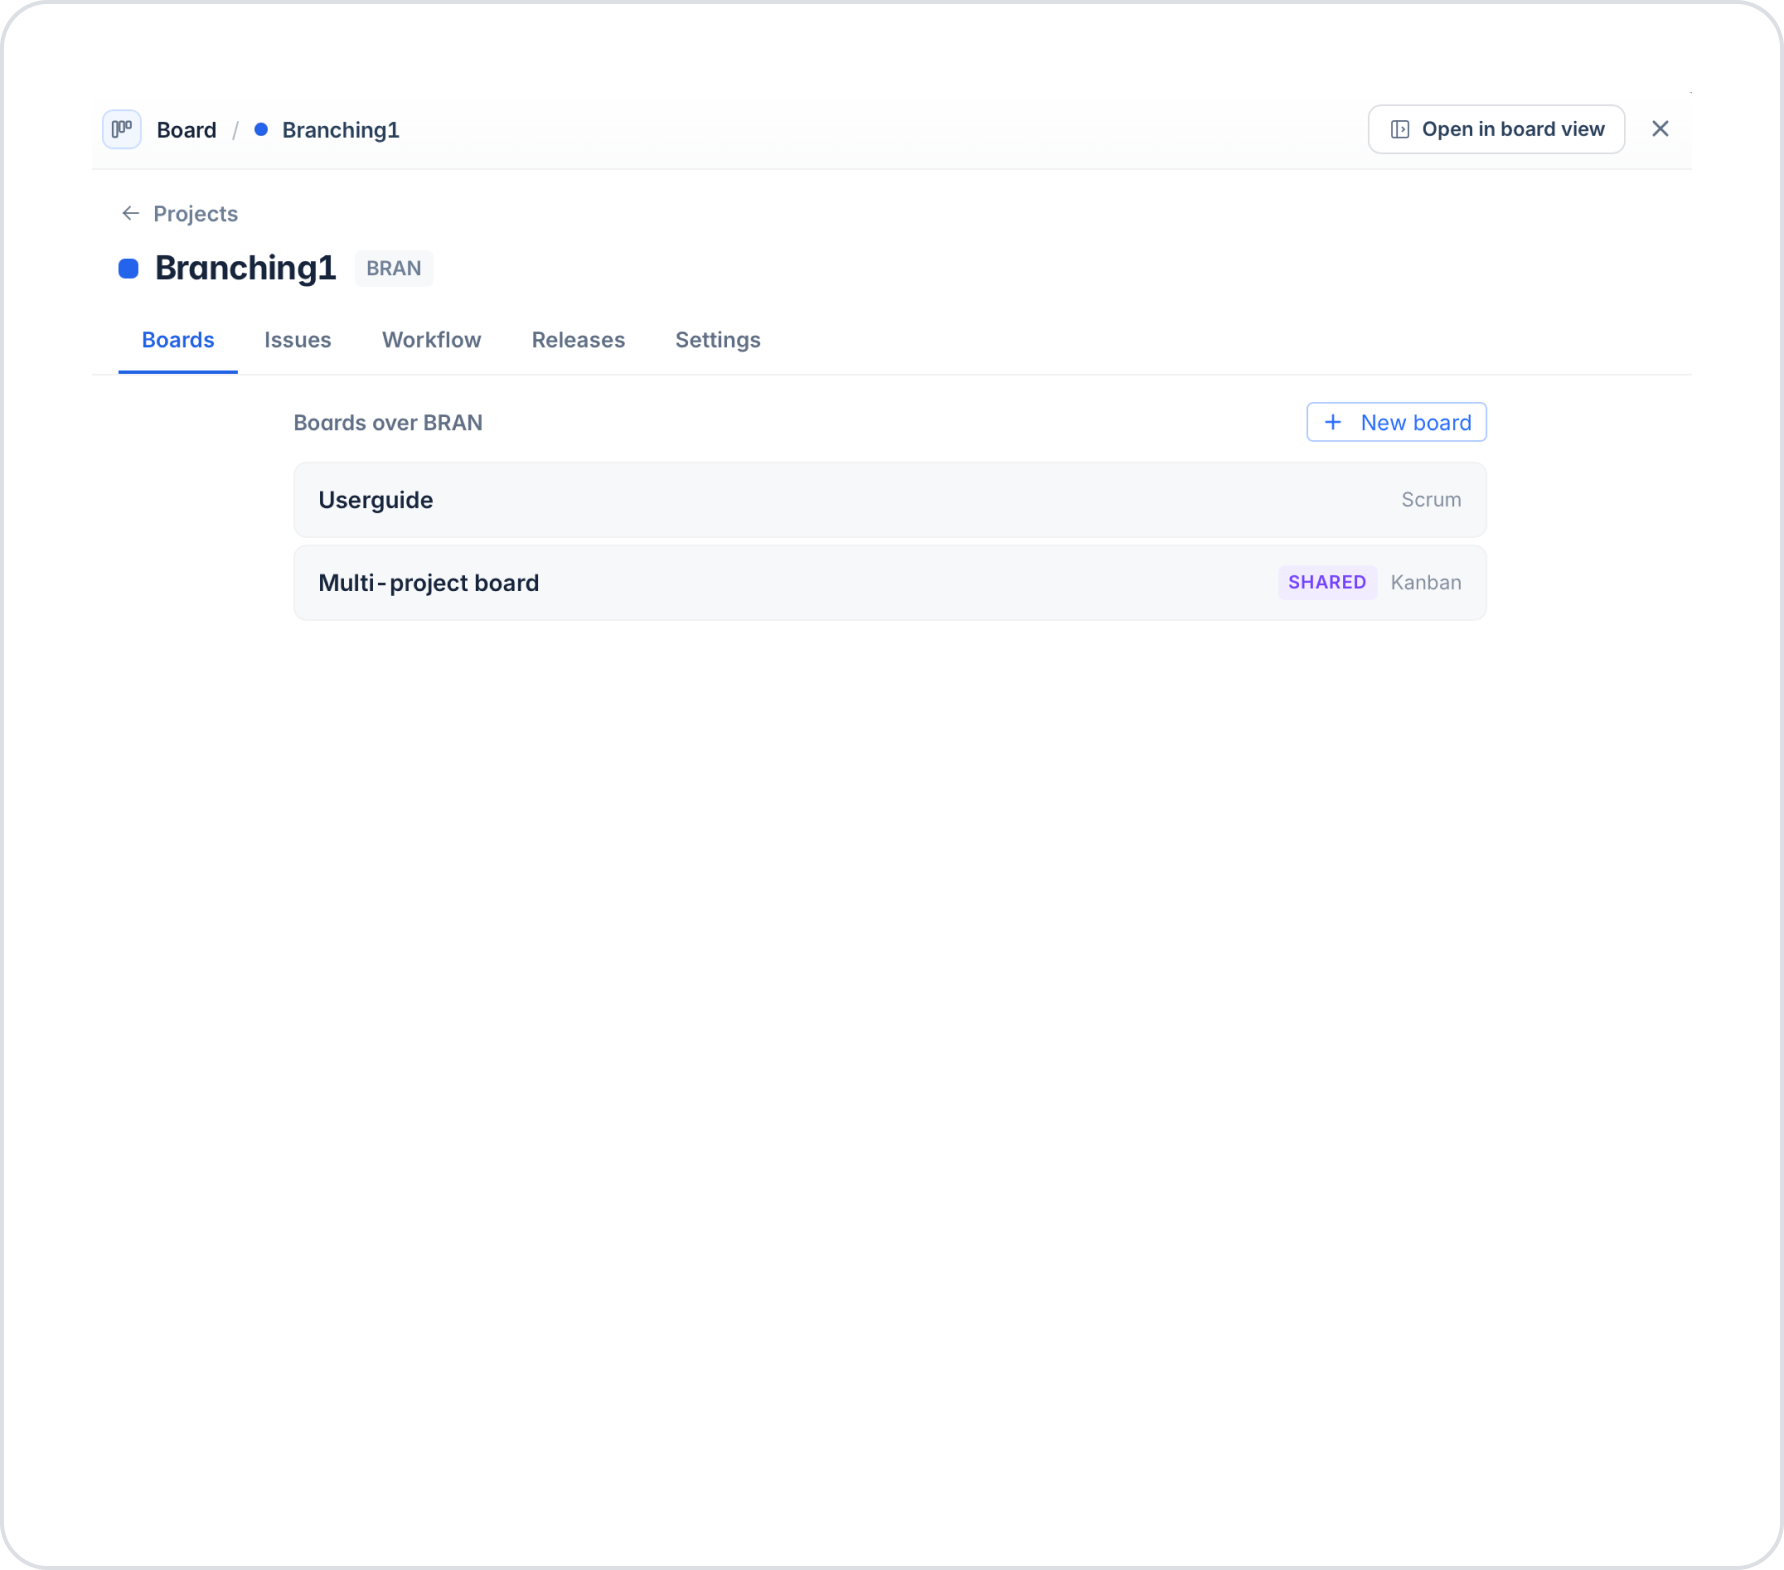
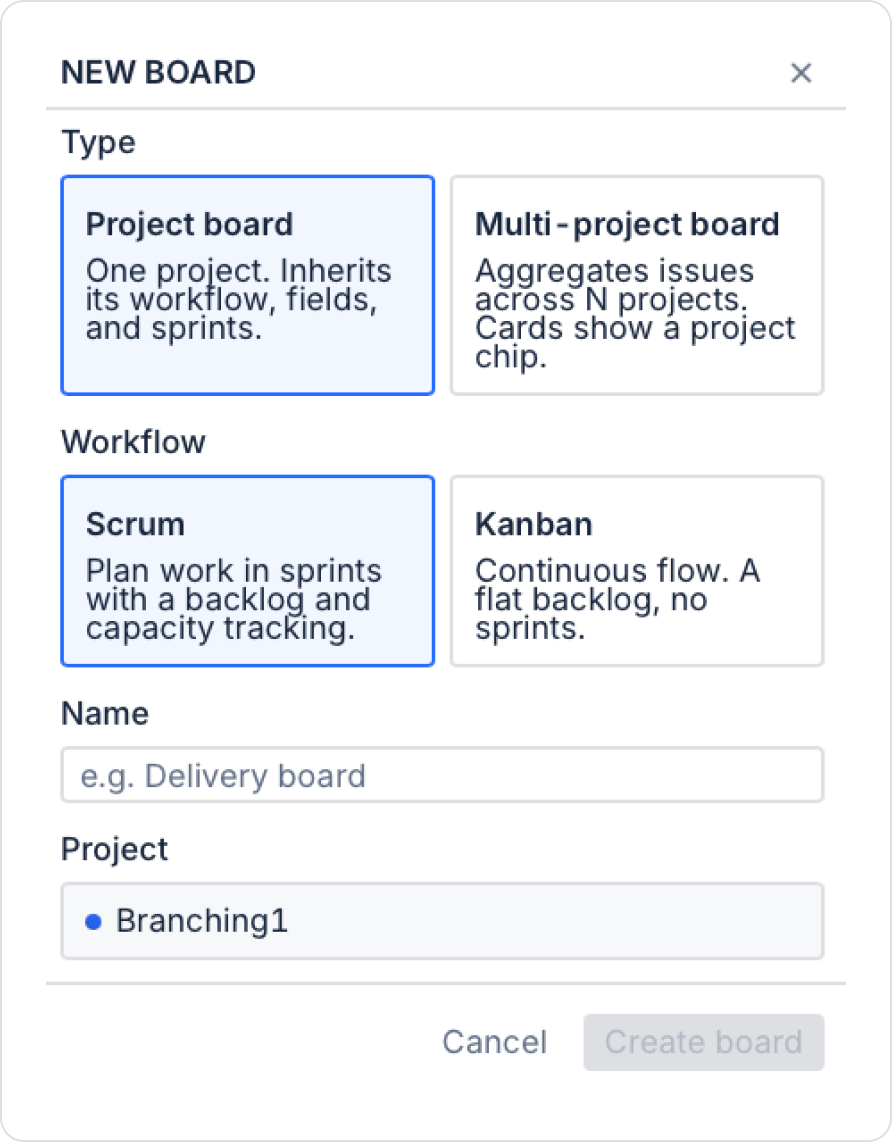
From the “Boards” tab on the project details page, click the + New board button, or click the + icon next to the ‘BOARDS’ heading in the left panel. On the “NEW BOARD” screen that opens, fill in the following fields:
Type — Select the board type:
Project board: Linked to a single project. It inherits the project’s workflow, fields, and sprint structure.
Multi-project board: Collects issues from multiple projects on a single board. A project label (chip) appears on each card to indicate which project it belongs to.
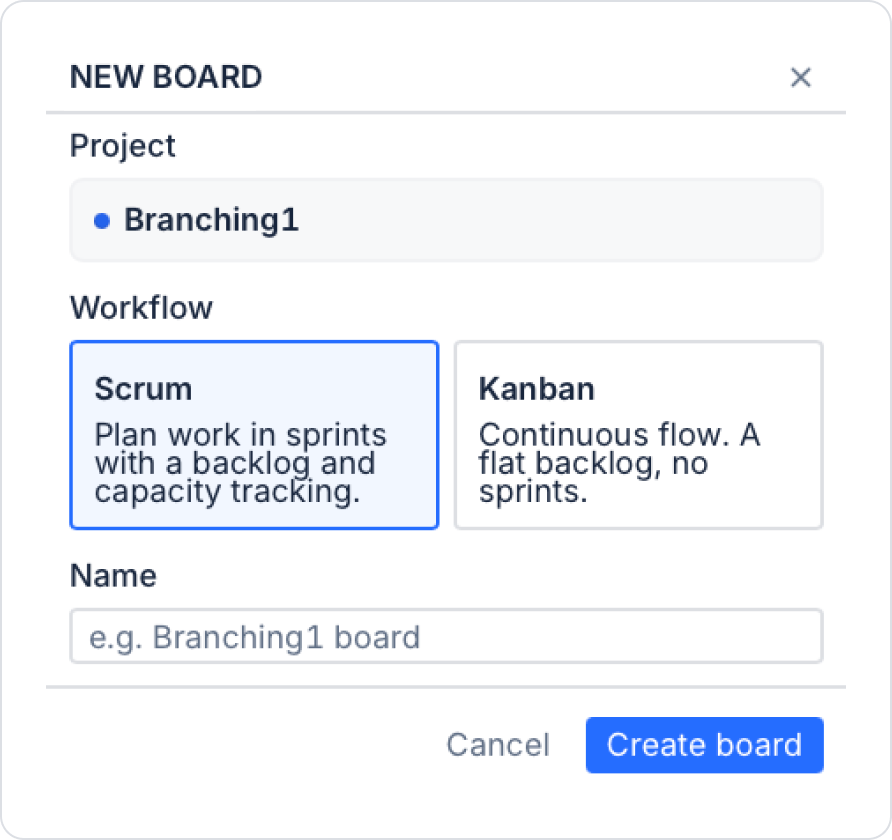
Workflow — Select the workflow model:
Scrum: Works with sprint planning and backlog management. Capacity tracking is available.
Kanban: A continuous flow model. There are no sprints; it works with a flat backlog.
Name: Give the board a name.
Project: Select the project to which the board will be linked.
After filling in the fields, click the Create board button.
2. Project Details Page
Clicking on a project in the left panel opens the project details page. It contains five tabs:
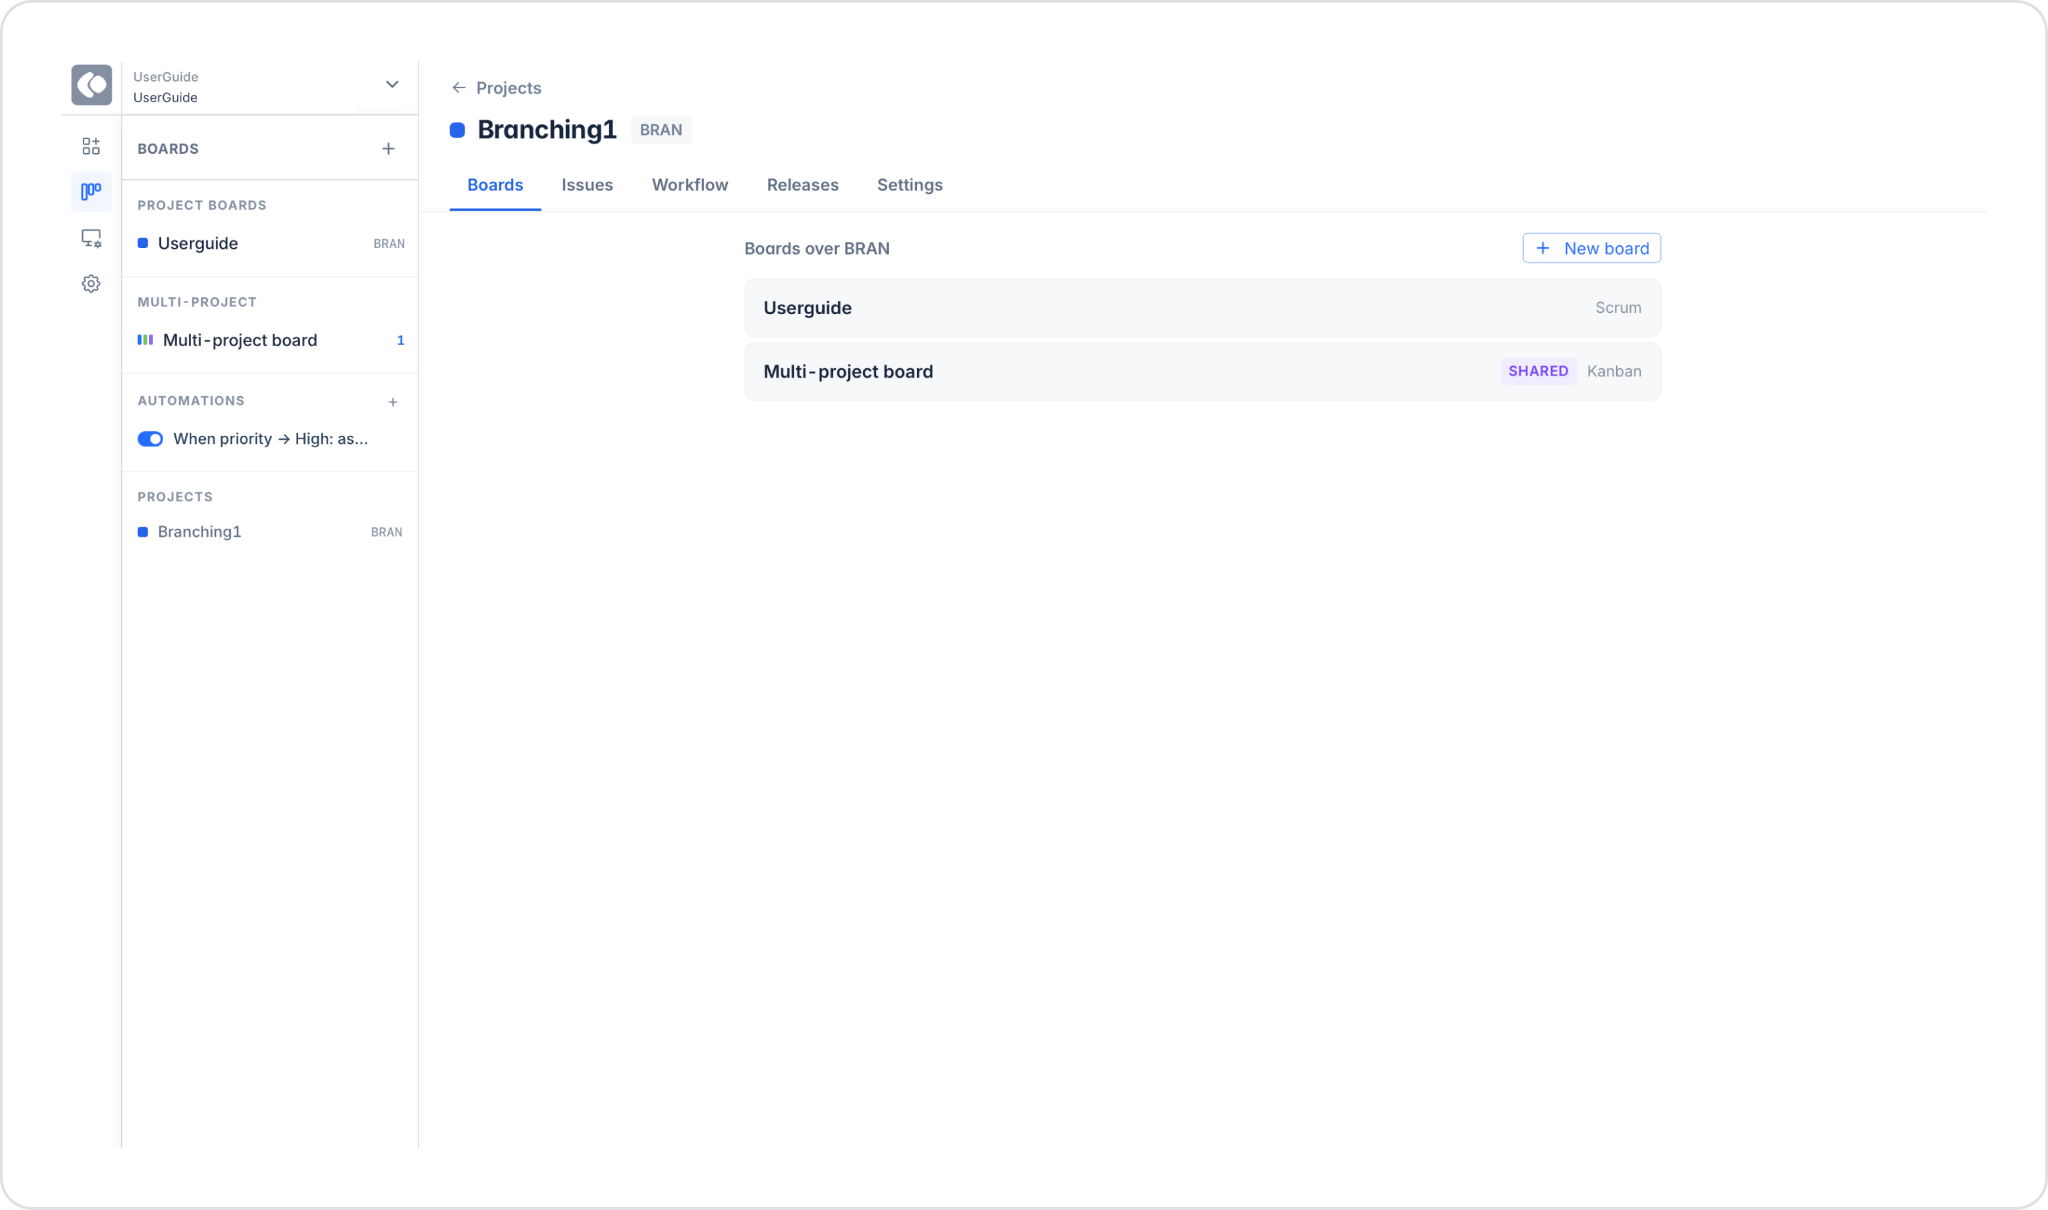
Boards tab: All boards associated with the project are listed. Next to each board, its type (Scrum or Kanban) and sharing status (Shared) are displayed. A new board can be added using the + New board button.
“Issues” tab: All issues in the project are listed. They can be filtered using the search box.
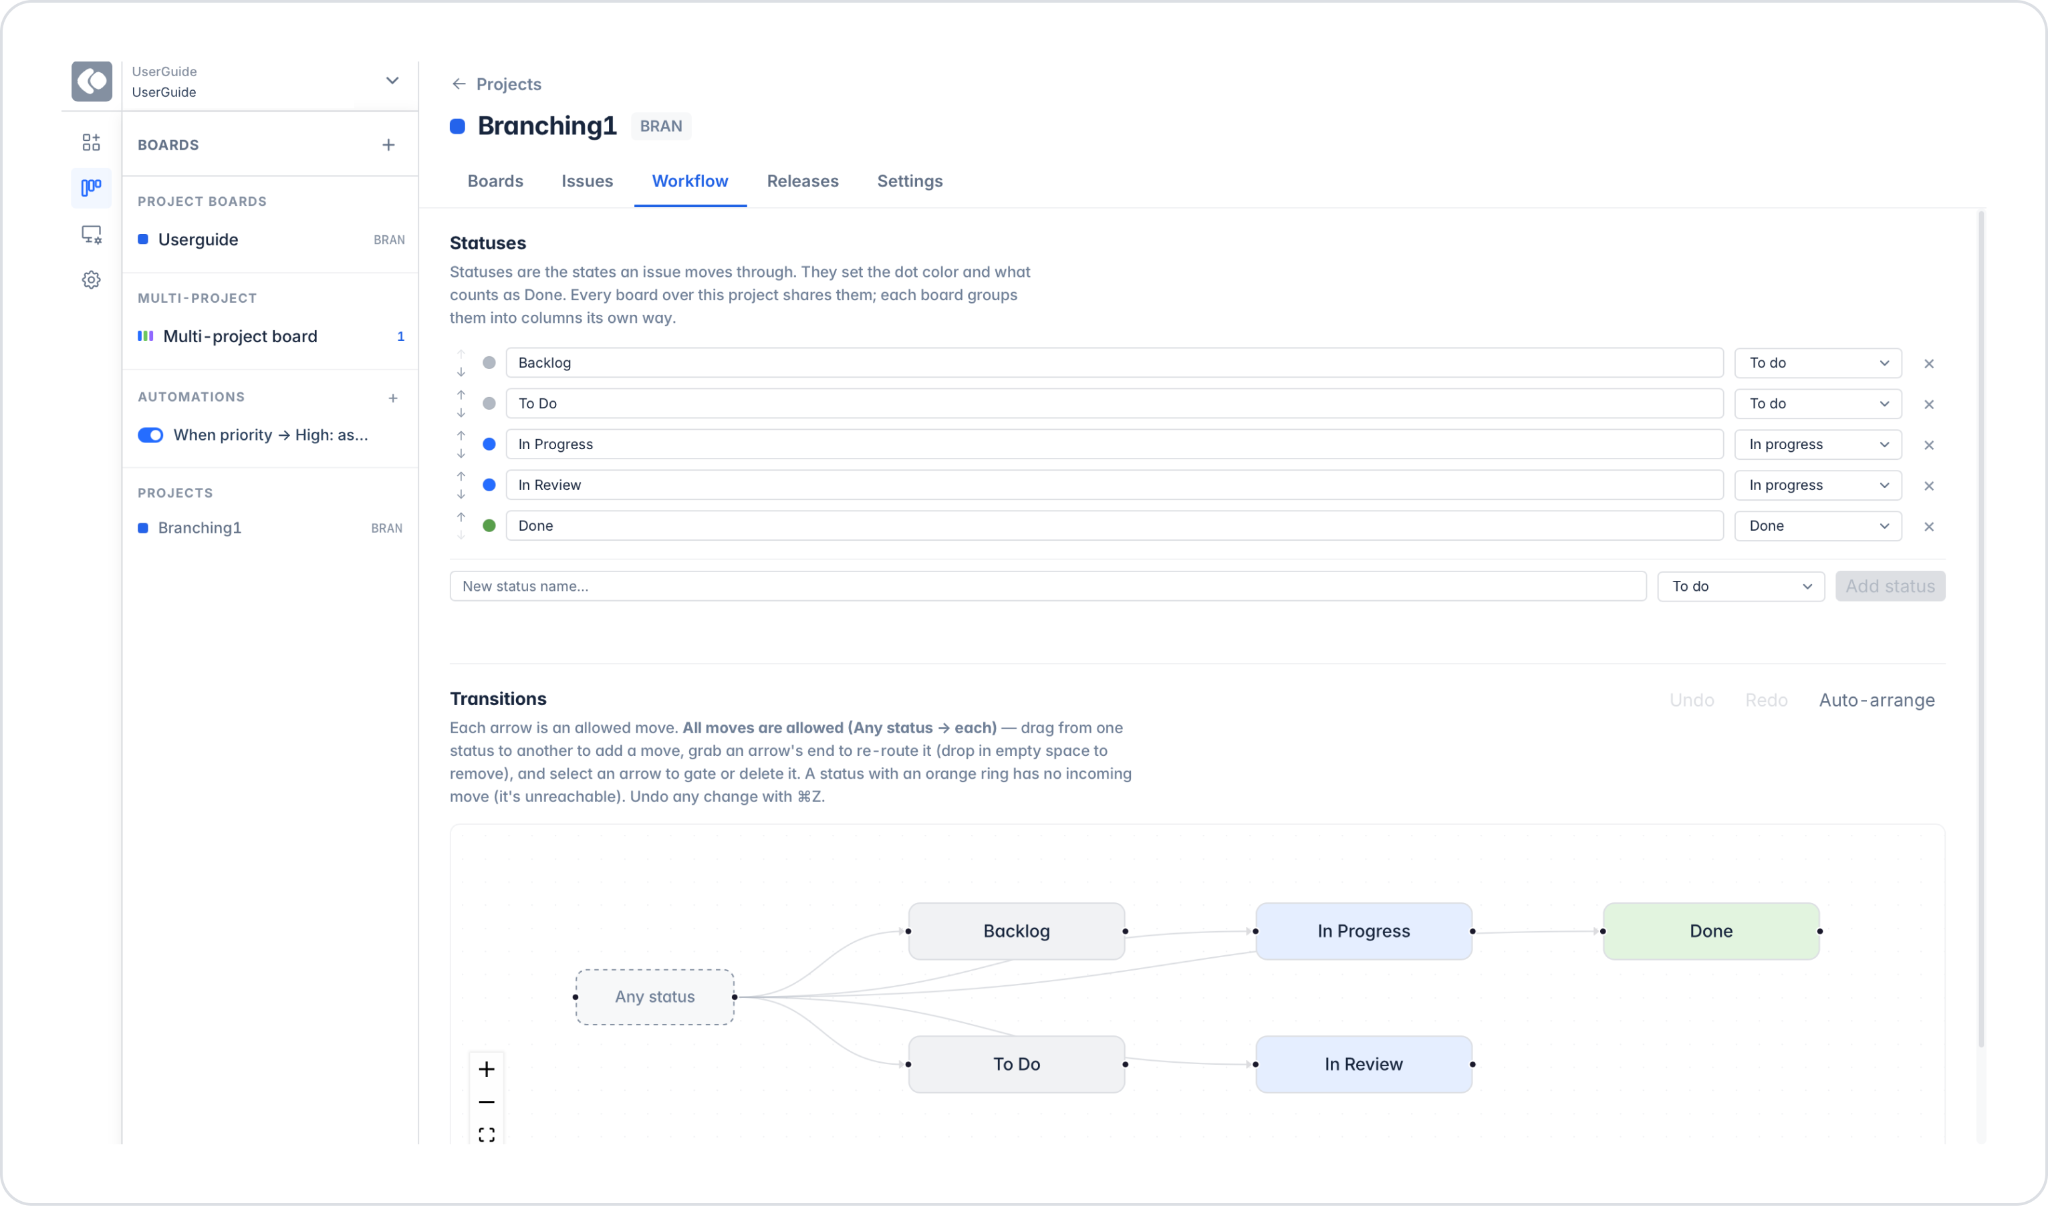
“Workflow” tab: The project’s status and transition structure are managed here.
‘Statuses’: The statuses Backlog, To Do, In Progress, In Review, and Done are listed. A new status can be added using the “Add status” button. Statuses can be sorted and deleted.
Transitions: Each arrow represents a transition. By default, all transitions are allowed (Any status → each). New transitions can be added by dragging. The layout is automatically adjusted with “Auto-arrange.” Changes can be undone with ⌘Z/ Control Z.
Releases tab: Project releases are managed. A new release can be added using the Add release button.
Settings tab: The project can be renamed or deleted. Additional project-specific fields can be defined in the Custom fields section.
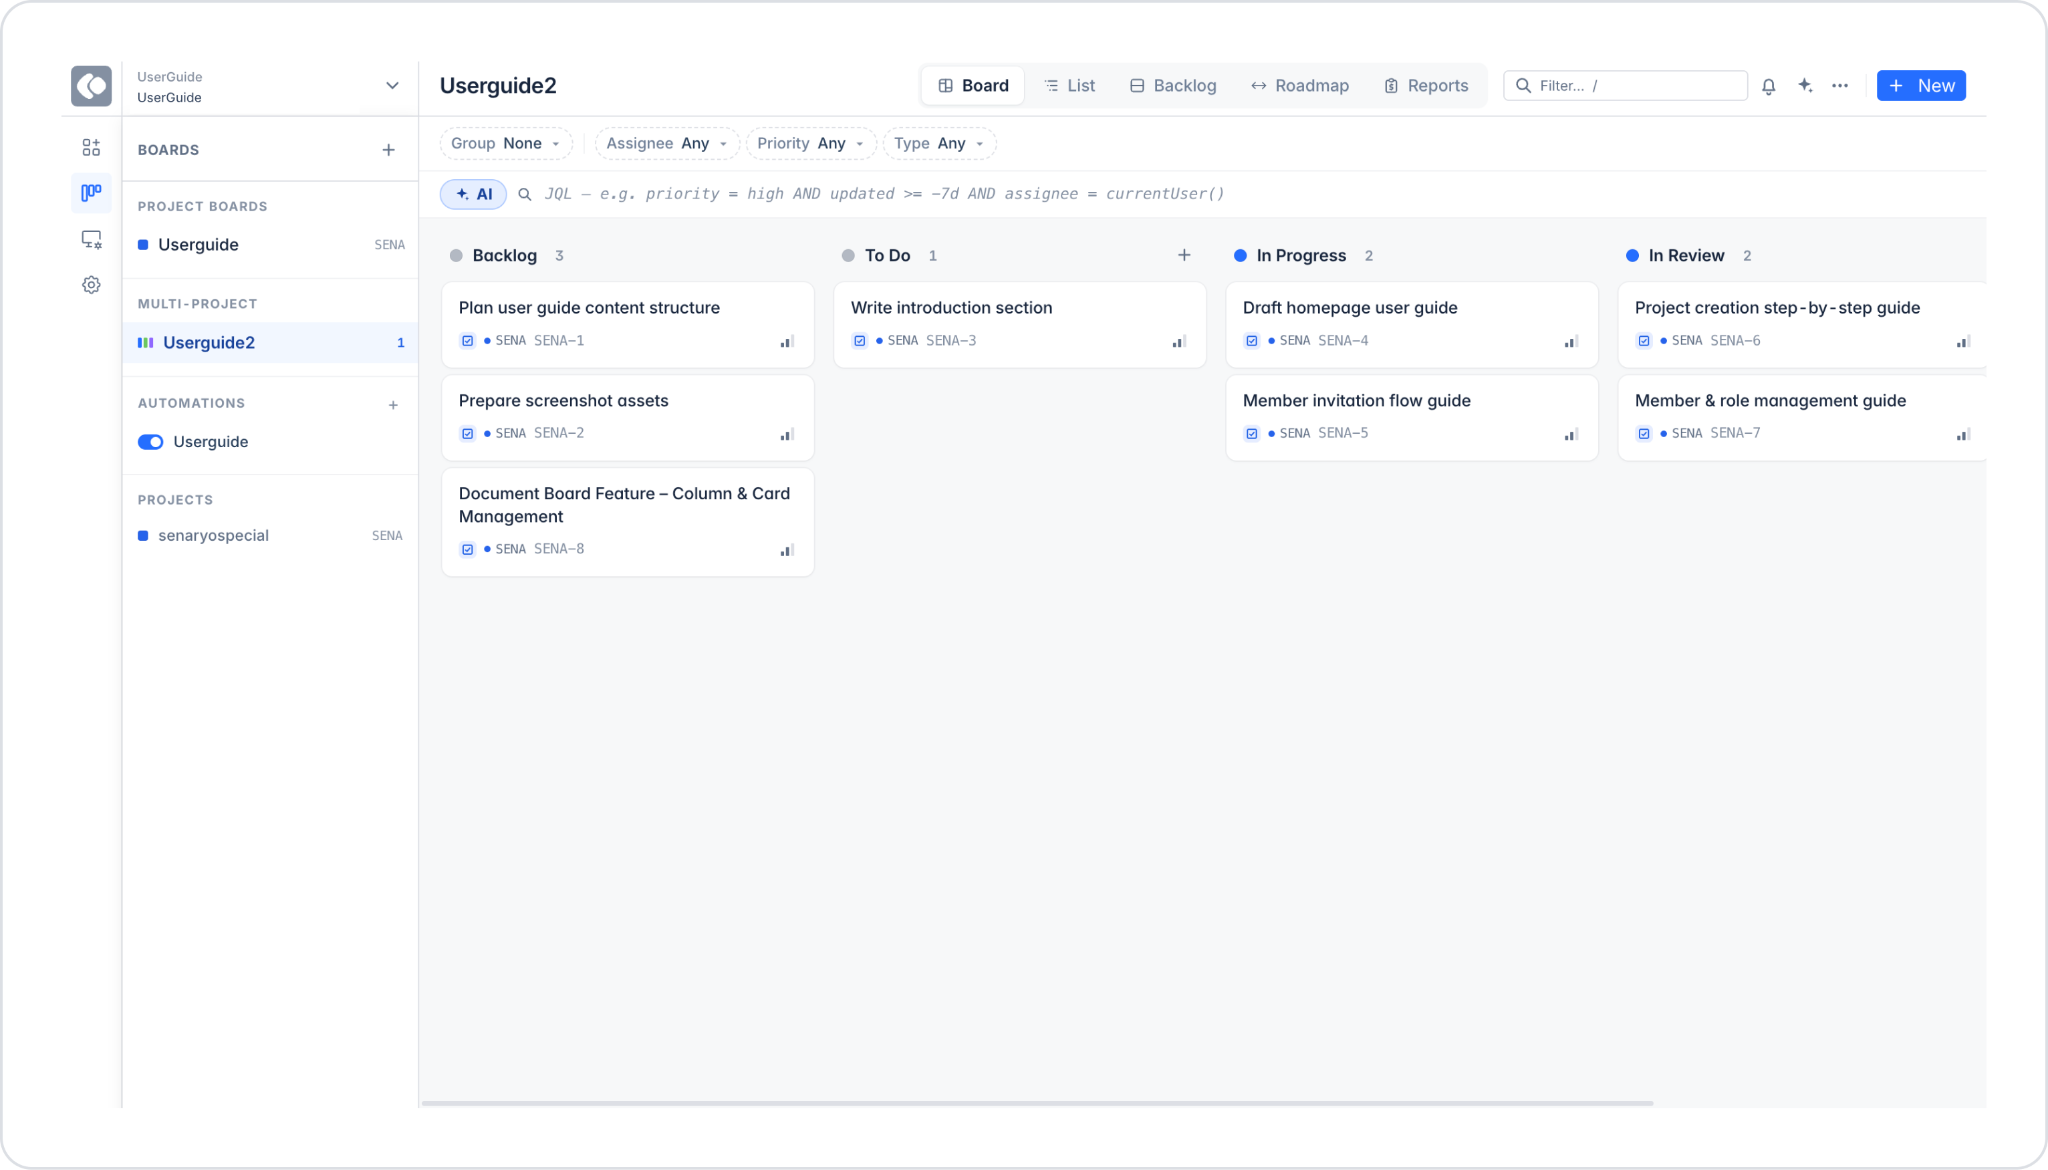
3. Board View and Navigation
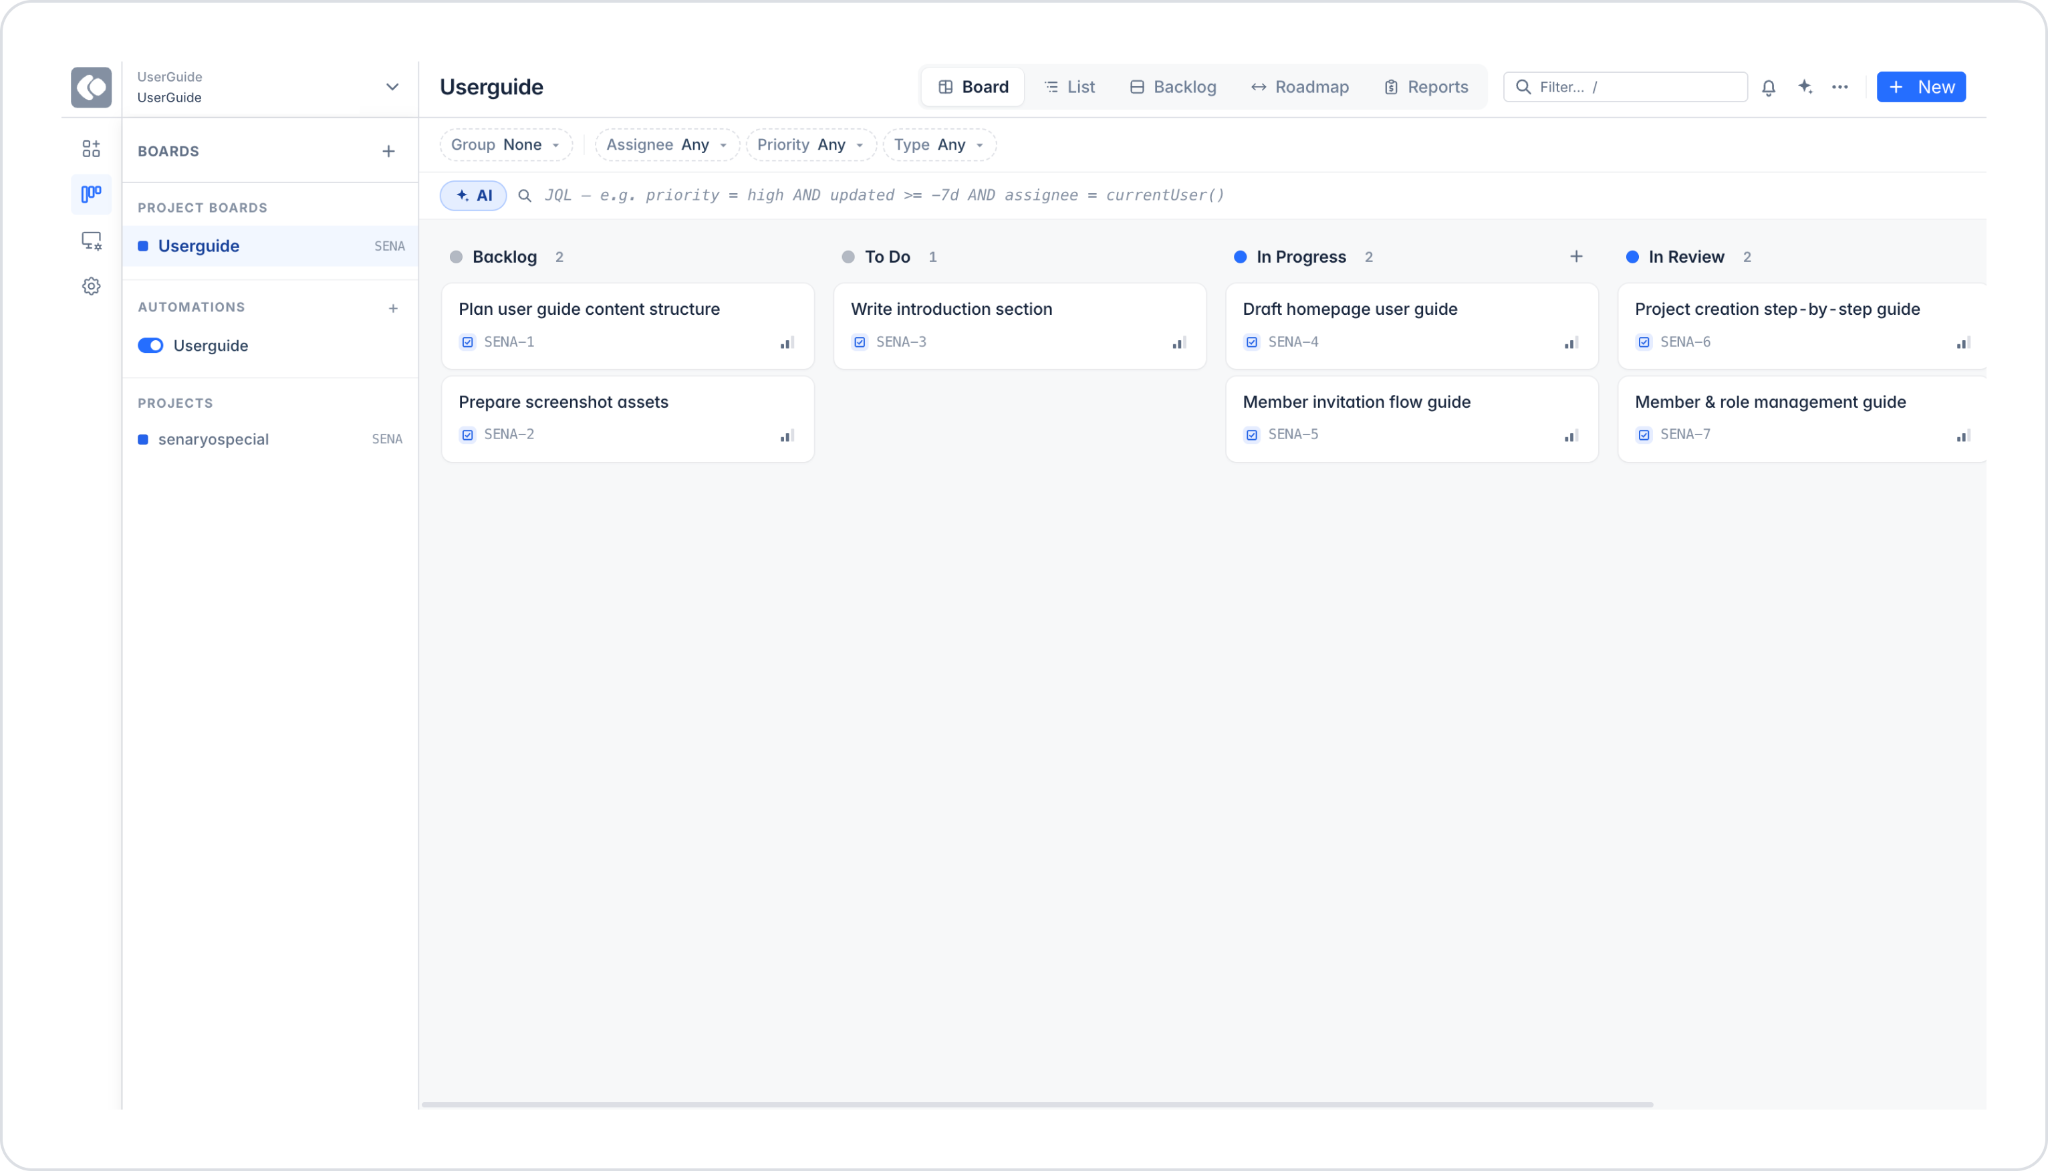
After a board is created, five different view options appear in the top menu: Board, List, Backlog, Roadmap, and Reports. The left panel displays the Project Boards, Multi-Project, Automations, and Projects sections. The workspace name, project name, and workflow type (SCRUM or KANBAN) are displayed at the top.
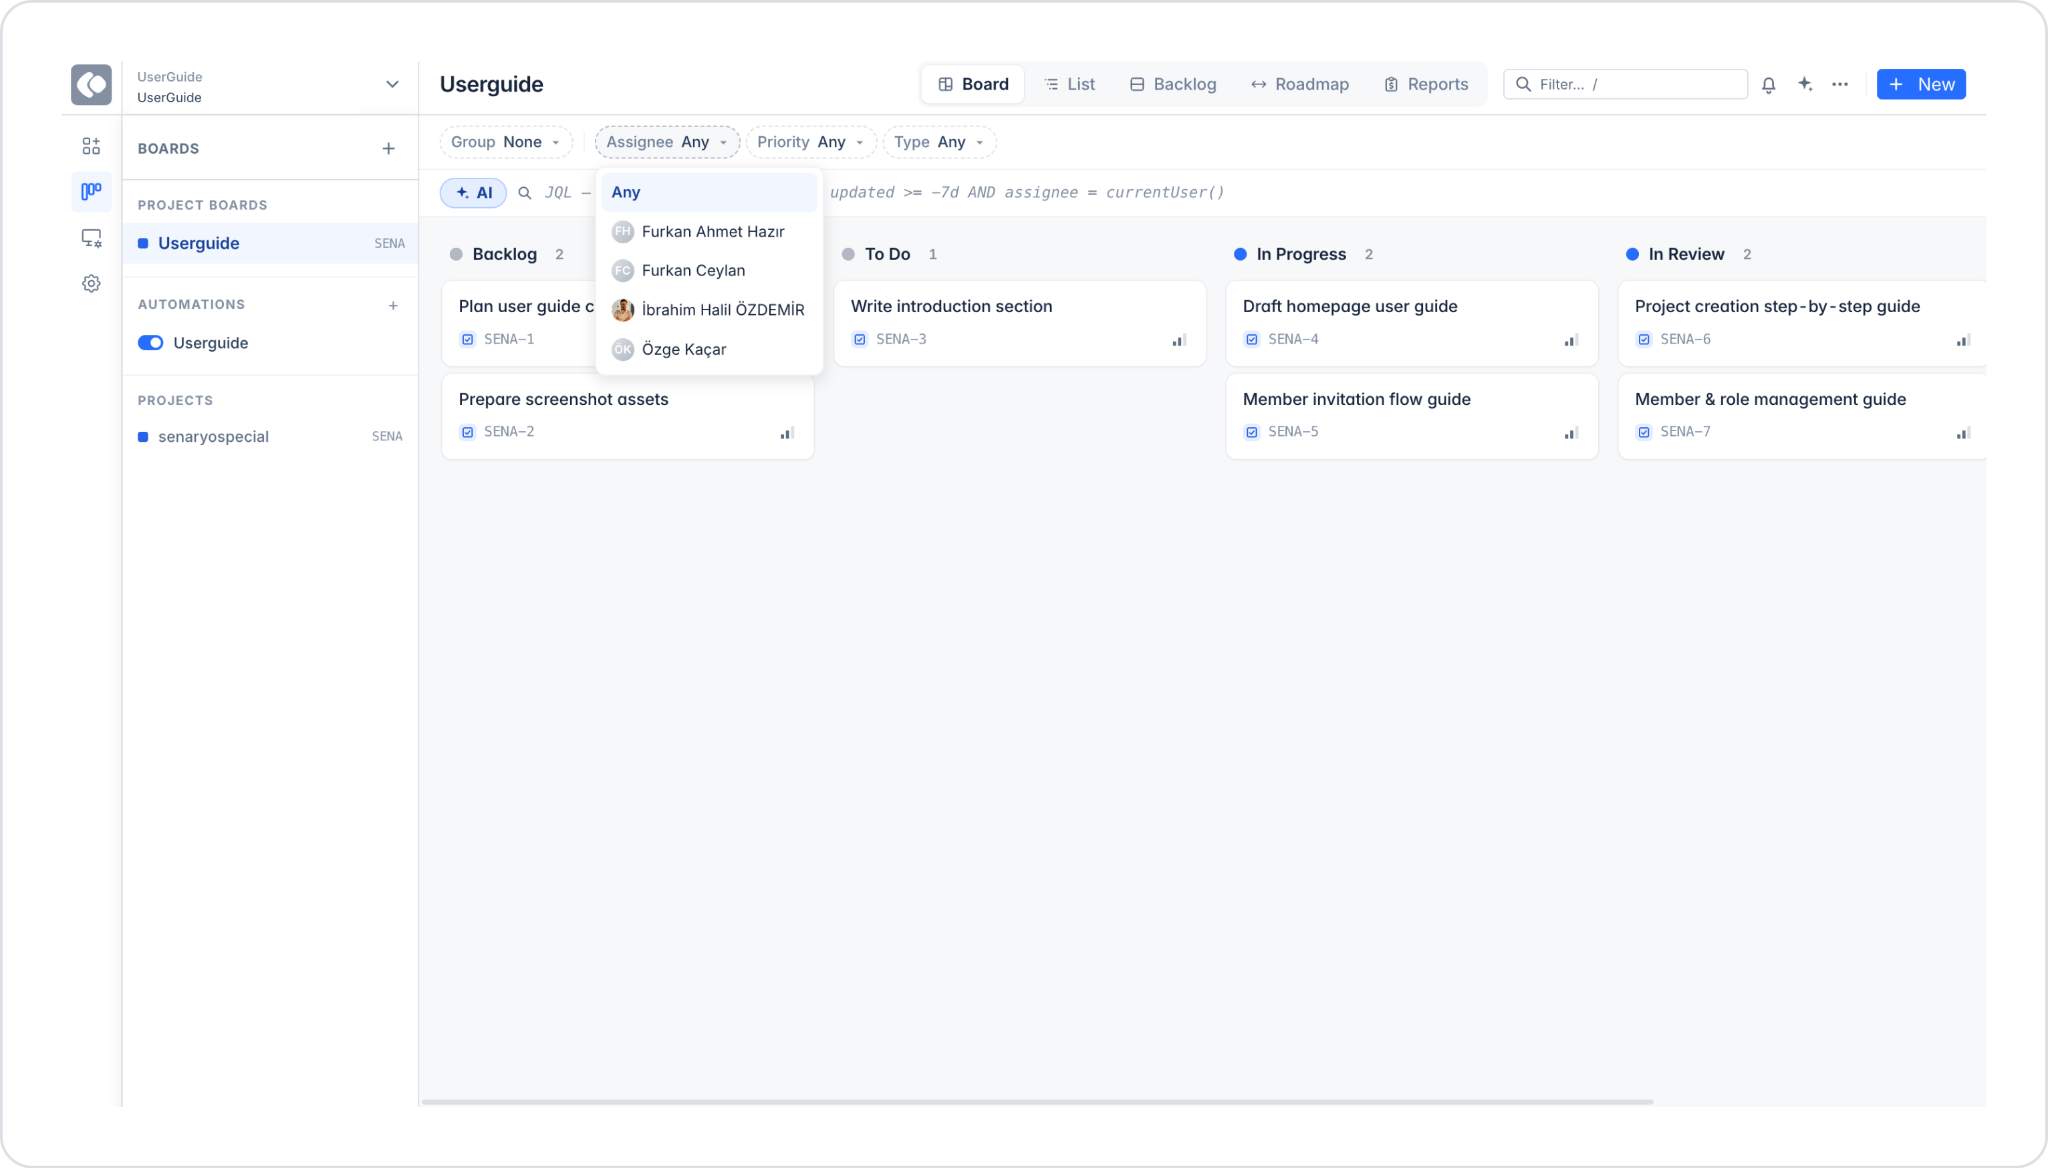
4. Board Filtering
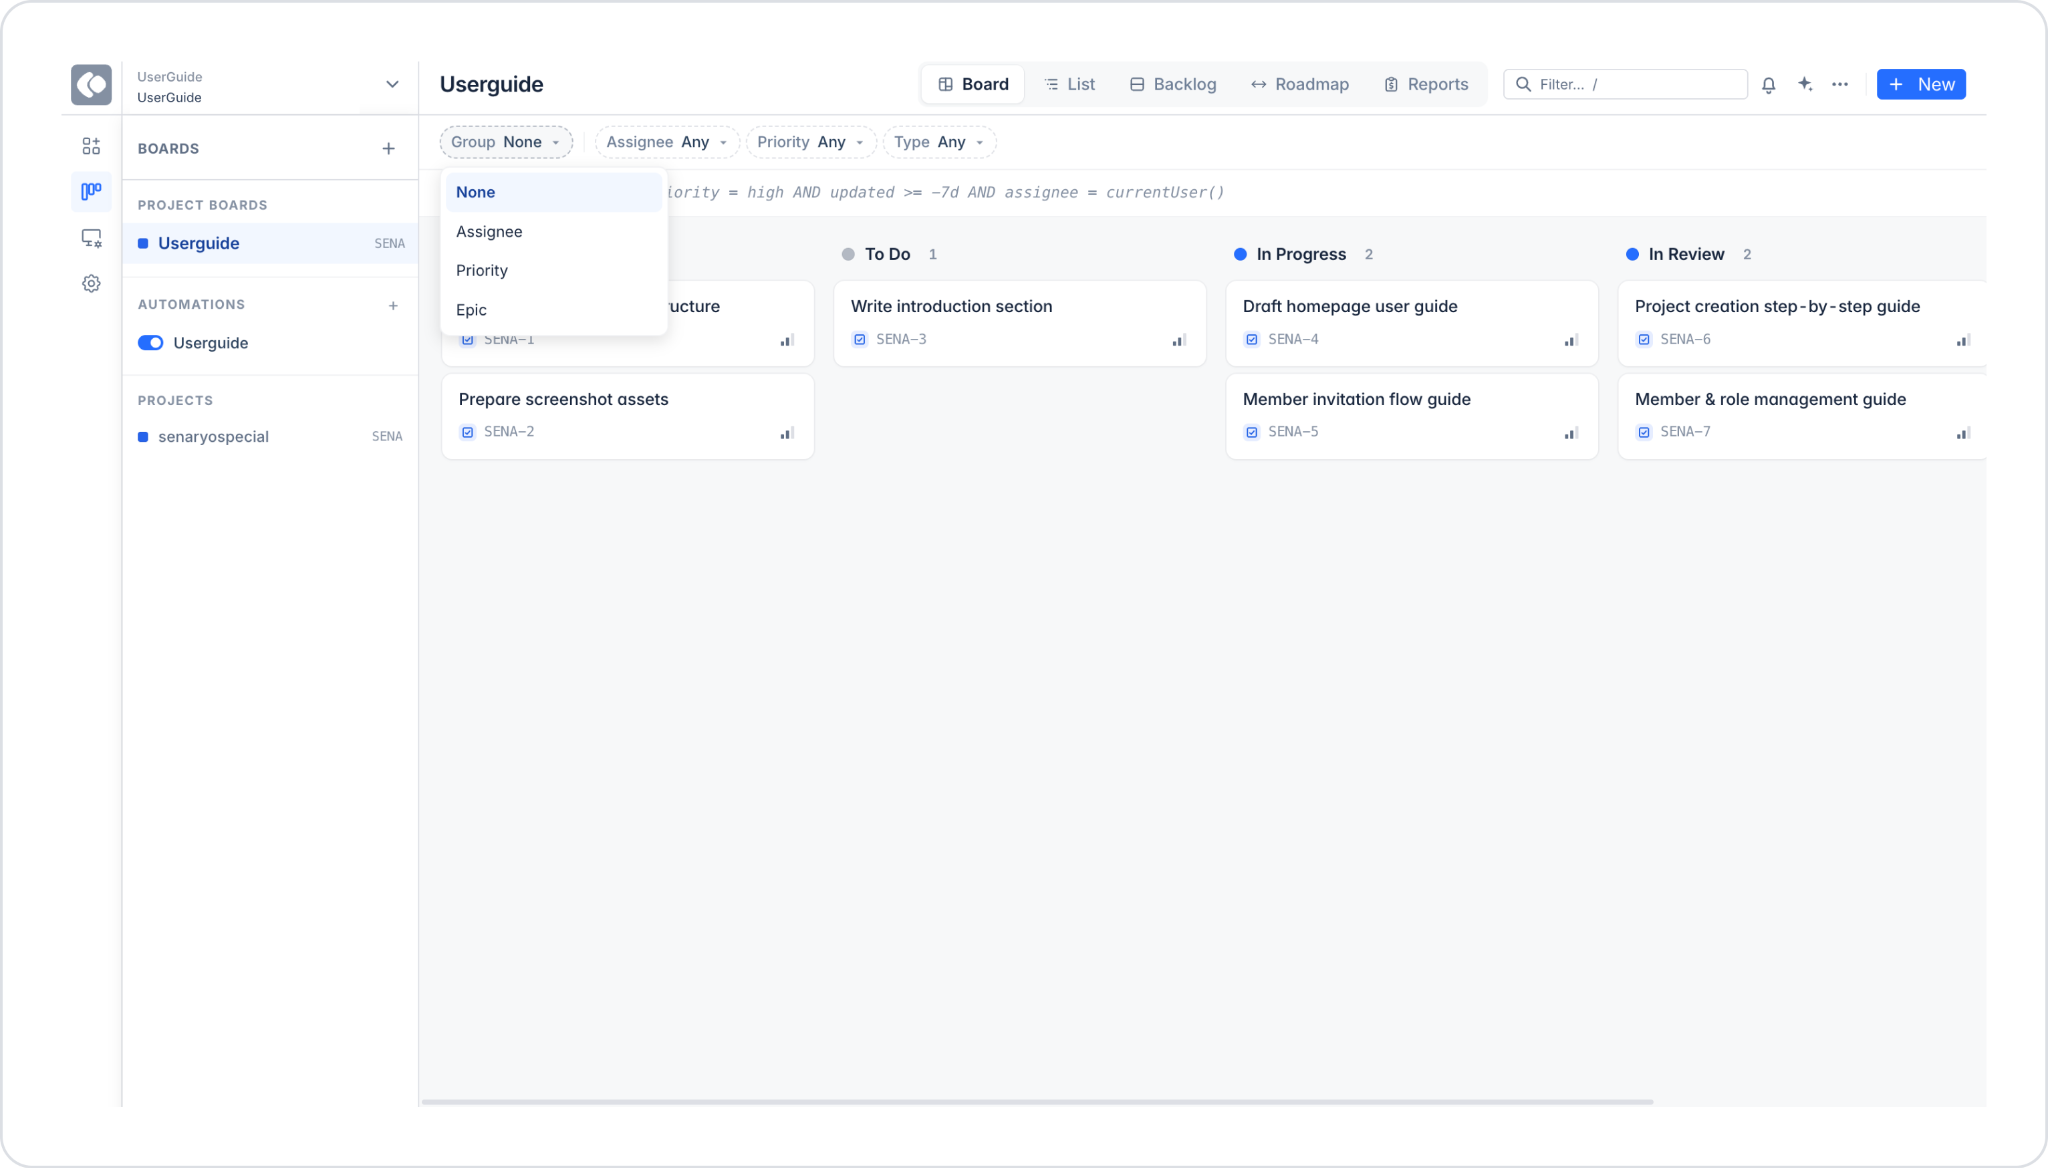
To filter issues on the Board screen, there are four filter options at the top:
Group: Select a grouping criterion for issues. Options include None, Assignee, Priority, or Epic.
Assignee: Filters issues by the assigned person.
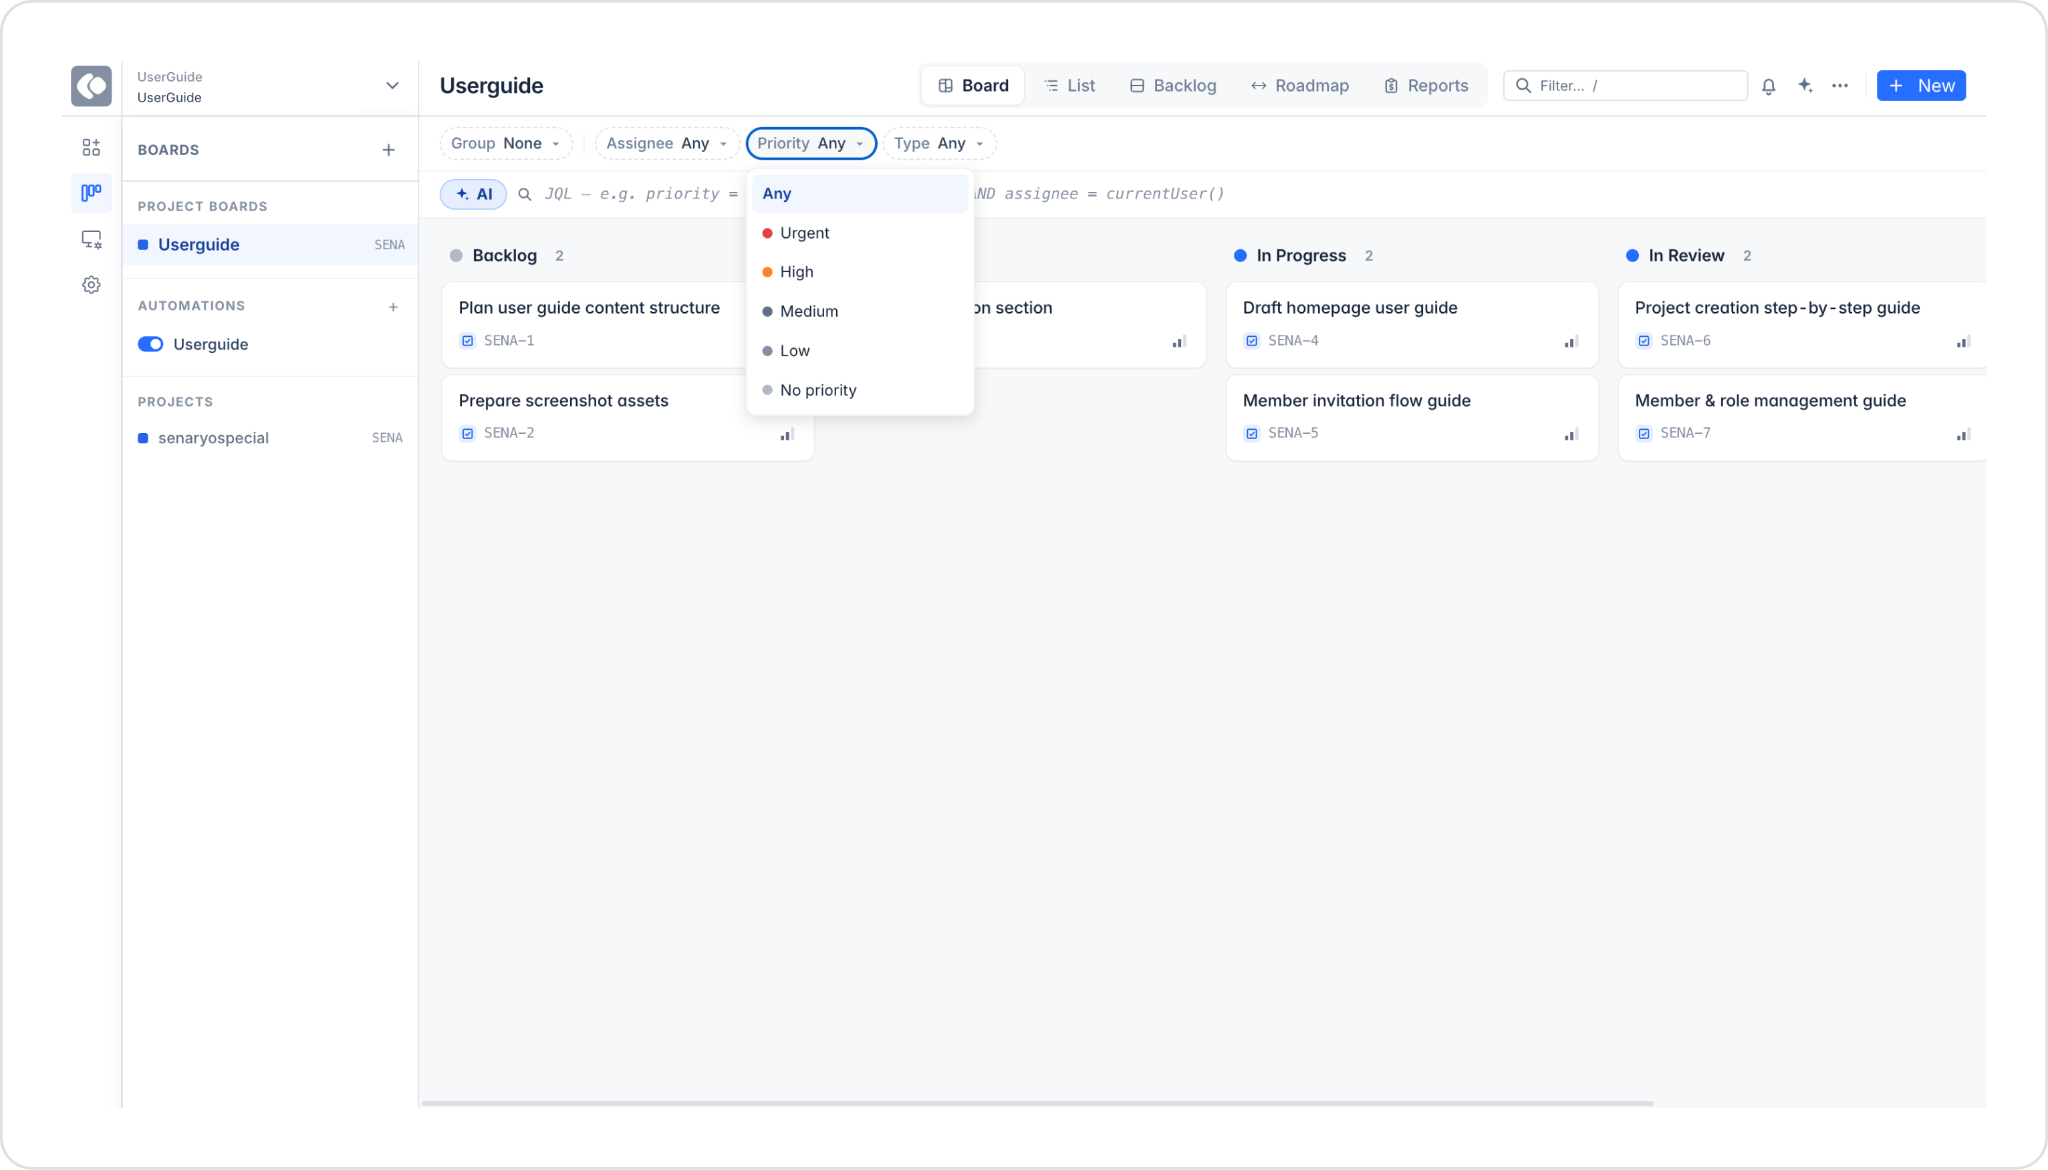
Priority: Filters by priority level. The options are Urgent, High, Medium, Low, and No priority.
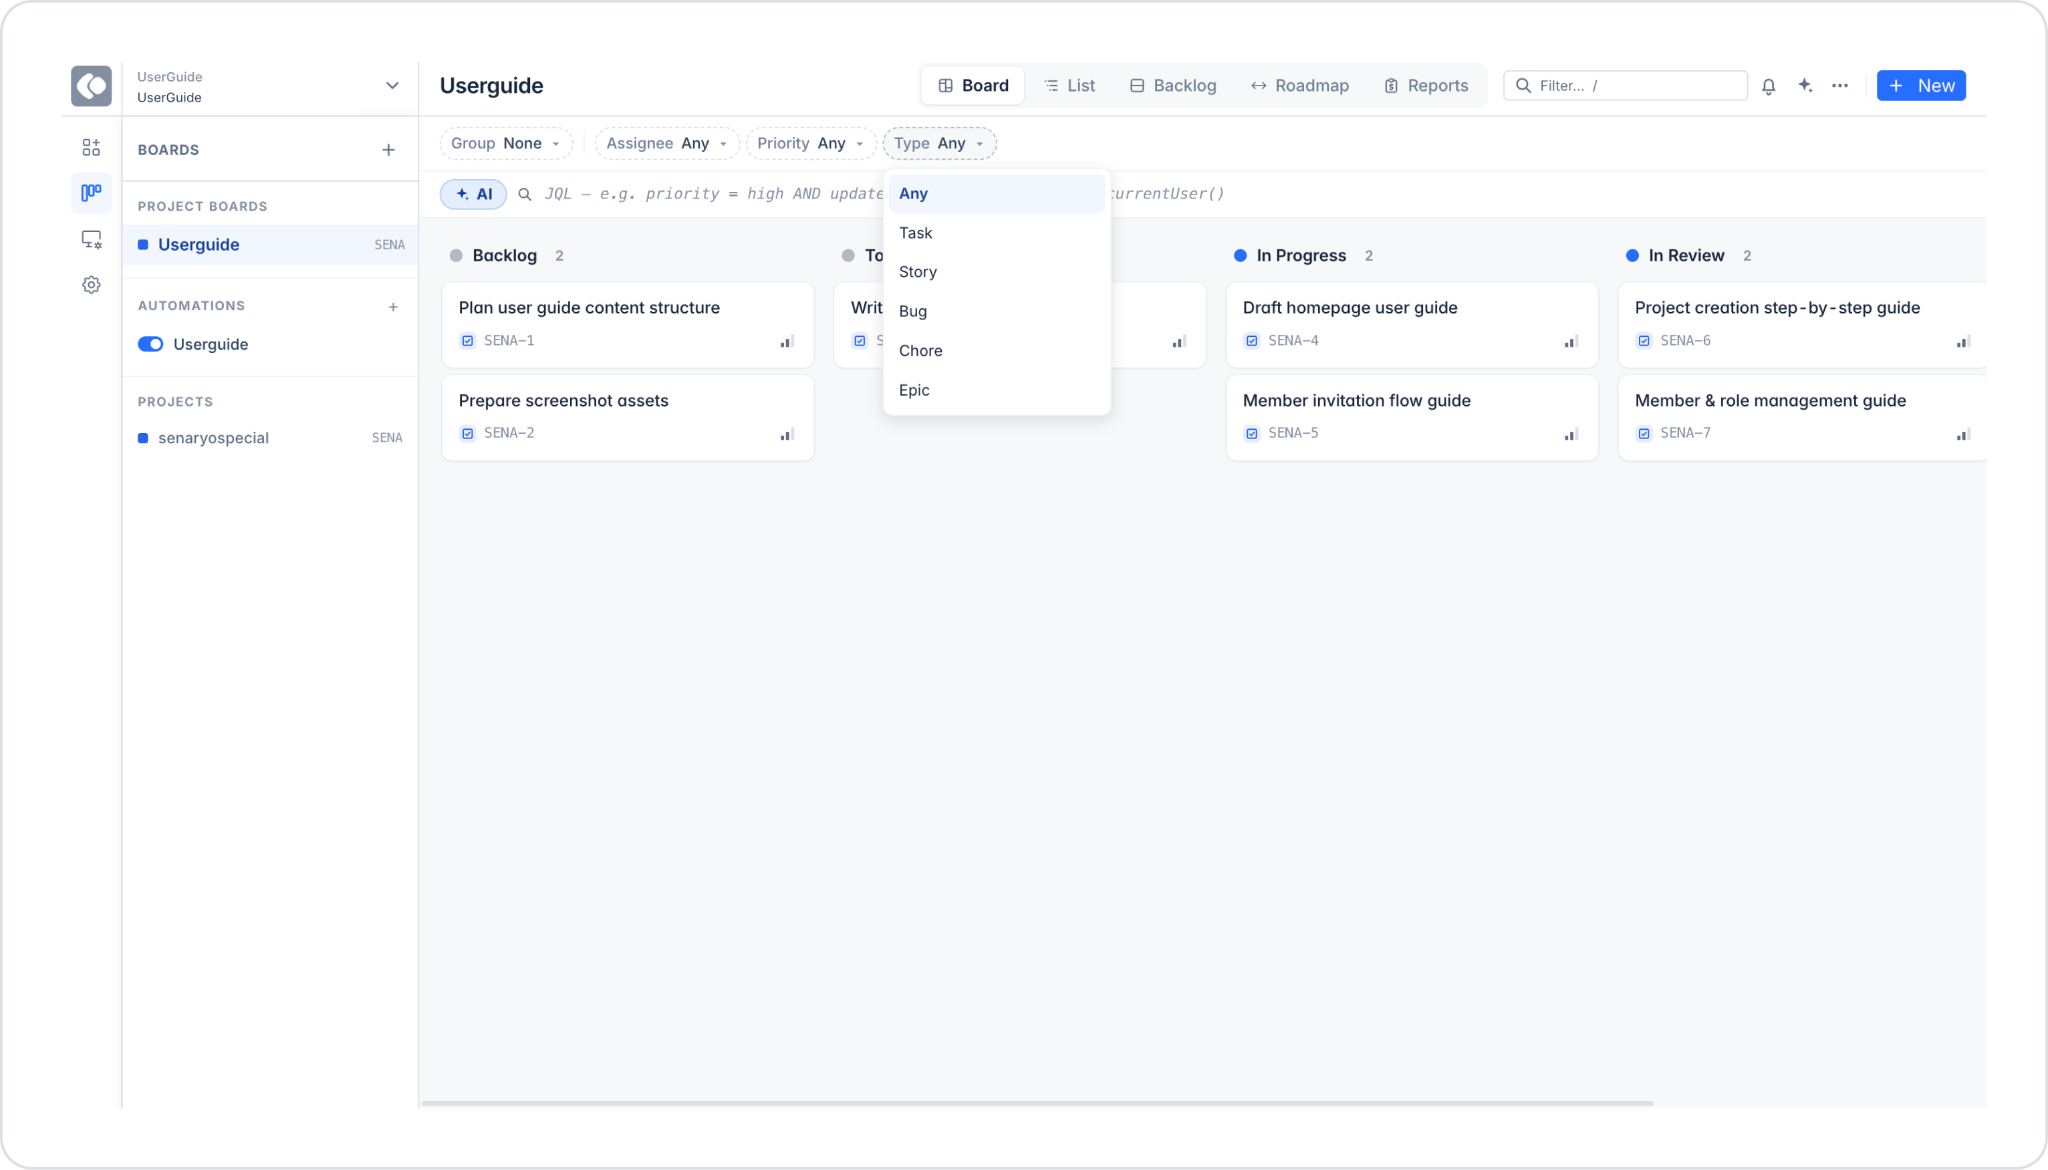
Type: Filters by issue type. The options are Task, Story, Bug, Chore, and Epic. Additionally, you can perform more advanced filtering by entering a query in the JQL field next to the filter area. Example: priority = high AND updated >= -7d AND assignee = currentUser()
Filtering with AI: You can create filters using natural language by clicking the + AI button at the top.
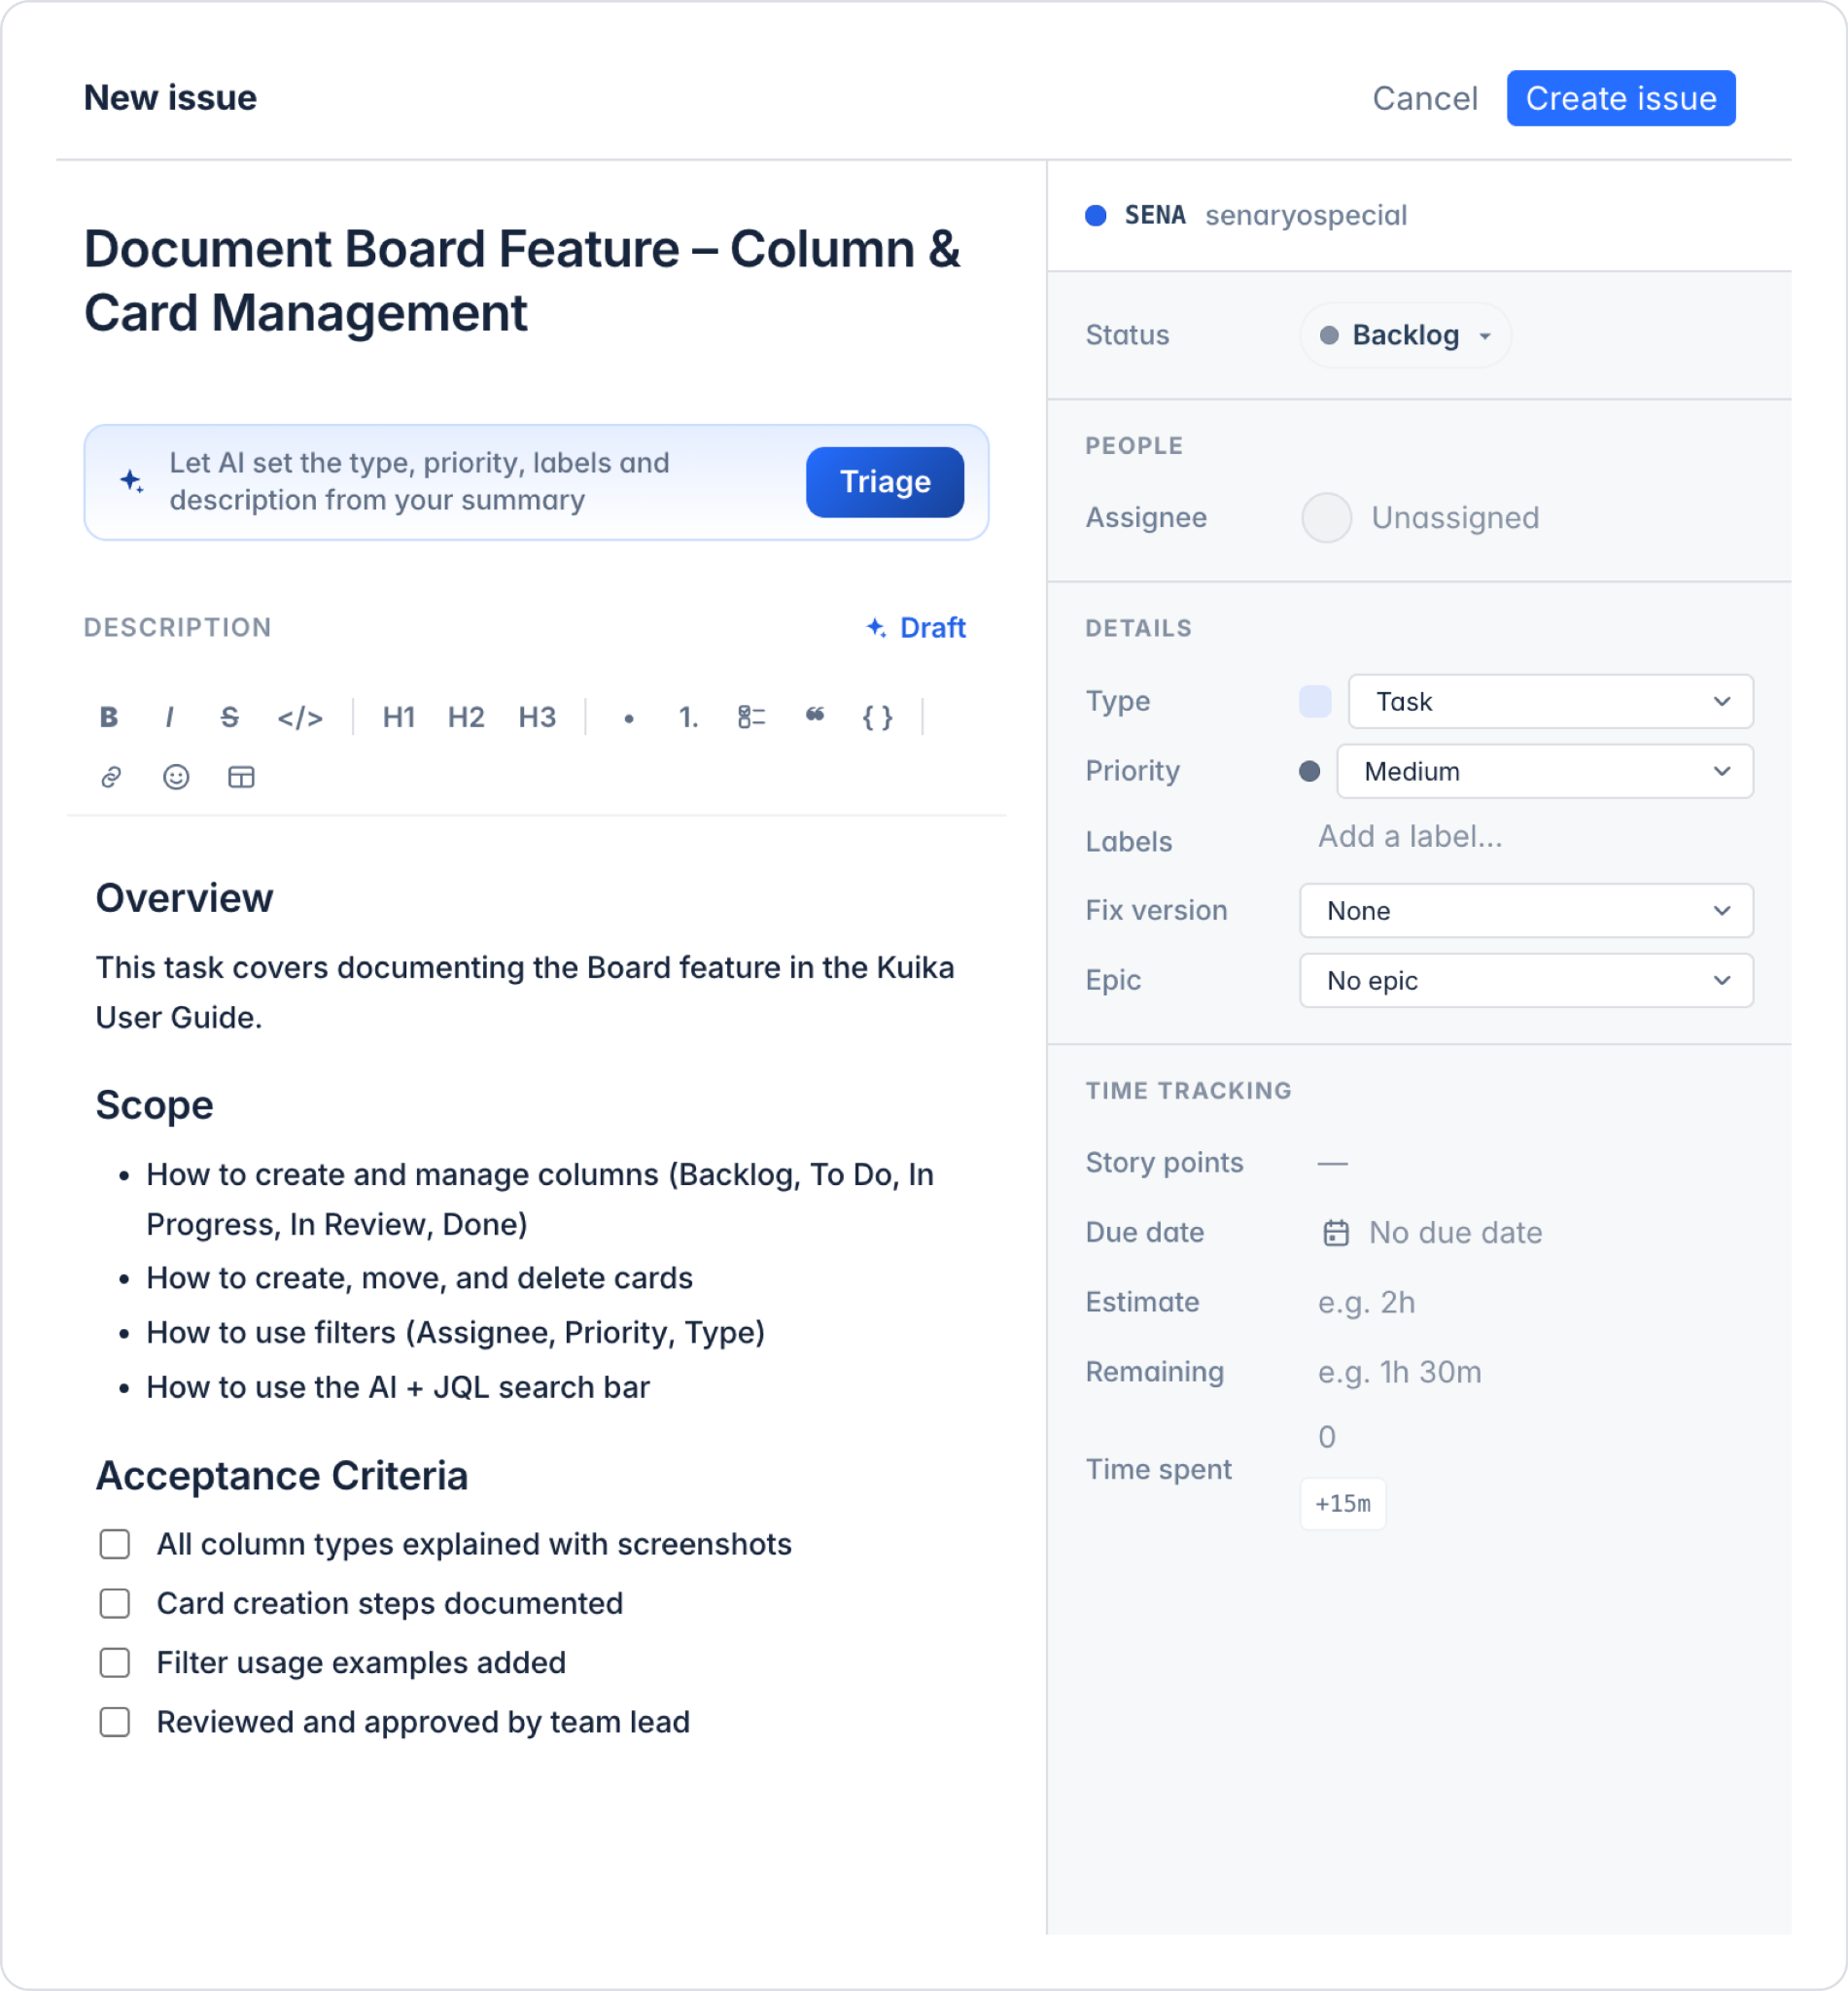
5. Creating a New Issue
To create a new issue, click the + New button in the top-right corner or press the C key on your keyboard while hovering over any column. Fill out the following fields in the form that opens:
Left pane:
Issue summary: Enter the issue title.
Triage: The AI automatically suggests the type, priority, labels, and description based on the entered title.
Description: Markdown is supported. You can create a draft with AI assistance using the + Draft button.
Right pane:
Status: Options include Backlog, To Do, In Progress, In Review, and Done.
Assignee: Specify who will be assigned the issue.
Type: Options include Task, Story, Bug, Chore, and Epic.
Priority: Options include Urgent, High, Medium, Low, and No priority.
The Labels, Fix version, Epic fields can be filled out.
Time Tracking: Time tracking is performed using the Story points, Due date, Estimate, Remaining, and Time spent fields.
After filling out all fields, click the Create issue button.
6. Board Views
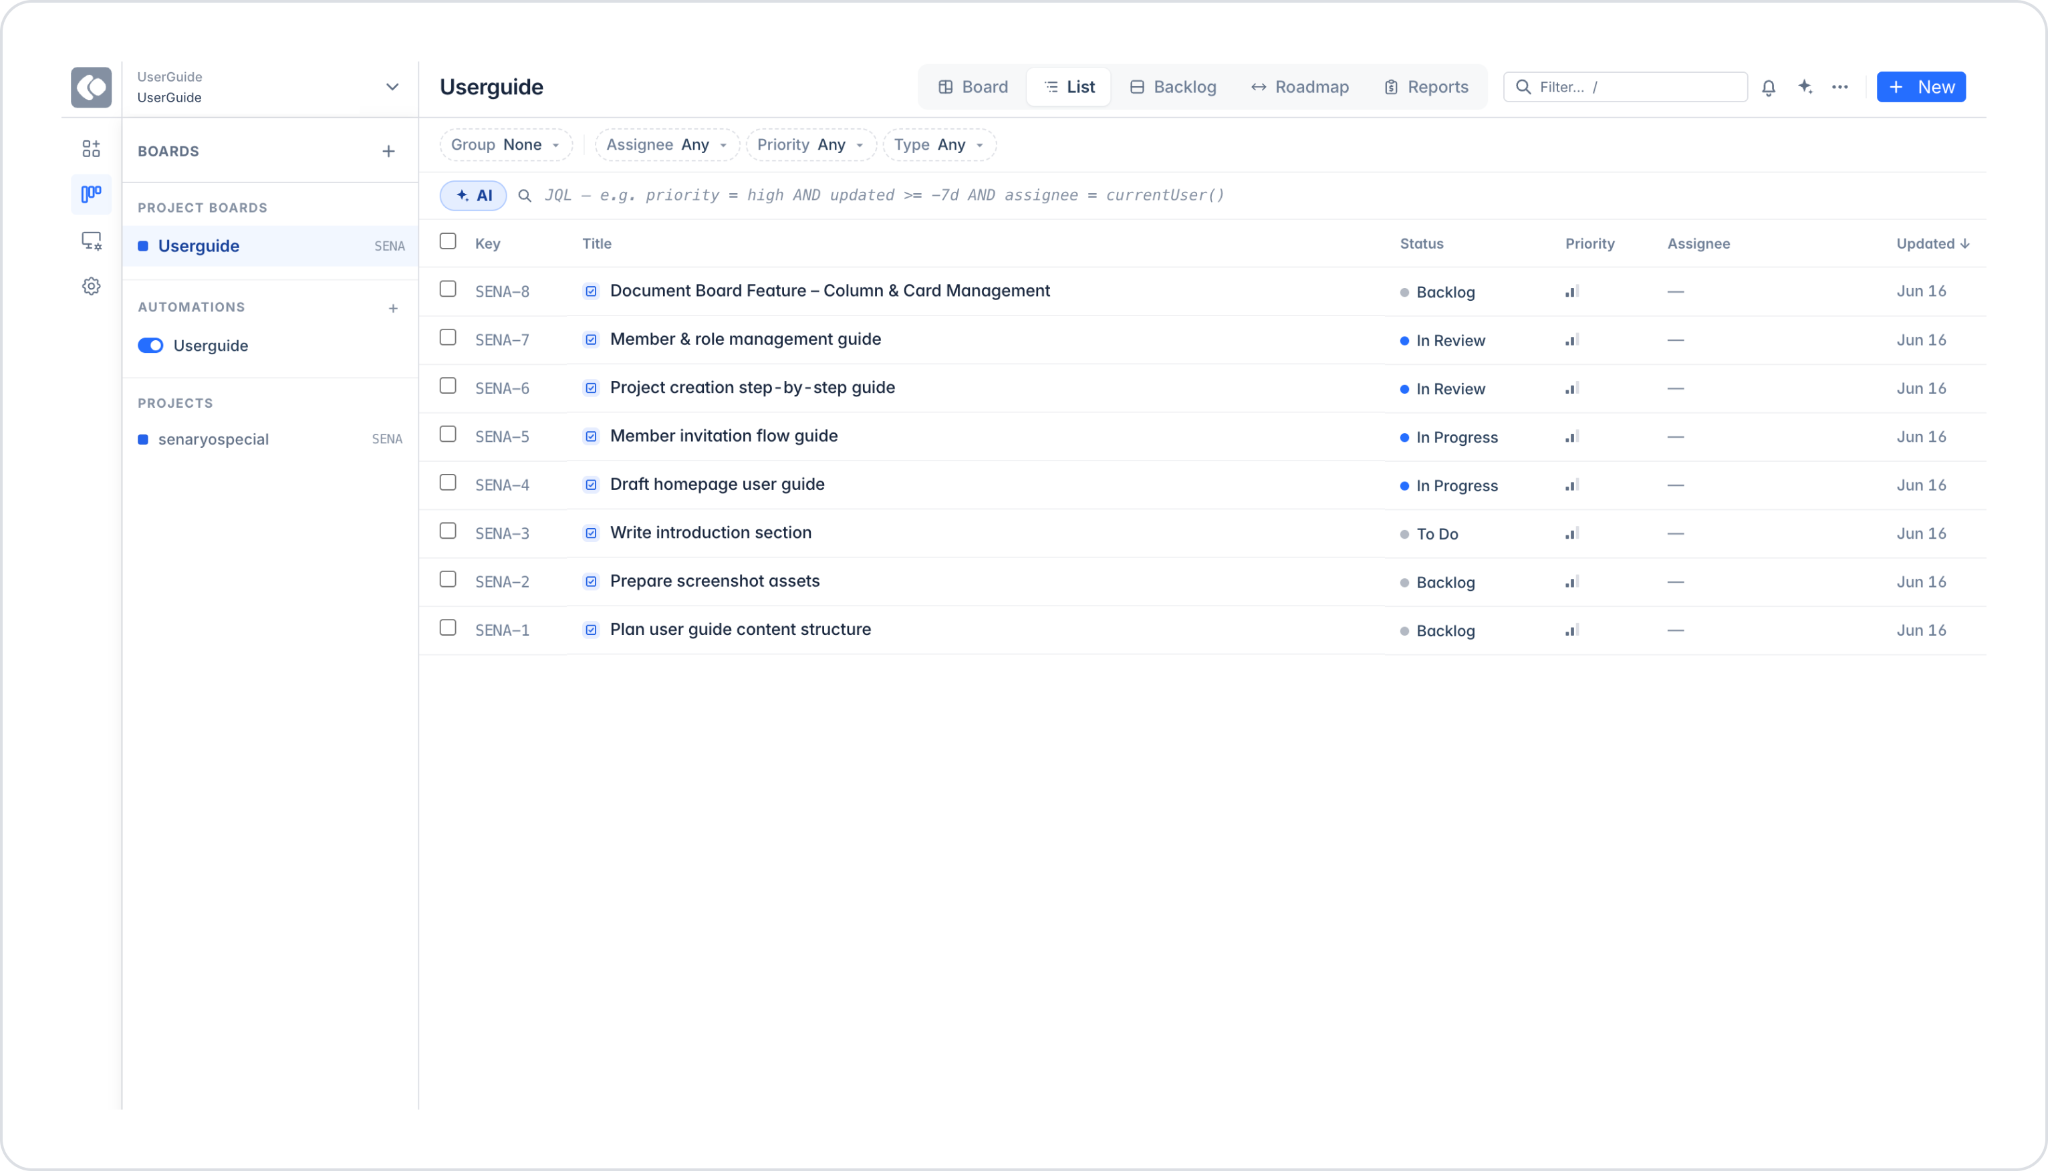
6.1. List View
When you click the “List” option in the top menu, issues are listed in a table format. Columns: Key, Title, Status, Priority, Assignee, Updated.
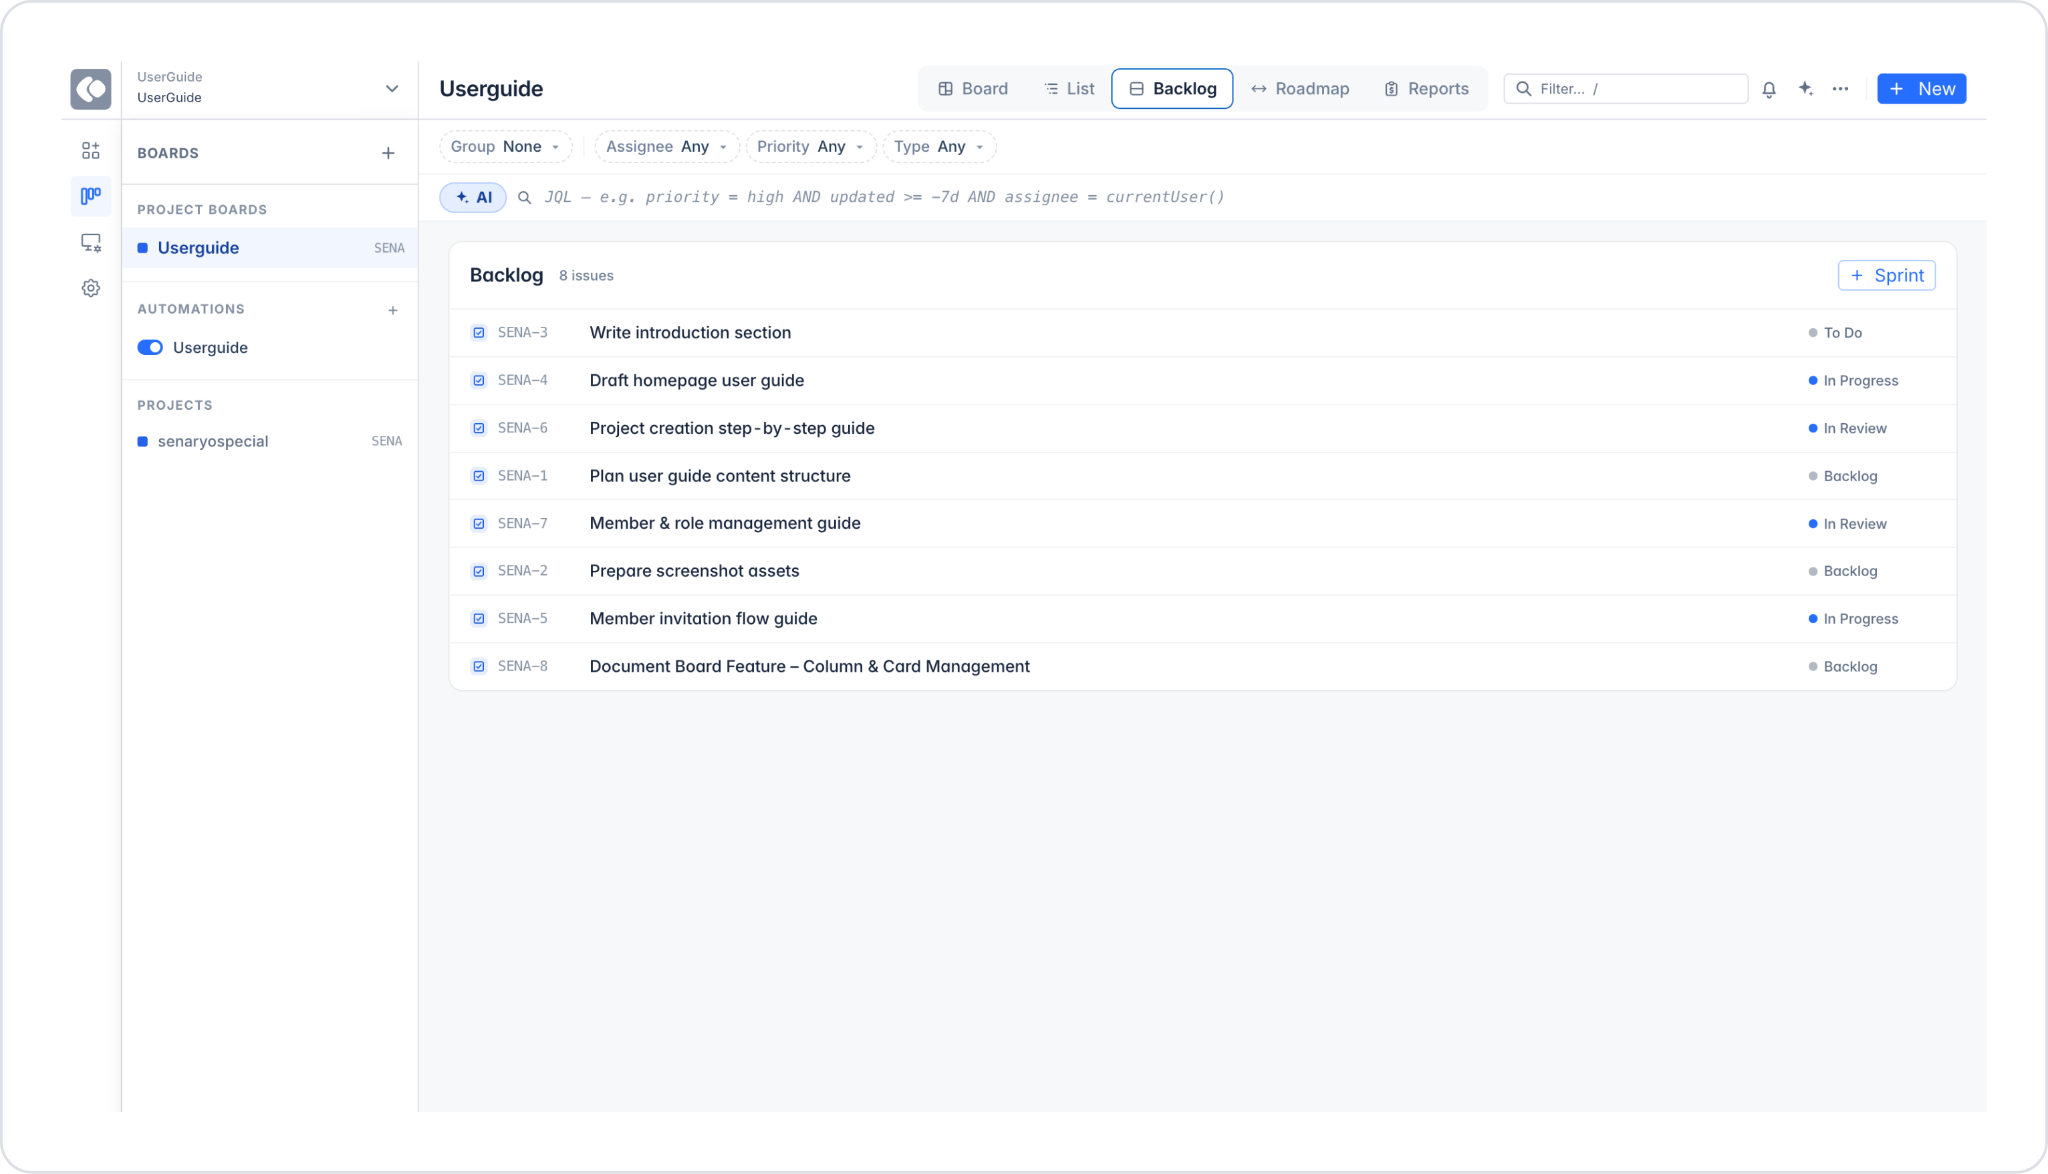
6.2. Backlog View
When you click the “Backlog” option in the top menu, the screen for managing issues outside of sprints opens. You can create a new sprint using the + Sprint button in the upper-right corner.
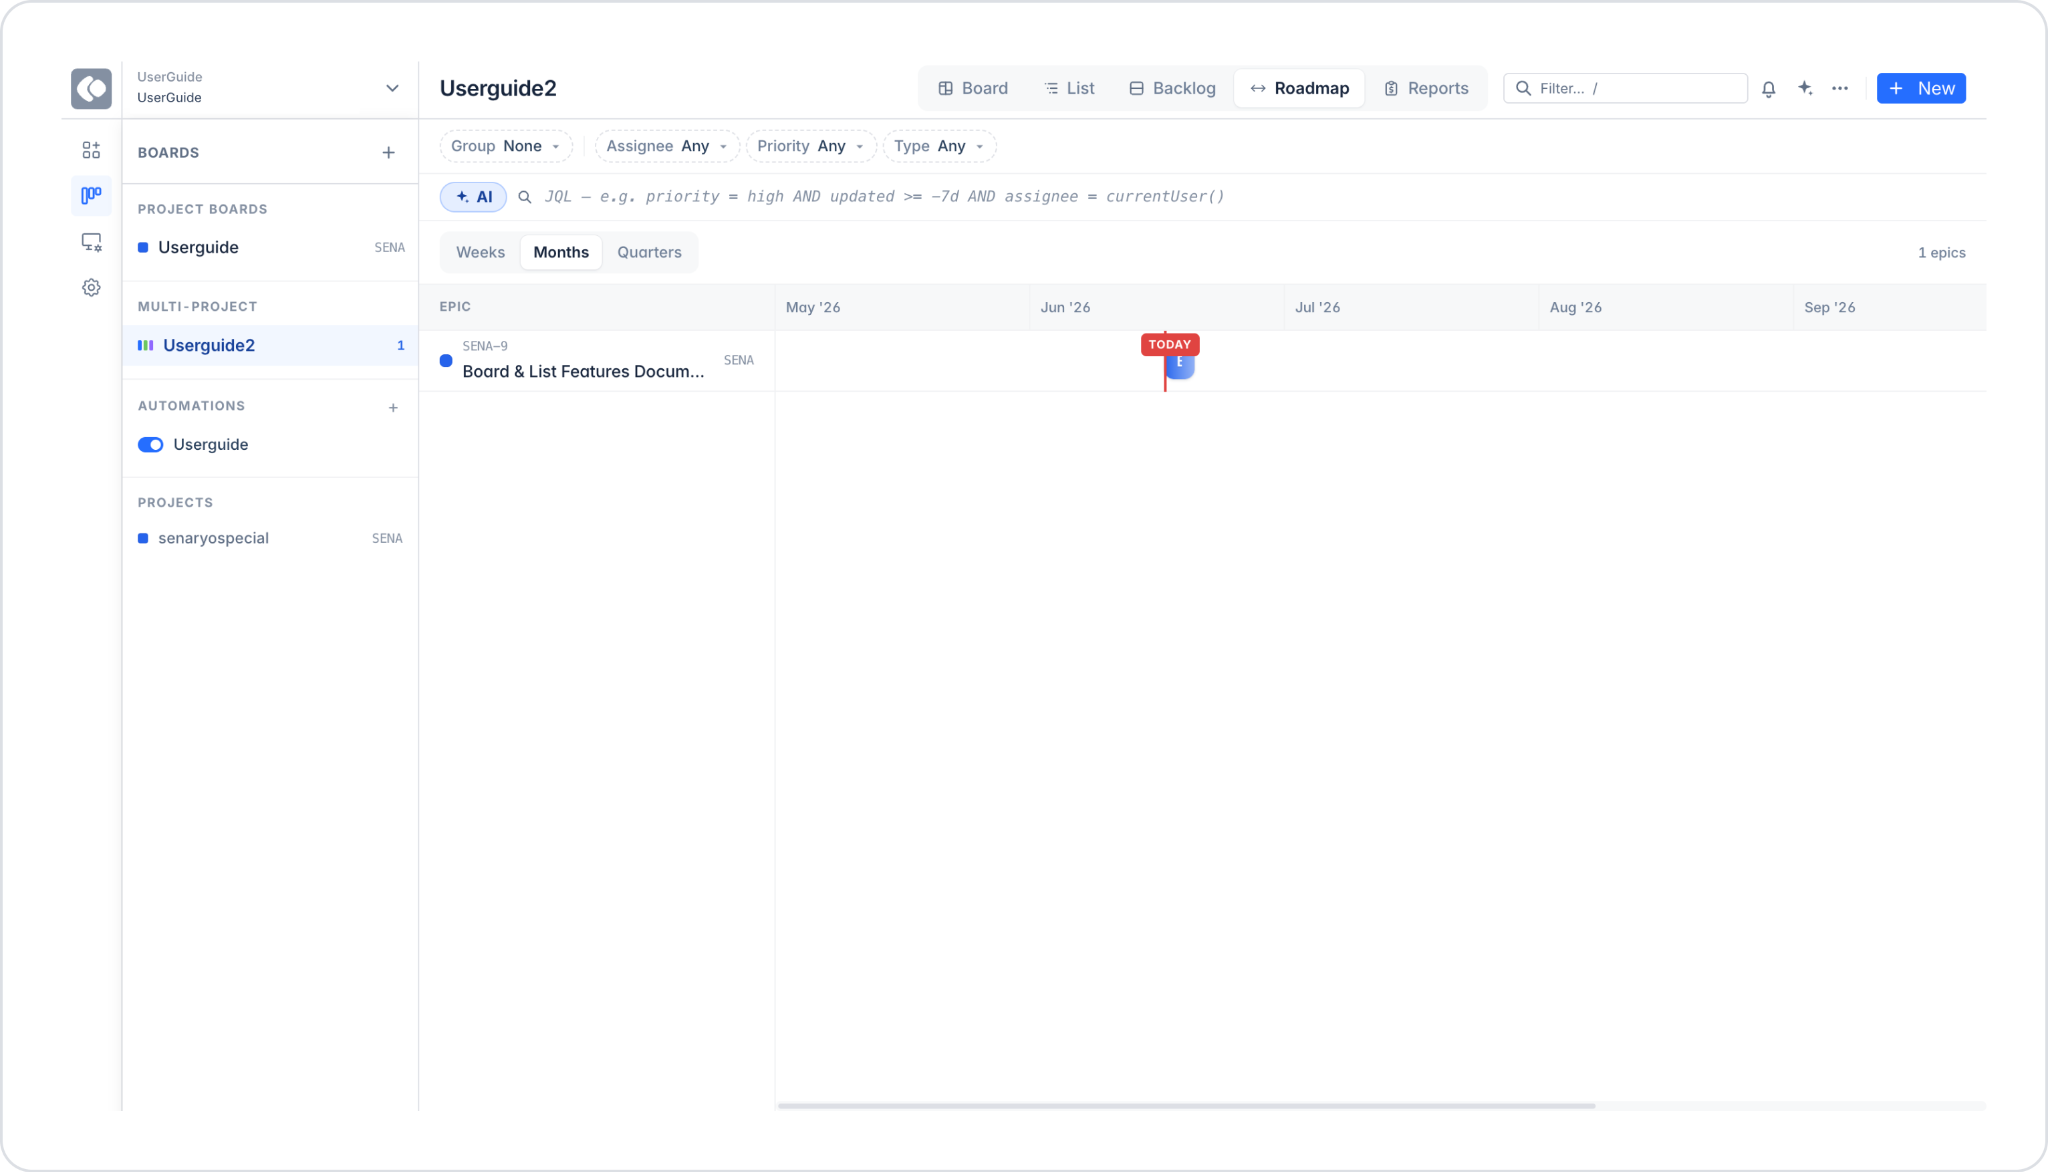
6.3. Roadmap View
The Roadmap is a timeline view. For an issue to be displayed on the Roadmap, its type must be set to Epic and a Due date must be specified. If no Epics have been created yet, the message “No epics yet” appears on the screen.
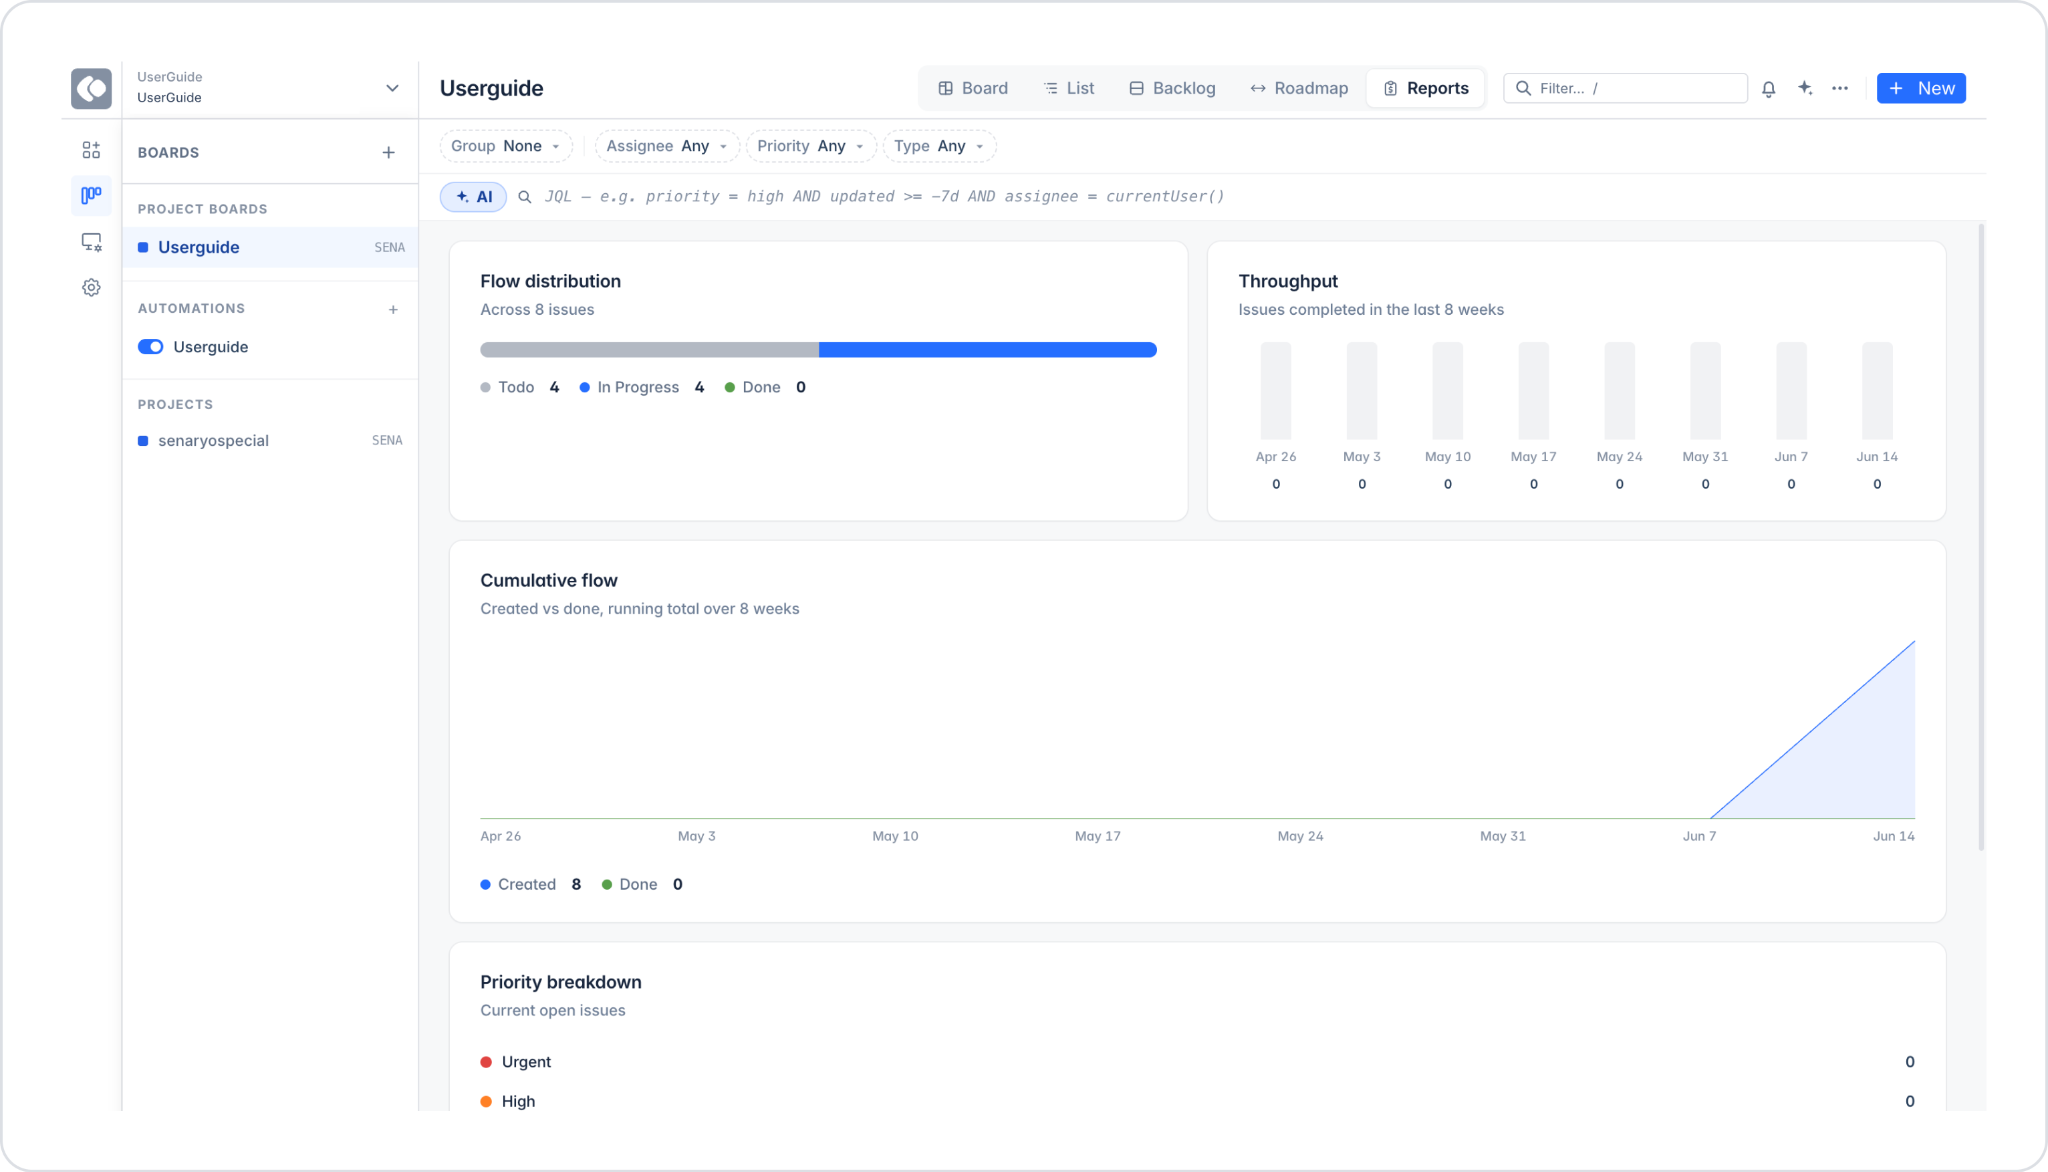
6.4. Reports View
Throughput, distribution, and flow metrics are displayed. The message “No data yet” appears before any issues are added.
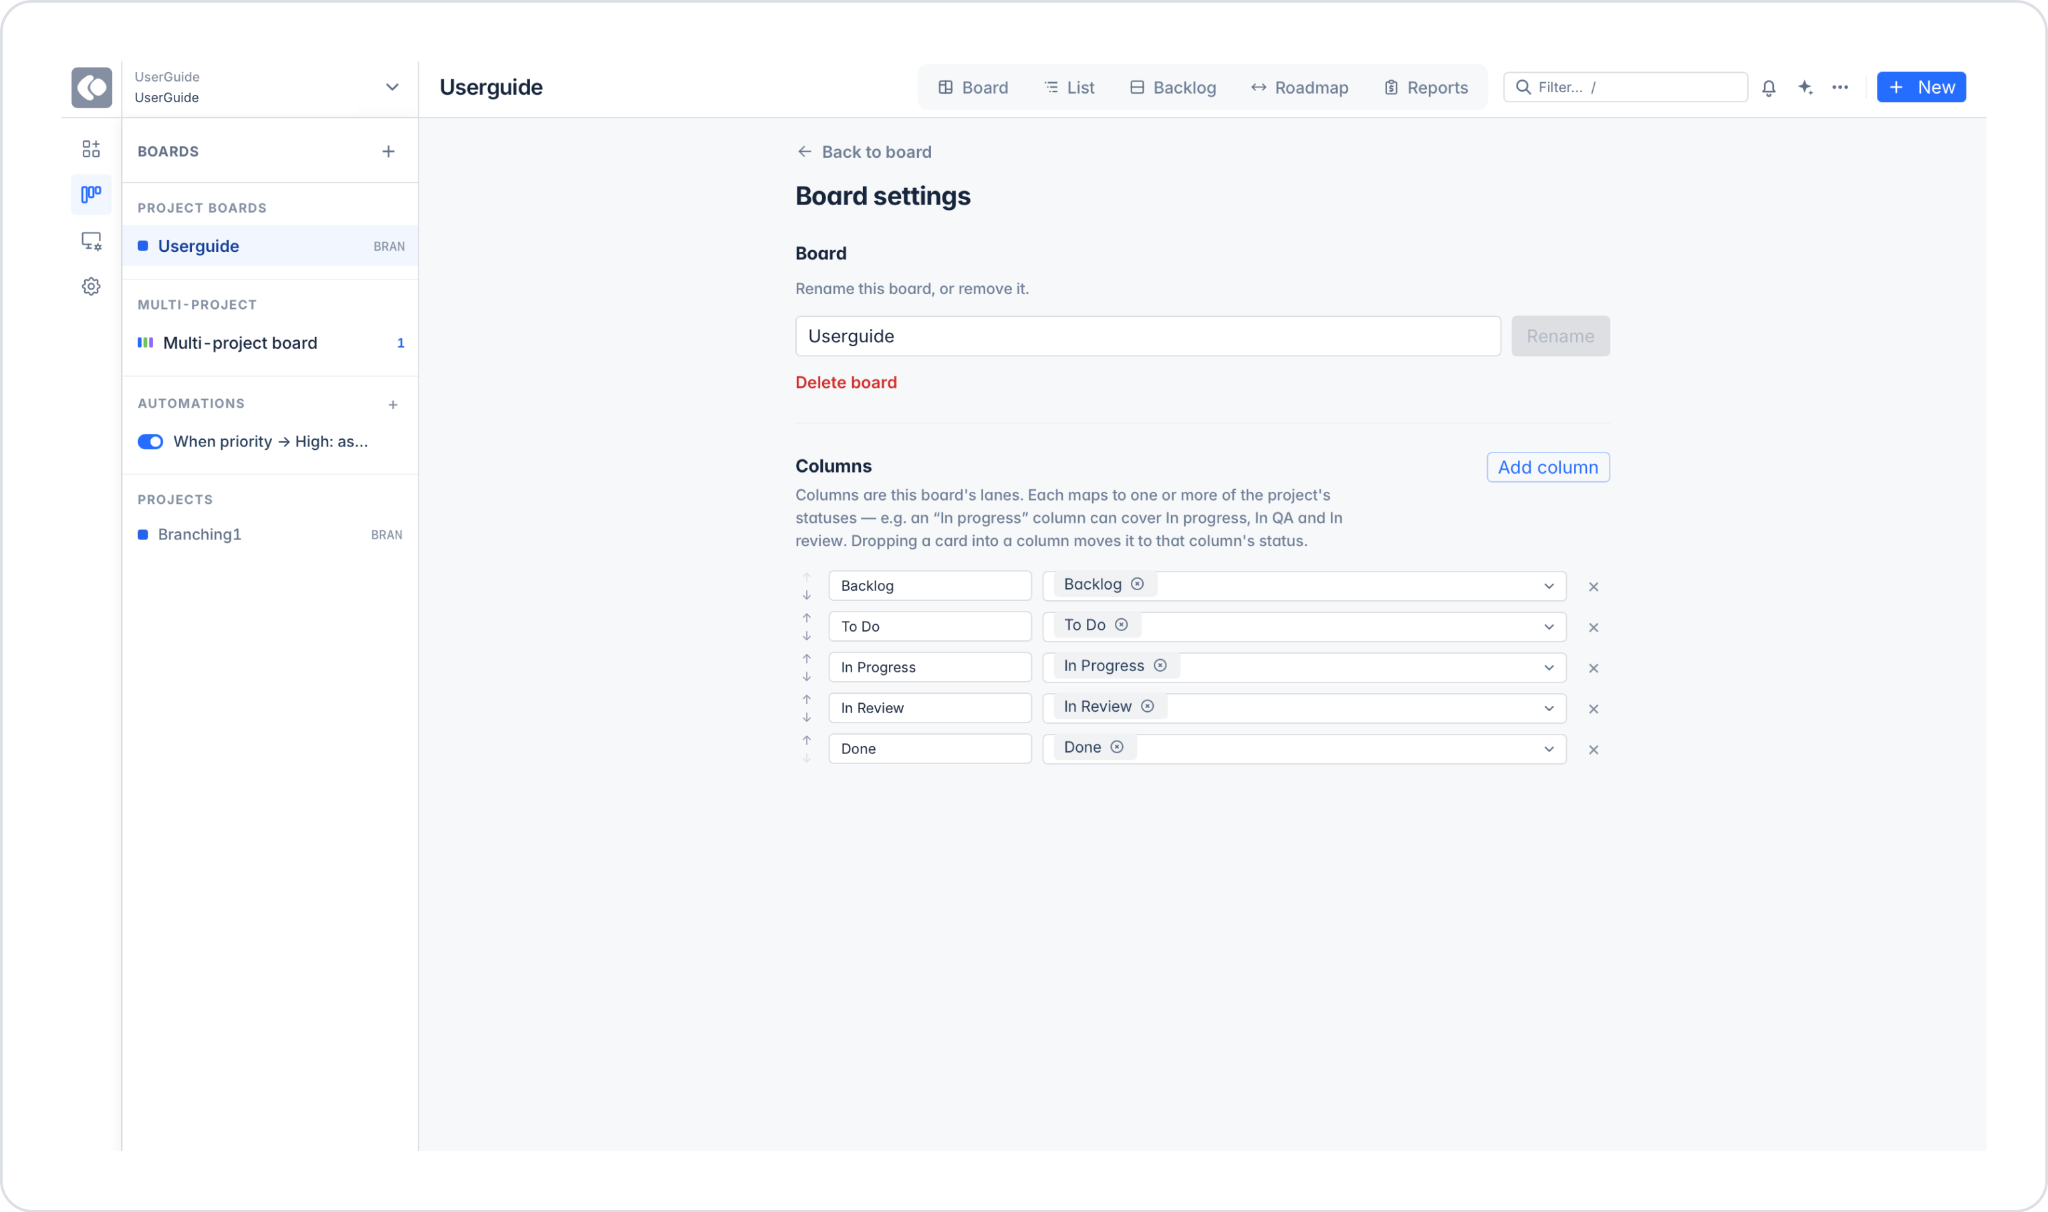
7. Board Settings
To access board settings, click the ··· button in the top-right corner and select the “Board settings” option.
In the Board section, you can rename the board (Rename) or delete it (Delete board).
In the Columns section, each column is mapped to one or more project statuses. The column order can be changed using the up/down arrows. A new column can be added using the Add column button. Existing columns can be deleted using the × button.
8. Automations
In the left panel, click the + icon next to the AUTOMATIONS heading to create a new automation rule. The rules you create are listed in this section and can be enabled or disabled using the toggle.
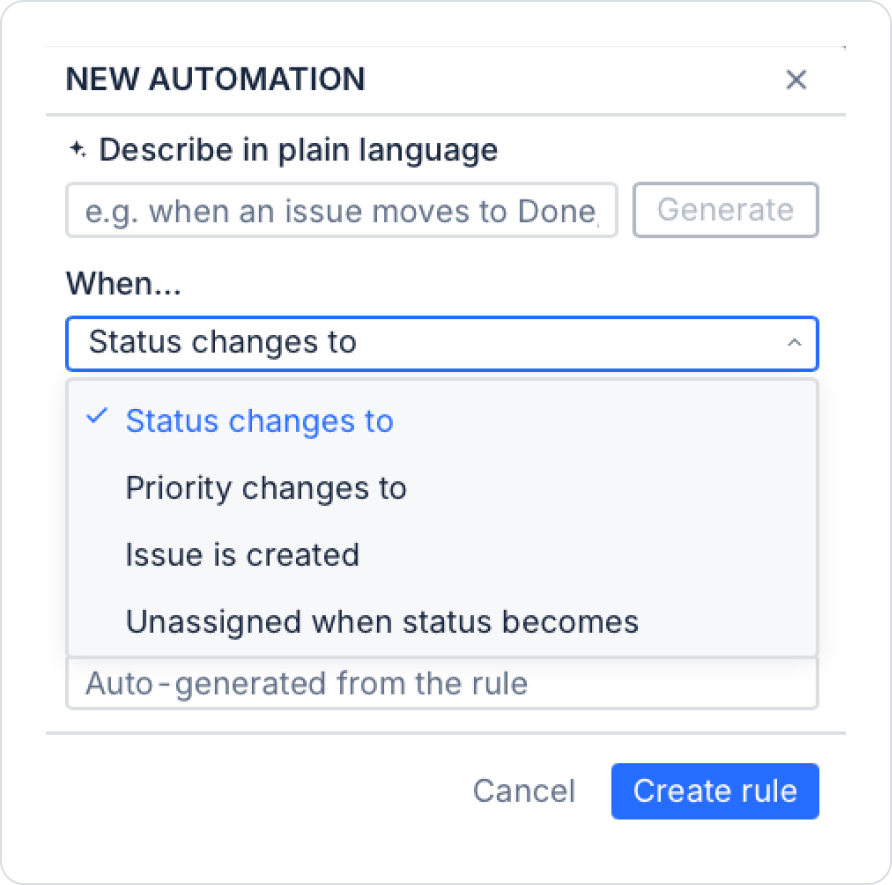
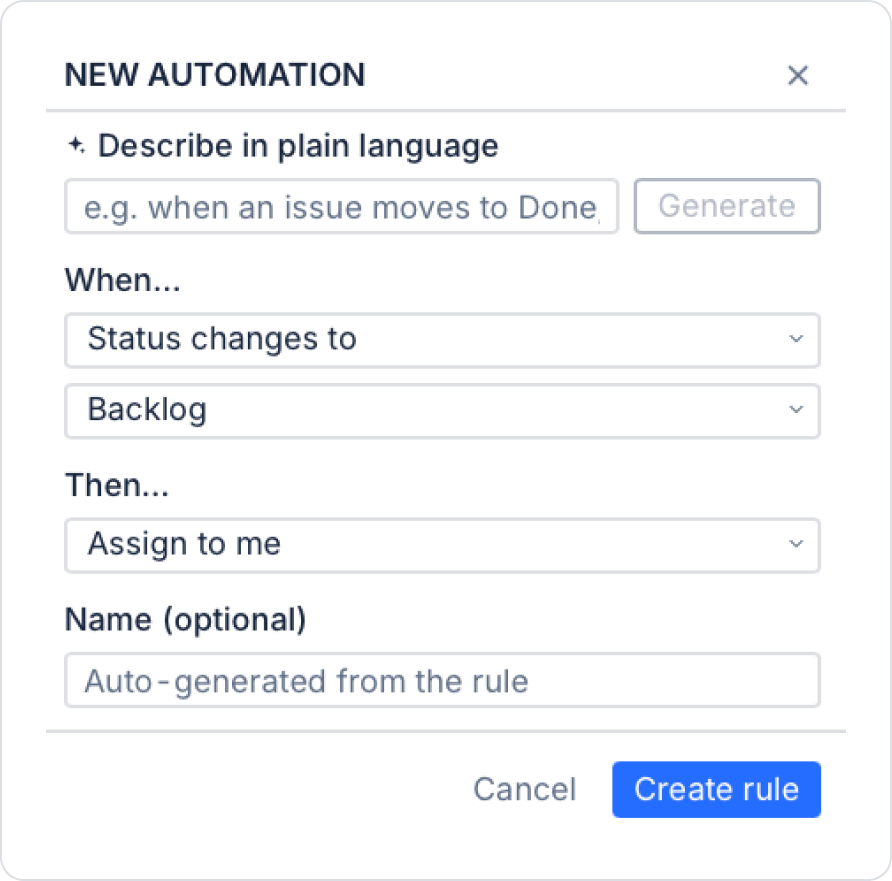
NEW AUTOMATION screen contains three sections:
Describe in plain language: Describe the automation rule in plain language and click the Generate button. The AI automatically generates When/Then rules.
When... (Trigger): There are four options: “Status changes to,” “Priority changes to,” “Issue is created,” and “Unassigned when status becomes.”
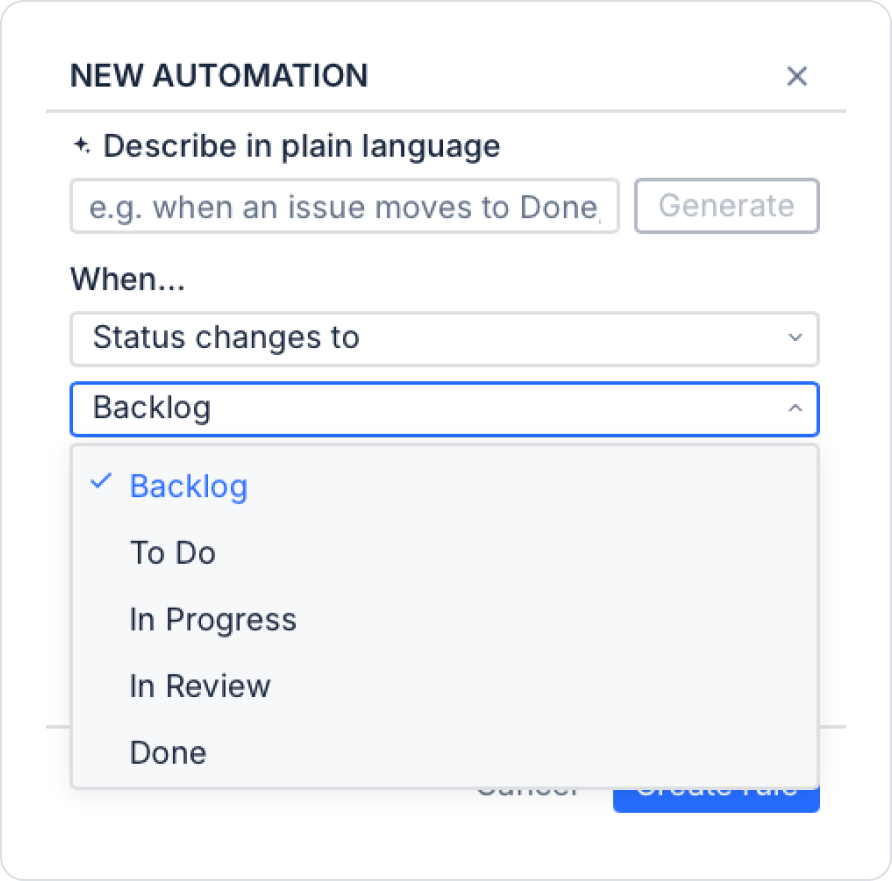
When “Status changes to” is selected, specify the status that will trigger the rule: Backlog, To Do, In Progress, In Review, or Done.
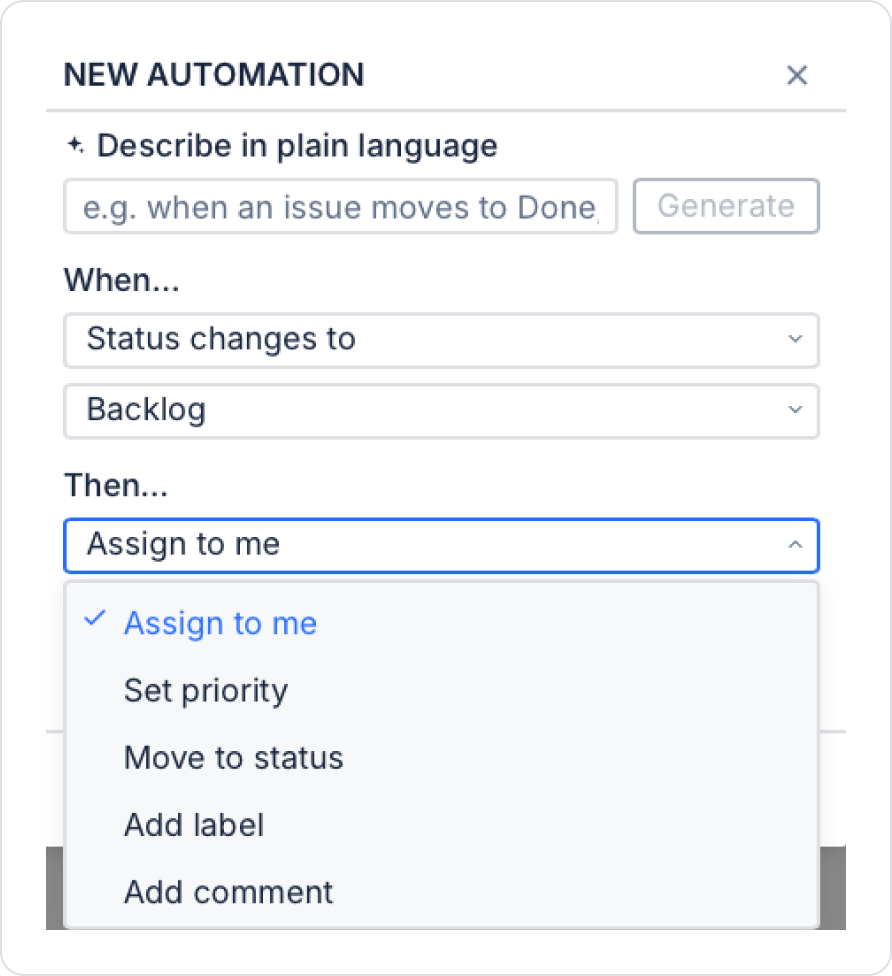
Then... (Action): There are five options: Assign to me, Set priority, Move to status, Add label, Add comment.
Name (optional): You can name the rule. If left blank, a name will be automatically generated from the rule.
After all fields are configured, click the Create rule button.
9. Tools
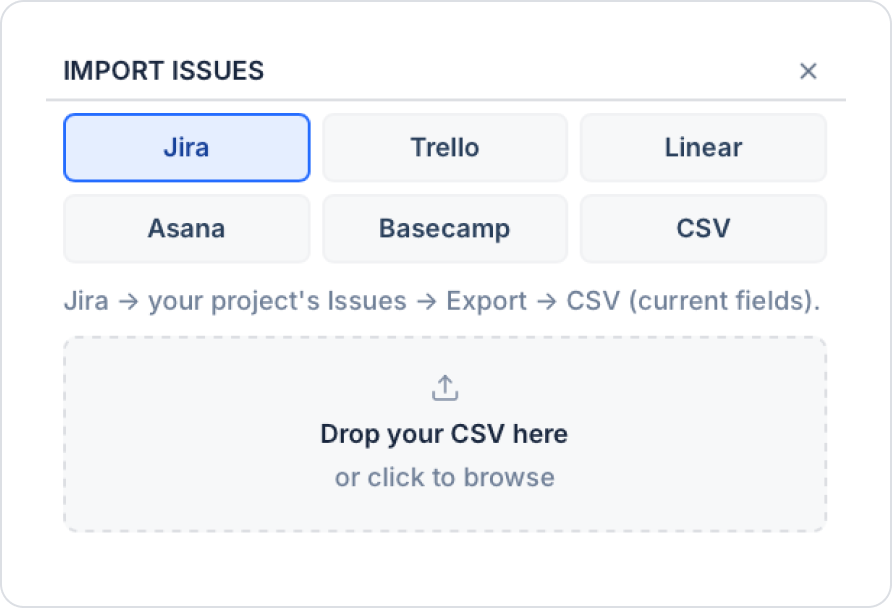
9.1. Import Issues
Click the ··· button in the top-right corner and select the “Import issues” option. Supported sources: Jira, Trello, Linear, Asana, Basecamp, CSV. After selecting the relevant source, upload the file via drag-and-drop or by clicking “Browse.”
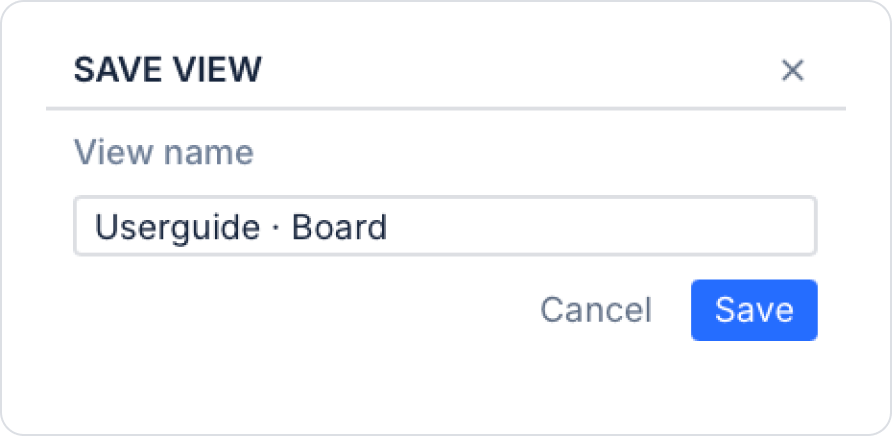
9.2. Save Current View
Click the ··· button and select the “Save current view” option. In the SAVE VIEW window that opens, give the view a name and click the Save button.
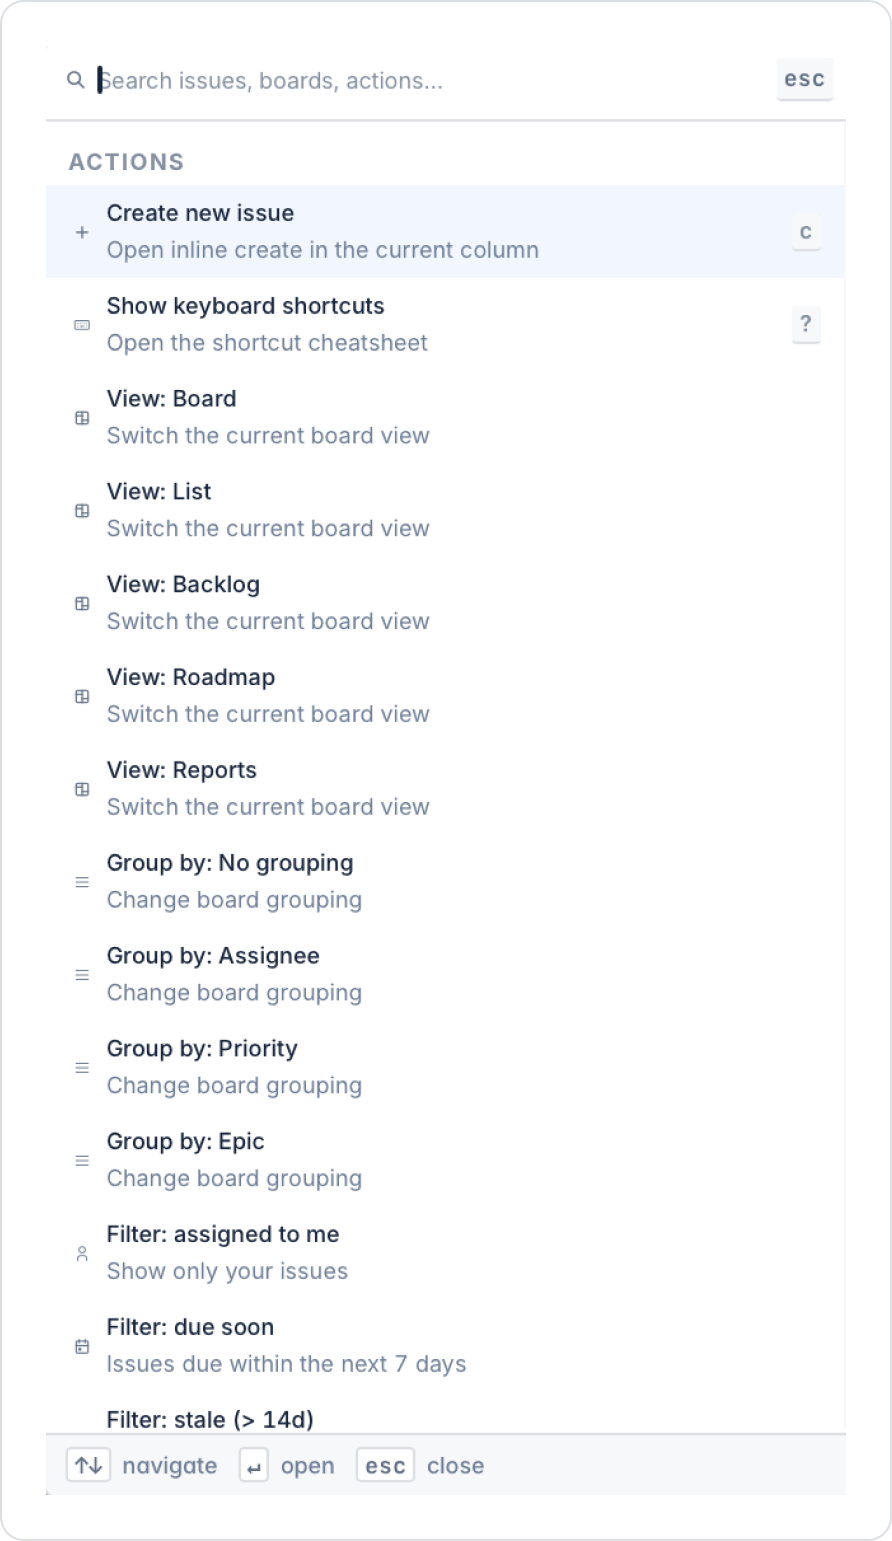
9.3. Command Palette
It can be opened using the ⌘ + K shortcut or by clicking the Command Palette option from the ··· menu. You can create issues, switch views (Board, List, Backlog, Roadmap, Reports), group items (No grouping, Assignee, Priority, Epic), and apply quick filters.
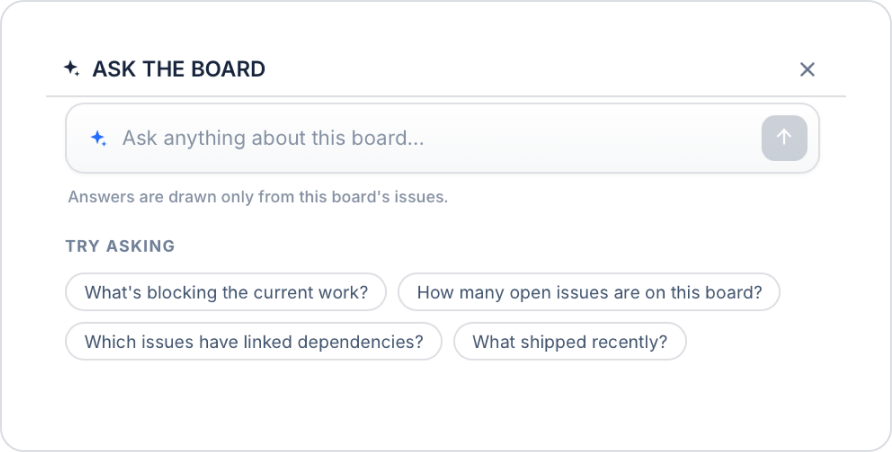
9.4. Ask the Board (AI Assistant)
Open it by clicking the AI button. You can ask questions about the issues on the board using natural language. Responses are generated solely from the data on that board.
Example questions: What’s blocking the current work? / How many open issues are on this board? / Which issues have linked dependencies? / What was shipped recently?
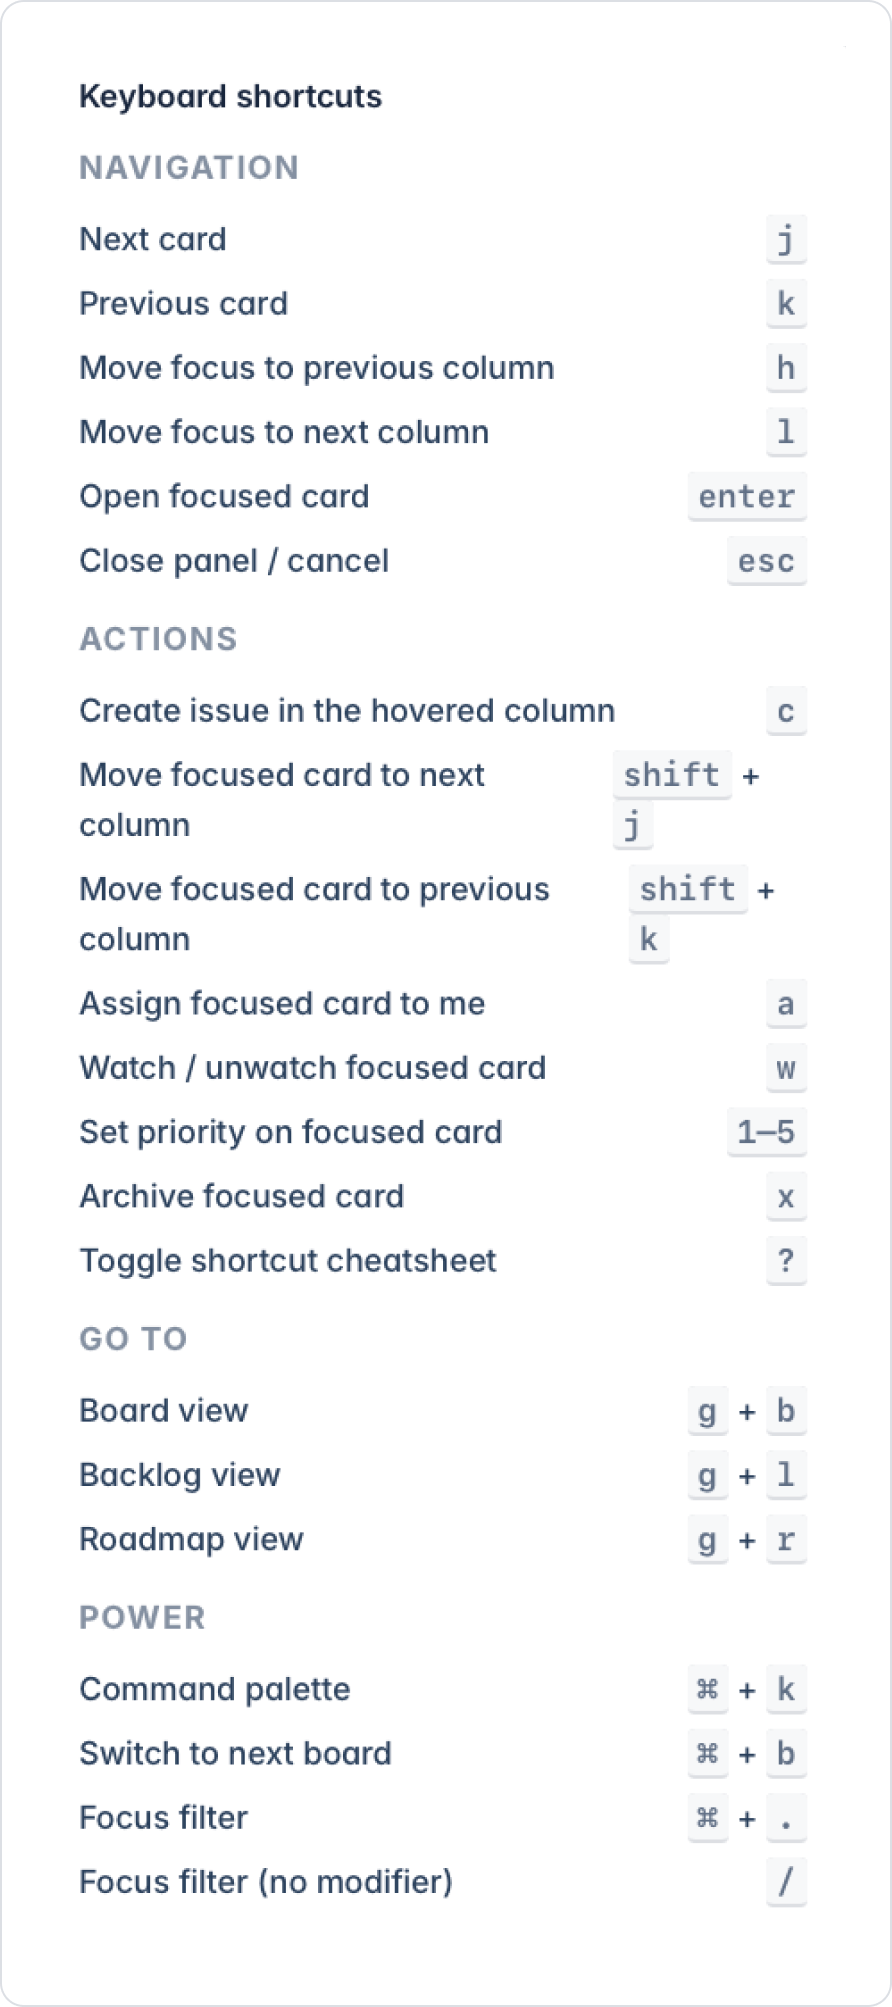
9.5. Keyboard Shortcuts
Press the ? key or click the “Keyboard shortcuts” option in the ··· menu to view them.
10. Multi-Project Board
A multi-project board aggregates issues from multiple projects onto a single board. When creating a board, select “Multi-project board” from the “Type” field. It is accessed from the “MULTI-PROJECT” section in the left panel. The “MULTI” label and the number of included projects are displayed next to the board name in the top menu. The workflow operates in KANBAN mode. A project label (chip) indicating which project the card belongs to is visible on the cards.