Initialize Checkout Form is the action used to initiate the payment process through Kuika's Iyzico integration. A payment form is created based on the information provided by the user and presented to the user via WebView on Iyzico's secure payment page.
Technical Features
WebView-Based Payment: The payment form provided by Iyzico is displayed directly in WebView.
Advanced User Information Transfer: Information such as the user's name, address, and phone number is taken from the Kuika screens and transferred to the Iyzico system.
Mobile Application Support: The action can be used in both Android and iOS applications.
Subscription Plan Support: Reference codes for subscription plans created by Iyzico can be used directly.
Initialize Checkout Form Action Application Steps
Log in to the Kuika platform and open your project.
Select the screen where you want to start the payment from the UI Design module.
Go to the Properties panel on the right side.
Click on the + ADD ACTION menu.
From the + ADD ACTION menu, add the Payment Iyzico>Initialize Checkout Form action according to the trigger event you want (Initial Actions, OnClick, OnBlur, etc.).
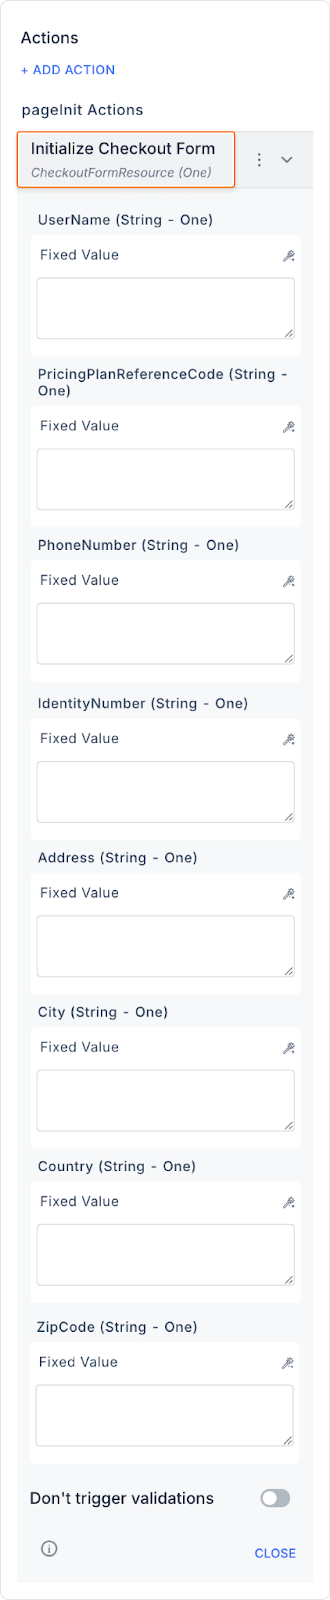
Configure the following fields in the settings that open:
User Name: The name of the user who will perform the payment transaction.
Pricing Plan Reference Code: The reference code of the subscription plan created by Iyzico in the system.
Phone Number: The phone number to be used by the user during the payment process.
Identity Number: The user's ID number (may be a required field).
Address: The user's full address.
City: The city where the user is located.
Country: The country where the user is located.
Zip Code: The postal code of the user's location.
Finally, click the SAVE button to complete the process.
Usage Scenario: Subscription Purchase Process
A health app allows users to subscribe to monthly plans. After logging into the app, the user selects a subscription plan and clicks the “Start Subscription” button.
Scenario Flow:
The user selects the “Premium Monthly Plan.”
The OnClick action of the button is assigned to Initialize Checkout Form.
The user's name, phone number, ID number, and address information are taken from the form components and linked to the action parameters.
The payment form provided by Iyzico opens in a WebView screen.
The user enters their credit card information and completes the payment process.
After successful payment, the user sees the message “Subscription Successfully Started” and access to premium content is provided within the application.
Initialize Checkout Form Action Advanced Customizations
Dynamic Plan Selection: If the user can choose from multiple plans, the reference code of the selected plan can be dynamically linked to the Pricing Plan Reference Code field.
Address Automation: The form can be automatically filled in by pulling address information from the user's registered profile.
Post-Payment Success Action Chain: When the payment is successful:
A role can be assigned to the user (e.g., PremiumUser).
A notification or email can be sent.
The user can be redirected to a confirmation page.
Technical Risks
Incomplete User Information: If fields such as Identity Number and Phone Number are left blank, Iyzico may return an error. Therefore, a pre-check should be performed.
Invalid Reference Code: A valid code must be entered in the Pricing Plan Reference Code field, otherwise the payment screen will not open.
WebView Not Opening: If WebView support is disabled on mobile devices, the user will not be able to see the payment screen. This should be tested in advance.
Double-click risk: A debounce mechanism can be added to buttons to prevent users from triggering the same action repeatedly.
Correct identity information: Since the identity number field may only be valid for Turkey, variations should be planned for international use of the application.
Initialize Checkout Form is an ideal, secure, and user-friendly solution for initiating the payment process with Iyzico in Kuika applications. It is preferred for subscription-based models, as it allows for easy integration of form data and a seamless payment process for the user.