User Manual

Dynamic Input Usage Scenario

Dynamic Input Usage Scenario

Kuika's Dynamic Input element allows users to select from predefined options or enter a new value. The element can be filled dynamically with a fixed list of values or by connecting to a data source. It also speeds up data entry with search and autocomplete features.

The Dynamic Input element can only be used in web applications.

Areas of Use

  • Creating form fields on registration or login screens
  • Selecting categories, cities, products, or departments
  • Entering email addresses or usernames
  • Search boxes linked to databases
  • Autocomplete systems
  • Dynamic dropdown lists

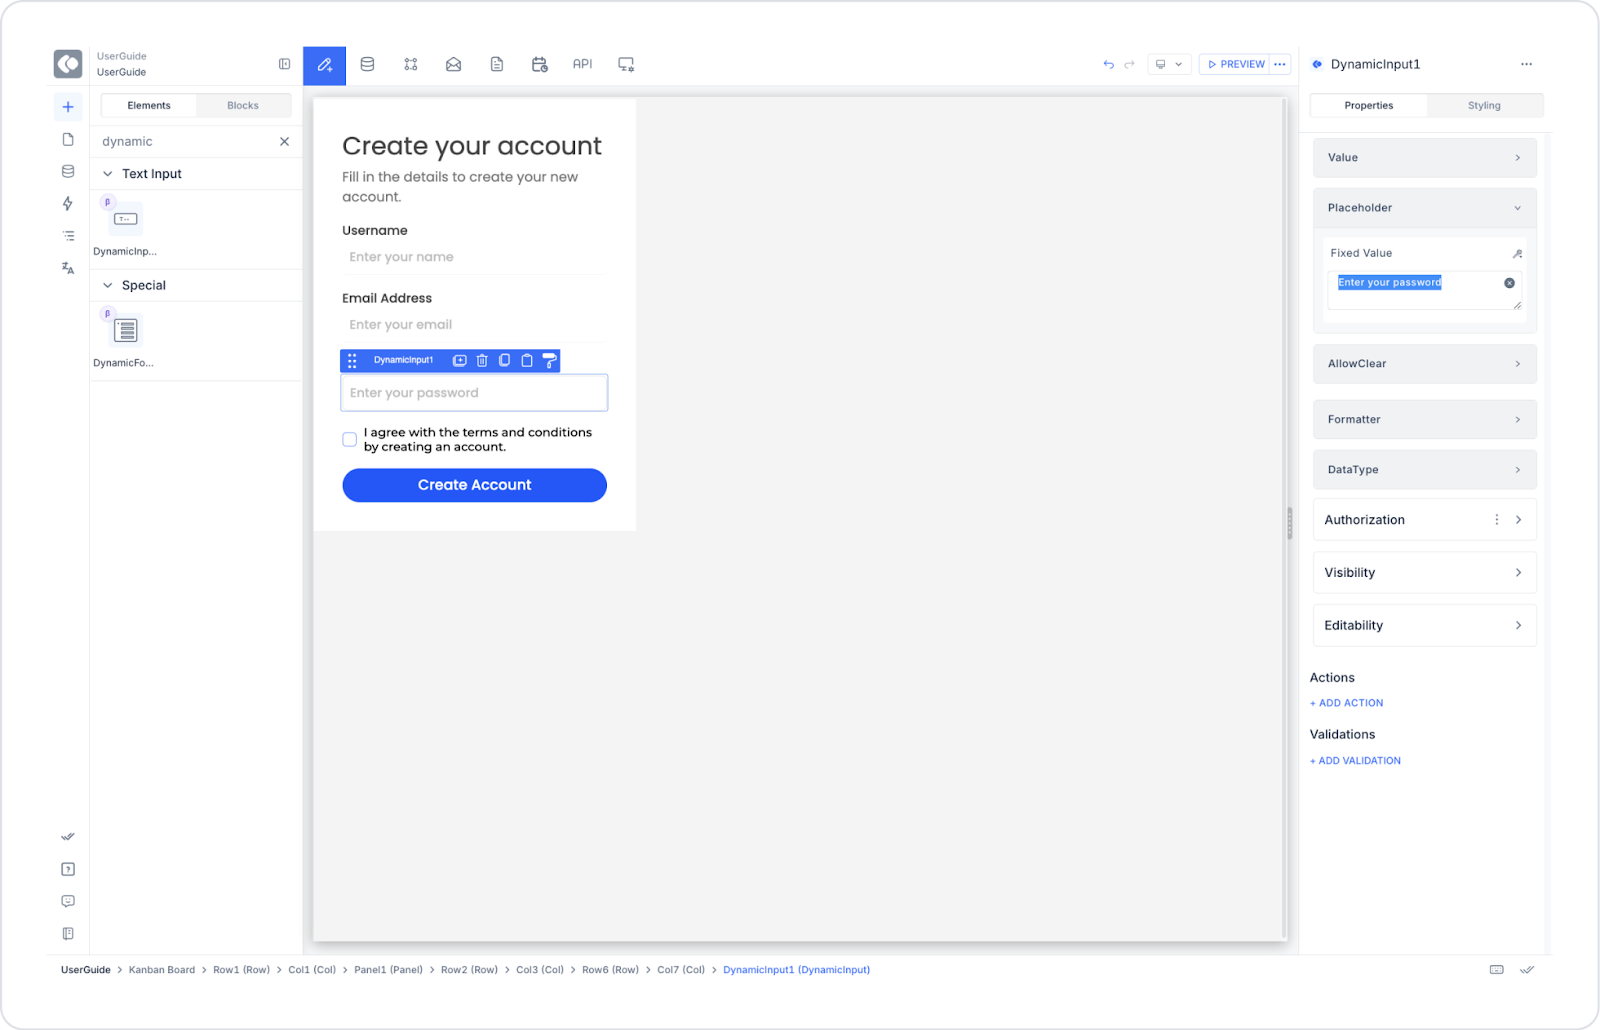
Use Case – User Registration Form

Dynamic Input elements are used on a user registration screen for users to enter their account information. The form has three fields: Username, Email Address, and Password.

In the scenario:

  • The user arrives at the “Create Account” screen.
  • They enter their username, email, and password into the Dynamic Input fields.
  • The input data is validated according to its type (e.g., email format or password length).
  • When the “Create Account” button is clicked, the information is saved to the database.

Connecting the Data Source

  1. Go to the Datasources module.
  2. Click on the Managed DB → Tables tab.
  3. Create a new table using the + Add New Table option.
  4. Add the following table fields.
  1. Then go to the Actions > SQL Actions tab.
  2. Create a new action: CreateUserAccount
  3. Add the following SQL query:
INSERT INTO UserAccounts (Username, Email, PasswordUser, CreatedAt)VALUES (@Username, @Email, @PasswordUser, SYSDATETIMEOFFSET());

UI Design Module Operations

  1. Go to the UI Design module.
  2. From the left panel, select the Elements > Text Input > Dynamic Input element.
  3. Add three Dynamic Input elements to the screen.
  4. Configure them as follows:
  • DynamicInput1 → Placeholder: “Enter your name”, Data Type: String
  • DynamicInput2 → Placeholder: “Enter your email”, Data Type: Email
  • DynamicInput3 → Placeholder: “Enter your password”, Data Type: Password
  1. Add a Button element below the form (Label: “Create Account”).
  1. Define the onClick → Managed DB → Save Record action for the button.
  2. Table: UserAccounts
  3. Perform field mappings:
    • Username → DynamicInput1.value
    • Email → DynamicInput2.value
    • Password → DynamicInput3.value
    • CreatedAt → Now()

Using Properties in the Scenario Context

  • Value: Represents the value entered by the user or coming from the data source.
  • Placeholder: Sample text that guides the user. Example: “Enter your email”
  • Data Type: Determines the type of input data (e.g., String, Email, Password).
  • Allow Clear: Allows the user to clear the entered value.
  • Formatter: Formats the entered value (e.g., display all letters in lowercase).

When the Scenario Step is Complete

  • The user fills out the form and clicks the “Create Account” button.
  • The data is dynamically saved to the database.
  • The email field passes the format validation.
  • After successful registration, the user sees the “Account created successfully” notification.

Limitations

  • Dynamic Input only works with a single data type.
  • Registration may fail if validation is not performed for empty fields.
  • Characters are masked in password fields.
  • A character limit is recommended for very long texts.

Tips and Best Practices

  • Write clear and instructive placeholder text.
  • Add automatic format validation using Data Type: Email.
  • Add a minimum character count check in the password field.
  • Keep the Allow Clear feature active to make it easier for the user.
  • Make sure all fields are filled in before saving to the database.
  • If necessary, add dynamic value lists via REST API or SQL.
No items found.

Other Related Content

No items found.

Glossary

No items found.

Alt Başlıklar