Kuika's Date element is an input element that makes it easy for users to select dates. Users can enter dates manually or select them from a calendar. It enables you to collect reliable data in forms and processes by adding date-based validations and restrictions.
The Date element is supported in both web and mobile applications.
Areas of Use
Reservation and appointment systems,
Selecting birth dates or delivery dates in forms,
Setting dates on invoice or order creation screens,
Project planning and scheduling applications, etc.
Appointment Date Selection
Static Usage Scenario – Appointment Date
In a travel reservation application, users should only be able to select future dates. The Date element presents the user with a date picker, and the selected date is recorded for the reservation.
Data Source Binding
No SQL or table is required for static usage. The date is assigned directly through the element.
The Value field is assigned today's date.
Past dates are disabled with the DisableBeforeDate property.
The Placeholder is set to “Select Appointment Date”.
If AllowClear is enabled, the user can reset their selection.
Using Properties in a Scenario Context
Value → Today's date is assigned as the start date.
Placeholder → “Select Appointment Date” guides the user.
AllowClear → Allows the selection to be cleared with a single click.
Format → Set to DD/MM/YYYY.
DisableBeforeDate → Past dates are disabled.
DisabledDays → Holidays can be disabled.
Return Display Value (Web only) → The date returns in the format displayed on the screen.
When the Scenario Step is Complete
The user can only select future dates.
The selected date is displayed on the screen in the specified format.
The user can clear the date if desired.
The selected date is transferred to the reservation process.
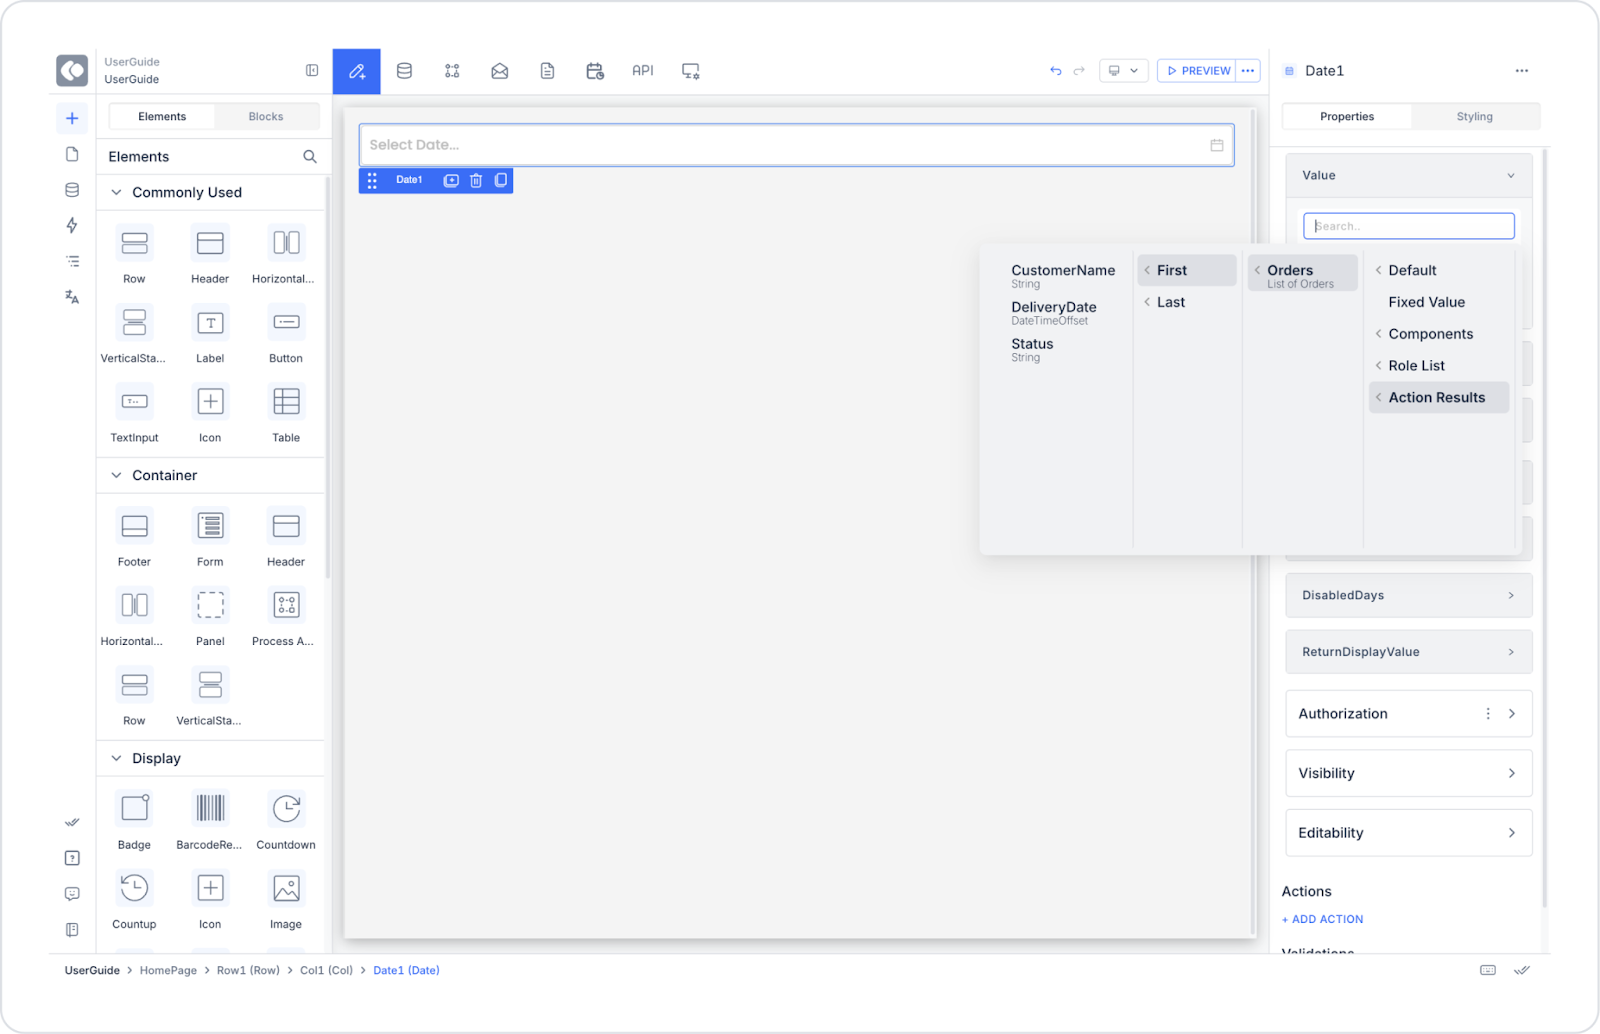
Dynamic Usage Scenario – Order Delivery Date
Delivery dates for orders are managed in an e-commerce application. When the user creates a new order, they select the delivery date, and the system records this date in the data table.
Connecting the Data Source
Go to the Datasources module.
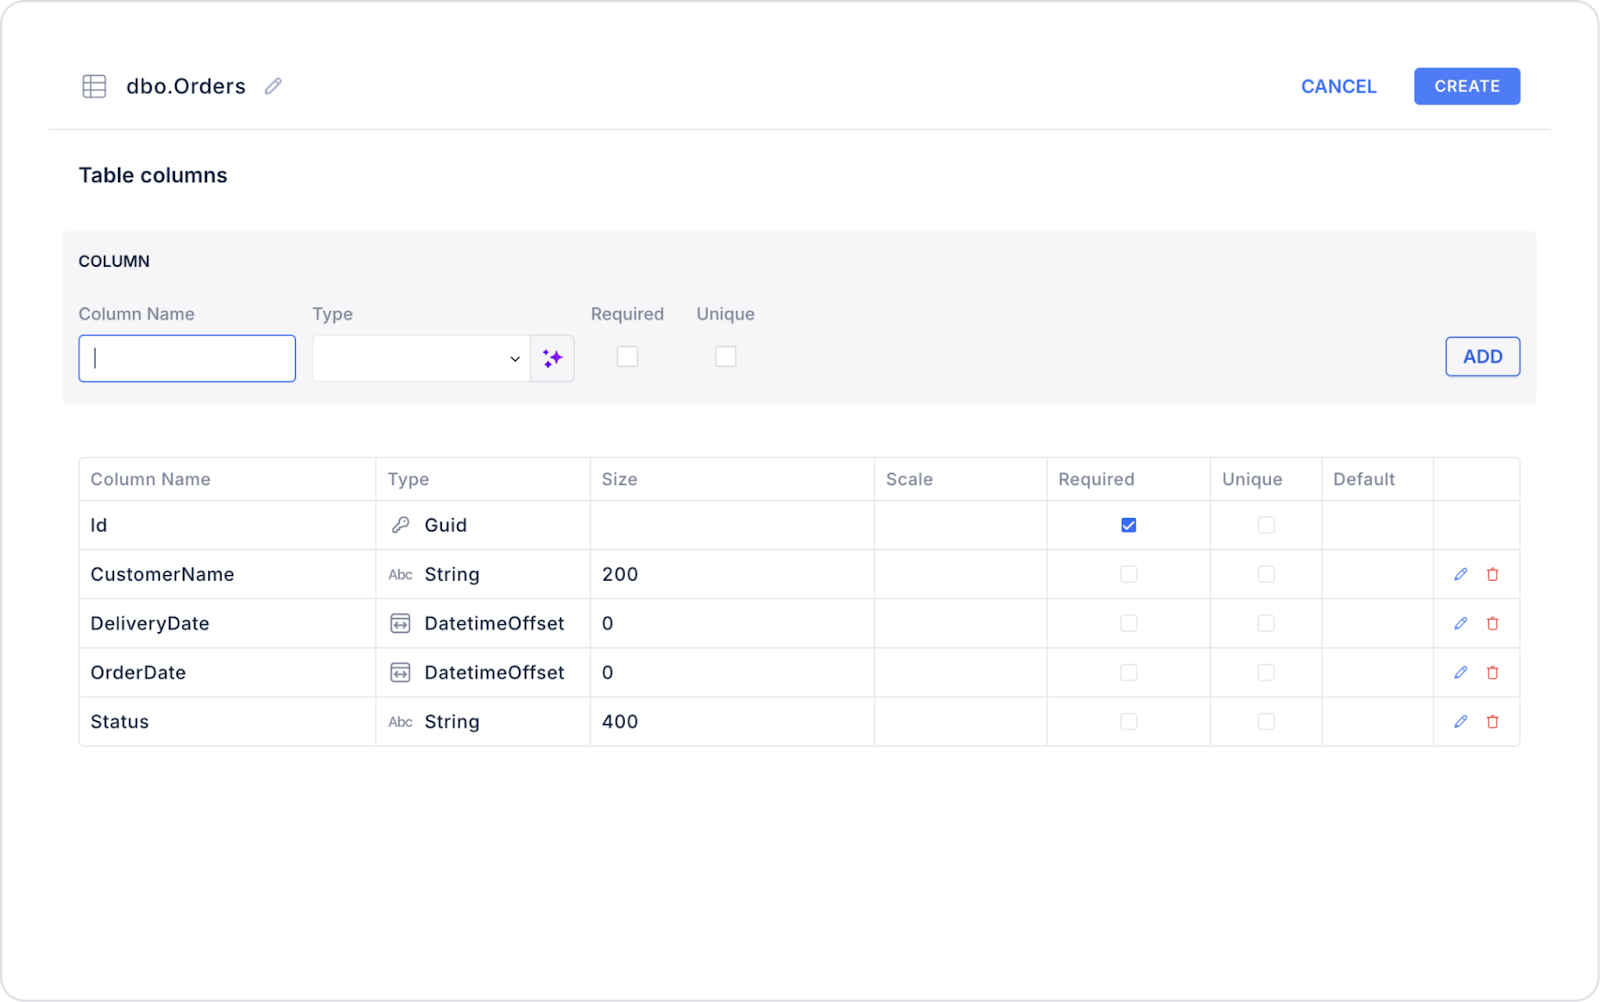
Then click the + icon next to the Tables heading and name the table Orders.
Create the following table:
Then click SQL Actions and name the action “Orders”.