Create Connected Account is an action used within Kuika's Stripe integration. With this action, you can create connected accounts on Stripe on behalf of platform users. This is especially necessary in marketplace applications so that sellers can receive payments independently.
Technical Features
Stripe Connect Integration: Compatible with Stripe Connect and enables connection via the “Express” account type.
Web and Mobile Application Support: The action can be used in both web and mobile applications.
Automatic Account Creation: An account directly connected to the Stripe API is created, and a personalized registration link is provided to the user.
Onboarding Tracking Support: The “Connected Account Onboarding Status” action can be used to check whether users have completed their accounts.
Create Connected Account Action Application Steps
Log in to the Kuika platform.
Select your project from the Apps screen.
Go to the UI Design module.
Select a UI element (e.g., “Create Stripe Account” button) that will initiate the Stripe-connected account creation process.
Click on the +ADD ACTION menu in the Properties panel on the right.
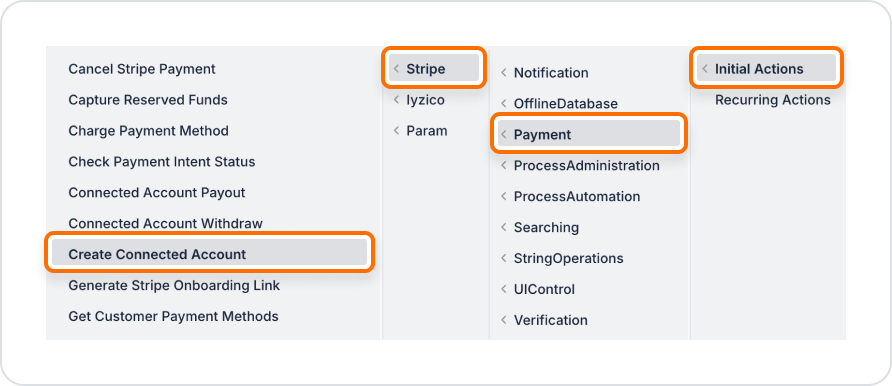
Select the button and add the Payment Stripe > Create Connected Account action from the + ADD ACTION menu according to the trigger event (Initial Actions, OnClick, OnBlur, etc.) you want.
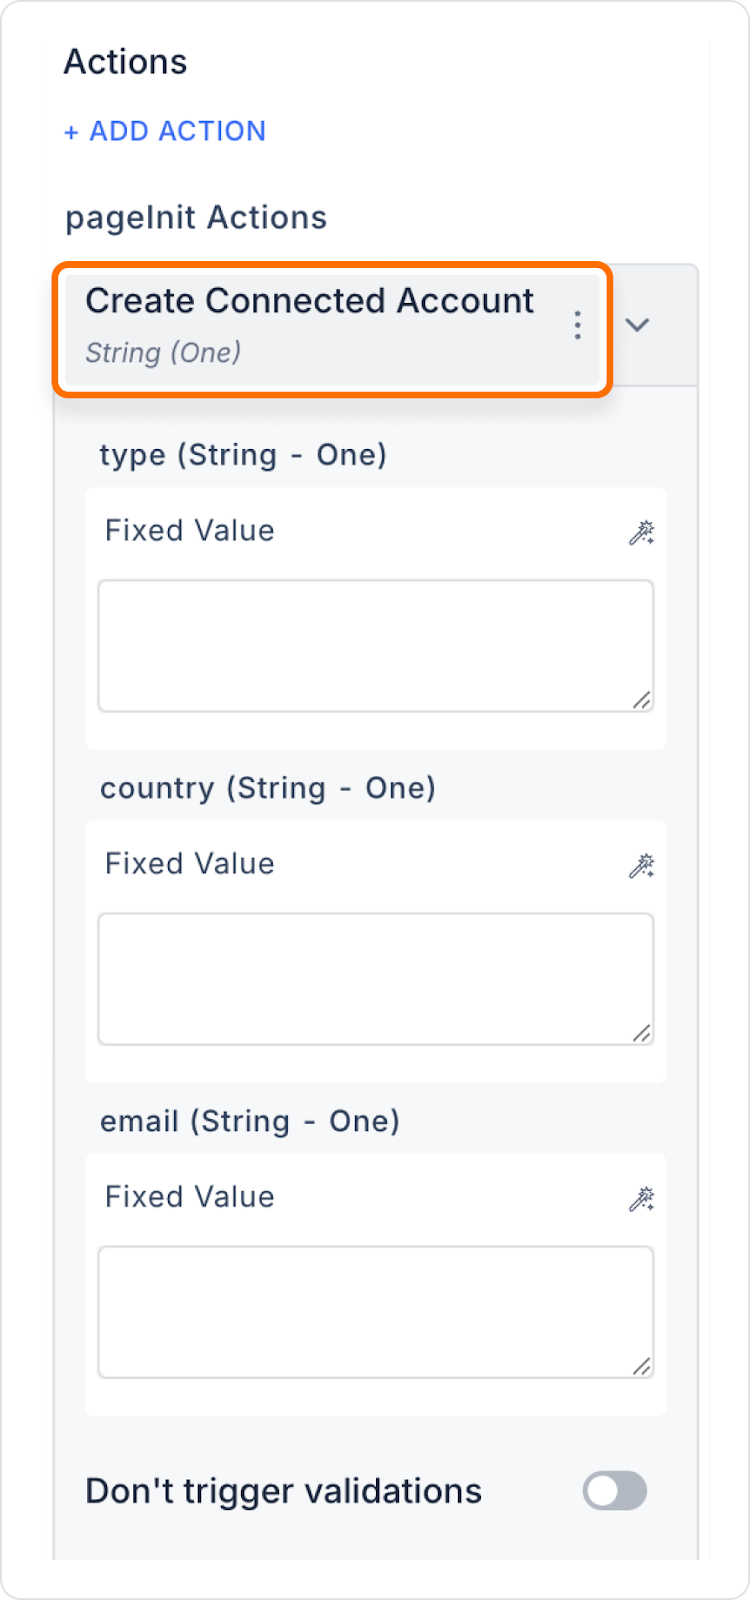
Configure the following fields in the settings that appear:
Type: Specifies the Stripe-supported account type. The account type supported by Kuika is “Express.”
Example entry: Express
Country: The country code in ISO 3166-1 alpha-2 format must be entered for the country where the account will be created.
Email: This is the email address of the user to whom the Stripe-connected account will be linked. All notifications and account information sent by Stripe will be managed through this address.
Example: kullanici@example.com
After filling in the fields, click the Close button.
When the action is successfully executed, an onboarding URL created by Stripe is returned. This URL is displayed to the user, allowing them to complete their accounts through the Stripe platform.
Use Case: Creating a Stripe Account for the Merchant
Scenario: In a marketplace application, a new merchant must create a Stripe-connected account in order to sell products.
Scenario Flow:
The merchant clicks the “Create Stripe Account” button.
The Create Connected Account action associated with this button is triggered.
A Stripe-connected account is created with the email and country information provided by the user.
The onboarding link returned by Stripe is displayed to the user.
The seller clicks on the link to complete the account creation process on Stripe.
Dynamic Data Support: Email and country information can be dynamically pulled from the user profile.
Automatic Redirection: After account creation, the user can be automatically redirected to the onboarding link.
Registration Tracking: The Connected Account Onboarding Status action can be used to check whether the user has completed the account creation process and take appropriate action.
Notification System: An informative email can be sent to users who have created a Stripe account.
Technical Risks
Invalid Country Code: If a country code that does not comply with the ISO format is entered, the Stripe connection cannot be established.
Invalid Email Address: If the email address is not entered or is entered incorrectly, the Stripe account cannot be created.
Payments Cannot Be Received If Onboarding Is Not Completed: Even if a Stripe account is created, the user cannot receive payments unless they complete the Stripe onboarding process.
Duplicate Accounts for the Same User: Stripe may return an error if multiple accounts are created with the same email address.
Create Connected Account is a fundamental action for platforms that integrate with Stripe. It is used to distribute payment infrastructure and enable users to receive payments directly, especially in systems with multiple users. With Kuika, you can manage these processes in a simple and secure manner, both technically and in terms of user experience.