Kuika's Chat element allows you to add real-time messaging functionality to your application. It is used for customer support systems, internal team communication panels, or user-to-user chat applications. It enables you to manage viewing message history, sending new messages, editing, and deleting messages all within a single interface.
Available for both web and mobile applications.
Areas of Use
Customer support systems
Social networks and community applications
Internal team or project-based chat areas
Instructor-student or user-advisor messaging
Real-time notification and support modules
Usage Scenario – Support Chat
In a customer support application, users and support representatives can chat in real time via the Chat element.
In the scenario:
The user opens the Support Chat screen within the application.
When the page loads, past messages are automatically displayed.
The user types and sends a new message.
The message box is cleared, and the sent message is saved to the data source.
The other party (e.g., the support representative) instantly sees the message from the same data source.
The user can edit or delete their message if they wish.
Connecting the Data Source
Go to the Datasources module.
Then click the + icon next to the Tables heading and name the table “chatHistory”.
Create the following table.
Filtering (optional):
WHERE username = loggedInUser.username
Select this table as the Datasource in the Chat element.
Using Properties in the Scenario Context
Datasource: Specifies the table from which you retrieve the message history.
Current User Name: Displays the active user name.
Dark Mode: Displays the chat interface in dark mode.
Show Profile Photo: Displays user avatars in messages.
Show User Name: Displays the sender's name on the balloon.
Allow Edit Message: Allows the user to edit their messages.
Allow Delete Message: Enables the message deletion action.
Speech To Text: Allows the user to type messages by speaking into the microphone.
UI Design Module Operations
Go to the UI Design module.
Select the Elements > Special > Chat element from the left panel.
Drag and drop it onto the screen.
Configure the following settings in the Properties panel:
Datasource: chatHistory
Current User Name: loggedInUser.name
Dark Mode: Active (can be activated as desired)
Show Profile Photo: Active
Show User Name: Active
Allow Edit Message: Active
Allow Delete Message: Active
Message Send Action
To save the message written by the user to the table:
Follow the steps: Chat1 → onMessageSend → Managed DB → Save Record.
Table: chatHistory
Fields:
Message: Chat1.message.text
UserDisplayName: loggedInUser.name
Username: loggedInUser.username
Avatar: loggedInUser.photo
CreatedAt: Now()
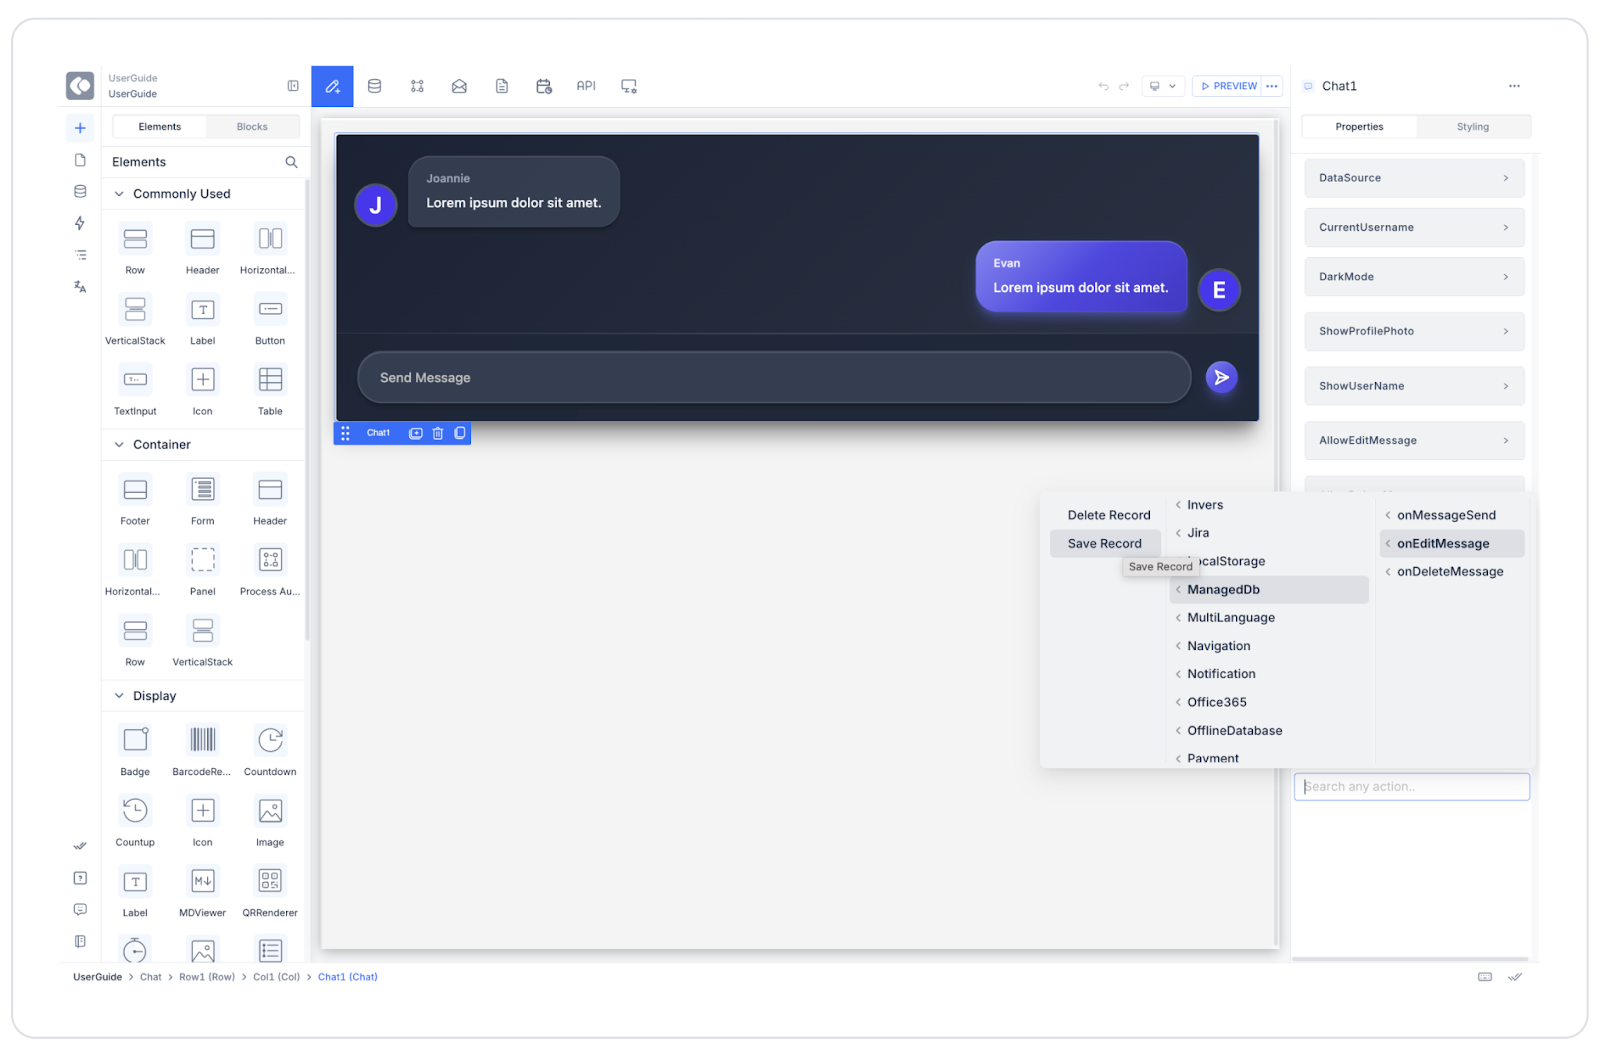
Message Editing
Chat1 → onEditMessage → Save Record (Update)
Message: Chat1.message.text
ModifiedAt: Now()
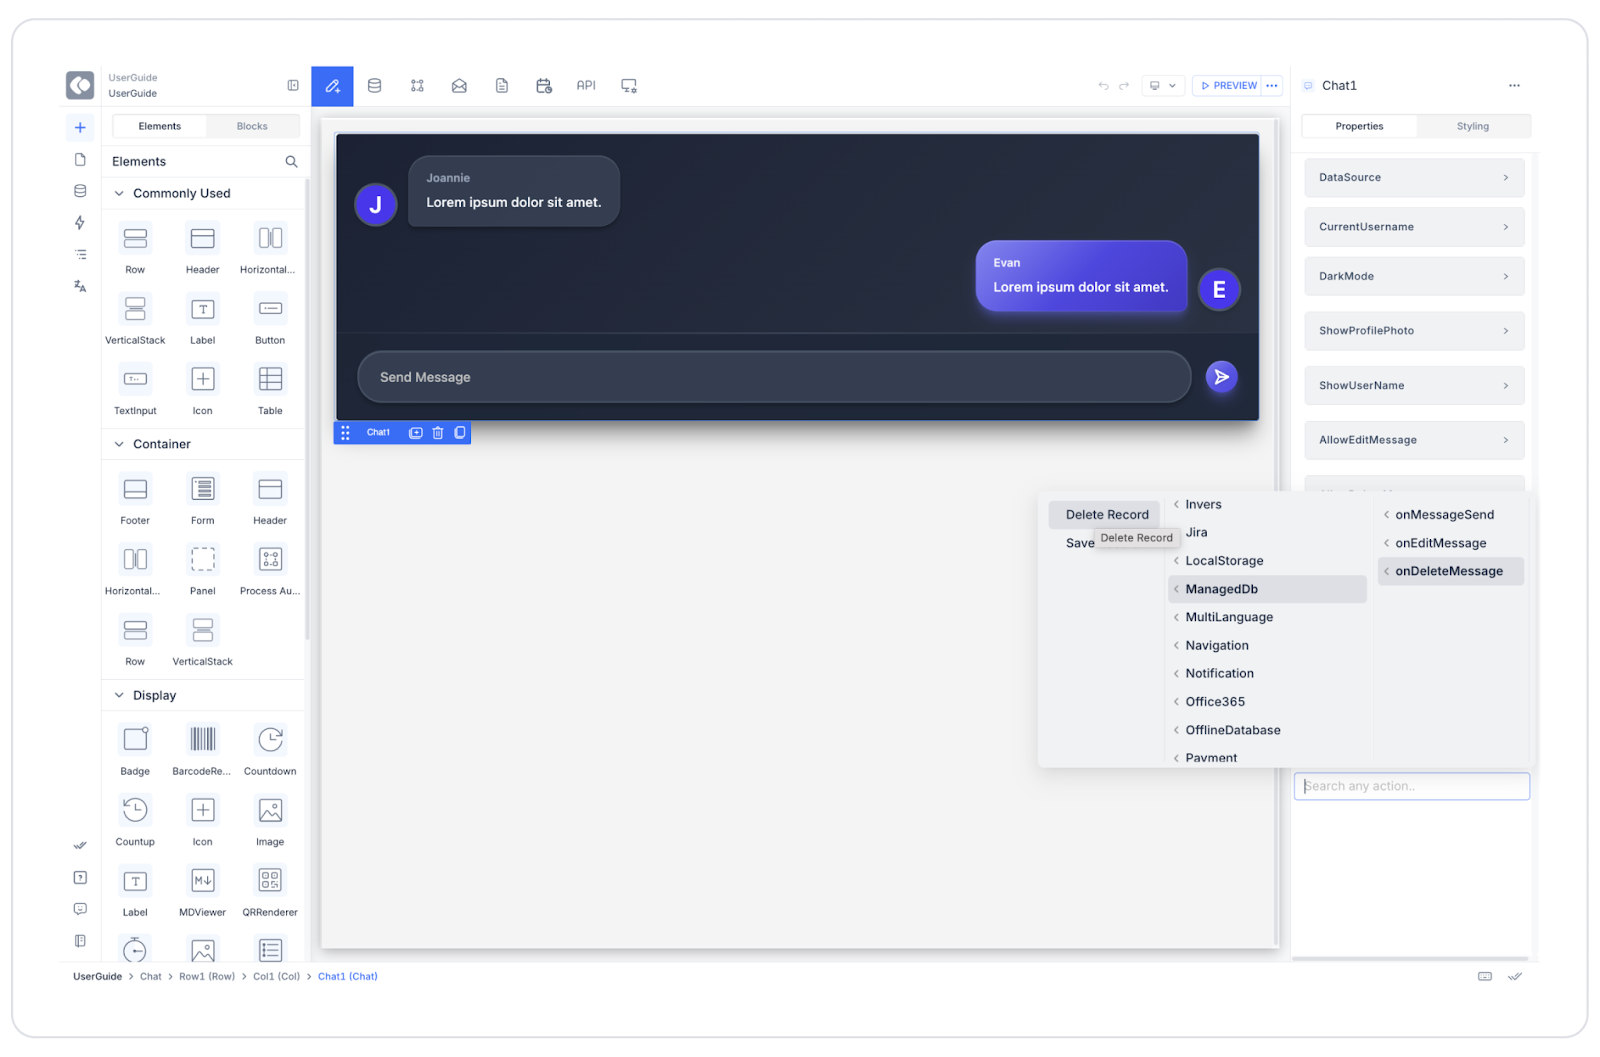
Message Deletion
Chat1 → onDeleteMessage → Delete Record
Id: Chat1.message.messageIdToBeDeleted
When the Scenario is Complete
The user writes and sends a message.
Messages are instantly added to the chat screen.
The user can edit or delete their last message.
The chat history is automatically loaded when the page opens.
Restrictions
The Chat element only pulls data from a single table.
Automatic refresh (Refresh Action) must be defined for real-time viewing.
Data filtering is important for performance in applications with heavy message traffic.
Tips and Best Practices
Offer a Dark Mode option to enhance the user experience.
If the Avatar column is empty, display the first letter of the username.
Increase accessibility for mobile users with the Speech to Text feature.
Make chat history more readable with date-based grouping.
Provide real-time interaction by adding a “typing...” indicator when necessary.