Cache Settings is a feature used to improve your app’s data performance and speed up data access. By configuring cache settings in Kuika’s Config Manager module, you can ensure your app accesses data faster and reduces server load.
Cache settings can be used in both web and mobile applications.
Cache Settings Steps
1. Open or Create a Configuration
Log in to the Kuika platform.
Open the project you’ll be working on from the Apps screen.
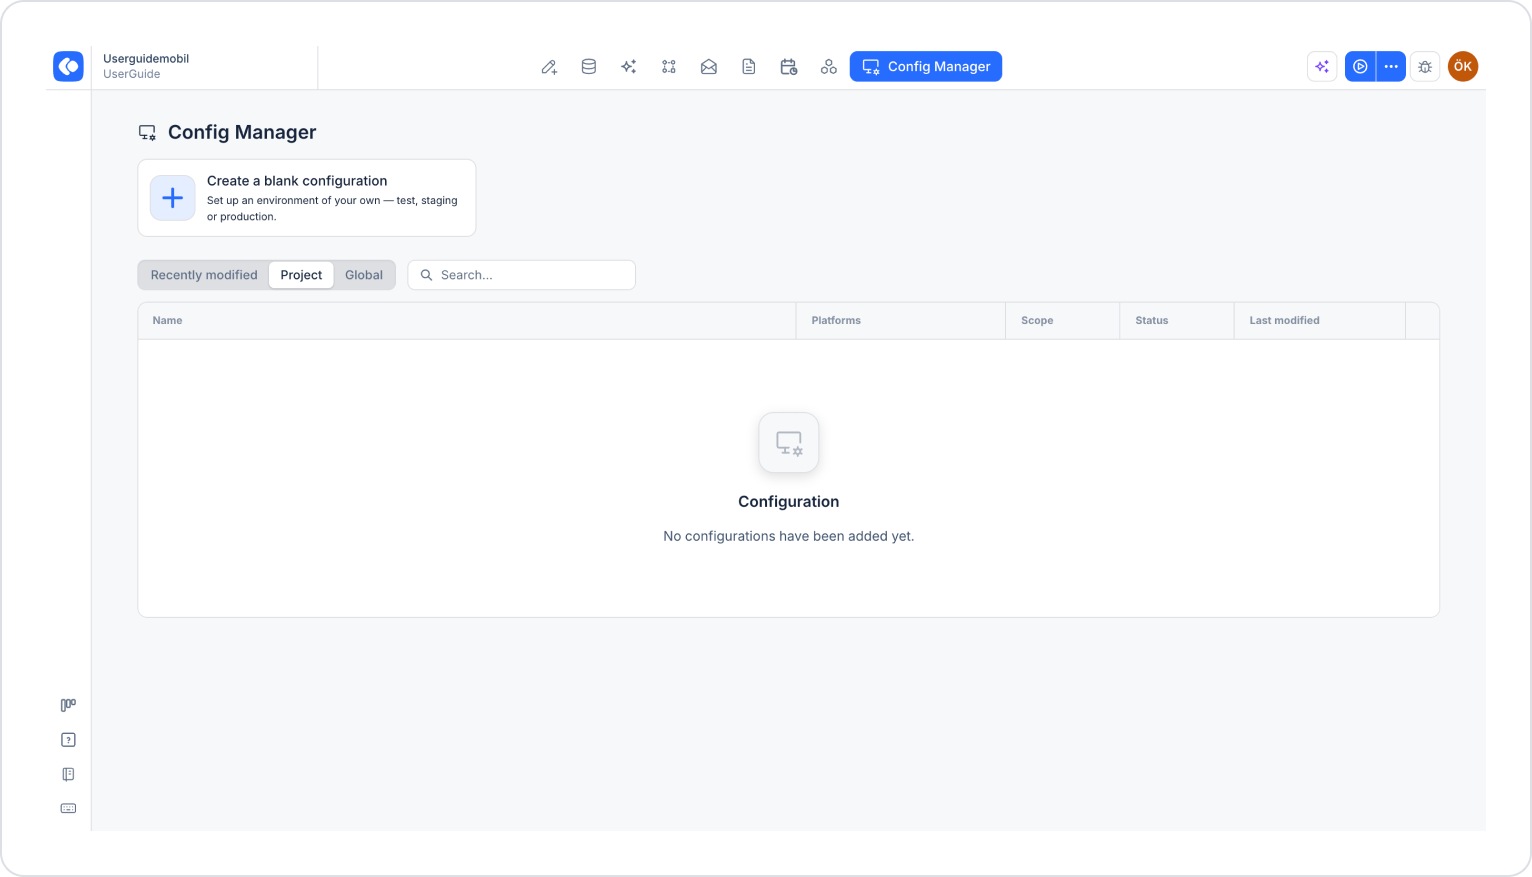
Click the Config Manager module in the top menu.
To create a new configuration, click the Create a blank configuration card.
Enter a meaningful name for the configuration (e.g., “MainCacheConfig”) and complete the creation process. If you want to use an existing configuration, click its name in the list.
2. Go to Cache Settings
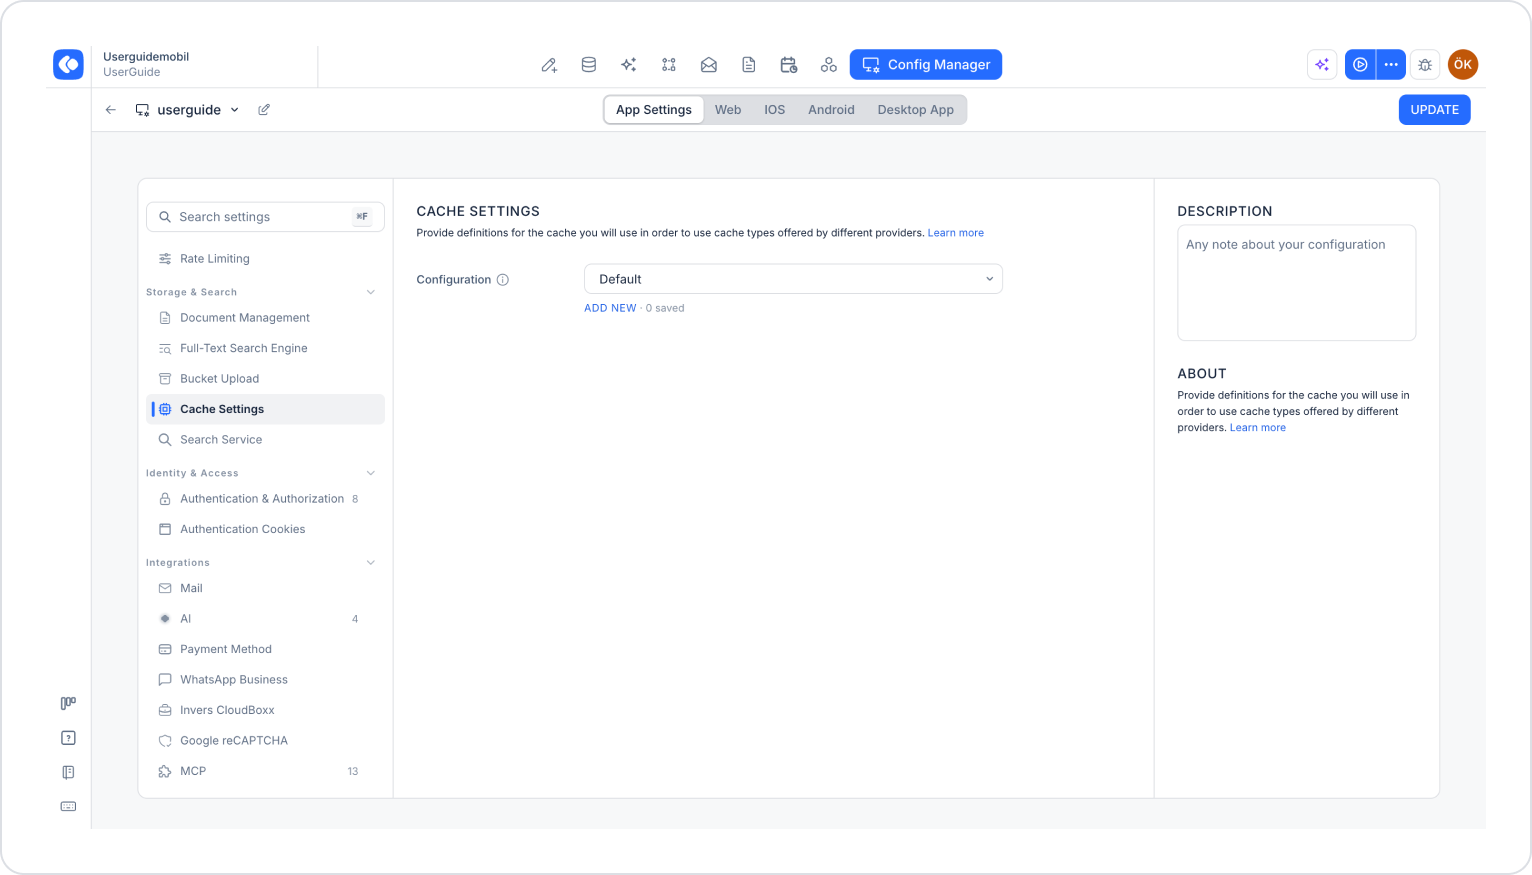
Make sure the App Settings tab is selected at the top of the configuration screen.
In the left menu, click the Cache Settings option under the STORAGE & SEARCH heading.
Click the Add New link under the Configuration section.
3. Create the Cache Configuration
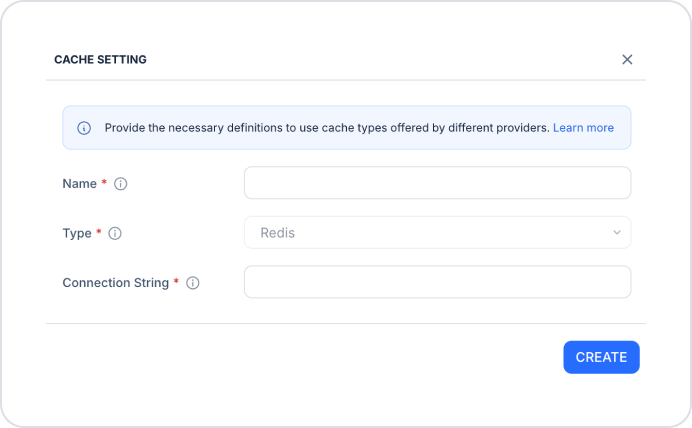
In the Cache Settings window that opens, fill in the following fields (all fields are required):
Name: The name to be given to the cache configuration. If you’ll be using multiple caches in your application, use a unique name to distinguish each one.
Type: The data provider to be used:
Redis: Memory-based, high-performance, and provides fast data access. It is particularly suitable for frequently read data.
Mongo: A NoSQL, document-based database. With its flexible and scalable structure, it is suitable for big data and complex data models.
SQL: A relational database. It ensures data is stored in an organized manner thanks to its powerful query capabilities and table structure.
Memory: Stores data in temporary memory. The data is deleted when the application closes; it is suitable for temporary operations requiring fast access.
Connection String: The connection string used to connect to the selected cache provider. It contains the server address, port number, and authentication information.
After filling in all fields, click the Create button.
4. Select and Save the Configuration
Select the configuration you created from the Configuration drop-down menu.
Click the Save button in the upper-right corner to save the changes. (In an existing configuration, this button appears as Update.)
After saving the cache settings, the platform automatically enables the data caching mechanism and optimizes your application’s data access speed.
5. Test the Settings
Click the three dots next to the Preview button in the top-right corner of the screen.
In the Generate App panel that opens, go to the Preview tab and click the Run button.
When the app opens, you can observe that the cache configuration is working and note the improvement in data access speed.
Tips
Cache duration: Short-term caching improves performance for data that does not need to be stored for a long time.
Prioritization: Prioritize caching critical and frequently accessed data.
Testing and monitoring: Test your app using Preview after making changes to ensure the cache is working correctly.