User Manual

Big File Upload Usage Scenario

Big File Upload Usage Scenario

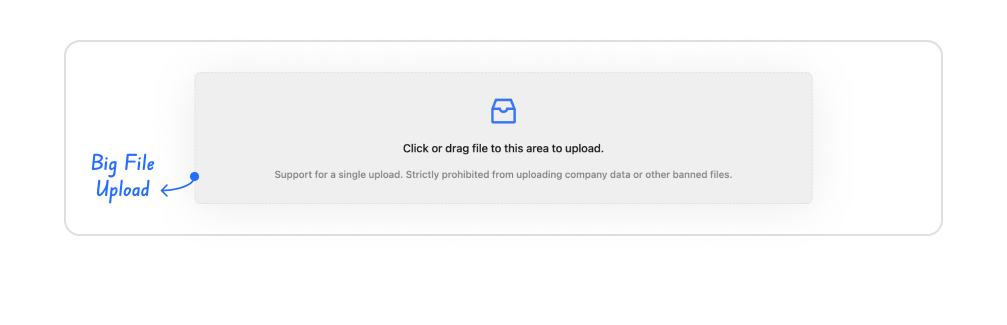
Kuika's Big File Upload element allows users to upload large files quickly, securely, and seamlessly. This element is particularly useful for managing high-volume data such as media content, project files, or large data sets.

Supported only in web applications.

Areas of Use

  • Areas for uploading IDs, diplomas, certificates, or contracts
  • Uploading large media files (video, audio, images)
  • Report or dataset sharing screens
  • Project, document, or file archiving applications
  • User-based document management modules

Use Case – User Document Upload Module

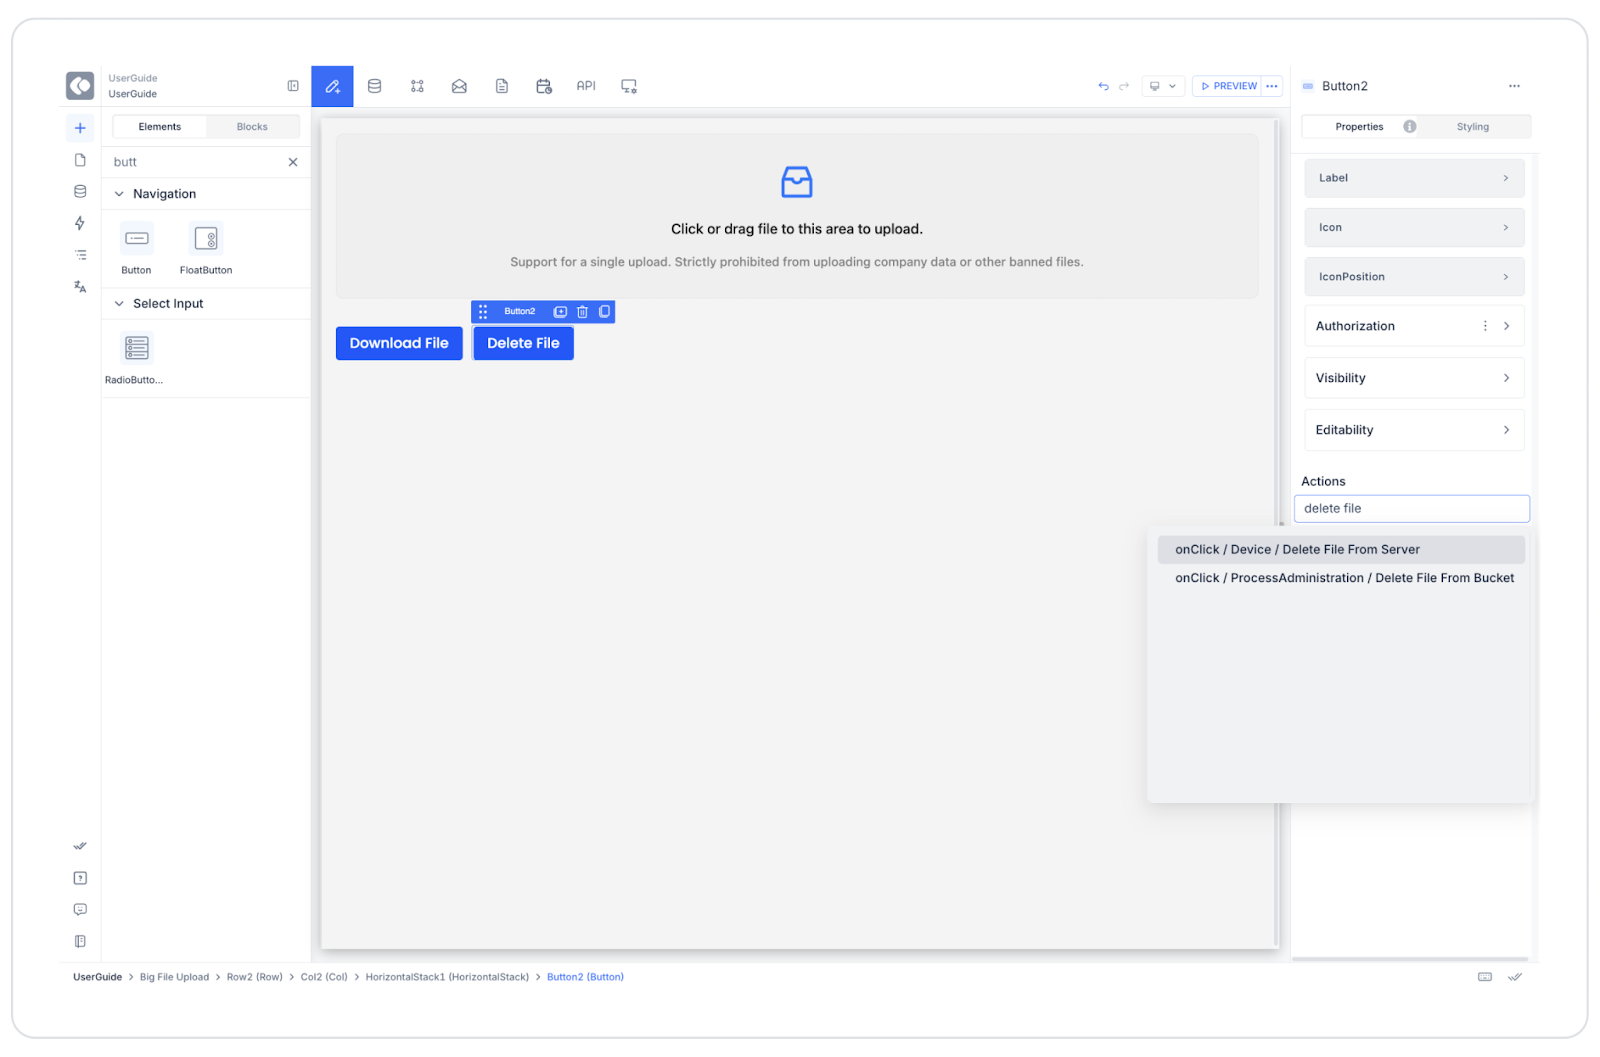
In a web application, users need to be able to upload documents such as IDs, diplomas, or certificates, and then view, download, and delete them. Documents are stored in directories specific to each user, and operations are tracked through the system.

In the scenario:

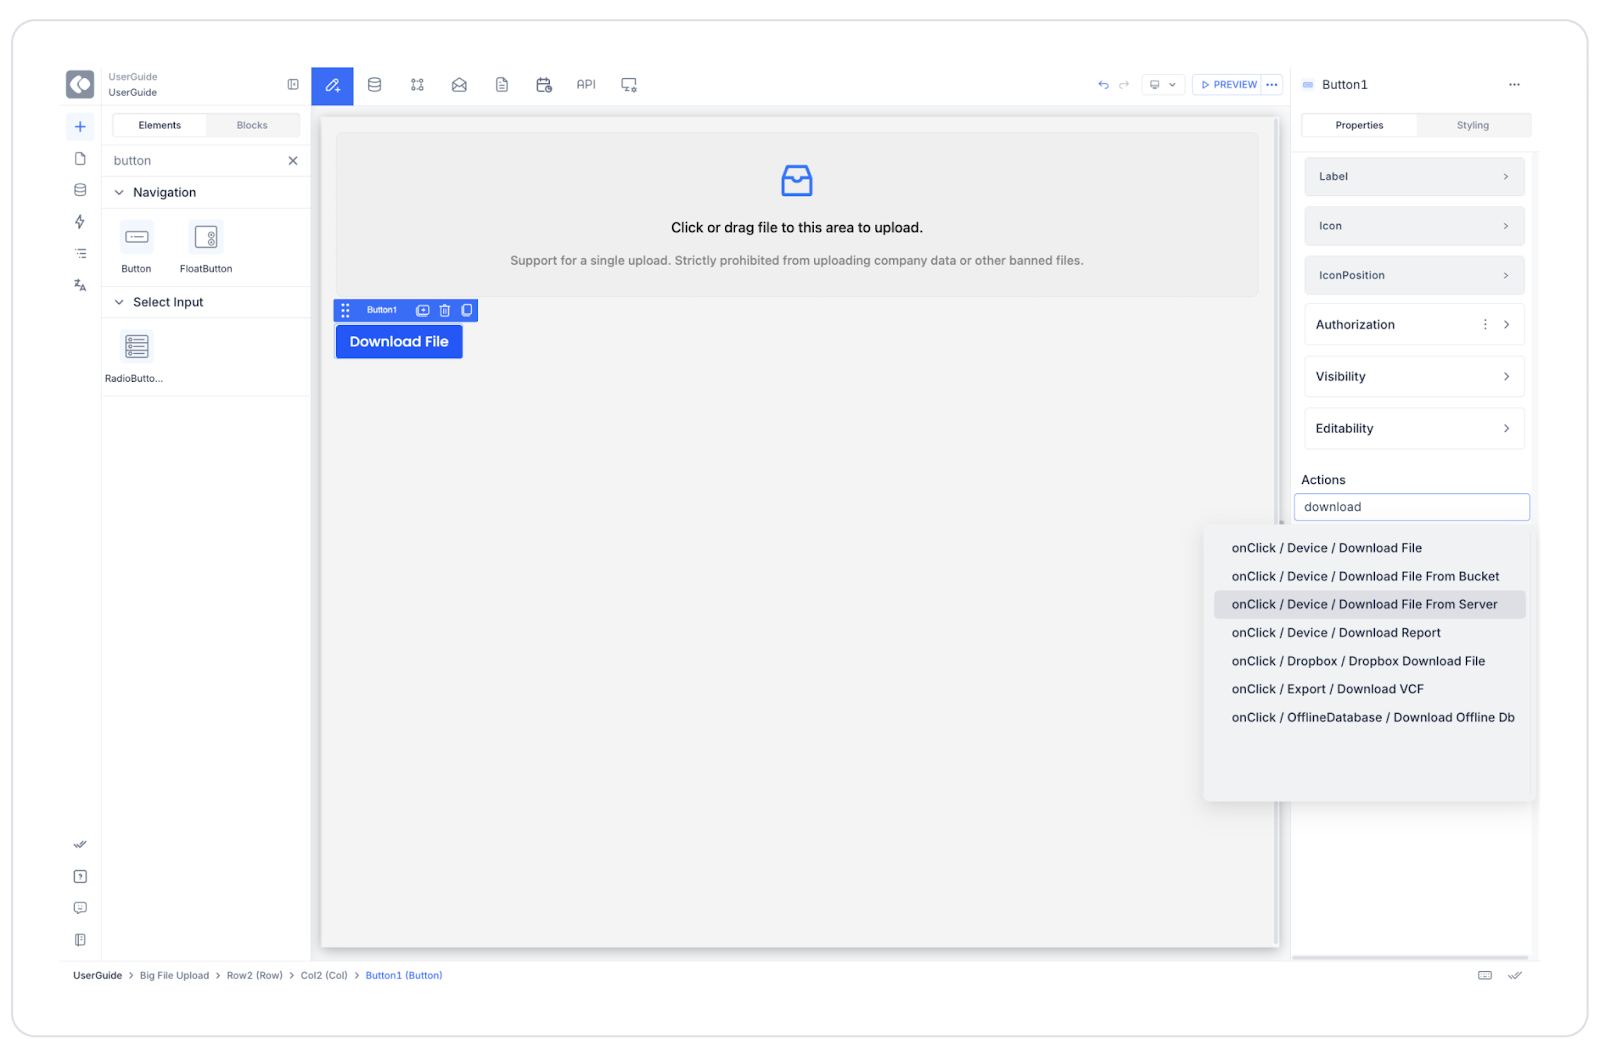
  • The user clicks on the “Click or drag file to this area to upload” field or drags and drops the file.
  • The system automatically splits the file into small chunks (chunk upload) and begins uploading.
  • When the upload is complete, the system assigns a unique File ID (GUID) to the file.
  • The file information (File ID, File Name, Upload Date) is associated with the user and stored in the database.

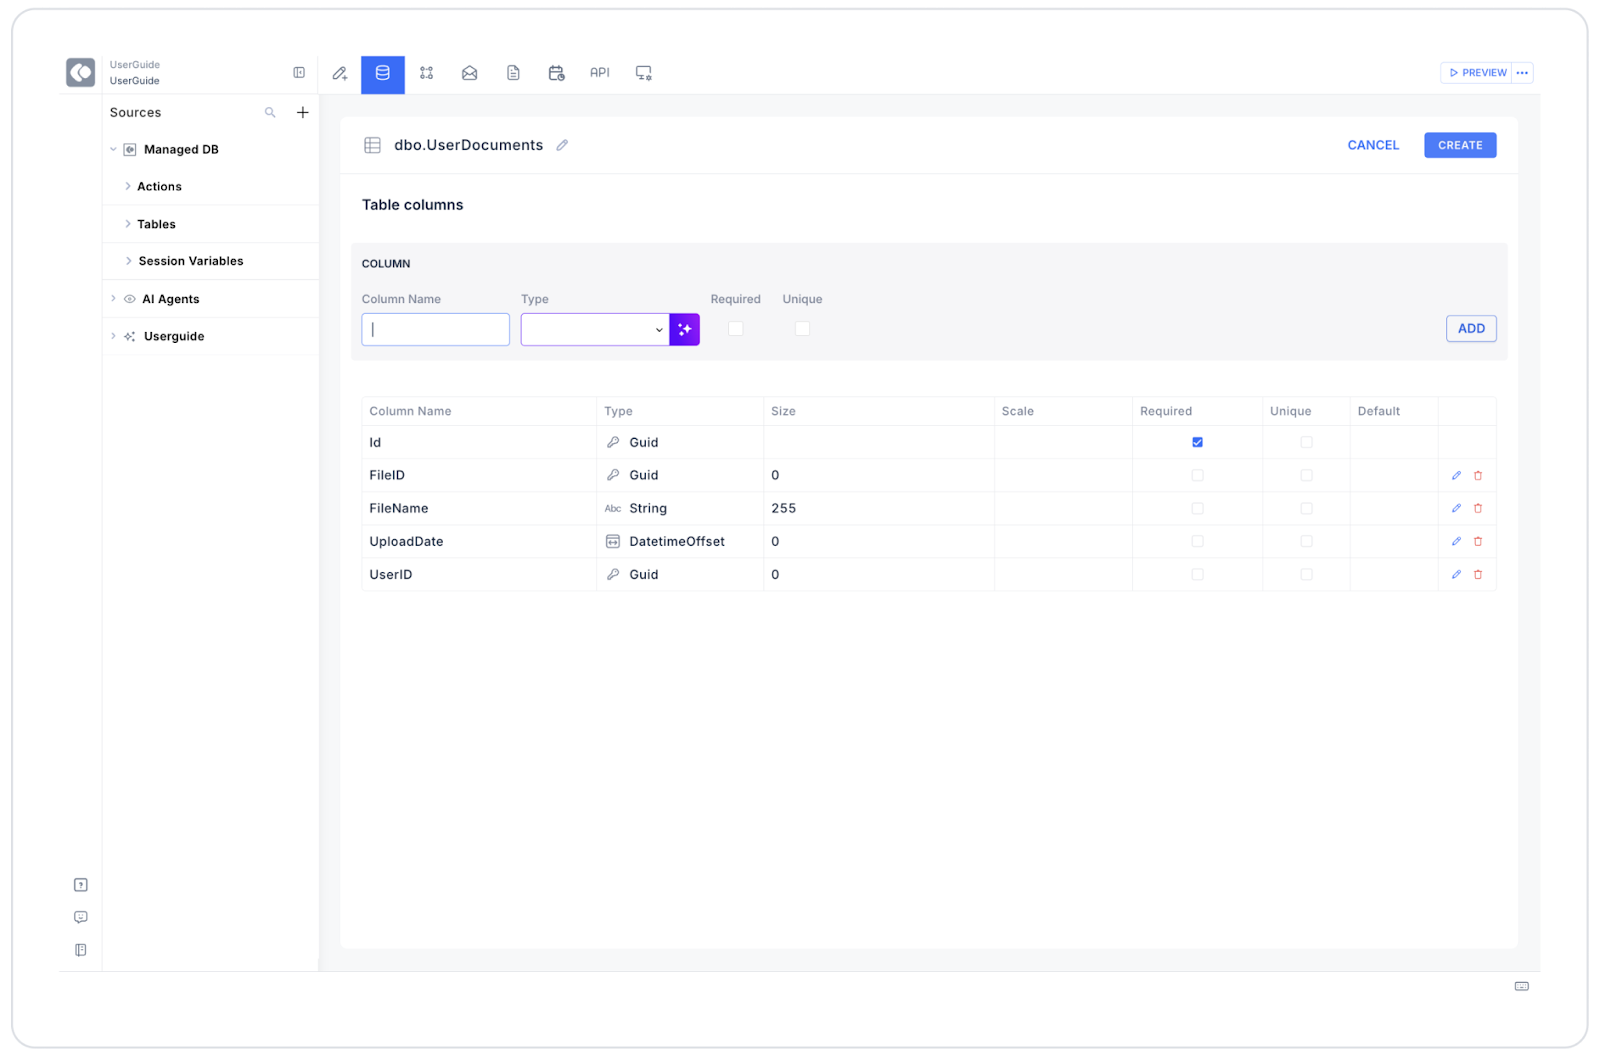
Connecting the Data Source

  • Go to the Datasources module.
  • Then click the + icon next to the Tables heading and name the table “UserDocuments”.
  • Create the following table.
  • Create a new action in the SQL Actions tab: InsertUserDocument
INSERT INTO UserDocuments (UserId, FileId, FileName, UploadDate)VALUES (@UserId, @FileId, @FileName, NOW());
  • Connect the InsertUserDocument action to the Switch element after upload.
  • Map the parameters:
    • @UserId = Current.User.Id
    • @FileId = Uploaded.File.Id
    • @FileName = Uploaded.File.Name

UI Design Module Operations

  1. Go to the UI Design module.
  2. From the left panel, select the Elements > Special > Big File Upload element.
  3. Drag and drop the element onto your screen.
  4. In the Properties panel, configure the following settings:
    • Label: Upload your document
    • Hint: Only .pdf, .jpg or .png files allowed. Max size: 200 MB
    • Chunk Size: 10 MB
    • File Upload Path: /userUploads/

Using Properties in a Scenario Context

  • Chunk Size: Allows the file to be uploaded in small chunks.
  • Label: Specifies the purpose of the upload field (e.g., “Upload your document”).
  • Hint: Informs the user about file types and limits.
  • File Upload Path: Specifies the server directory where files will be stored.
  • On Upload Finish: Defines the action to be triggered when the upload is complete.

File Upload – Download – Delete

  • Upload: User uploads the file → the system splits the file into chunks based on the Chunk Size and saves them.
  • Download:
  • Add a Button element and name it “Download file”.
  • OnClick → Device → Select the Download File From Server option.
  • Write {{selectedDocument.FileId}} as the File ID.
  • Delete:
  • Add a Button element and name it “Delete File”.
  • OnClick → Device → Select the Delete File From Server option.
  • Enter {{selectedDocument.FileId}} as the File ID.
  • Obtain user confirmation before deleting.

When the Scenario is Complete

  • The user uploads the file.
  • The system completes the upload by splitting it into chunks.
  • The file is associated with the user ID.
  • The user can download and delete the uploaded document.
  • All operations are logged through the system.

Restrictions

  • Only single file uploads are supported.
  • For very large files (1 GB+), the Chunk Size value must be optimized.
  • If the File ID is not saved, no operations (download/delete) can be performed on the file.
  • The dynamic upload directory cannot be defined; the path is set in Configuration Manager.

Tips and Best Practices

  • Customize the Label and Hint fields to guide the user.
  • Clearly specify file type and size limits.
  • Display an “upload success” notification for critical files.
  • Provide the user with upload progress status for large files.
  • Always use a confirmation dialog for deletion.
No items found.

Other Related Content

No items found.

Glossary

No items found.

Alt Başlıklar