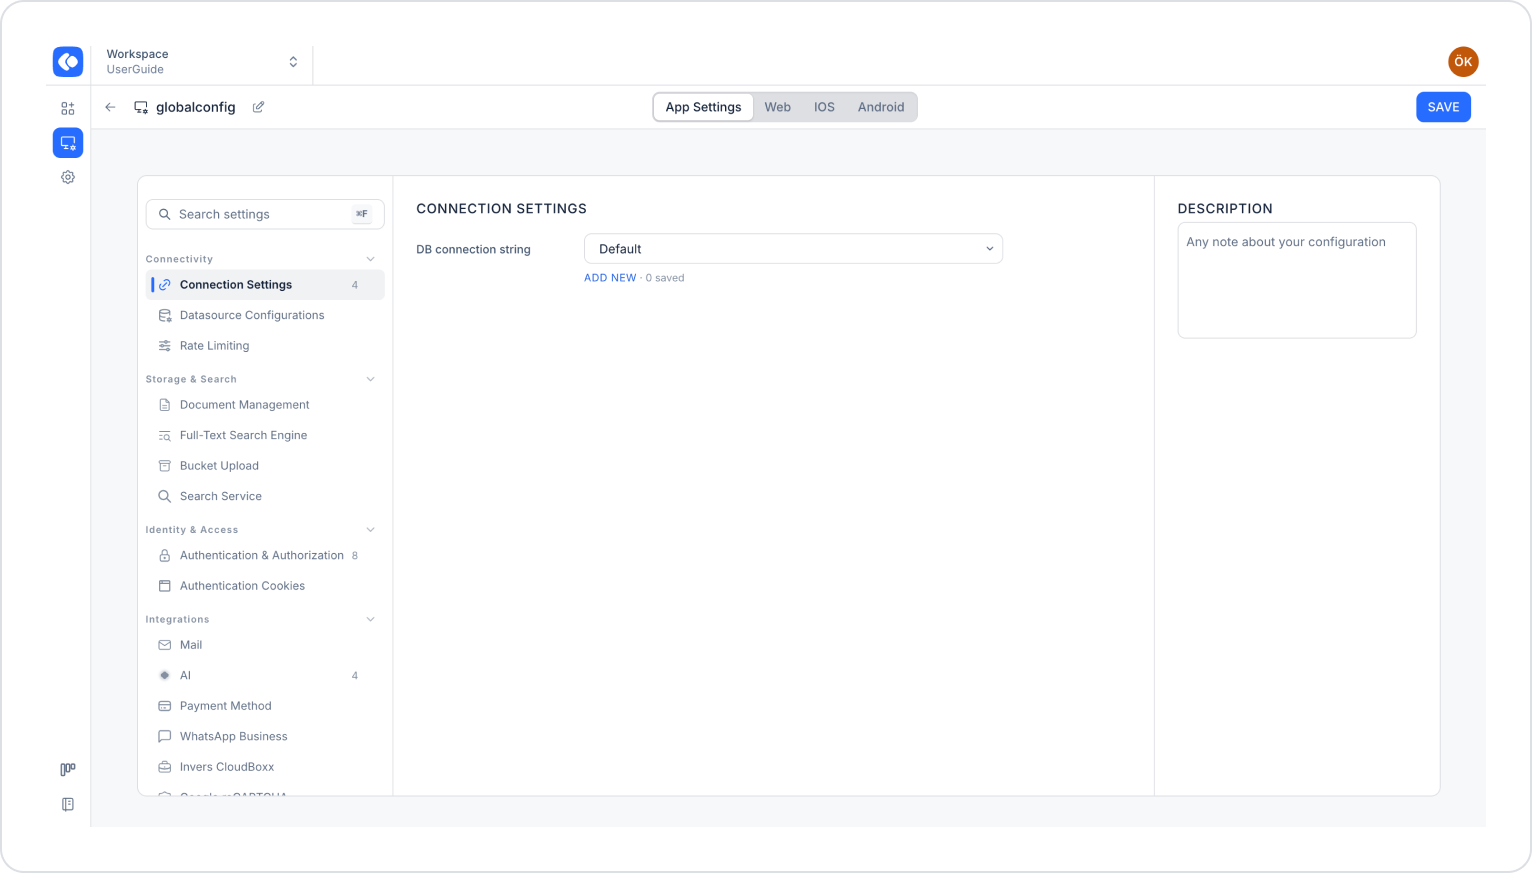
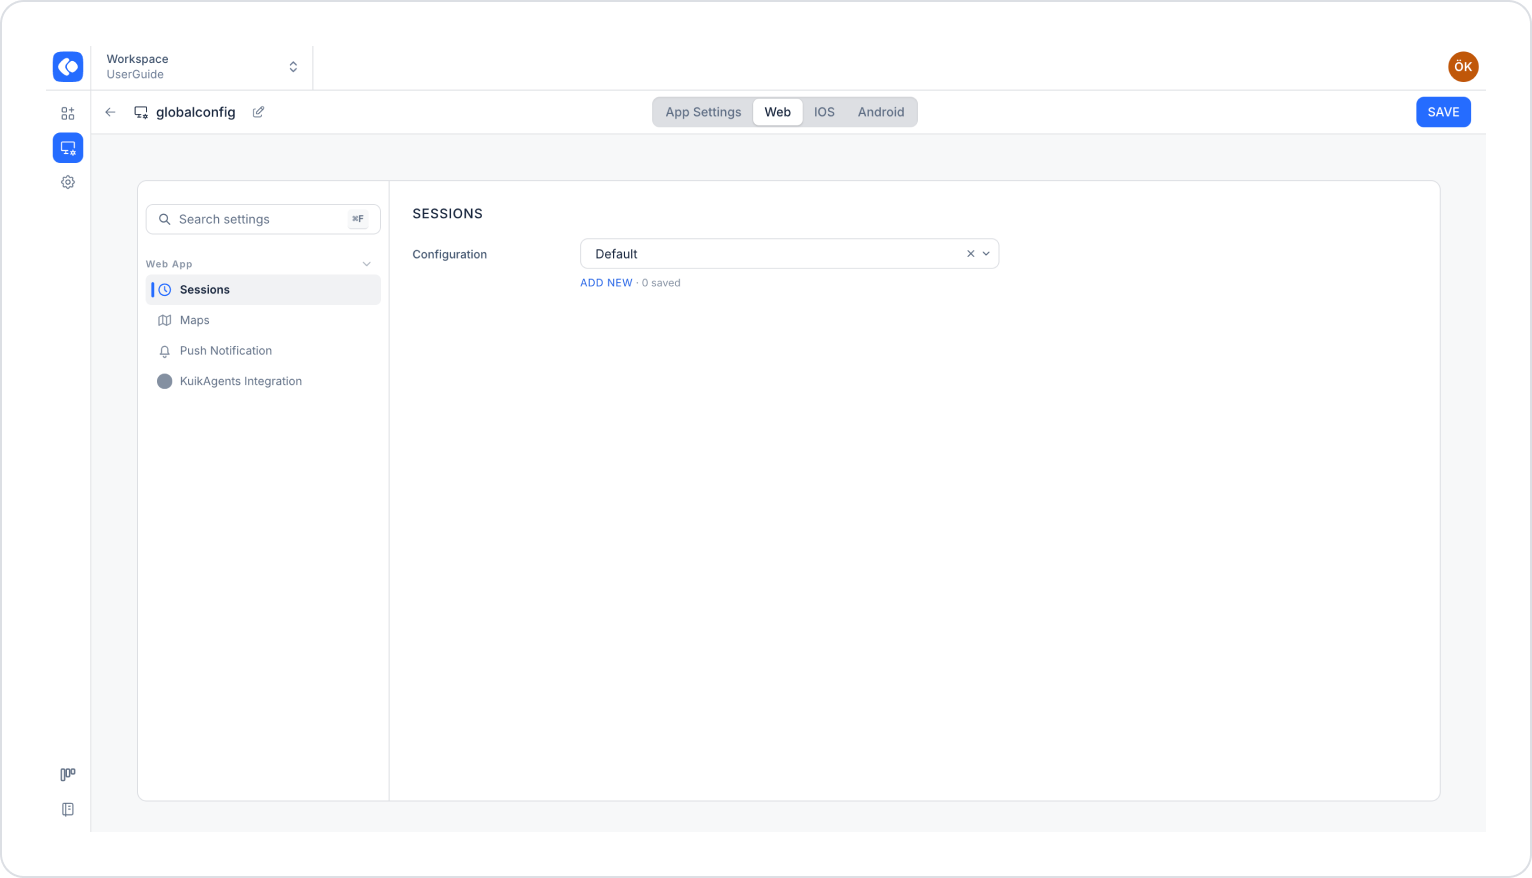
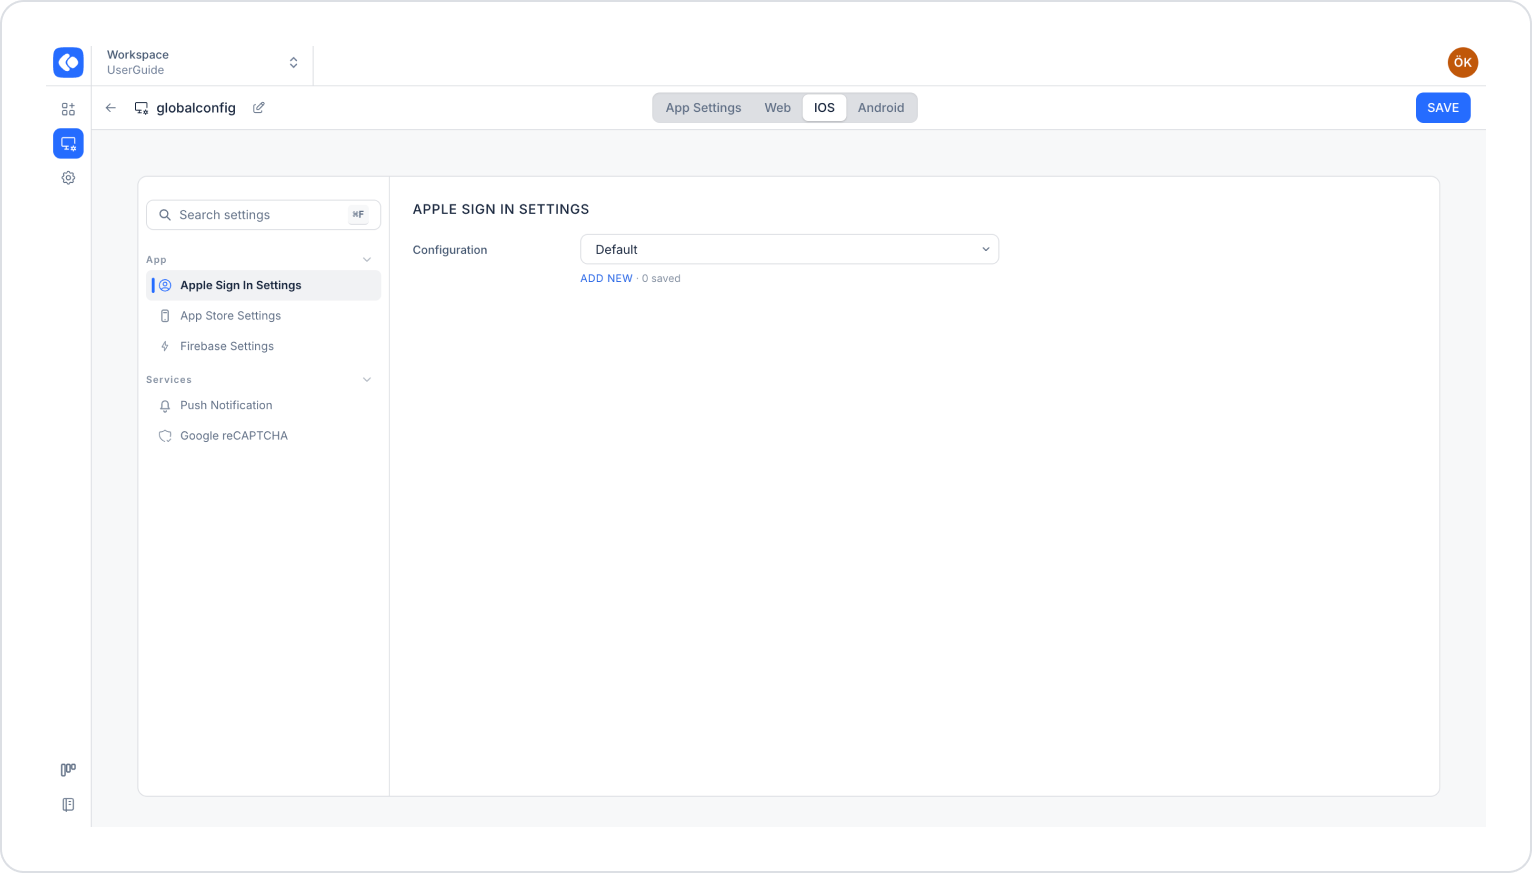
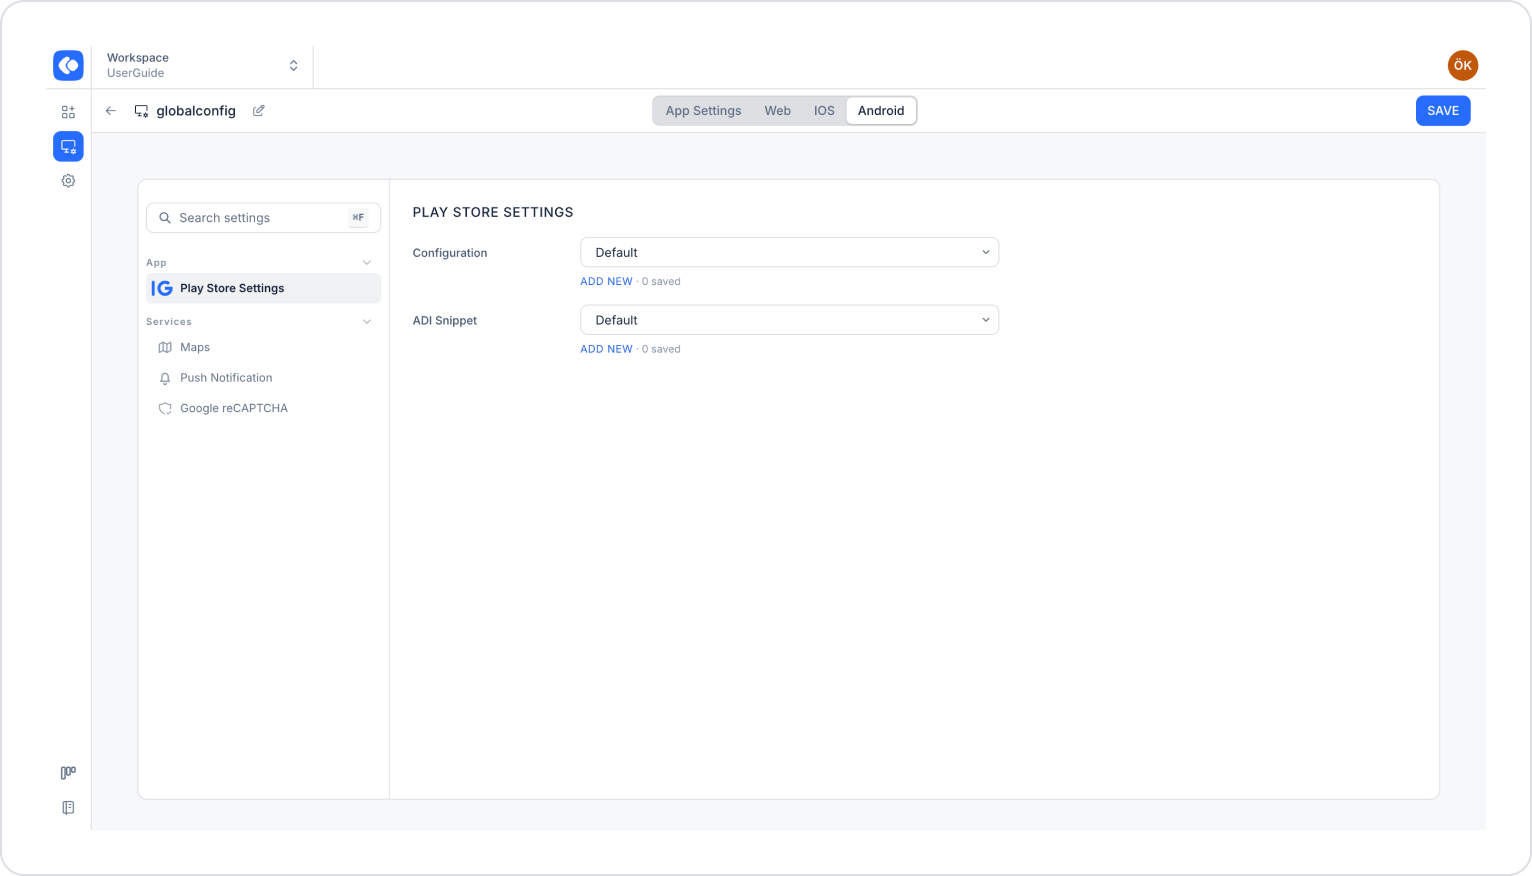
There are four tabs at the top of the configuration screen: App Settings, Web, iOS, and Android. In each tab, select the setting you want to configure from the left menu, then choose a configuration from the corresponding drop-down menu or click the ADD NEW link below the menu to create a new configuration.
App Settings Tab
This tab contains general settings that apply to all platforms. The settings are organized into categories in the left-hand menu.
Connectivity contains connection settings:
Connection Settings: The app’s connection settings. For example, in the DB connection string field, you define the connection string containing the server address, database name, username, and password used to connect to the database.
Datasource Configurations and Rate Limiting settings are also located under this heading.
Storage & Search contains settings for Document Management, Full-Text Search Engine, Bucket Upload, and Search Service.
Authentication & Authorization: Authentication provider, password policy, sign-in with Google and MSAL, OTP, two-factor authentication (2F Auth), and session settings. For more information, see the Authentication & Authorization Settings document.
The Authentication Cookies setting is also located under this heading.
The Integrations section contains integrations with external services:
Mail: The infrastructure used for sending emails within the application.
Payment Method: Stripe, Iyzico, and Param integrations for in-app payments. For more information, see the Payment Method Settings document.
Invers CloudBoxx: Integration with Invers CloudBoxx, a cloud-based management and automation platform.
AI, WhatsApp Business, and Google reCAPTCHA settings are also located under this heading.
Web Tab
This tab contains settings specific to web applications. The following settings are located under the Web App heading in the left menu:
Sessions: The timeout duration for user sessions in the web application.
Maps: Settings required for using maps in the web application.
Push Notification: Push notification settings for the web application.
Apple Sign In Settings: Settings for signing in with an Apple account. For more information, see the Apple Sign In documentation.
App Store Settings: Settings required for publishing to the App Store.
Firebase Settings: Integration of Firebase services into the app.
Services section:
Push Notification: Push notification settings for the iOS app.
Google reCAPTCHA: reCAPTCHA settings for the iOS app.
Android Tab
This tab contains settings specific to Android apps:
App section:
Play Store Settings: Settings required for publishing the app to the Play Store. This section includes the Configuration and App ID Snippet fields.
Services section:
Maps: Settings required for using maps in the Android app.
Push Notification: Push notification settings for the Android app.
Google reCAPTCHA: reCAPTCHA settings for the Android app.
4. Save the Settings
For each setting you want to configure, select the configuration you created from the relevant dropdown menu.
Make sure you have filled out all required fields completely and correctly.
Click the SAVE button in the upper-right corner to save your changes.
Once you’ve completed these steps, the global configuration you created will be ready for use in your apps within the Workspace.
Viewing Global Configurations in an Application
In an application’s Config Manager module, you can view global configurations by clicking the Global tab above the configuration list. The Scope column in the list indicates whether the configuration belongs to a project or to the Workspace.
Important Tips
Information added to global configurations is displayed as read-only or hidden (***) to users without the appropriate permissions. This allows you to make sensitive information—such as connection strings and API keys—available for shared use without having to share them directly with team members.
Create separate global configurations for each environment (test, staging, production) and name them in a way that clearly identifies the environment.
Changes you make to a global configuration may affect all applications using that configuration. Before modifying configurations used in the production environment, test the changes in the test environment first.
By centrally managing your shared settings with Global Configuration, you can ensure your applications run consistently across all platforms.