Bucket Upload is a feature that ensures files uploaded by your app are securely stored in the cloud. By configuring Bucket Upload settings in Kuika’s Config Manager module, you can simplify file management and securely store your data.
Bucket Upload settings can be used in both web and mobile apps.
Bucket Upload Steps
1. Open or Create a Configuration
Log in to the Kuika platform.
Open the project you’ll be working on from the Apps screen.
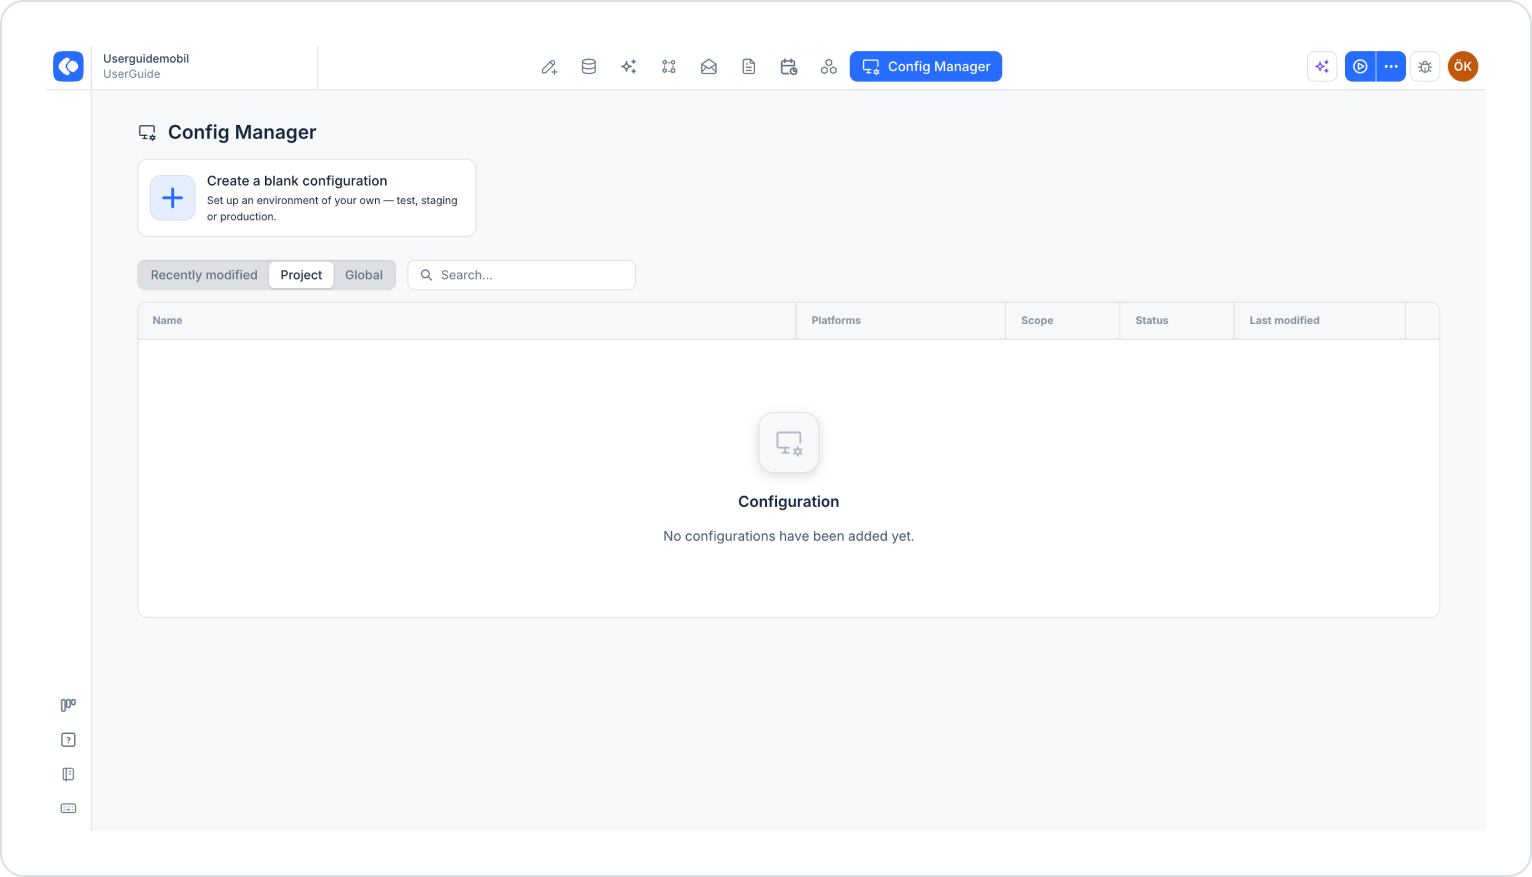
Click the Config Manager module in the top menu.
To create a new configuration, click the Create a blank configuration card.
Enter a meaningful name for the configuration (e.g., “UserFilesBucket”) and complete the creation process. If you want to use an existing configuration, click its name in the list.
2. Go to the Bucket Upload Setting
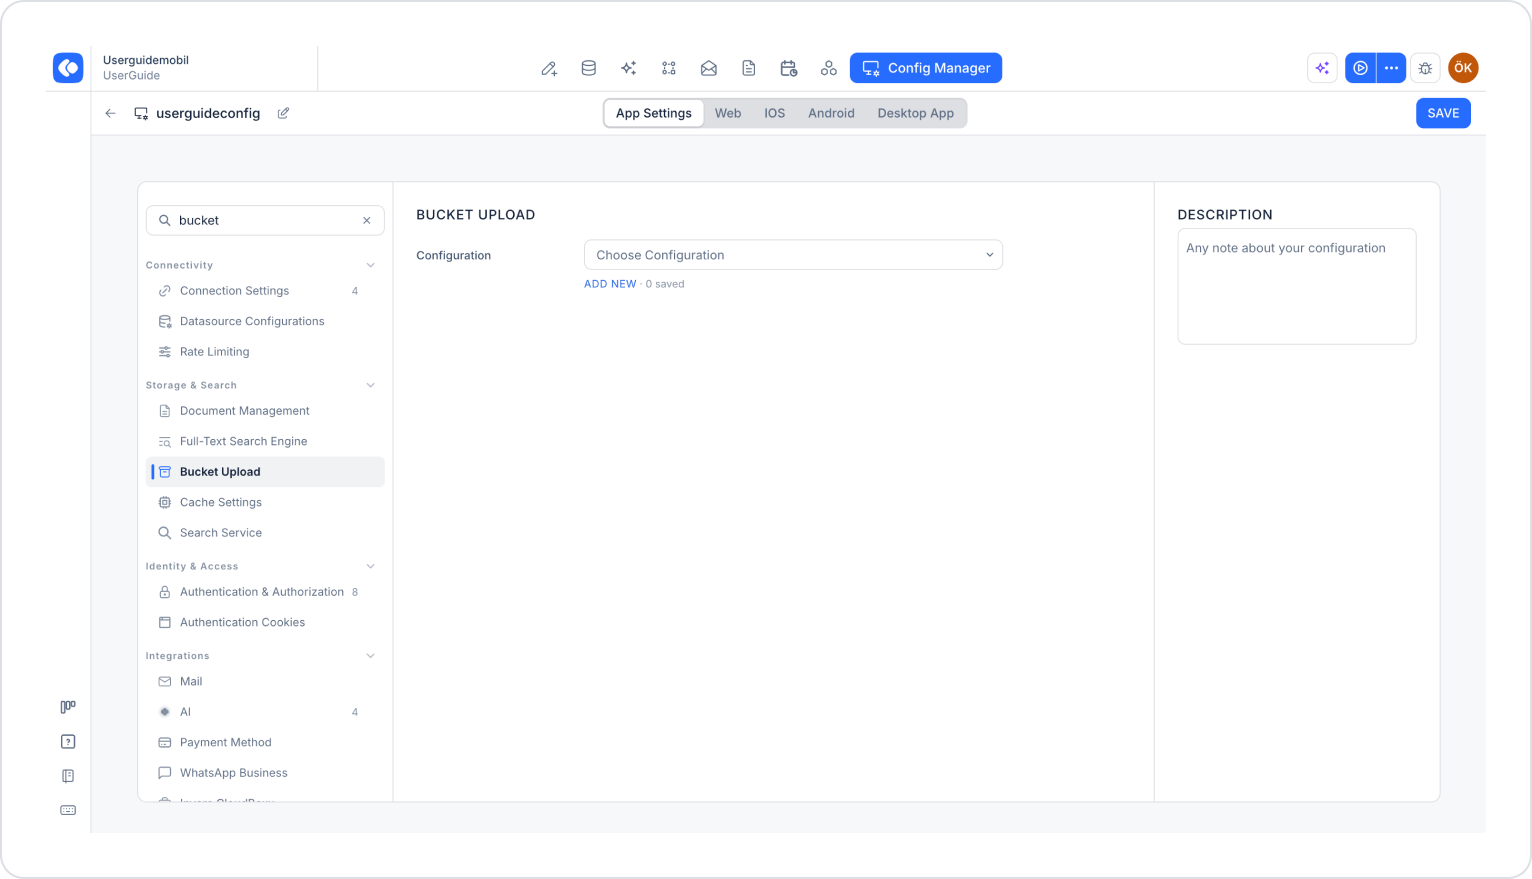
Make sure the App Settings tab is selected at the top of the configuration screen.
In the left menu, click the Bucket Upload option under the STORAGE & SEARCH heading. You can also quickly access this setting by typing “bucket” into the Search settings field at the top of the menu.
Click the Add New link under the Configuration section.
3. Configure Bucket Settings
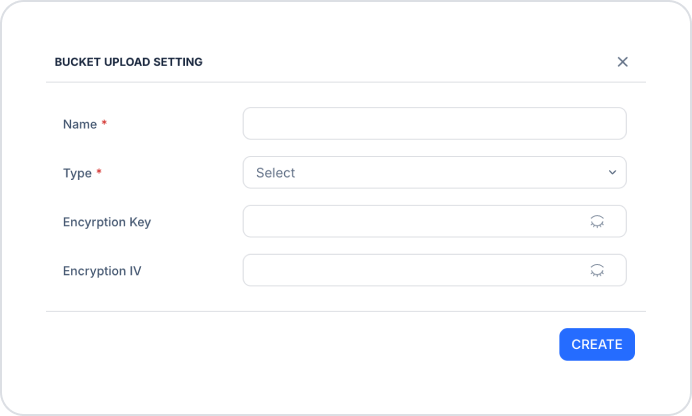
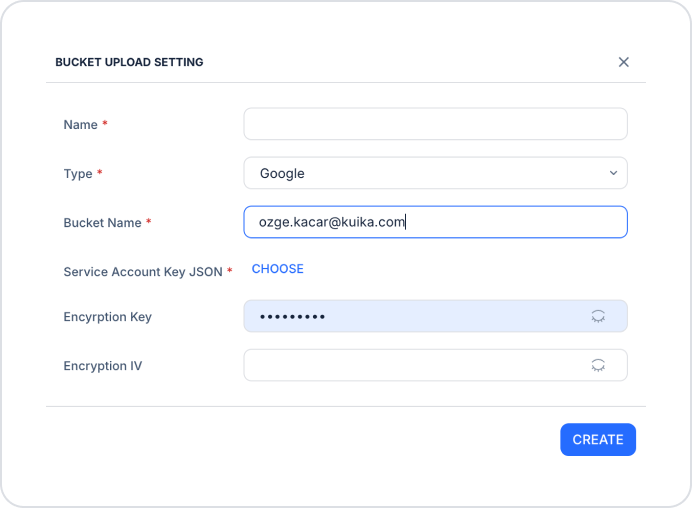
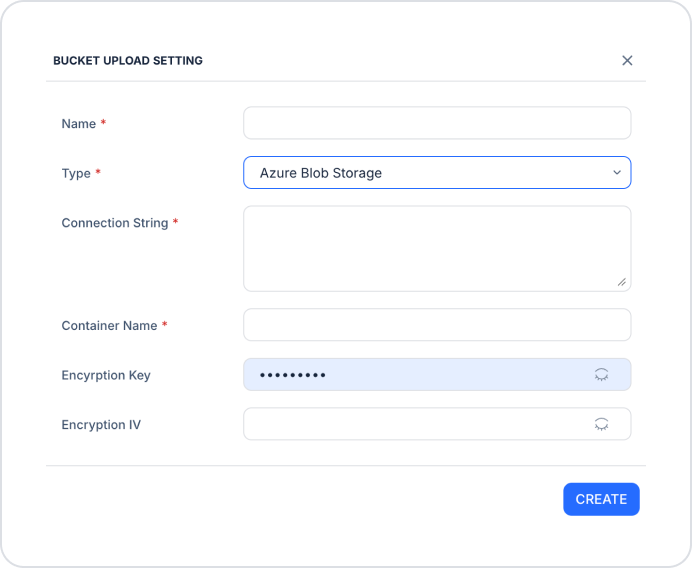
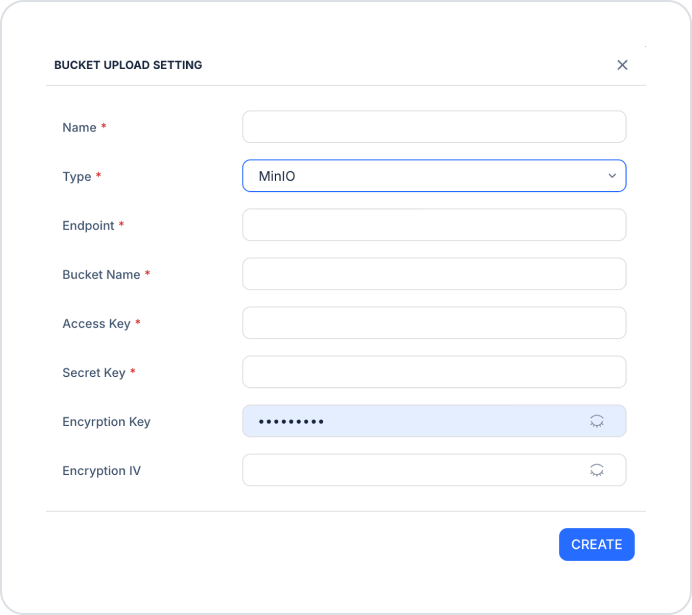
In the Bucket Upload Setting window that opens, first fill in the fields common to all providers:
Name (required): The name to be given to the bucket configuration. If you’ll be using multiple buckets in your app, use a unique name to distinguish each one.
Type (required): Select which storage provider will be used to store the files:
AWS: Provides storage on Amazon Web Services (S3).
Google: Provides storage on Google Cloud Storage.
Azure Blob Storage: Provides storage on Microsoft Azure Blob Storage.
MinIO: Provides storage on the S3-compatible MinIO object storage server.
Encryption Key: The key used to encrypt uploaded files. Its use is recommended to enhance file security.
Encryption IV: The initialization vector (IV) used during encryption.
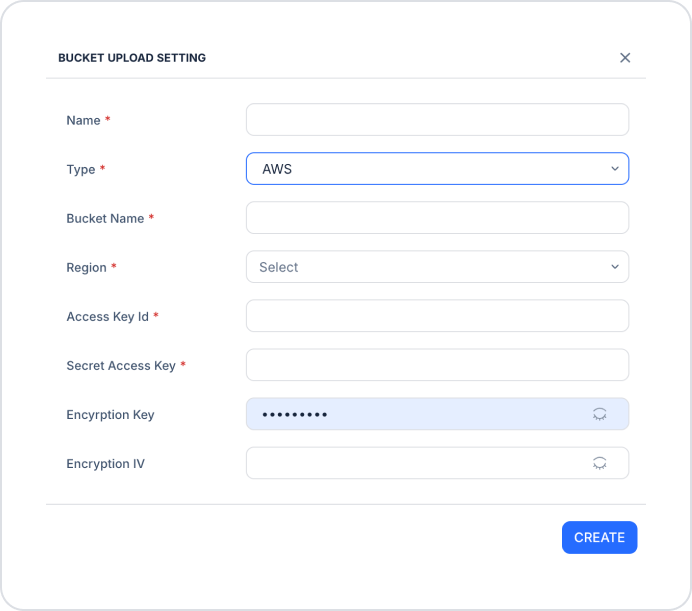
Depending on your selection in the Type field, provider-specific fields will be added to the window.
Required Fields for AWS
Bucket Name (required): The name of the AWS S3 bucket where files will be uploaded. Enter the name of the bucket you previously created on AWS.
Region (required): The AWS region where the bucket is located (e.g., us-east-1, eu-central-1). Selecting the correct region is important for performance and cost considerations.
Access Key ID (required): The ID of the access key you created in your AWS account.
Secret Access Key (required): The secret key used in conjunction with the Access Key ID. These two pieces of information allow your application to authenticate on AWS.
Required Fields for Google
Bucket Name (required): The name of the Google Cloud Storage bucket where files will be uploaded. Enter the name of the bucket you previously created on Google Cloud.
Service Account Key JSON (required): The JSON-formatted key file for the service account you created on Google Cloud. Click the Choose button to upload the file. Your application uses this file to authenticate on Google Cloud Storage.
Required Fields for Azure Blob Storage
Connection String (required): The connection string for your Azure Storage account. You can find it on the Access keys page of your storage account in the Azure Portal.
Container Name (required): The name of the Blob container where the files will be uploaded.
Required Fields for MinIO
Endpoint (required): The address of your MinIO server.
Bucket Name (required): The name of the MinIO bucket where the files will be uploaded.
Access Key (required): The key used to access the MinIO server.
Secret Key (required): The secret key used in conjunction with the Access Key.
4. Create and Save the Configuration
After filling in all fields, click the Create button.
Select the configuration you created from the Configuration dropdown menu.
Click the Save button in the top-right corner to save your changes. (In an existing configuration, this button appears as Update.)
(i) After saving the Bucket Upload settings, the platform automatically transfers the uploaded files to the selected storage provider and stores them securely.
5. Uploading and Testing a File
Click the three dots next to the Preview button in the top-right corner of the screen.
From the dropdown menu, click the Run option.
Once the application opens, upload a file to verify that it is transferred to the bucket and that the configuration is working correctly.